


6158
Glass squeegee ...... x 1
●
Crosshead screwdriver
●
Drill
●
8mm Masonry bit
●
Hammer
●
Rubber mallet
●
Tape measure
●
Pencil
●
Fine tooth saw
●
Spirit level
●
Masking tape
●
Silicone sealant / Applicator
●
De-greaser e.g White spirit
EQUIPMENT NEEDED
Issue 1 - 07/11
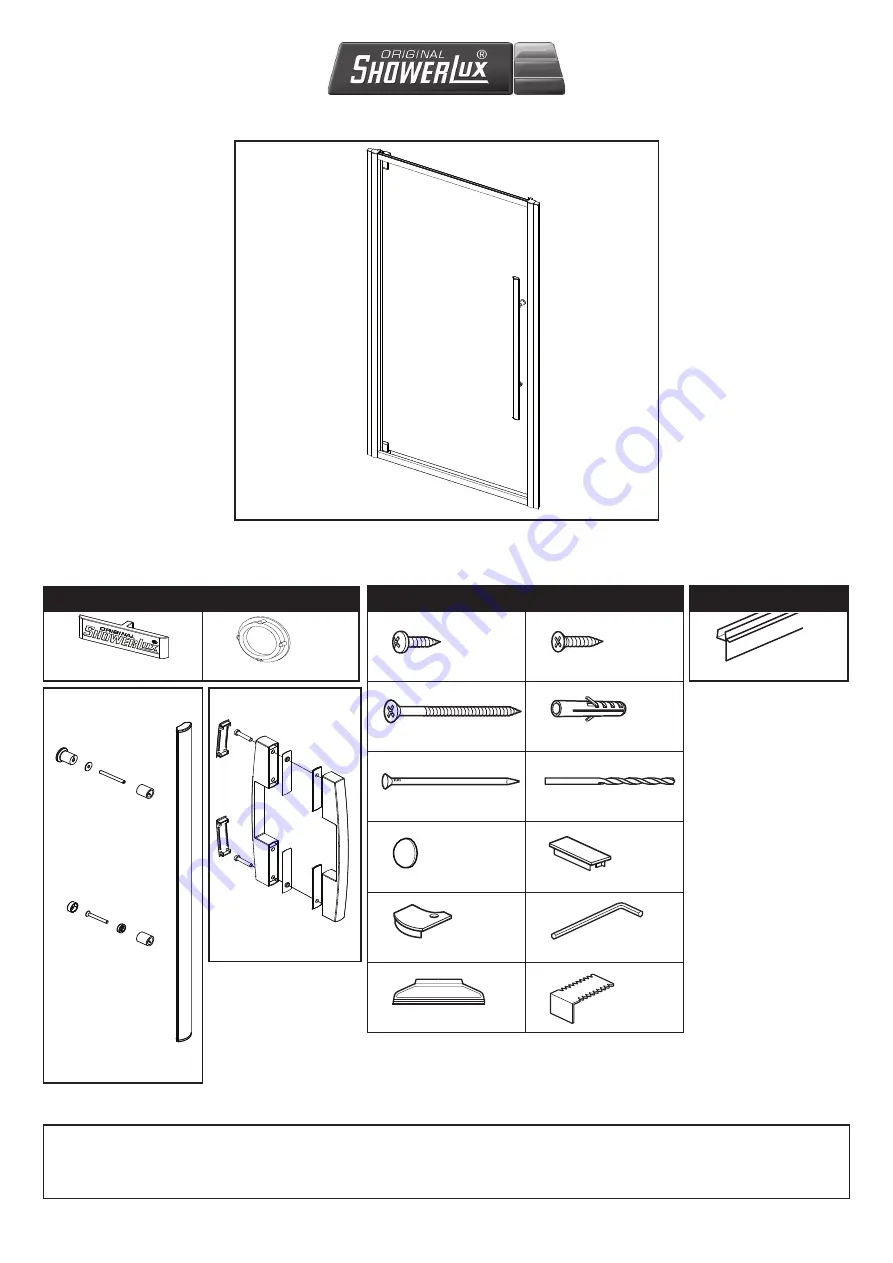
PIVOT CONTENTS
BAG 3.1
SEALS
60140
9.5mm Screw .......... x 8
L
60005
13mm Screw ........... x
M
6064
65mm Screw ........... x 8
N
5006
Wall plug .................. x 8
O
609
Centre punch .......... x 1
P
607
.8mm Drill bit ......... x 1
Q
0795
Screw cover ............ x 8
R
Frame cap ............ x 1/1
S
T
&
J
V
488
Measuring
tool ............ x 1
W
361
Horizontal seal ....... x
Z5
11 (L)
1 (R)
10
Wall channel cap .... x
550
Pivot Block
Screw Cover Cap ...... x
A
9
Screw Hole Plug ..... x 8
B
BAG 2
BAG 1
648
3mm Allen key ........ x 1
U
488
Linea Touch
Handle....... x 1
I
Glide Handle....... x 1
I
DS--13


