background image


10 

The Compact Power Lightset can be operated with a controller in 

control mode

 or without the controller 

in 

stand-alone mode. 


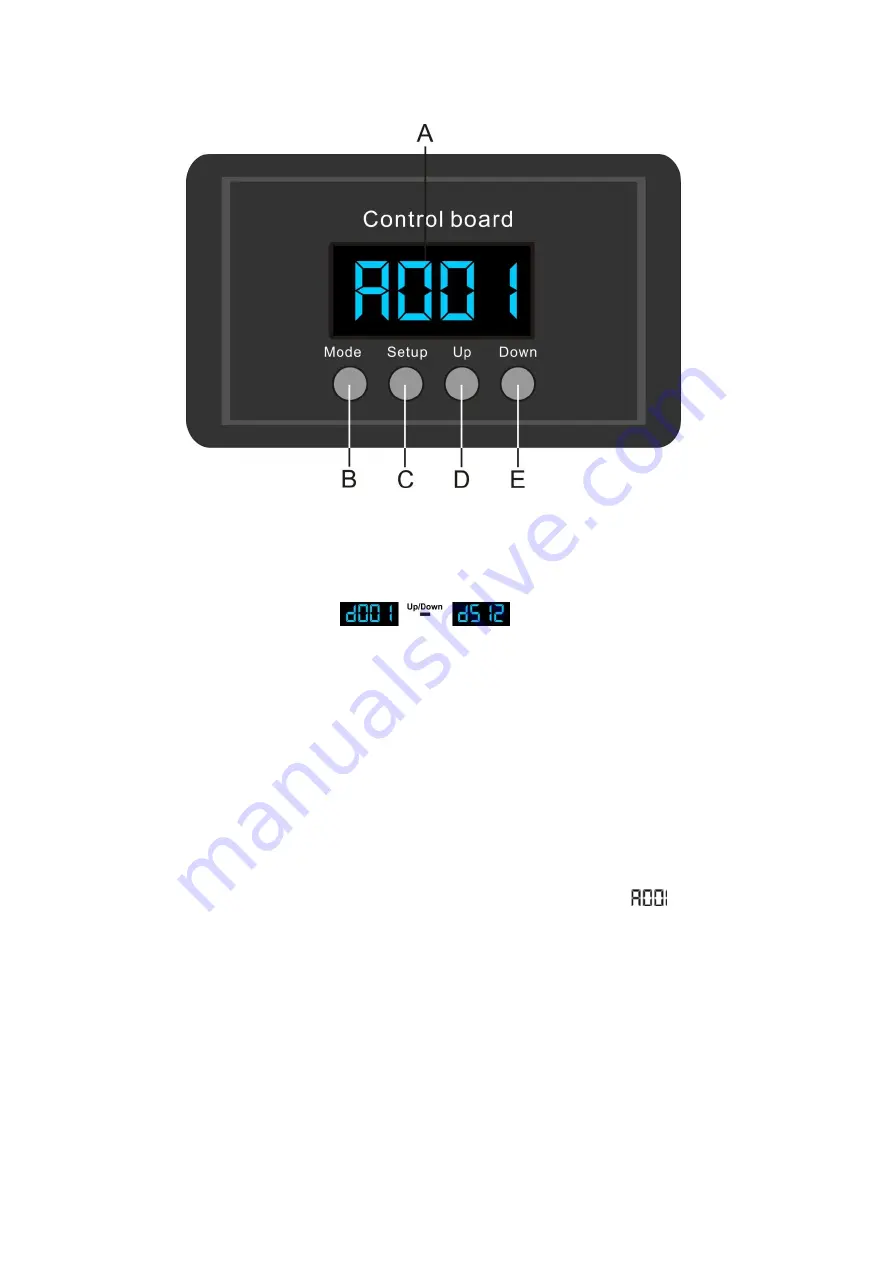
Control Panel


Fig. 4


A.

 LCD Display  


D.

 Up Button 

B.

 CHOOSE button 


E.

 Down Button 

C.

 ENTER Button 


DMX Control Mode 

The fixtures are individually addressed                            


       on a data-link and connected to the 

controller.  
The fixtures respond to the DMX signal from the controller. (When you select the DMX address and save it, 
the controller will display the saved DMX address the next time.)


DMX Addressing


The control panel on the front side of the Compact Power Lightset allows you to assign the DMX fixture 
address, which is the first channel from which the Compact Power Lightset will respond to the controller. 
Please note when you use the controller, the unit has 

15

 channels. 

When using multiple Compact Power Lightsets, make sure you set the DMX addresses right. 
Therefore, the DMX address of the first Compact Power Lightset should be 

1(A001)

; the DMX address of 

the second Compact Power Lightset should be 

1+15=16 (A016

); the DMX address of the third Compact 

Power Lightset should be 

16+15=31 (A011)

, etc. Please, be sure that you don’t have any overlapping 

channels in order to control each Compact Power Lightset correctly. 
If two or more Compact Power Lightsets are addressed similarly, they will work similarly.


For address settings, please refer to the instructions under ”Addressing’ (menu 

)


Controlling: 

After having addressed all Compact Power Lightset fixtures, you may now start operating these via your 
lighting controller.


Note:

 After switching on, the Compact Power Lightset will automatically detect whether DMX 512 data is 

received or not. 

If there is 

no data received at the DMX-input, the “

LED

 “ on the control panel will not 

flash.


The problem may be:


- The XLR cable from the controller is not connected with the input of the Compact Power Lightset.


- The controller is switched off or defective, the cable or connector is detective, or the signal wires are    
  swapped in the input connector. 

 
Note: 

It’s necessary to insert a XLR termination plug (with 120 Ohm) in the last fixture in order to ensure 

proper transmission on the DMX data link. 

Summary of Contents for Compact Power Lightset V2

Page 1: ...Compact Power Lightset V2 ORDERCODE 30268...

Page 2: ...ely on Showtec for more excellent lighting products We design and manufacture professional light equipment for the entertainment industry New products are being launched regularly We work hard to keep...

Page 3: ...ams Auto Run Static Color One Compact Power Lightset Sound Control Multiple Compact Power Lightset Master Slave control Multiple Compact Power Lightset DMX control Fixture Linking Data Cabling Control...

Page 4: ...40 000 to 50 000 hours will be achieved under normal operational conditions If improving on this lifespan expectancy is of a higher priority place care in providing for lower operational temperatures...

Page 5: ...that the available voltage is not higher than stated on the rear panel Make sure that the power cord is never crimped or damaged Check the device and the power cord from time to time If the external c...

Page 6: ...yourself Always let the installation be carried out by an authorized dealer Procedure If the Compact Power Lightset is lowered from the ceiling or high joists professional trussing systems have to be...

Page 7: ...description of the symptoms Claims The client has the obligation to check the delivered goods immediately upon delivery for any short comings and or visible defects or perform this check after our ann...

Page 8: ...ct Built in programs DMX Control DMX 7 modes 2 3 4 7 8 14 15 Channel Mode Music controlled via built in microphone Master Slave function Variable in stand height 1200 2000mm Footswitch with 5m cable 3...

Page 9: ...trol 1 Plug the end of the electric mains power cord into a proper electric power supply socket 2 Turn on the music If device is set to Audio and you have pressed enter then the fixture will react to...

Page 10: ...signal cable from the first unit s DMX out socket to the second unit s in socket Repeat this process to link the second third and fourth units 5 Supply electric power Plug electric mains power cords...

Page 11: ...y result in deterioration of the digital DMX signal Maximum recommended DMX data link distance 100 meters Maximum recommended number of Compact Power Lightsets on a DMX data link 30 fixtures Data Cabl...

Page 12: ...f the second Compact Power Lightset should be 1 15 16 A016 the DMX address of the third Compact Power Lightset should be 16 15 31 A011 etc Please be sure that you don t have any overlapping channels i...

Page 13: ...11 Menu Overview 1 Auto Program 2 DMX Address 3 Slave 4 Sound controlled 5 Static Color 6 Built in Programs...

Page 14: ...menus Number of Loops from 01 100 Speed from 01 99 and FL Fade Time from 00 99 Flash Frequency from 00 99 Use the SETUP button to scroll through the menu 2 DMX Mode With this menu you can set the DMX...

Page 15: ...Press the MODE button until the display shows 2 With this menu you can set 3 Static colors of the Compact Power Lightset You can choose Red Green or Blue by pressing the Setup button Use the Up Down...

Page 16: ...14 6 Built in Programs...

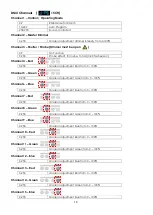
Page 17: ...l 3 Blue Channel 4 Red Channel 5 Green 0 255 Gradual adjustment Red from 0 100 0 255 Gradual adjustment Green from 0 100 0 255 Gradual adjustment Blue from 0 100 0 255 Gradual adjustment Red from 0 10...

Page 18: ...0 20 flashes sec 0 255 Gradual adjustment dimmer intensity from 0 100 0 255 Gradual adjustment Red from 0 100 0 255 Gradual adjustment Green from 0 100 0 255 Gradual adjustment Blue from 0 100 0 255 G...

Page 19: ...ram 13 210 219 Program 14 220 229 Program 15 230 239 Program 16 240 255 Sound controlled Note CH1 When CH1 is set to 0 79 CH2 has no function When CH1 is set to 80 239 CH2 controls the speed of the pr...

Page 20: ...CH2 15 10 249 Auto Program 250 255 Sound controlled 0 255 Gradual adjustment dimmer intensity from 0 100 0 255 Gradual adjustment Red from 0 100 0 255 Gradual adjustment Green from 0 100 0 255 Gradual...

Page 21: ...9 Program 11 190 199 Program 12 200 209 Program 13 210 219 Program 14 220 229 Program 15 230 239 Program 16 240 255 Sound controlled Note CH5 When CH4 is set to 0 79 CH5 has no function When CH4 is se...

Page 22: ...four years in the course of an acceptance test The operator has to make sure that safety relating and machine technical installations are to be inspected by a skilled person once a year The following...

Page 23: ...LR Out of the first fixture on the link i e signal is reversed Install a phase reversing cable between the controller and the first fixture on the link Fixtures reset correctly but some respond errati...

Page 24: ...240V 50Hz CE Fuse 1A 250V Music Control Dimensions 1200x295x60mm LxWxH Weight 8 7 kg Foot Controller Voltage 240V 50Hz CE Jack plug to connect to T bar with controller Cable length 5m Dimensions 500x1...

Page 25: ......
Reviews: