background image


      Return Procedure 

Returned merchandise must be sent prepaid and in the original packing, call tags will not be issued. 
Package must be clearly labeled with a Return Authorization Number (RMA number). Products returned 
without an RMA number will be refused. Highlite will not accept the returned goods or any responsibility. 
Call Highlite 0031-455667723 or mail 

aftersales@highlite.nl

 and request an RMA prior to shipping the fixture. 

Be prepared to provide the model number, serial number and a brief description of the cause for the 
return. Be sure to properly pack fixture, any shipping damage resulting from inadequate packaging is the 
customer’s responsibility. Highlite reserves the right to use its own discretion to repair or replace 
product(s). As a suggestion, proper UPS packing or double-boxing is always a safe method to use. 
 

Note: If you are given an RMA number, please include the following information on a piece of paper 
inside the box: 

1) Your name 
2) Your address 
3) Your phone number 
4) A brief description of the symptoms 


Claims 

The client has the obligation to check the delivered goods immediately upon delivery for any short-
comings and/or visible defects, or perform this check after our announcement that the goods are at their 
disposal. Damage incurred in shipping is the responsibility of the shipper; therefore the damage must be 
reported to the carrier upon receipt of merchandise. 
 It is the customer's responsibility to notify and submit claims with the shipper in the event that a fixture is 
damaged due to shipping. Transportation damage has to be reported to us within one day after receipt 
of the delivery.  
Any return shipment has to be made post-paid at all times. Return shipments must be accompanied with 
a letter defining the reason for return shipment. Non-prepaid return shipments will be refused, unless 
otherwise agreed in writing. 
Complaints against us must be made known in writing or by fax within 10 working days after receipt of the 
invoice. After this period complaints will not be handled anymore. 
Complaints will only then be considered if the client has so far complied with all parts of the agreement, 
regardless of the agreement of which the obligation is resulting.  


Summary of Contents for Compact Power Lightset V2

Page 1: ...Compact Power Lightset V2 ORDERCODE 30268...

Page 2: ...ely on Showtec for more excellent lighting products We design and manufacture professional light equipment for the entertainment industry New products are being launched regularly We work hard to keep...

Page 3: ...ams Auto Run Static Color One Compact Power Lightset Sound Control Multiple Compact Power Lightset Master Slave control Multiple Compact Power Lightset DMX control Fixture Linking Data Cabling Control...

Page 4: ...40 000 to 50 000 hours will be achieved under normal operational conditions If improving on this lifespan expectancy is of a higher priority place care in providing for lower operational temperatures...

Page 5: ...that the available voltage is not higher than stated on the rear panel Make sure that the power cord is never crimped or damaged Check the device and the power cord from time to time If the external c...

Page 6: ...yourself Always let the installation be carried out by an authorized dealer Procedure If the Compact Power Lightset is lowered from the ceiling or high joists professional trussing systems have to be...

Page 7: ...description of the symptoms Claims The client has the obligation to check the delivered goods immediately upon delivery for any short comings and or visible defects or perform this check after our ann...

Page 8: ...ct Built in programs DMX Control DMX 7 modes 2 3 4 7 8 14 15 Channel Mode Music controlled via built in microphone Master Slave function Variable in stand height 1200 2000mm Footswitch with 5m cable 3...

Page 9: ...trol 1 Plug the end of the electric mains power cord into a proper electric power supply socket 2 Turn on the music If device is set to Audio and you have pressed enter then the fixture will react to...

Page 10: ...signal cable from the first unit s DMX out socket to the second unit s in socket Repeat this process to link the second third and fourth units 5 Supply electric power Plug electric mains power cords...

Page 11: ...y result in deterioration of the digital DMX signal Maximum recommended DMX data link distance 100 meters Maximum recommended number of Compact Power Lightsets on a DMX data link 30 fixtures Data Cabl...

Page 12: ...f the second Compact Power Lightset should be 1 15 16 A016 the DMX address of the third Compact Power Lightset should be 16 15 31 A011 etc Please be sure that you don t have any overlapping channels i...

Page 13: ...11 Menu Overview 1 Auto Program 2 DMX Address 3 Slave 4 Sound controlled 5 Static Color 6 Built in Programs...

Page 14: ...menus Number of Loops from 01 100 Speed from 01 99 and FL Fade Time from 00 99 Flash Frequency from 00 99 Use the SETUP button to scroll through the menu 2 DMX Mode With this menu you can set the DMX...

Page 15: ...Press the MODE button until the display shows 2 With this menu you can set 3 Static colors of the Compact Power Lightset You can choose Red Green or Blue by pressing the Setup button Use the Up Down...

Page 16: ...14 6 Built in Programs...

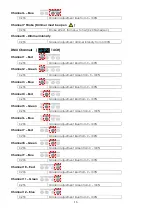
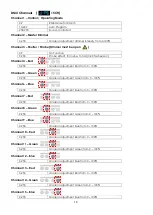
Page 17: ...l 3 Blue Channel 4 Red Channel 5 Green 0 255 Gradual adjustment Red from 0 100 0 255 Gradual adjustment Green from 0 100 0 255 Gradual adjustment Blue from 0 100 0 255 Gradual adjustment Red from 0 10...

Page 18: ...0 20 flashes sec 0 255 Gradual adjustment dimmer intensity from 0 100 0 255 Gradual adjustment Red from 0 100 0 255 Gradual adjustment Green from 0 100 0 255 Gradual adjustment Blue from 0 100 0 255 G...

Page 19: ...ram 13 210 219 Program 14 220 229 Program 15 230 239 Program 16 240 255 Sound controlled Note CH1 When CH1 is set to 0 79 CH2 has no function When CH1 is set to 80 239 CH2 controls the speed of the pr...

Page 20: ...CH2 15 10 249 Auto Program 250 255 Sound controlled 0 255 Gradual adjustment dimmer intensity from 0 100 0 255 Gradual adjustment Red from 0 100 0 255 Gradual adjustment Green from 0 100 0 255 Gradual...

Page 21: ...9 Program 11 190 199 Program 12 200 209 Program 13 210 219 Program 14 220 229 Program 15 230 239 Program 16 240 255 Sound controlled Note CH5 When CH4 is set to 0 79 CH5 has no function When CH4 is se...

Page 22: ...four years in the course of an acceptance test The operator has to make sure that safety relating and machine technical installations are to be inspected by a skilled person once a year The following...

Page 23: ...LR Out of the first fixture on the link i e signal is reversed Install a phase reversing cable between the controller and the first fixture on the link Fixtures reset correctly but some respond errati...

Page 24: ...240V 50Hz CE Fuse 1A 250V Music Control Dimensions 1200x295x60mm LxWxH Weight 8 7 kg Foot Controller Voltage 240V 50Hz CE Jack plug to connect to T bar with controller Cable length 5m Dimensions 500x1...

Page 25: ......
Reviews: