background image

13 


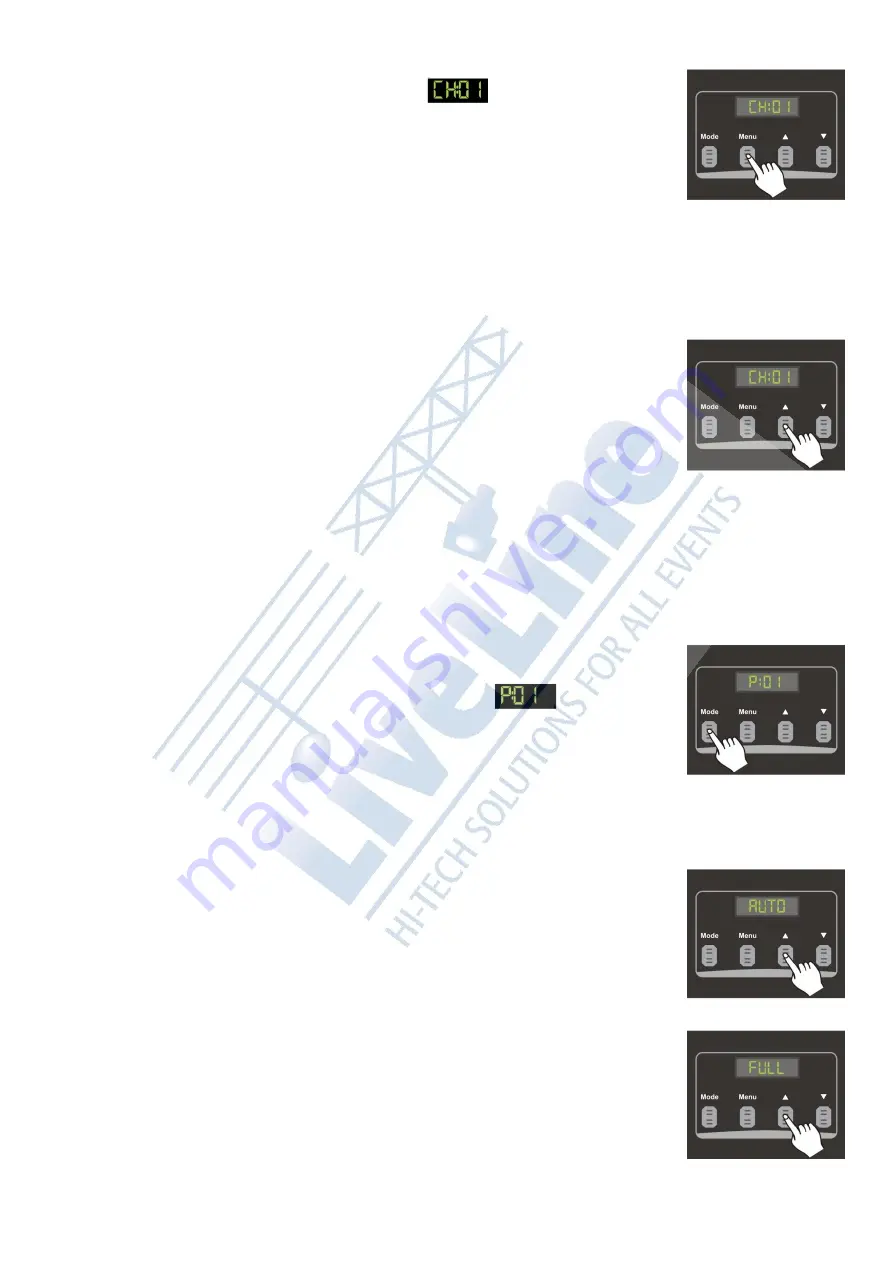
Setting the Channel Mode


1)


Press the 

MENU

 button, until the display shows                   .  

2)


Channel mode is indicated by an “

CH

” followed by 2 digits (

01

02

05

 or 

10

) in 

the LED Display.  
You can press the 

UP

/

DOWN

 buttons to set 4 different DMX Modes.   


3)


You cannot use the 

MENU

 Button to select the Channel Mode, unless you have 

selected the DMX Operation Mode. 

4)


Once you have activated the Channel Mode, you can push the 

UP

 or 

DOWN


button to change the setting from 

01

02

05

 or 

10

5)


When 

CH:01

 is shown in the display, all channels will be controlled by one DMX 

Channel. 

6)


When 

CH:02

 is shown in the display: 

Channel 1-5 will be controlled by DMX Channel 1 
Channel 6-10 will be controlled by DMX Channel 2. 

7)


When 

CH:05

 is shown in the display: 

CH1 and CH 2 will be controlled by DMX Channel 1. 
CH3 and CH4 will be controlled by DMX Channel 2. 
CH5 and CH6 will be controlled by DMX Channel 3. 
CH7 and CH8 will be controlled by DMX Channel 4. 
CH9 and CH10 will be controlled by DMX Channel 5.  
You have a total of 5 DMX Channels available. 

8)


When 

CH:10

 is shown in the display, each light will be individually controlled by 

one DMX Channel. 


Note

 : Default setting is CH:10; this means 10 DMX Channels, so every light is individually controllable. 


CHASE Mode 

You can only use this mode, when you are using the device as a Chaser. The unit has 16 built-in 
programs, Auto and Full. You can select any of these programs to create a chase for a lightshow.  
You can also control the program’s chase speed. 
 

1)


Press and hold the 

MODE

 button for 5 seconds, until the display starts blinking.  


2)


Press the 

MODE 

or

 MENU

 button, until the display shows                     .  


Chase mode is indicated by a “

P

” followed by 2 digits (01-16) in the LED 

Display.  
If the Display shows “

A

”, you are in the wrong mode (DMX Mode).


If the Chase Mode has been activated, the Chase program Mode starts and 
this is the Default setting. 

3)


Once you have activated the Chase Mode, you can push the 

UP

/

DOWN

 buttons to change the 

setting from 01-16, Auto or Full. 

4)


You can select any of these settings to run at a single time. 


Auto


1.


The Sunstrip Active will play all built-in programs, one after the other. 

2.


The dimmer must also be set, for this function to work, 

d>000


Full


1.


All 10 lights on the Sunstrip Active will light up and remain ON at 100% output. 

2.


The dimmer must also be set, for this function to work, 

d>000


Summary of Contents for Sunstrip Active MKII

Page 1: ...Sunstrip Active MKII ORDERCODE 30714 ...

Page 2: ...ign and manufacture professional light equipment for the entertainment industry New products are being launched regularly We work hard to keep you our customer satisfied For more information iwant showtec info You can get some of the best quality best priced products on the market from Showtec So next time turn to Showtec for more great lighting equipment Always get the best with Showtec Thank you...

Page 3: ... Linking 10 Data Cabling 10 Control Panel 11 DMX Control Mode 11 DMX Addressing 11 Menu Overview 12 Control Modes 12 DMX Mode 12 Setting the Channel Mode 13 CHASE Mode 13 Auto 13 Full 13 Program direction Normal Reverse 14 Selecting the Chase Speed 14 Selecting the Intensity Dimming Mode 14 Selecting your own welcome text logo editing 14 DMX Channels 15 1 Channel 15 2 Channels 15 5 Channels 15 10 ...

Page 4: ...h the installation operation and maintenance of this device has to be qualified follow the instructions of this manual Before your initial start up please make sure that there is no damage caused by transportation Should there be any consult your dealer and do not use the device To maintain perfect condition and to ensure a safe operation it is absolutely necessary for the user to follow the safet...

Page 5: ...before cleaning Only handle the power cord by the plug Never pull out the plug by tugging the power cord Make sure that the device is not exposed to extreme heat moisture or dust Make sure that the available voltage is not higher than stated on the rear panel Make sure that the power cord is never crimped or damaged Check the device and the power cord from time to time If the external cable is dam...

Page 6: ...ty issues Do not attempt the installation yourself Always let the installation be carried out by an authorized dealer Procedure If the Sunstrip Active is lowered from the ceiling or high joists professional trussing systems have to be used Use a clamp to mount the Sunstrip Active with the mounting bracket to the trussing system The Sunstrip Active must never be fixed swinging freely in the room Th...

Page 7: ...hod to use Note If you are given an RMA number please include the following information on a piece of paper inside the box 1 Your name 2 Your address 3 Your phone number 4 A brief description of the symptoms Claims The client has the obligation to check the delivered goods immediately upon delivery for any short comings and or visible defects or perform this check after our announcement that the g...

Page 8: ...ur clamp in any desired position For optimal creativity we recommend the special multibracket 30713 Power Input 230V 50Hz Power Consumption 500W Control 16 Built in Programs Sound Active Master Slave DMX Control Display 4 Digits LED Power Connector Neutrik Powercon in output Data Connector XLR In Out 3 Pin DMX control via standard DMX controller 16 built in programs subject to Speed and Dimmer exc...

Page 9: ...tor sends the power to the next unit Max 20A 3 DMX OUT 4 LED Display 5 Mode Button 6 Menu Button 7 Up Button 8 Down Button 9 Power On Off 10 Fuse 6 3A 250V 5 20mm 11 DMX IN 12 Power Input Blue This connector is the input power for this unit Max 20A ...

Page 10: ... higher wattage Lamps with a higher wattage generate temperatures the device was not designed for Damages caused by non observance are not subject to warranty Procedure 1 Loosen the 4 screws on the front of the housing 2 Gently remove the metal housing 3 Read lamp instructions Do not touch the lamp bulb glass Push and turn the lamp Counter Clockwise and remove the lamp Oil on hands shortens the la...

Page 11: ...t onto firm trussing Leave at least 0 5 meter on all sides for air circulation 2 Plug the end of the electric mains power cord into a proper electric power supply socket 3 Always use a safety cable ordercode 70140 70141 4 Use a 3 p XLR cable to connect the Sunstrip Active 5 Link the units as shown in figure 4 Connect a DMX signal cable from the first unit s DMX out socket to the second unit s in s...

Page 12: ... link Connecting more than 30 fixtures on one serial data link without the use of a DMX optically isolated splitter may result in deterioration of the digital DMX signal Maximum recommended number of Sunstrips on a power link 240V 7 fixtures Maximum recommended DMX data link distance 100 meters Maximum recommended number of Sunstrips on a DMX data link 30 fixtures Data Cabling To link fixtures tog...

Page 13: ...address of the third Sunstrip should be 11 10 21 etc Please be sure that you don t have any overlapping channels in order to control each Sunstrip correctly If two or more Sunstrips are addressed similarly they will work similarly For address settings please refer to the instructions under Addressing menu d001 Controlling After having addressed all Sunstrips you may now start operating these via y...

Page 14: ...starts blinking DMX Mode With this menu you can set the DMX address and the required channel mode You can only use this mode when you are using the device as a DMX Dimmer This function allows you to set your device as a 1 2 5 or 10 Channel DMX Dimmer 1 Press and hold the MODE button for 5 seconds until the display starts blinking Press the MODE or MENU button until the display shows DMX mode is in...

Page 15: ... light will be individually controlled by one DMX Channel Note Default setting is CH 10 this means 10 DMX Channels so every light is individually controllable CHASE Mode You can only use this mode when you are using the device as a Chaser The unit has 16 built in programs Auto and Full You can select any of these programs to create a chase for a lightshow You can also control the program s chase s...

Page 16: ... shows d followed by 3 digits 4 Use the UP DOWN buttons to change the dimmer setting from 000 100 5 A value of 000 means the weakest output intensity and a value of 100 means the highest output Selecting your own welcome text logo editing 1 Press and hold the MODE button for 5 seconds until the display starts blinking 2 Now press and hold the MODE button while pressing the following sequence UP UP...

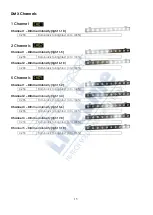
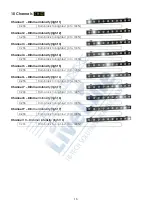
Page 17: ...0 255 From black to brightest 0 to 100 5 Channels Channel 1 Dimmer intensity light 1 2 0 255 From black to brightest 0 to 100 Channel 2 Dimmer intensity light 3 4 0 255 From black to brightest 0 to 100 Channel 3 Dimmer intensity light 5 6 0 255 From black to brightest 0 to 100 Channel 4 Dimmer intensity light 7 8 0 255 From black to brightest 0 to 100 Channel 5 Dimmer intensity light 9 10 0 255 Fr...

Page 18: ... From black to brightest 0 to 100 Channel 5 Dimmer intensity light 5 0 255 From black to brightest 0 to 100 Channel 6 Dimmer intensity light 6 0 255 From black to brightest 0 to 100 Channel 7 Dimmer intensity light 7 0 255 From black to brightest 0 to 100 Channel 8 Dimmer intensity light 8 0 255 From black to brightest 0 to 100 Channel 9 Dimmer intensity light 9 0 255 From black to brightest 0 to ...

Page 19: ...ont of the housing 2 Gently remove the metal housing 3 Follow directions for installing a new lamp page 8 Replacing a Fuse Power surges short circuit or inappropriate electrical power supply may cause a fuse to burn out If the fuse burns out the product will not function whatsoever If this happens follow the directions below to do so 1 Unplug the unit from electric power source 2 Insert a flat hea...

Page 20: ...e controller and the first fixture on the link Fixtures reset correctly but some respond erratically or not at all to the controller Poor data quality Check data quality If much lower than 100 percent the problem may be a bad data link connection poor quality or broken cables missing termination plug or a defective fixture disturbing the link Bad data link connection Inspect connections and cables...

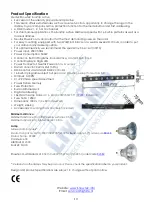
Page 21: ...y 4 Digits LED Power Connector Neutrik Powercon in output Data Connector XLR In Out 3 Pin DMX control via standard DMX controller 16 built in programs subject to Speed and Dimmer except for Auto Full Dimmer 0 100 01 99 Chase speed adjustment Power Failure Memory Fuse Protection Built in Dimmerpack Digital Addressing 10x Osram Lamp Halopar 16 GU10 230V 50W 35 80418 Included Fuse T6 3A 250V Dimensio...

Page 22: ......
Reviews: