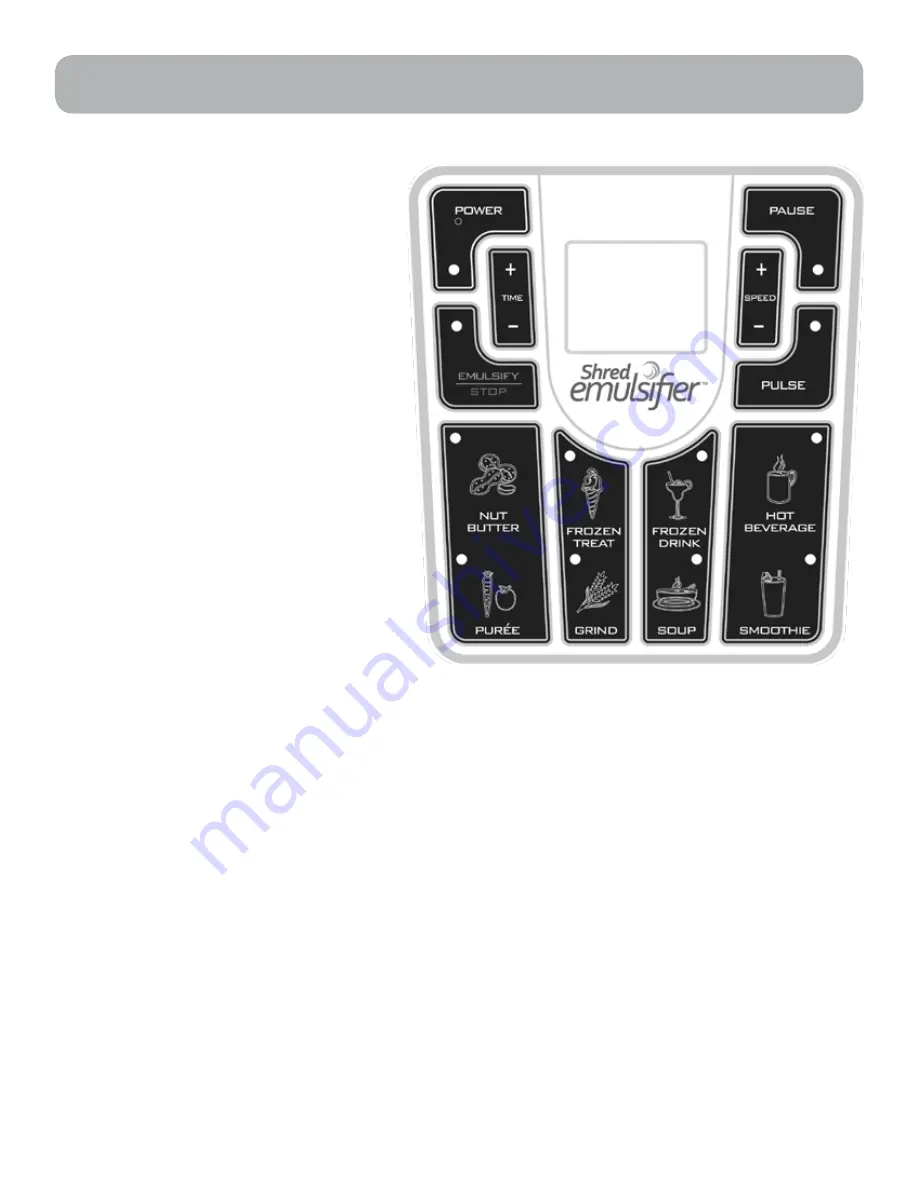
POWER Button:
Once the Pitcher is
in place and the unit is plugged into
a 120V AC outlet, the Power Button
Light will turn Blue indicating that
the unit is ON but does not actually
have Power. Now, select the Power
Button, the LED Display will light up
and the unit will have Power.
NOTE:
During any processing
function, selecting the Power
button will shut everything down. To
continue processing you must re-
select the Power Button.
(“o” denotes power off)
STOP Button:
Located just below
the Power Button will also effectively
stop any Processing function
immediately but it will not cut the
power and the LED will remain lit.
TIME Button:
The unit has a 10 Min.
Maximum run time. Add or subtract
minutes with the
+
or
-
buttons in the
TIME panel.
SPEED Button:
The unit has 10
speeds. The default speed is 2. The lowest speed is “STIR”. If the LED is set on 2, selecting a
lower speed will change the LED reading to STIR. If the LED speed is set to 9, selecting a higher
speed will change the LED to “H” which is the highest setting.
EMULSIFY Button:
Automatically operates the unit at its lowest speed for a 10 minute default
time. For less “Emulsify” Time, selecting STOP located below the Emulsify Button will cancel
the Process.
PAUSE Button:
Allows you to stop any function in progress without cancelling the setting.
When on Pause you may add ingredients and then hit Pause again to complete the
pre-programmed setting.
PULSE Button:
This button is used when you need short bursts at full power. Pulse will only
work only while button is pressed... removing your finger stops the process.
PRE-SET Buttons:
There are 8 Pre-Set Functions that occupy the bottom half of the control panel.
You may apply these functions to your own recipes or select any from the
Shred Emulsifier
TM
Recipe Guide.
8
Using the Shred Emulsifier
TM
10:00
2
Control Panel
Summary of Contents for SE1-PRO
Page 15: ......


