


Operating Instructions
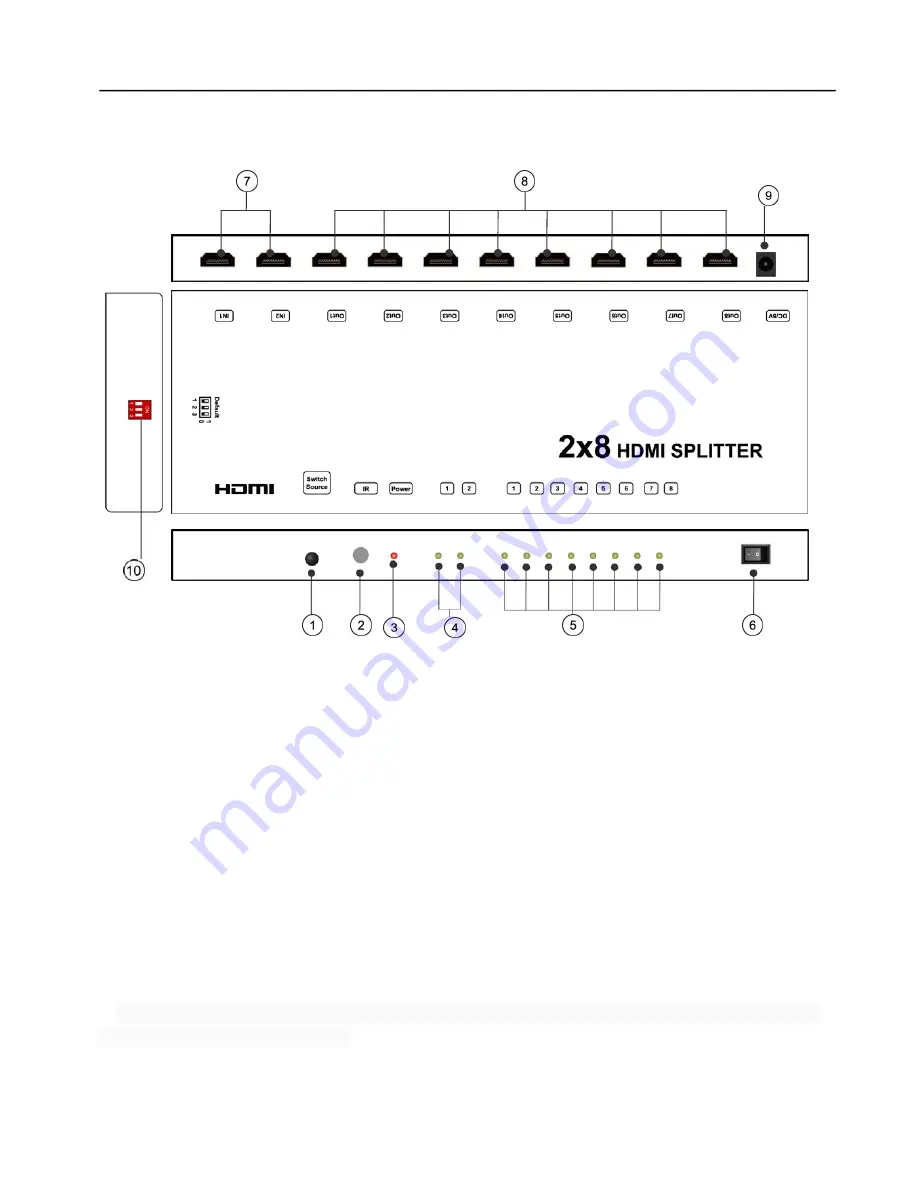
PANEL DESCRIPTIONS
1)
Source Select Button:Manually select button to switch signal source.
2)
IR Receiver window.
3)
Indicator of power Inputs. When power is ON, the corresponding LED lights.
4)
Indicator of HDMI Inputs. When a HDMI equipment is connected, the corresponding blue LED lights
5)
Indicator of HDMI output. When a HDMI equipment is connected, the corresponding blue LED lights.
6)
Power ON/OFF. Press the up/down button to open/close the device.
7) HDMI input ports. 8) HDMI output ports. 9) Power input. 10) DIP switch.
CONNECT AND OPERATE
1)
Connect the HDMI signal sources(Such as PS3,STB etc) into HDMI inputs.
2)
Connect the HDMI display devices (such as: HD-LCD,HD-DLP) into HDMI outputs.
3)
Set the EDID if necessary (refer Page 4).
4)
Insert the DC side of 5v power supply into Power input.
5)
Press the power button to open the device.
6)
Use remote or push the button to select the source.when you choose the source, the 8 displays will show
the same HDMI source simultaneously.
Attention: Insert / Extract cable gently.
3


