P/N 1127747 Rev. A
6
LiteALL™ Work Light Installation
- continued
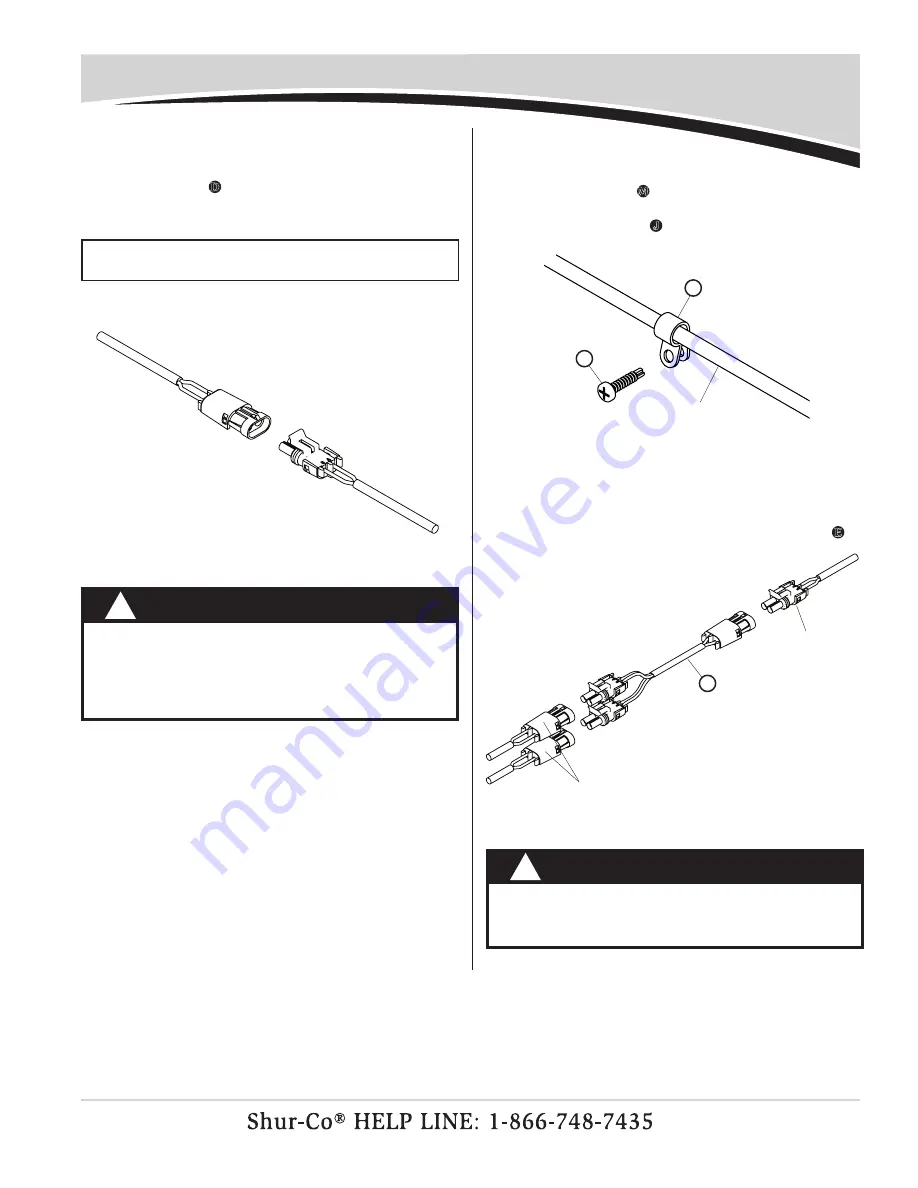
STEP 6:
Coil and secure any excess cable with cable ties.
STEP 5:
Use wire clips
M
and/or cable ties to secure work light
and extension cables. Use drill and #2 Phillips bit to
self-drill screws
J
to secure wire clips.
STEP 4:
Route work light cable to LiteALL™ control module.
Verify cable routing before securing cable. If 20' exten
-
sion cable
D
is needed, route extension cable between
LiteALL™ control module and work light cables.
NOTE:
If needed, 20' extension cables are available (see
parts list).
J
work
light
cABle
M
STEP 7:
Repeat steps above for each additional work light. If
more than one work light is to be connected to either
LiteALL™ module output, insert output splitter
E
.
E
liteAll
™
module
output
work
light
cABles
CAUTION
Disconnect LiteAll™ before welding onto truck or
trailer. Failure to disconnect module may cause
damage and will void warranty.
!
NOTICE
Do not power any Shur-Co
®
wireless system with
battery charger alone, as this will likely cause
system abnormalities and/or system malfunction.
Instead, use a 12-volt truck/automobile battery to
provide power to trailer.
!
Summary of Contents for LITEALL SMART2 Remote
Page 1: ...P N 1127747 Rev A SMART2 Remote ...
Page 16: ......


