30
ENGLISH • Instructions manual
M 39 ATV
M 39 ATV
BEAD BREAKING
ATTENTION
During this stage of operation, noise levels may be up to 70 dB(A). We
recommend that operators wear hearing protectors.
Deciding from which side of the wheels the tyre
must be demounted
Clamp the rim on the turntable keeping the side of the rim on which the
brake disk or drum
is fitted facing downward.
Special instructions
Alloy wheels
Some alloy wheels on the market have minimal rim channels or are even
completely without rim channels (these wheels are not DOT approved).
DANGER
When working on these wheels, it is possible to damage the tyre, the
rim or both, with the risk of the tyre exploding under pressure causing
serious injury or death.
When mounting tyres on this type of wheel, use the utmost caution.
Bead breaking
- Fully deflate the tyre
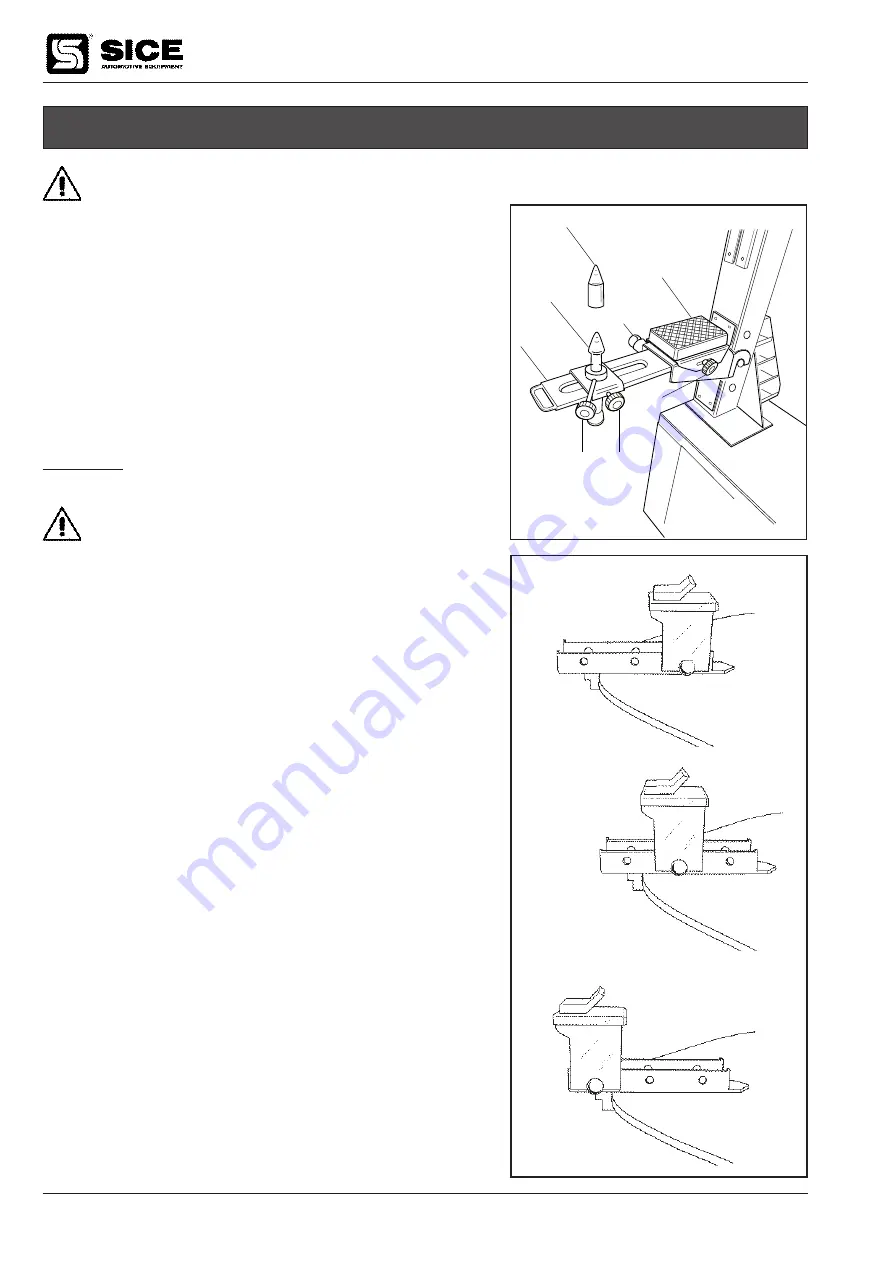
- Depending on the wheel width to be handled, move the bead breaking support
to increase or decrease the machine bead breaking capacity (see Technical Data
paragraph).
- Place the wheel in the bead breaking position on the wheel support
Q
(Fig
5). With Kit SR line up the vertical slide arm
B
fig 4 with the central hole
of the rim, place the wheel in a perfectly horizontal position and tighten
the knob
F
fig 4.
- Pressing slightly on the bead breaker pedal
K
fig 5, position the bead
breaker on the bead of the tyre (Fig .6) The bead breaker pedal can be
removed to work more easily on larger diameter wheels
- Adjust the wheel position so that the bead breaker is as near as possible
to the edge of the rim and then tighten the knob
F
fig 4 and
D
fig 4.(Kit
SR optional)
- Press down the pedal completely to release the bead from the rim.
- Repeat this operation in various points around the tyre until the bead is
freed from the rim. Repeat the operation on the opposite side of the tyre.
If the wheel only has one kingpin with the hub to one side, use the hori
-
zontal swing arm extension
A
fig.4 so that the wheel is perfectly horizontal.
- Remove counterweights.
- Using pedal
G
, adjust the opening of the four self-centering clamps.
- Adjust the position of the sliding clamps (position 1,2 or 3) according to
the diameter of the wheel.(Fig 7).
- If the wheel that needs to be blocked has a diameter equal to 5’’ (go-kart),
the special plastic adaptors that are supplied with the machine must be
mounted.
- Lubricate the tyre all around the edge of the bottom and top bead to aid
A
B
C
D
E
F
G
H
4
5 - 13”
10 - 18”
15 - 23”
7
Summary of Contents for M 39 ATV
Page 19: ...ITALIANO Manuale d uso 19 M 39 ATV 12 12...
Page 37: ...ENGLISH Instructions manual 37 M 39 ATV 12 12...
Page 55: ...FRAN AIS Manuel d instructions 55 M 39 ATV 12 12...
Page 73: ...DEUTSCH Betriebsanleitung 73 M 39 ATV 12 12...
Page 91: ...ESPANOL Manual de instrucciones 91 M 39 ATV 12 12...


