8018061/2015-04-13
• Subject to change without notice • SICK AG • Waldkirch • Germany • www.sick.com
1
Lector
®
632 | SIcK
en
Quickstart
Lector
®
632
Image-based code readers
Product information
The Lector63x is an industrial image-based code
reader family for all common 1D (bar codes / stacked
codes) and 2D (matrix) codes. The result is sent to the
control system via digital output or its host interfaces:
Serial, CAN or Ethernet.
The Lector63x Flex variants feature exchangeable S-
or C-mount optics, internal lighting and filter options
to meet a wide range of application requirements.
about this document
This quickstart contains instructions that support
the set up and operation of the Lector63x Flex. Make
sure that the installation is performed by a qualified
technician.
This quickstart as well as the Lector63x operating
instructions, containing additional information, are
available in English and German online. To download:
www.SICK.com > type a document number in the
P
art
number
field: quickstart EN/DE, 8018061/8018060,
operating instructions EN/DE, 8018071/8018070.
Mount
Assemble the optical kit on the Lector63x. For details
see section C at the end of this quickstart.
NOTICE
Use only Lector63x optics to ensure optimal image
quality and to avoid damage to the device.
Mount the device at a suitable working distance from
the object, for example using a mounting bracket
(angled bracket part no. 2076735, cooling bracket
2078970, or bracket kit 2076735). For information
about suitable working distances, see section E.
Fig. 1: Mounting
Mount the Lector63x with a 10 to 20 degree tilt to
avoid reflections.
connect
To connect the Lector63x:
1. Connect the Gigabit Ethernet to a network or
directly to a PC.
2. Connect the power I/O to a 24 V power source.
WarNiNG
Ensure that the ground potential is the same at all
grounding points. Incorrect grounding or connection
can damage the device and cause fire.
Ensure that any loose cable ends are isolated. Do
not connect external I/O signals to the Lector63x
while it is powered.
Configure with PC
The SOPAS Engineering Tool (ET) software for PC is
used to connect and configure the Lector63x and
other SICK devices.
To install SOPAS ET:
1.
Download SOPAS ET (version 3.0.1 or newer)
from www.mysick,com/en/SOPAS_ET.
2.
Run the downloaded installation file.
3. Follow the instructions on the screen.
SOPAS ET main window
The SOPAS ET main window is split into two panes,
the project view to the left and a list of connected de-
vices to the right. To add the Lector63x to the project,
drag the device to the left project pane.
Double-click the product icon to open the device
window and start the configuration.
If there are IP address connection issues, click the
text next to the warning symbol in the project pane to
make adjustments.
If the device driver is missing, click the text next to
the warning symbol in the project pane and follow the
instructions. The device will be in offline mode after
installing the driver. Put the device in online mode by
clicking the
O
ffline
button next to the product icon.
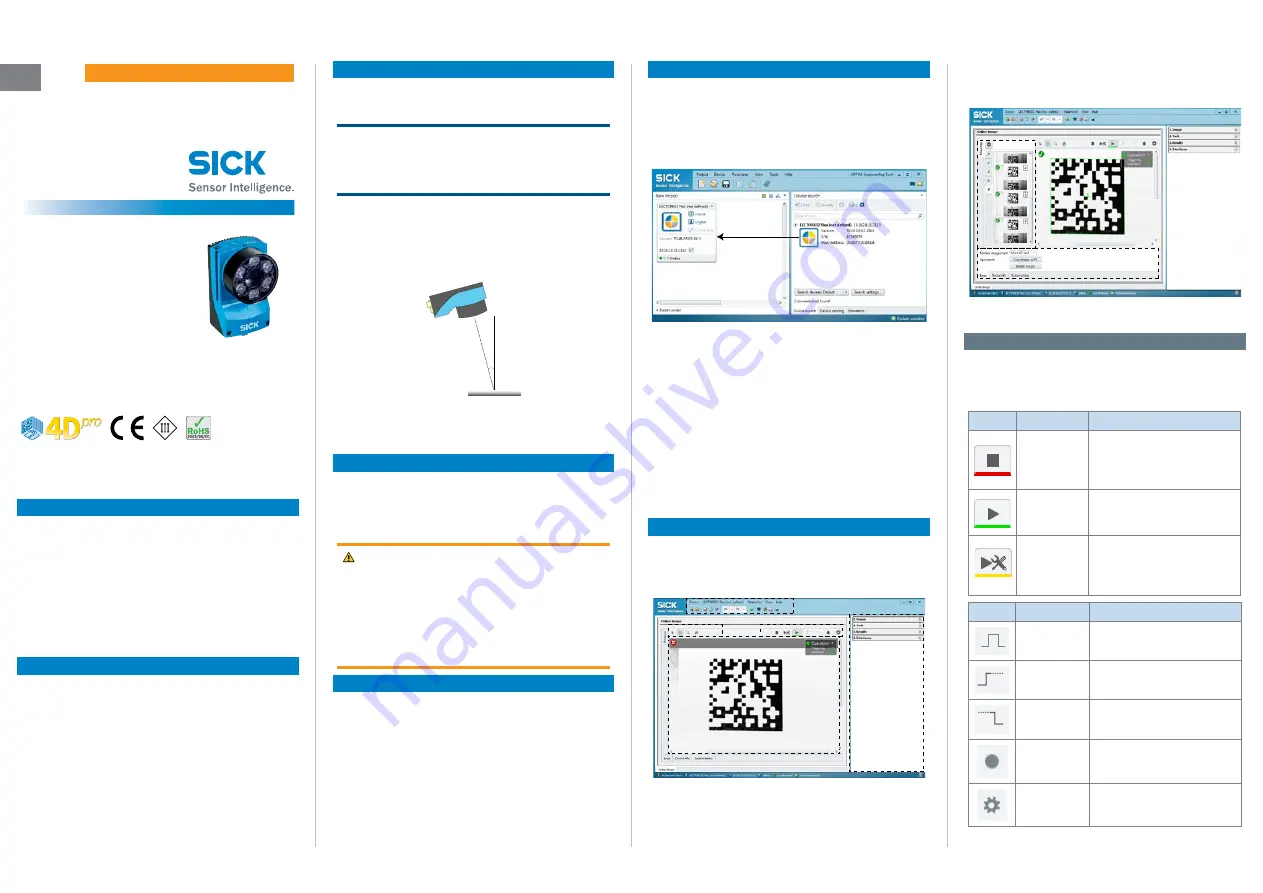
SOPAS ET device window
The Lector63x is configured in the SOPAS ET device
window. The code in the image below can be used to
test your device.
1.
SOPAS functions
2.
Image handling controls
3.
Device controls
4.
Parameter pane with workflow
5.
Image area
Additional expandable panels are available to the left
of and below the image area.
1.
Filmstrip
2.
Information area
Device controls
The device controls are used to change between
image acquisition modes and to activate related
functions.
Button
Mode
Description
Stop
Stops image acquisition.Exter-
nal interfaces including inputs
are disabled. The device does
not receive triggers.
Live
Activates live image acquisi-
tion. External interfaces are
disabled.
Operation
Activates image acquisition
as configured in the triggering
settings. External interfaces are
enabled.
Button
Function
Description
Manual
trigger
Trigger a single image
(single image mode).
Start trigger
Start image series
(image series mode).
Stop trigger
Stop image series
(image series mode).
Record
Records images to a folder on
the PC.
Settings
Recording settings.


