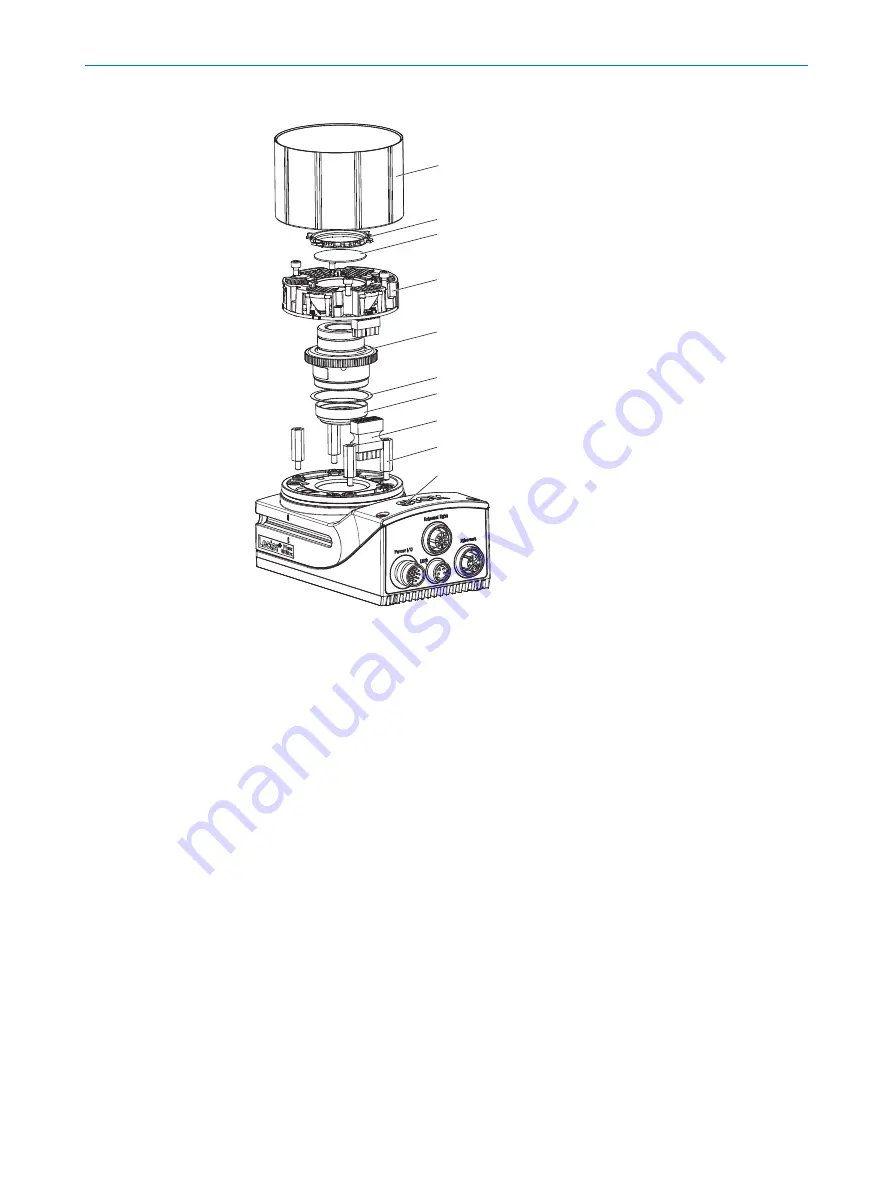
5.4.1
Mounting the optics: compact c-mount lens
1
2
3
4
5
6
7
8
9
ß
1
Camera housing (basic device)
2
Spacer for integrable illumination
3
Plug connector for illumination
4
Optical filter (optional)
5
Spacer disk (included with delivery of filter)
6
Compact C-mount lens
7
Integrable illumination unit
8
C-mount filter (optional), cannot be used with f = 15 mm lens (part number: 2080213)
9
Filter holder
ß
Protective optics cover
1.
Switch off the supply voltage to the device.
2.
Place the camera housing on a nonslip base.
3.
Remove the protective cap from the round light inlet.
4.
Carefully insert the optional filter and spacer disk into the light inlet.
5.
Screw the lens unit into the C-mount thread until it engages. This will also lock the
optional filter in place at the same time.
6.
Mount the four spacers. Maximum recommended torque: 65 Ncm.
7.
Insert the illumination unit connector.
8.
Mount the illumination unit using the 4 screws. Use the enclosed SW 2 hexagon
key for this purpose.
9.
If the required adjustments are not carried out immediately, mount the optics
protective hood.
5
MOUNTING
26
O P E R A T I N G I N S T R U C T I O N S | Lector63x Flex C-mount and S-mount
8018071/1E1C/2021-12-16 | SICK
Subject to change without notice


