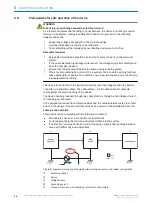
5.4.3
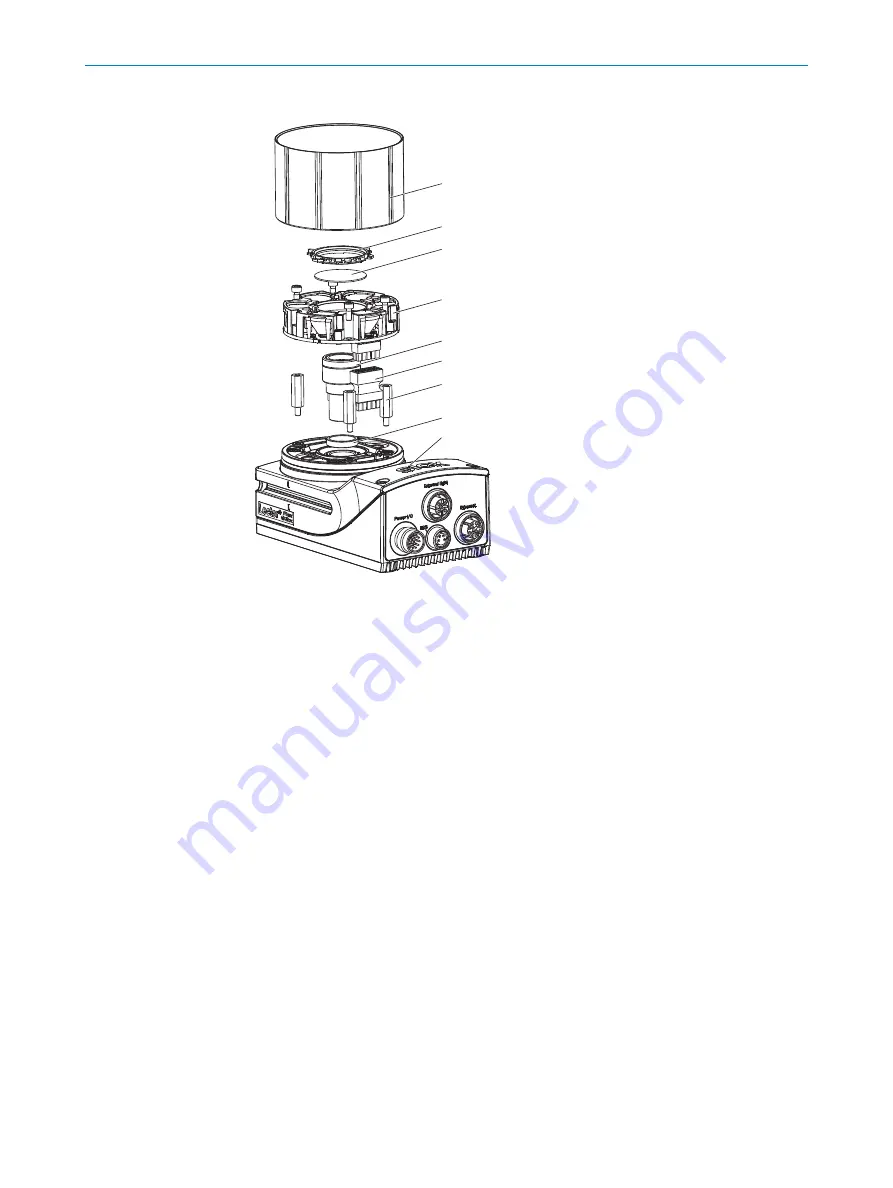
Mounting the optics: s-mount lens
1
2
3
4
5
6
7
8
9
1
Camera housing
2
Spacer ring (optional)
3
Spacer for integrable illumination
4
Plug connector for illumination
5
S-mount lens
6
Integrable illumination unit
7
Optical filter (optional)
8
Filter holder
9
Protective optics cover
1.
Switch off the supply voltage to the device.
2.
Place the housing on a nonslip base.
3.
Remove the protective cap from the round light inlet.
4.
Depending on the lens used and the desired working distance, one or more spacer
rings may need to be mounted below the lens. The spacer rings are sold in packets
(part number: 2066933 and 2081458). The recommended spacer rings to use
depend on the working distance and the focal length of the lens,
.
5.
Screw in the lens unit until the limit stop is reached and the thicker part of the
lens is inside the light inlet of the housing. If the lens is only screwed in as far as
its thread, the lens is not tightly screwed into the housing.
5
MOUNTING
28
O P E R A T I N G I N S T R U C T I O N S | Lector63x Flex C-mount and S-mount
8018071/1E1C/2021-12-16 | SICK
Subject to change without notice


