6.6.3
Configuring measuring point automatic
Procedure
1.
Menu: Call up
BCU
/
Parameter
/“
Measuring point automatic
”.
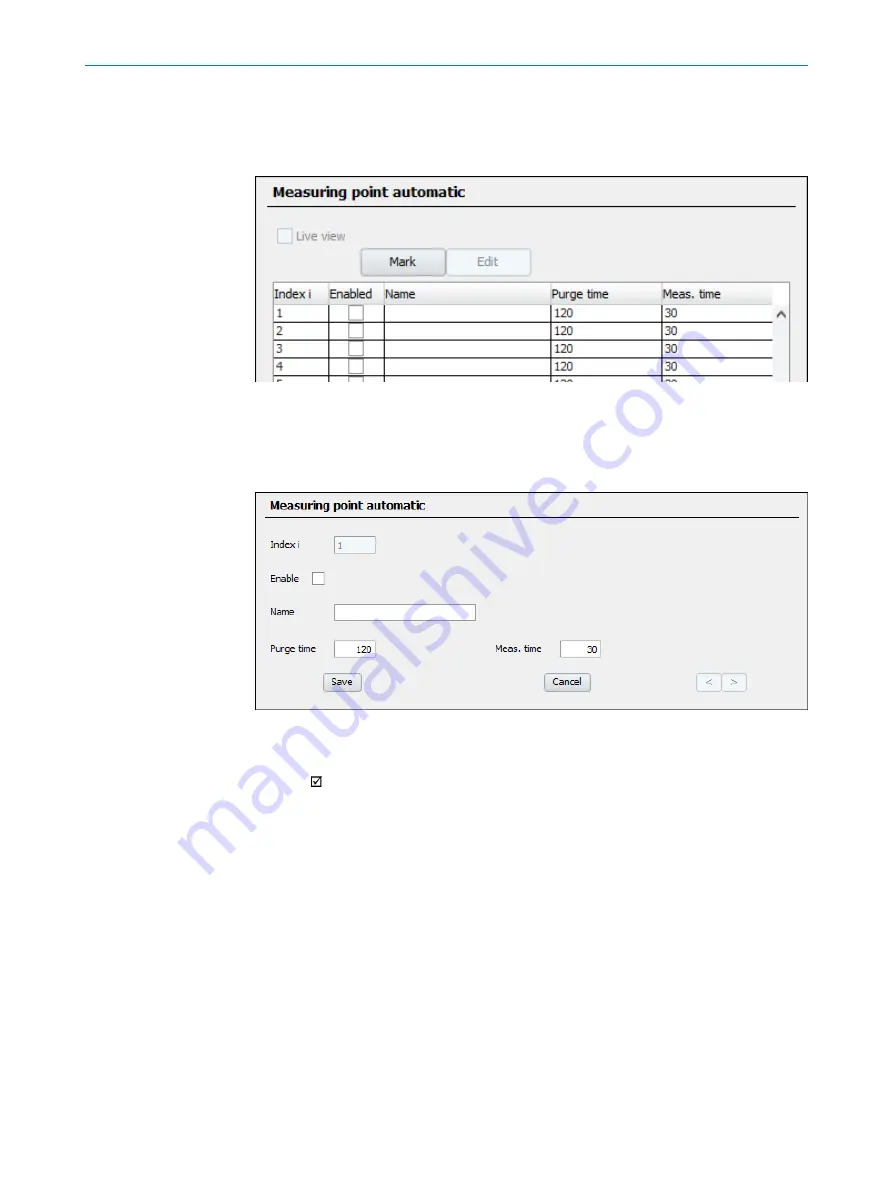
Figure 32: Menu “Measuring point automatic” – Table (example)
2.
Deactivate
Live view
.
3.
Select the desired Table rows.
4.
Select
Edit
.
Figure 33: Menu “Measuring point automatic” – Edit (example)
1
Consecutive number (1 = MP1, 2 = MP2 etc.)
1
2
= this measuring point is used by measuring point automatic
3
Name of the measuring point
4
Wait time after switching to this measuring point
2
5
Measuring time with the sample gas from this measuring point
3
4
1
Defines the sequence of the measuring points during switchover.
2
Criterion: Response time + T
90 %
.
3
Select as required.
4
Flush time + measuring time = activation time of the digital output = total time for this measuring point.
5.
Make the desired entries.
6.
Select
Save
.
6.7
Backup of settings
Current parameter settings can be stored in internal storage.
Backup files can be created in the device at any time. Each module has its own backup.
A maximum of two backups are stored on the sensor modules and the BCU. The first
backup is overwritten when the third backup is created. This means only the last two
backups are saved.
TESTS AND SETTINGS
6
8017324/15A2/V6-0/2019-10 | SICK
T E C H N I C A L I N F O R M A T I O N | MARSIC200
53
Subject to change without notice


