background image

INSTALLATION AND OPERATING 

INSTRUCTIONS

DRIVE

Radio sensor for status and locking monitoring system of windows.

SIEGENIA senso secure

Window systems
Door systems
Comfort systems

Summary of Contents for Senso Secure

Page 1: ...INSTALLATION AND OPERATING INSTRUCTIONS DRIVE Radio sensor for status and locking monitoring system of windows SIEGENIA senso secure Window systems Door systems Comfort systems...

Page 2: ......

Page 3: ...INSTALLATION 14 8 1 Installation of window sensor 14 8 2 Installation of frame magnet 17 9 OPERATION 19 9 1 Device functions in the SIEGENIA Comfort app 19 9 1 1 Status indicator 19 9 1 2 Signal tone...

Page 4: ...ly via EnOcean radio to the SIEGENIA Connect Box or to other remote stations which support the EnOcean Equipment Profile EEP of the SIEGENIA senso secure e g mediola EnOcean PlugIn Use the sensor only...

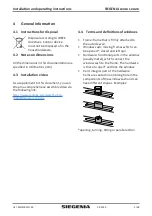
Page 5: ...am a comprehensive assembly video via the following link https www youtube com watch v qHL rTip8jE feature youtu be 4 4 Terms and definitions of windows Frame frame that is firmly attached to the outs...

Page 6: ...net marking 3 Slider 3a Sash magnet 3b Cropping area 4 Bag with accessories 4a Cam catcher self adhesive 4b Batteries AAAA 2x 4c Frame magnet self adhesive 6 Function SIEGENIA senso secure is a concea...

Page 7: ...radio channels External magnetic and or electromagnetic sources e g power lines neodymium magnets etc can impair the functioning of the sensor and and cause incorrect notifications Youwill find notes...

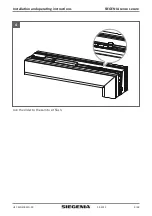
Page 8: ...and operating instructions 2 Position the slider in the casing Do not remove the protection foil from the adhesive tapes 3 Position senor on the hardware of the window sash Suitable installation locat...

Page 9: ...09 2019 9 28 H47 SENS002EN 00 Installation and operating instructions SIEGENIA senso secure 4 Join the slider to the cam to sit flush...

Page 10: ...or B If the cam is seated on the right of the sensor the slider must be in position A for the installation The oblong hole of the cam is not covered in the installation of the slider If the cam is se...

Page 11: ...osition A or B If the cam is seated below the sensor the slider must be in position A for the installation The oblong hole of the cam is not covered in the installation of the slider If the cam is sea...

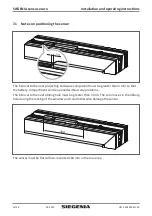
Page 12: ...rojecting hardware component must be greater than 3 mm so that the battery compartment can be opened without any problems The interval to the next oblong hole must be greater than 3 mm The cam moves i...

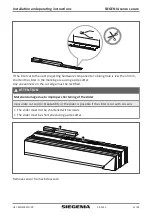
Page 13: ...the slider in the marking area using a side cutter Any unevenness on the cut edge must be rectified ATTENTION Material damage due to improper shortening of the slider Inaccurate cut and or breakabili...

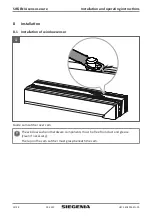
Page 14: ...lation and operating instructions 8 Installation 8 1 Installation of window sensor 1 Guide cam catcher over cam The window sash and hardware components must be free from dust and grease clean if neces...

Page 15: ...ions SIEGENIA senso secure 2 Remove protection foil from cam catcher adhesive tape 3 Glue the slider onto the cam catcher The slider must be seated closely on the cam 1 mm clearance Press the slider o...

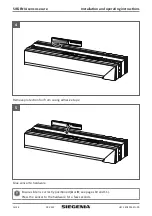
Page 16: ...so secure Installation and operating instructions 4 Remove protection foil from casing adhesive tape 5 Glue sensor to hardware Ensure slider is correctly positioned A or B see pages 10 and 11 Press th...

Page 17: ...H47 SENS002EN 00 Installation and operating instructions SIEGENIA senso secure 8 2 Installation of frame magnet 1 Transfer the frame magnet marking to the window sash 2 Transfer the window sash markin...

Page 18: ...g instructions 3 Remove protection foil from frame magnet 4 Glue frame magnet to the frame from the inside The frame and hardware components must be free from dust and grease clean if necessary Press...

Page 19: ...ifies the status of the connected window Window locked Window not locked tilted Window not locked turn opened 9 1 2 Signal tone In case of vibration of the connected window the signal tone will be emi...

Page 20: ...rt app The following figures demonstrate this sequence of steps 7 Add window sensor Cancel Finished If you want to add a new sensor 1 insert batteries 2 clip on battery compartment 3 confirm with Fini...

Page 21: ...of the casing Never clean the unit with a high pressure cleaner or steam jet cleaner 10 2 Replacing the batteries 1 Remove battery compartment and batteries 2 Insert new batteries into the battery co...

Page 22: ...nsert battery compartment with batteries into the sensor 3 Tap 4x on the sensor with your finger Sensor briefly beeps 2x 12 Spare parts and accessories Name Content Material number SIEGENIA senso secu...

Page 23: ...ion performance 0 4 mW Radio range in open space 300 m Protection type IP64 electronics IP40 battery compartment Permissible room temperature 20 C to 60 C Batteries 2x AAAA Service life of batteries a...

Page 24: ...ng instructions SIEGENIA Connect Box H47 MOTS013EN Interference of the wireless signal Observe notes on wireless range planning and potential sources of interference see page 7 SIEGENIA senso secure n...

Page 25: ...settings Via Further settings it is possible to regulate the alarm sensitivity from level 0 to level 6 Please proceed as shown below 1 Open SIEGENIA Comfort app 2 Select SIEGENIA Connect Box 3 SIEGENI...

Page 26: ...30 4 2011 A1 2014 Emission EN 50130 4 2011 A1 2014 EN 61000 6 2 2005 b 2014 53 EU RED Directive b1 Electromagnetic compatibility EN 301 489 1 V 1 9 2 EN 301 489 3 V 1 6 1 b3 Safety of persons in elect...

Page 27: ......

Page 28: ...www siegenia com H47 SENS002EN 00...

Reviews: