Installation
UM353-1B
April
2012
7-16
AG
003
25
a
52
51
50
49
48
47
46
45
44
43
Analog Input Universal 1 a
Analog Input Universal 1 d
Analog Input Universal 2 a
Analog Input Universal 2 d
Reference Junction for AINU1
Reference Junction for AINU2
Note:
Place Reference Junctions
against the connector
and as close to the
Connector Socket
Assembly as possible.
Connector Socket
Assembly
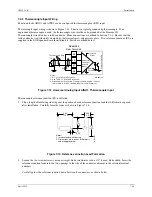
3.
Check that all involved components and station wiring are fully inserted. Carefully tighten the terminal screws
to 5 in. lbs.
4.
Repeat the above steps if the other AINU function block is to be used as a thermocouple input.
7.4.6 RTD Input Wiring
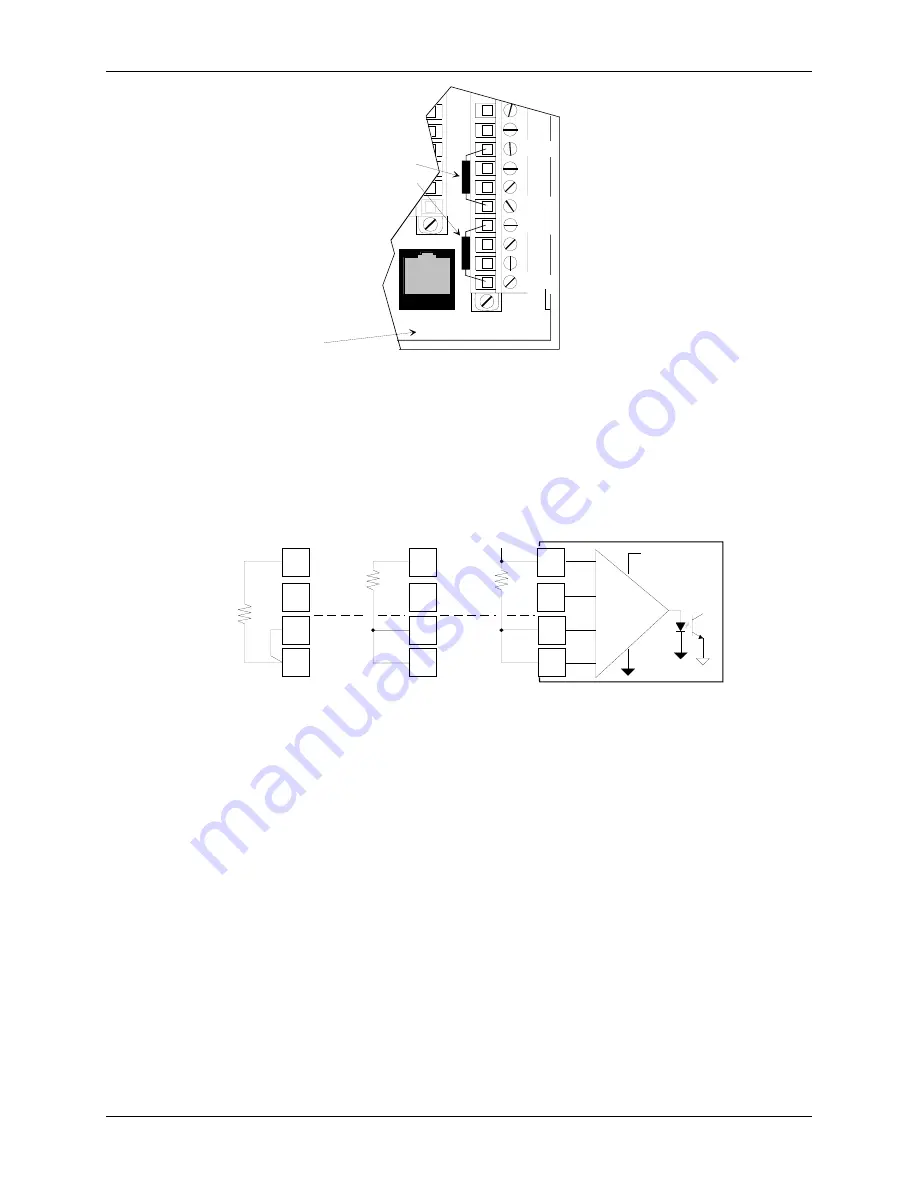
Wiring for 2-, 3-, and 4-wire RTDs is shown in Figure 7-15. Make connections as outlined in Section 7.4.1. Note
the wire jumper between terminals 47 and 48 when a 2-wire RTD is installed.
45
46
47
48
45
46
47
48
J
umper
2-Wire
RTD
3-Wire
RTD
45
46
47
48
C
ontr
o
lle
r C
ir
c
ui
tr
y
Isolated
Power
Isolated
Ground
Universal
Converter,
Isolated
Inputs
4-Wire
RTD
Note: See Table 7-1 for AINU2 terminals.
NC = No Connection
MG00513a
Controller Terminals
NC
Figure 7-15 Universal Analog Input AINU1; 2, 3, and 4-Wire RTD Inputs
Summary of Contents for 353
Page 12: ...Contents UM353 1B x April 2012 ...
Page 22: ...Introduction UM353 1B April 2012 1 10 ...
Page 30: ...Configuration Overview UM353 1B April 2012 2 8 ...
Page 122: ...Function Blocks UM353 1B April 2012 3 92 ...
Page 168: ...Data Mapping UM353 1B April 2012 6 28 ...
Page 204: ...Controller and System Test UM353 1B April 2012 9 8 ...
Page 222: ...Calibration UM353 1B April 2012 11 4 ...
Page 226: ...Circuit Description UM353 1B April 2012 12 4 ...
Page 238: ...Model Designation and Specifications UM353 1B April 2012 13 12 EC Declaration of Conformity ...
Page 240: ...Model Designation and Specifications UM353 1B April 2012 13 14 ...
Page 244: ...Abbreviations And Acronyms UM353 1B 14 4 April 2012 ...


