UM353-1B
Controller and System Test
April 2012
9-3
7.
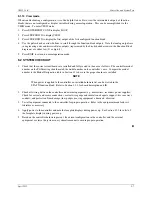
Press STEP DOWN for the function Block menu.
8.
Turn the pulser knob to the desired Function Block and Press STEP DOWN.
9.
The first function block parameter will be displayed. For example, RG PTR for the A/M Transfer Block or
MINSCALE for the Analog Input Block. Press STEP DOWN to display current parameter value or use the
pulser knob to select a different parameter. Press STORE to save any changes.
10.
Press EXIT to return to normal operation mode.
Notice that the SETPT, ALARM, PID, and ODC function blocks in FCO101 all refer to AIN1 as the RG PTR
(range pointer) to determine the operating range of the function block. Be aware that making changes to a
configuration may require changing referenced RG PTRs. For example, in FCO105 (Ratio Set Control), the PID
controller output range is determined by the range of AIN2.
Try changing the default 0-100% range of analog input #1 (AIN1) to 100.0-500.0
°
F using the Configuration Road
Map in Figure 2-1 or the following steps:
1.
Press ENTER/EXIT CONF to display LOOP.
2.
Press STEP DOWN twice to display VIEW.
3.
Turn pulser knob or use arrow button to display EDIT FB.
4.
Press STEP DOWN to display Function Block menu.
5.
Turn the pulser knob or use right arrow button to display AIN1.
6.
Press STEP DOWN to display MINSCALE.
7.
Press STEP DOWN to display current 0% of range.
8.
Turn the pulser knob to display 1 in the last digit. Display should read “0.00001”.
9.
Now press the left arrow (TAG) button. Notice that the decimal place will move one place every time the
button is pressed. Press the arrow button until the display reads “100.000” and then press the STORE button.
10.
Press STEP UP.
11.
Turn the pulser knob or use the arrow button to display MAXSCALE.
12.
Press STEP DOWN to display “100.000”.
13.
Press the right arrow button until display reads “0.00001”.
14.
Turn the pulser knob to change the last digit to 5. Display should read “0.00005”
15.
Press left arrow button until display reads “500.000” and press store.
16.
Press STEP UP.
17.
Turn the pulser knob or the use arrow button to display DPP.
18.
Press STEP DOWN. Notice “0.00” or 2 decimal places is the default. Turn the pulser knob to set the number
of decimal places to 0.0 or to show 1 decimal place on the display and press STORE button.
19.
Press STEP UP and turn the pulser knob or use the arrow button to display ENGUNITS.
20.
Press STEP DOWN. Notice that the default units are PRCT.
21.
Use the arrow buttons to move the flashing cursor to the space before the P. Now turn the pulser knob to
display “D”. Use the arrow button to move to the next position and turn the pulser knob to select “E”. Repeat
until display reads DEG F and press the STORE button.
22.
Press ENTER/EXIT CONF to return to normal operation.
Try displaying the process and setpoint. Notice that these are now displayed in engineering units scaled 100 to 500
DEG F, or 300 at 50%. Press the UNITS button to display the engineering units configured above.
Summary of Contents for 353
Page 12: ...Contents UM353 1B x April 2012 ...
Page 22: ...Introduction UM353 1B April 2012 1 10 ...
Page 30: ...Configuration Overview UM353 1B April 2012 2 8 ...
Page 122: ...Function Blocks UM353 1B April 2012 3 92 ...
Page 168: ...Data Mapping UM353 1B April 2012 6 28 ...
Page 204: ...Controller and System Test UM353 1B April 2012 9 8 ...
Page 222: ...Calibration UM353 1B April 2012 11 4 ...
Page 226: ...Circuit Description UM353 1B April 2012 12 4 ...
Page 238: ...Model Designation and Specifications UM353 1B April 2012 13 12 EC Declaration of Conformity ...
Page 240: ...Model Designation and Specifications UM353 1B April 2012 13 14 ...
Page 244: ...Abbreviations And Acronyms UM353 1B 14 4 April 2012 ...


