864-5091.9 • INSTALLATION AND OPERATING INSTRUCTIONS • 8DB10 • Revision 06
79/214
Installation
Mounting busbar housing
covers without
desiccant bag holders
For this reason, the busbar housing covers
without
a holder for desiccant bags are mounted
first (cover
without
"Filter" inscription).
➭ Remove tools, clean the inside of the housings with a hand vacuum cleaner, and clean
the bushing plates with a rag.
➭ Prepare the flanges of the cleaned busbar housings for assembly.
➭ Clean the contact surfaces of the busbar housing covers with a lint-free paper, and apply a
thin film of grease (e.g. Polylub GLY 801, 0.40 kg).
➭ Put the covers on the prepared flanges and bolt them tight crosswise.
Tightening torque: 20 Nm.
Bolting
the subframes together
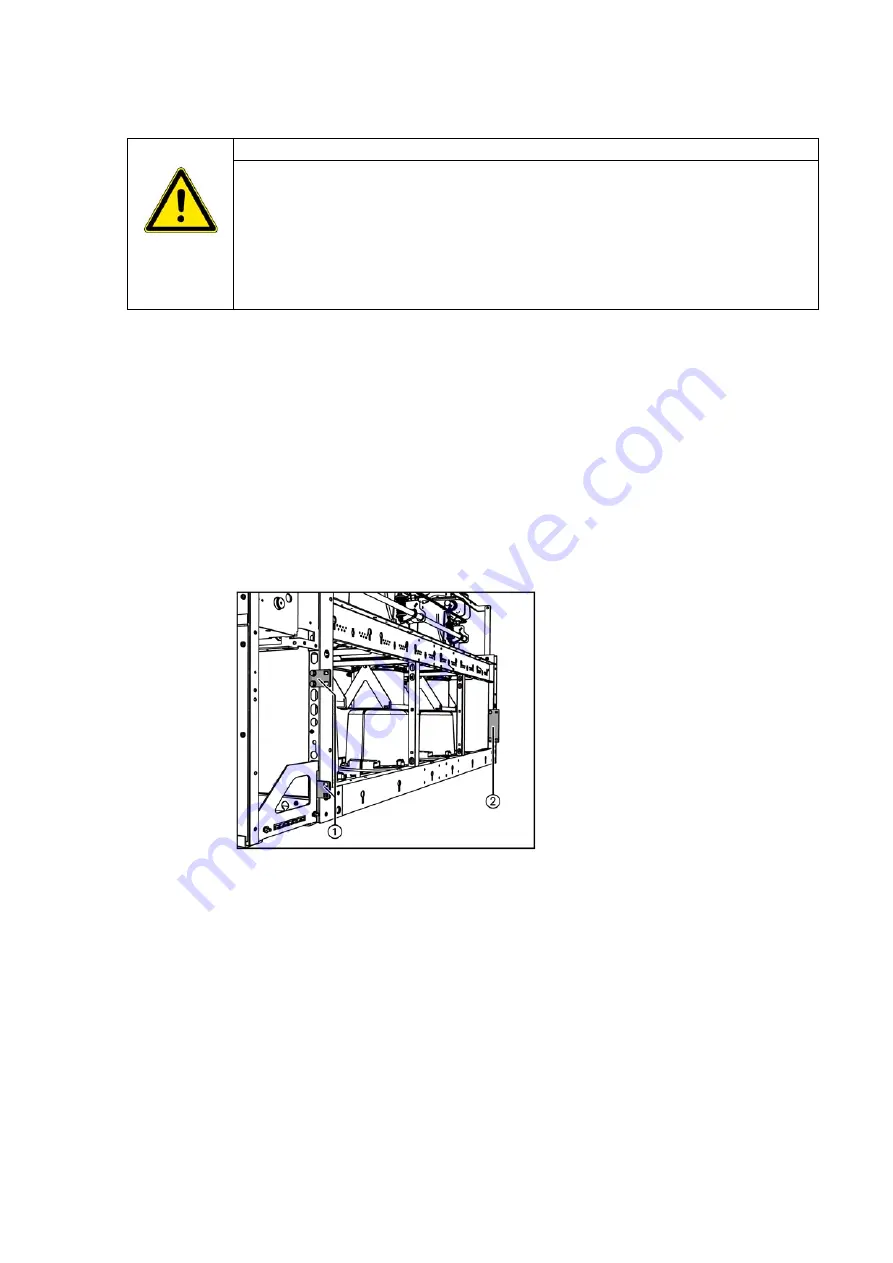
The subframes of the transport units are bolted together at the panel joints using connecting
links at the front and a connecting plate at the rear.
➭ Align adjacent connecting links at the subframes. The holes must be in line.
➭ Bolt the transport units together at the front connecting links using four bolts M10 x 20
(tightening torque 40 Nm), and at the rear connecting plate using two coach bolts
M10 x 20 (tightening torque 40 Nm).
ATTENTION
In the ambient air, the desiccant bags lose their effectiveness rapidly and cannot be used
anymore.
➭ Use only desiccant bags whose packing is not damaged and whose humidity indicators in
the packing are
blue
.
➭ Do
not
use desiccant bags if the humidity indicators are
pink
.
➭ After opening the packings, mount the desiccant bags in the gas compartment within
30 minutes and close the gas compartment hermetically.
Fig. 75:
Bolting the subframe together
(representation with 4MC4 current
transformer)
①
Connecting plate (rear)
②
Connecting links (front)


