7SR210 & 7SR220 Description of Operation
Unrestricted ©2018 Siemens Protection Devices Limited
Page 93 of 94
6.5
Operating Mode
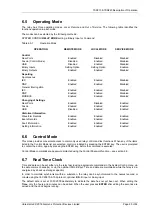
The relay has three operating modes, Local, Remote and Out of Service. The following table identifies the
functions operation in each mode.
The modes can be selected by the following methods: -
SYSTEM CONFIG>
RELAY MODE
setting, a Binary Input or Command
Table 6.5-1
Operation Mode
OPERATION
REMOTE MODE
LOCAL MODE
SERVICE MODE
Control
Rear Ports
Enabled
Disabled
Disabled
Fascia (Control Mode)
Disabled
Enabled
Disabled
USB
Disabled
Enabled
Disabled
Binary Inputs
Setting Option
Setting Option
Enabled
Binary Outputs
Enabled
Enabled
Disabled
Reporting
Spontaneous
IEC
Enabled
Enabled
Disabled
DNP
Enabled
Enabled
Disabled
General Interrogation
IEC
Enabled
Enabled
Disabled
DNP
Enabled
Enabled
Disabled
MODBUS
Enabled
Enabled
Disabled
Changing of Settings
Rear Ports
Enabled
Disabled
Enabled
Fascia
Enabled
Enabled
Enabled
USB
Disabled
Enabled
Enabled
Historical Information
Waveform Records
Enabled
Enabled
Enabled
Event Records
Enabled
Enabled
Enabled
Fault Information
Enabled
Enabled
Enabled
Setting Information
Enabled
Enabled
Enabled
6.6
Control Mode
This mode provides convenient access to commonly used relay control and test functions. When any of the items
listed in the Control Mode list are selected, control is initiated by pressing the ENTER key. The user is prompted
to confirm the action, again by pressing the ENTER key, before the command is executed.
Control Mode commands are password protected using the Control Password function – see section 6.9.
6.7
Real Time Clock
Time and date can be set either via the relay fascia using appropriate commands in the System Config menu, via
the data comms channel(s) or via the optional IRIG-B input. Time and date are maintained while the relay is de-
energised by a back up storage capacitor.
In order to maintain synchronism within a substation, the relay can be synchronised to the nearest second or
minute using the IEC 60870-5-103 protocol, optional IRIG-B input or binary input.
The default date is set at 01/01/2000 deliberately to indicate the date has not yet been set. When editing the
Time
, only the hours and minutes can be edited. When the user presses
ENTER
after editing the seconds are
zeroed and the clock begins running.
Summary of Contents for Argus 7SR21
Page 1: ...Energy Management 7SR21 7SR22 Argus Overcurrent Relay Reyrolle Protection Devices ...
Page 2: ......
Page 4: ...Contents 7SR11 and 7SR12 Page 2 of 2 2018 Siemens Protection Devices Limited ...
Page 185: ...7SR210 Settings Guide Unrestricted 2018 Siemens Protection Devices Limited Page 61 of 61 ...
Page 277: ...7SR220 Settings Guide Unrestricted Page 72 of 107 2013 Siemens Protection Devices Limited ...
Page 382: ...7SR220 Technical Manual Chapter 4 Page 2 of 96 2017 Siemens Protection Devices Limited ...
Page 386: ...7SR220 Technical Manual Chapter 4 Page 6 of 96 2017 Siemens Protection Devices Limited ...
Page 398: ...7SR220 Technical Manual Chapter 4 Page 18 of 96 2017 Siemens Protection Devices Limited ...
Page 414: ...7SR220 Technical Manual Chapter 4 Page 34 of 96 2017 Siemens Protection Devices Limited ...
Page 466: ...7SR220 Technical Manual Chapter 4 Page 86 of 96 2017 Siemens Protection Devices Limited ...
Page 468: ...7SR220 Technical Manual Chapter 4 Page 88 of 96 2017 Siemens Protection Devices Limited ...
Page 470: ...7SR220 Technical Manual Chapter 4 Page 90 of 96 2017 Siemens Protection Devices Limited ...
Page 472: ...7SR220 Technical Manual Chapter 4 Page 92 of 96 2017 Siemens Protection Devices Limited ...
Page 643: ...Unrestricted ...

