background image

OPERATING YOUR HEARING INSTRUMENT-

OPTIONAL FEATURES

22

OPERATING YOUR HEARING INSTRUMENT-

OPTIONAL FEATURES

23

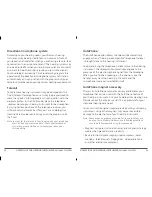
Directional microphone system

According to your hearing needs, your Siemens hearing  
instrument may be adjusted to focus on sounds in front of  
you (directional mode) for when you are having a face-to-face 
conversation in a noisy environment. The hearing system may 
also be adjusted for when you are in more quiet environments  
and want to hear the sounds around you (omnidirectional). 
Your Audiologist or Hearing Care Provider may program the 
operation of the directional microphone system to function 
automatically or in conjunction with the program button or 
remote control based on your particular hearing requirements. 

Telecoil

Your Siemens hearing instrument may be equipped with a 
T-coil (telecoil) for telephone use. It may be programmed to 
work in a specific listening program in conjunction with the 
program button. In the T-coil mode, place the telephone 
 receiver close to your hearing instrument for best reception. 
By trying various positions of the telephone receiver, you  
will discover what works best for you. Your Audiologist or 
Hearing Care Provider can advise you on the proper use of  
the T-coil.

Note: In order for the telecoil to function properly, your telephone  
   

must be “hearing aid compatible”. Check your telephone’s  


instruction manual to find out whether your phone has  


this capability.

AutoPhone

®

The AutoPhone option allows the telecoil to automatically  
engage when a “hearing aid compatible” telephone handset  
is brought close to the hearing instrument. 

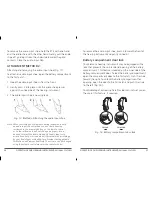
To operate, bring the telephone handset close to the hearing 
instrument. The telecoil will automatically engage to the  
presence of the electromagnetic signal from the telephone. 
When you are finished speaking on the phone, move the  
handset away from the hearing instrument and the  
microphone mode will re-establish itself.

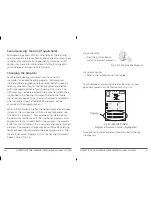
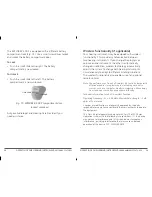
AutoPhone magnet accessory

There is an AutoPhone magnet accessory available for your 
telephone that can be used with the AutoPhone feature of 
your hearing instrument. Ask your Audiologist or Hearing Care 
Provider about this accessory and if it is appropriate for your 
individual hearing care needs.

You must use the original magnet provided with your hearing 
instrument. Using other magnets may cause irreversible  
damage to the electronics of your hearing instrument.

Note : When magnets are properly cared for, they are safe to use  
 

and can last a lifetime. However, the following guidelines  


should be followed while using these magnets. 

•  Magnets can pose risks to electronics and magnetic storage  
  media when placed in close proximity. 

•  Be careful not to place magnets near computers, color  
  monitors, television sets, floppy disks, video/audio tape,  
  and other electronic equipment. 

Summary of Contents for Behind-the-Ear Hearing Instruments

Page 1: ...Behind the Ear Hearing Instruments User Manual ...

Page 2: ...sed with our product If this Hearing Instrument is being purchased for an infant or young child please confirm with your Audiologist or Hearing Care Provider that it is recommended for this purpose and to ensure appropriate supervision and use of the product Hearing Aid Information Serial Number Left Right Battery Size Left Right Purchase Date Left Right Dispenser Info stamped here ...

Page 3: ...fe Tube 15 Operating Your Hearing Instrument Optional Features Remote Control 17 Tek miniTek 18 Changing the volume 18 Learning volume preference feature 19 SoundLearning feature 20 Changing the program 20 Directional microphone system 22 Telecoil 22 AutoPhone Autophone magnet accessory 23 Audio input 24 Battery compartment door lock 27 Operating Your Hearing Instrument Programmable Features Wirel...

Page 4: ...ult a physician or hospital immediately If infants small children or mentally disabled persons need to wear hearing instruments ensure adequate supervision Ensure appropriate supervision when your child is wearing the hearing instruments Check the integrity of the hearing instruments regularly Ensure that your child does not detach the hearing instrument from the ear mold Consult your Audiologist ...

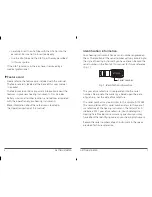
Page 5: ... this manual Identification information Your hearing instruments have a serial number engraved on them The location of the serial number will vary according to the style of hearing instrument you have chosen Record the serial number in the front of this manual for future reference Fig 1 The year of manufacture is incorporated into the serial number Please note the warranty is based upon the date o...

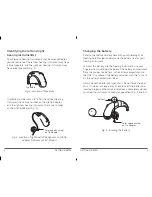
Page 6: ...ne the battery size for your hearing instrument To insert the battery into the hearing instrument use your fingernail to swivel open the door of the battery compartment Place the proper size battery in the battery compartment so that the symbol on the battery coincides with the mark on the battery compartment door Gently close the battery compartment Do not force the door shut If it does not close...

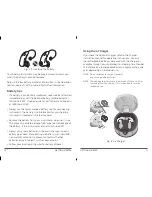
Page 7: ...f the battery if the instruments are not fully turned off Always carry spare batteries in the event that your current battery goes dead Place each spare battery in an individual non metallic container to prevent contact with other batteries or metal objects such as keys or coins Follow your local recycling rules for battery disposal Fig 4 1 Inserting the battery CENTRA Life Using the eCharger If y...

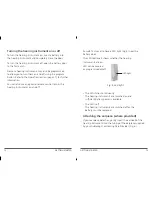
Page 8: ...tional remote control to turn the hearing instruments on and off Some BTE s may also have a LED light Fig 5 near the battery door The LED optional shows whether the hearing instruments are on LED can be covered or programmed on off The LED shines continuously The hearing instruments are switched on and sufficient battery power is available The LED is off The hearing instruments are switched off or...

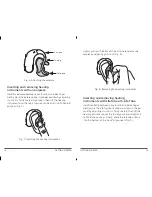
Page 9: ...serting the hearing instrument Earhook Earpiece Tubing Lightly push on the back of the ear to help release the earpiece and gently pull it out Fig 8 Inserting and removing hearing instruments with LifeTube or S Life Tube Hold the LifeTip between your thumb and index finger Gently work the LifeTip into its proper position in the ear canal by adjusting it until it is firmly seated Then lift the hear...

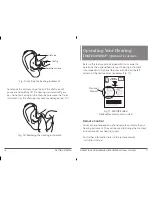
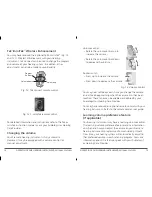
Page 10: ...y have received an optional remote control with your hearing instrument They can be used to change the memory and volume of your hearing system For further information refer to the remote control instruction manual Fig 11 FEATURE CARD Optional features section circled Optional Features HEARING INSTRUMENT Volume control Learning volume control Program button Directional microphone Telecoil AutoPhon...

Page 11: ...an be enabled or disabled by your Audiologist or Hearing Care Provider You may have received an optional remote control with your hearing instrument Refer to the remote control user guide Learning volume preference feature if applicable You hearing instrument may have a learning volume control The learning volume preference feature retains information on when and how you adjust the volume on your ...

Page 12: ...provide you with the number of programs most appropriate for your needs Each time you press the program button on the instrument the instrument changes to the next program The program change may be confirmed by alerting tones or beeps that correlate to the program you are in That means if you select Program 3 then the hearing instrument beeps 3 times Fig 14 Your Audiologist or Hearing Care Provide...

Page 13: ...e must be hearing aid compatible Check your telephone s instruction manual to find out whether your phone has this capability AutoPhone The AutoPhone option allows the telecoil to automatically engage when a hearing aid compatible telephone handset is brought close to the hearing instrument To operate bring the telephone handset close to the hearing instrument The telecoil will automatically engag...

Page 14: ...r to the next page for the method you should follow WARNING Risk of injuries caused by electric shock Connect audio input only to devices conform to IEC 60065 IEC Standard for audio video and other electronic devices ATTACHMENT METHOD 1 Attaching and removing the audio input shoe Fig 16 1 Using the fingernail of your thumb or index finger open the battery compartment door to the first catch 2 Usin...

Page 15: ...nge programs It can be used to select the audio mode only audio input only microphone only or mixed mode if programmed accordingly by your Audiologist or Hearing Care Provider not applicable for Motion and Siemens Explorer The volume can be changed using the volume control wheel or the remote control Fig 17 Method 2 Attaching the audio input shoe To remove the audio input shoe press it toward the ...

Page 16: ...addition wireless technology automatically adjusts the system to change both hearing instruments simultaneously to adapt to different listening situations The wireless functionality also enables use of an optional remote control Note The performance of the e2e wireless 2 0 could be temporarily affected when in close proximity to electromagnetic noise sources such as a computer monitor or televisio...

Page 17: ... on a circuit different from that to which the receiver is connected Consult the dealer or an experienced radio TV technician for help Push button on off Your Siemens hearing instruments may be programmed to allow you to turn them on and off using the program button To turn the instrument off using the program button press and hold the button for 3 5 seconds To turn it back on press and hold the p...

Page 18: ... period you may prefer to wear your hearing instruments for only a portion of the day and then gradually increase your usage throughout your normal routine each day You may find that a quiet environment is more comfortable in the beginning of the adjustment period Gradually introduce new listening environments as your ears become accustomed to hearing instrument amplification If you are a new hear...

Page 19: ...e damage to them Always store your hearing instruments and earpieces LifeTube or LifeTip inside the case A soft carrying pouch is also included for your convenience when traveling Remove the batteries to prevent damage from corrosion when storing hearing instruments for an extended period of time Store the instruments in a dry area preferably at room temperature If you perspire heavily or live in ...

Page 20: ...hearing instruments to be constantly immersed in water Performance Checklist If the solutions in this checklist do not address a particular issue you are having with your hearing instruments consult your Audiologist or Hearing Care Provider Problem Cause Possible Solution Sound is weak Instrument emits whistling sound Sound is distorted Instrument does not work Insert new battery Clean instrument ...

Page 21: ... directed to an Audiologist since hearing loss may cause problems in language development and the educational and social growth of a child An Audiologist is qualified by training and experience to assist in the evaluation and rehabilitation of a child with a hearing loss Important notice for prospective hearing instrument wearers Good health practice requires that a person with a hearing loss have...

Page 22: ...uation from a licensed physician or signed a waiver statement declining the medical evaluation for religious or personal beliefs that preclude consultation with a physician may purchase hearing instruments The exercise of such a waiver is not in your best health interest and its use is strongly discouraged Warning to Audiologists or Hearing Care Providers An Audiologist or Hearing Care Provider sh...

Page 23: ...vered instrument parts received for warranty service at an authorized Siemens Service Center will be repaired or replaced with new or reconditioned components without charge to meet the performance specifications for that model This warranty does not cover malfunctions due to unusual wear and tear or mistreatment of the instrument such as physical shock excessive wax build up or tampering with the...

Page 24: ...to an authorized Siemens Service Center Extended warranty programs Siemens offers extended warranty and service programs for your hearing instruments Please consult with your Audiologist or Hearing Care Provider for more details on these programs IMPORTANT This warranty gives you specific legal rights and you may have other rights which may vary from location to location For more information conta...

Page 25: ...Inc 320 Pinebush Road Cambridge ON N1T 1Z6 www siemens ca hearing Siemens Appareils auditifs inc 320 Pinebush Road Cambridge Ontario N1T 1Z6 www siemens ca hearing Legal Manufacturer Siemens Audiologische Technik GmbH Gebberstrasse 125 91058 Erlangen Germany Global Business Unit Siemens Audiologische Technik GmbH Gebberstrasse 125 91058 Erlangen Germany Phone 49 9131 308 0 Global Siemens Headquart...

Reviews: