background image

96

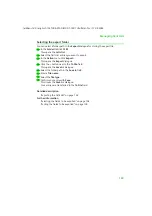
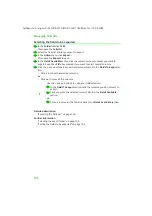
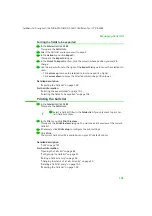
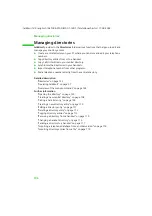
Managing Calls lists

talk&surf V.6 / englisch / A31008-X100-B100-1-76D1 / Ruflisten.fm / 17.09.2003

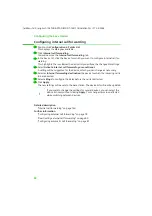
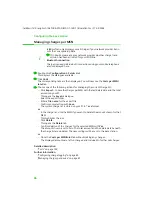
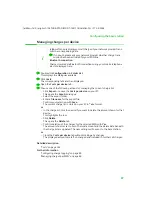
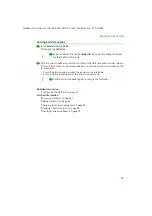
Grouping Calls list entries

ì

In the 

Folder list

 click 

CLM

.

This opens the 

Calls list

.

ì

In the 

View

 menu click 

Groupbar

The grouping bar appears above the current Calls list.

ì

Click the column header to group the contents of the Calls list entries on that col-

umn. Keep the mouse button pressed.

ì

Drag the column header to the 

Groupbar

.

When you release the mouse button, the Calls list entries are grouped. The number 

of groups depending on the how much the contents in the selected column differ.

Detailed description

"Configuring the Calls list" on page 91

Further information

"Removing columns" on page 91
"Adding columns" on page 92
"Changing the column sequence" on page 94
"Sorting Calls list entries" on page 95

i

ì

Select a Calls list filter in the 

Folder list

 if you want to change the view 

for that Calls list filter only.

i

You can drag several column headers to the 

Groupbar

 to combine 

groups:

ì

Drag the column headers one after the other to the 

Groupbar

.

The Calls list entries are combined in cascaded groups. The order of 

the sub-groups will be determined by the order in which you dragged 

the column headers to the 

Groupbar

.

Summary of Contents for Gigaset talk & surf 6.0

Page 1: ...gaset Communications GmbH Desejamos que tenham bons momentos com o seu Gigaset DA Kære Kunde Gigaset Communications GmbH er retlig efterfølger til Sie mens Home and Office Communication Devices GmbH Co KG SHC som fra deres side videreførte Siemens AGs Gigaset forretninger Siemens AGs eller SHCs eventuelle forklaringer i betjeningsvejledningerne skal derfor forstås som Gigaset Communications GmbHs ...

Page 2: ...кви изложения направени от Siemens AG или SHC които се намират в ръководствата за потребителя следва да се разбират като изложения на Gigaset Communications GmbH Надяваме се да ползвате с удоволствие вашия Gigaset HU Tisztelt Vásárló A Siemens Home and Communication Devices GmbH Co KG SHC törvényes jogutódja a Gigaset Communications GmbH amely a Siemens AG Gigaset üzletágának utódja Ebből következ...

Page 3: ...talk surf V 6 englisch A31008 X100 B100 1 76D1 Cover_vorne fm 17 09 2003 s Be inspired ...

Page 4: ...ul installation 21 Icons for the talk surf components 22 Notes on operation 23 Using Bluetooth connections 23 Assigning a Bluetooth mobile telephone to an internal device 23 Operating the base station via a Bluetooth PC or Bluetooth PDA 24 Using the Bluetooth headset 24 Configuring anti dialler protection 25 How the dialler blocker works 25 Operating and configuring the dialler blocker 26 Uninstal...

Page 5: ...IN 41 Saving the system PIN 41 Opening Help 42 Closing the program 42 Configuring the base station 43 Registering a wireless device 44 Deregistering a wireless device 45 Registering a Bluetooth device 46 Registering a GSM telephone 47 Registering a Bluetooth PC or Bluetooth PDA 48 Registering a Bluetooth headset 49 Deregistering a Bluetooth device 50 Configuring registered devices 50 Configuring B...

Page 6: ... automatic call forwarding 81 Configuring internal call forwarding 82 Configuring Night service 83 Configuring door intercoms 84 Configuring charge logging 85 Managing charges per MSN 86 Managing charges per device 87 Managing Calls lists 88 Opening the Calls list 89 Calling a Calls list entry 90 Configuring the Calls list 91 Removing columns 91 Adding columns 92 Changing the column width 93 Chang...

Page 7: ...mporting directories Composition of the name 122 Wizard for importing directories Composition of the telephone number 123 Folders and Dialogues 124 Directories 125 The working area in the directory folder 125 Central directory 127 Mapping of a handset directory 128 Transferring data to and from handsets 129 Copying individual directory entries 130 Recommended editing sequence 131 CLM 132 Calls lis...

Page 8: ...u File 164 Menu Edit 165 Menu View 166 Menu Action 167 Menu Help 168 Operating with other devices 169 Wireless Gigaset data boxes 169 Wireless devices from other manufacturers 169 Glossary 170 Appendix 175 Service Customer Care 175 Guarantee certificate United Kingdom 175 Guarantee certificate Ireland 176 Index 178 ...

Page 9: ...t carefully You will find an overview of the talk surf CD folder structure in Chapter Contents of the talk surf CD on page 10 Further information Safety precautions on page 6 Trademarks on page 7 talk surf on page 8 Installing the software and device drivers on page 13 Safety precautions General u Always pass on the devices with the installation leaflet and the talk surf CD u Dispose of CD ROMs yo...

Page 10: ...ee the base station s operating instructions Otherwise the connection will con tinue to incur charges u Reboot your PC u Remove the ISDN cable from the Gigaset base station for at least 20 seconds This will definitely close down the connection Further information Notes on the operating instructions on page 6 Trademarks on page 7 System requirements on page 11 Compatibility on page 12 Installing th...

Page 11: ...ansfer the entries individually to your connected devices u Log your telephone charges and assign them to individual devices or telephone numbers u Use your base station as a fax machine answering machine room monitor and door intercom u Connect your PC to the Internet via the base station and use channel bundling for data transfer Further information New functions in talk surf 6 0 on page 9 Conte...

Page 12: ... few meters The range of the connection depending on the technical features of the con nected device 1 mobile telephone 3 PCs or PDAs and 1 headset can be used at the same time on one base station Only available for Gigaset SX3x3isdn Dialler blocker Protection against diallers The dialler blocker monitors all outgoing telephone calls and fax connections that your PC sets up via the base station Th...

Page 13: ...drivers fax Individual installation talk surf fax driver gigaset 307x 417x Gigaset 307xisdn and Gigaset 417xisdn individual installation gigaset cx1x0 Gigaset CX1x0isdn unimodem driver inf and instructions gigaset cx2x3 Gigaset CX2x3isdn unimodem driver inf and instructions gigaset handset c1 c2 s1 s11 Gigaset C1 C2 S1 S11 Handsets Instructions gigaset m101data Gigaset M101data Individual installa...

Page 14: ... Minimum PC hardware requirements u IBM AT compatible Pentium II with 200 MHz u 64 MB RAM u 95 MB free hard disk memory u 1 free USB socket for direct USB connection to the base station or operation with Gigaset USB Adapter DECT u 1 CD ROM drive or 1 DVD drive Minimum operating system requirements u Windows 98 SE Windows ME Windows 2000 or Windows XP u Dial up network ready for use Minimum base st...

Page 15: ...older Gigaset series or third party products you want to use with your base station You will have to update the firmware for Gigaset 3070 3075 and Gigaset 4170 4175 base stations You will find more information about this in Chapter Operating with other devices on page 169 Further information talk surf on page 8 New functions in talk surf 6 0 on page 9 Contents of the talk surf CD on page 10 System...

Page 16: ...you want to use with your base station As a rule the following steps are required for installing talk surf 1 Preparing the base station for use 2 Uninstalling old versions of talk surf and device drivers 3 Inserting the talk surf CD and running the talk surf wizard 4 Rebooting the PC 5 Setting up further components as required After successful installation you can launch talk surf and configure yo...

Page 17: ...tor u Predecessor versions You should uninstall the older version before installing talk surf 6 0 Please read Chapter Uninstalling old versions on page 16 During installation the talk surf wizard can prepare your PC for use with other devices In this case make sure that the following conditions have been met u Wireless connection via Gigaset USB Adapter DECT The Gigaset USB adapter DECT is ready f...

Page 18: ... yet During installation you will be prompted by the talk surf wizard to set up this connection i Now that your base station is ready for use you can make external calls and also take incoming calls You do not need to install talk surf for this ì You can check that your base station is working properly by dialling an external telephone number ì Check your ISDN connection or the settings of your PA...

Page 19: ... of the task bar next to the clock In the pop up menu select Stop Monitor ì If necessary deactivate the dialler blocker This can be done by right clicking the monitor icon in the status area of the task bar next to the clock In the pop up menu select Deactivate dialler blocker ì Open the Control panel of your Windows operating system ì In the control panel open Software ì Click talk surf and then ...

Page 20: ... Select the language in which you want to install talk surf ì Click Continue This opens the talk surf wizard main menu ì Click Readme Operating instructions or Service Support if you want to read more information about installing talk surf or ì Click Install the software to start the installation of talk surf You will find a detailed description of the installation steps in Chapter Installing the ...

Page 21: ...ll find the name of your base station on the device itself ì Choose whether you want to have the base station s firmware checked during installation and updated if necessary Select this option only if you want to use talk surf with an older base station You can also update the firmware after installation To find out how to do this please read Chapter Updating firmware on page 20 ì If appropriate s...

Page 22: ...ponents are to be installed Click Browse to choose your own installation folder or Click Continue to confirm the prompted installation folder ì Click Install to start installation of the selected software components ì After the software components have been installed click Exit to confirm completion of installation and close the talk surf wizard ì Reboot your PC This will automatically start the t...

Page 23: ...ion ì Restart your PC ì Reconnect the USB connection ì Restart the talk surf wizard Updating firmware Normally you will only have to update the firmware if you want to operate talk surf with older base stations ì Close all running programs ì Make sure your base station is in the idle state ì Select Start Programs Gigaset ì Click Firmware Update ì Follow the instructions of the firmware update tool...

Page 24: ...et talk surf 6 0 Start Programs Gigaset Base station Firmware update u The driver manager of the Windows operating system Control panel System now includes the drivers for your base station and other drivers you have installed Computer name DECT Devices DECT Base Computer name Ports DECT USB serial Interface COMx u The Software page in the Control panel of the Windows operating system shows the na...

Page 25: ... surf 6 0 monitor Connection to base station active There are new messages talk surf 6 0 monitor Connection to base station active There are no new messages talk surf 6 0 monitor Connection to base station inactive There are new messages talk surf 6 0 monitor Connection to base station inactive There are no new messages Connection wizard USB connection has been deactivated Data transfer via the wi...

Page 26: ...eless devices on page 35 Launching talk surf on page 36 Using Bluetooth connections Only available for Gigaset SX3x3isdn Assigning a Bluetooth mobile telephone to an internal device A registered Bluetooth mobile telephone is entered in the MSN list of the MSN settings tab as GSM Thus you can select the mobile telephone as the Send or Receive MSN for an internal device in the DECT devices tab The f...

Page 27: ...an use the following functions u Configure the base station using the Bluetooth connection Make sure that the Bluetooth adapter is set up on the PC on which you have installed talk surf u Transfer data e g directory between the base station and PC or PDA u Surf the Internet with up to three PCs or PDAs via Bluetooth connections Using the Bluetooth headset As long as you are in Bluetooth range of t...

Page 28: ...llation This makes de installation impossible with the normal methods u The telephone number is preset and cannot be changed The connection is made to an expensive special telephone number or abroad u The connection is made without your noticing it making it hard to monitor the dura tion The dialler blocker runs in the background The icon in the status area of the task bar shows the type of operat...

Page 29: ...ialler protection Select Allow no outgoing connections to prevent any connections via your PC With this setting no Internet or fax functions are possible via your Gigaset base station or Select Permit certain numbers for outgoing connections Enter all the telephone numbers or blocks of numbers in a list e g Internet pro viders or fax polling servers or Select Permit all outgoing connections to dea...

Page 30: ... with psdlt exe which you will find in the Tools folder on the talk surf CD u Pre recorded announcements can be replaced only via the USB connection If the base station is operated via a wireless connection e g Gigaset USB Adapter DECT you will have to use the connection wizard to change the connection u Under Windows 2000 and Windows XP you must have administrator rights If nec essary contact you...

Page 31: ... folder in Outlook ì Click Dial Phone in the Actions Call Contact menu ì Click Dialling options in the Dial Phone dialogue ì In the Connect using line tab select the setting Line 0 on HUB Device ì Confirm your entry with OK ì Close the Dial Phone dialogue Calling the contact ì Open the Contacts folder in Outlook ì Select the contact ì Click the telephone number in the Actions Call contact menu Thi...

Page 32: ... ì Enter the program name dialer exe in the Open field ì Confirm your entry with OK This opens the Windows phone dialler ì In the Edit menu click Options This opens the Options Lines dialogue ì In the Line used for phone calls tab select the setting Line 0 on HUB Device ì Confirm your entry with OK ì Close the Windows phone dialler Making the call ì Open the Windows address book ì Select the conta...

Page 33: ...talled by talk surf Softmodem V32bis Fax Class 1 ì Confirm your selection with This complete fax console set up ì Read the fax console online help if you want to use all the features of this fax appli cation with your base station i You can only use the fax function if the fax and talk surf CAPI driver com ponents have been properly installed i The fax function set up described here was tested on ...

Page 34: ...elephone number set in talk surf for device Int40 in the Receive MSN field ì If necessary deactivate the MSN busy busy on busy option under Configuration ISDN settings in talk surf ì Select the folder Start Programs Gigaset Loopback test ì Enter the PC s telephone number ì Click Start test This sets up a test connection If the connection is opened then the talk surf CAPI driver has been correctly ...

Page 35: ...rd s instructions for setting up the new dial up connection Windows 2000 Network and dial up connections ì Click Start Settings Network and dial up connections in the Start menu ì Double click Make New Connection ì Click Next in the Network connections wizard dialogue ì Select the Connect to the Internet option and click Next This opens the Internet access wizard ì Select the Configure telephone o...

Page 36: ...our selection with OK When you open your Internet browser the new dial up connection will be opened automatically ì Click Dial Now to open the connection to the Internet via your Gigaset base station Setting up channel bundling Channel bundling means that a dial up connection uses both B channels of the ISDN line at the same time The advantage of channel bundling is that the double bandwidth leads...

Page 37: ... the task bar This opens the status display for the dial up connection ì Open the Details tab It shows 1 device as the number of active devices ì Click Resume This opens the dialogue for setting up the second connection ì Click Dial This sets up the additional connection via the second B channel The status display now shows 2 devices as the number of active devices Channel bundling is active again...

Page 38: ...tatus area of the tool bar next to the clock ì Right click the wireless connection icon ì Click Deactivate wireless mode or Prepare USB direct mode Participant 2 ì Right click the wireless connection icon ì Click Activate wireless mode Icon Description The UBS direct connection is deactivated Data is transferred via the wireless mode Wireless mode is deactivated Data is transferred via the USB dir...

Page 39: ... surf monitor is opened automatically every time you power up or reboot your PC If you do not need talk surf all the time you can remove the talk surf monitor from Autostart ì Select Start Programs Autostart ì Right click the talk surf Monitor entry ì Choose Delete to remove the link to the talk surf monitor from Autostart Alternatively you can drag the link in the start menu to the Start Programs...

Page 40: ...olders and dialogues u In the working area you can enter your data and execute commands u In the menu bar you will find talk surf help and all the commands available for the various folders Further information Folders and Dialogues on page 124 Managing directories on page 106 Managing Calls lists on page 88 Configuring the base station on page 43 Notes on operation on page 23 Overview of the menu ...

Page 41: ... to show or hide the toolbars Creating links If you want to create a new link in Shortcuts make sure the Folder list is displayed see above ì Right click the entry in the Folder list that you want to create a link for ì Click Create Shortcut The new link will be shown in Shortcuts i Each folder in the Folder list contains menu commands that are not avail able for other folders This applies in part...

Page 42: ...dialling parameters and call num bers e g for emergency calls room monitor SMS service centres Base settings Change the system settings for the base station e g date time PIN waiting melody assignments Local Answering Machine Configure the base station s internal answering machine External call forward ing Redirect calls to an external number Internal call forward ing Redirect calls to an internal...

Page 43: ...ect the menu command Action Update Data in talk surf If you now open Configura tion MSN settings you will see that the change to the base station ringer melody has now been transferred to talk surf Updating the base station data ì Click Apply in a tab to confirm all the changes you have made The new configuration will be sent to the base station Example Changing the ringer melody in talk surf You ...

Page 44: ...uration area can only be opened with the correct PIN Saving the system PIN You can save the system PIN for the duration of a configuration session so that you do not have to repeatedly enter it in talk surf Precondition The factory set system PIN 0000 has been changed to a different value ì Open any folder in Configuration ì Enter your system PIN ì Activate the Save base PIN option ì Confirm your ...

Page 45: ... over any entries in the tabs for information about that entry This opens a ToolTip about the entry in question u You can open the complete talk surf help file by clicking Gigaset Help Topics in the menu bar u The entire operating instructions are available in PDF format on the supplied CD ROM for printing This requires Adobe Acrobat Reader this free program can also be installed from the CD ROM C...

Page 46: ...a wireless device on page 44 Deregistering a wireless device on page 45 Registering a Bluetooth device on page 46 Deregistering a Bluetooth device on page 50 Configuring registered devices on page 50 Configuring Bluetooth devices on page 52 Entering multiple subscriber numbers MSN on page 53 Deleting multiple subscriber numbers MSN on page 54 Configuring ISDN features on page 54 Setting dialling p...

Page 47: ...arges per MSN on page 86 Managing charges per device on page 87 Registering a wireless device ì Double click Configuration in Folder List This displays the dialogues available ì Click register This opens the Register cordless devices tab ì Click the register button This activates the base station s readiness for registration Alternatively you can press the base station s register button Detailed d...

Page 48: ...egister This highlights the row The De register button beneath the device list is also acti vated ì Click De register This opens the Deregister tab ì Confirm deregistration of the device by clicking Yes The new settings are then sent to the base station The device is removed from the device list Detailed description Device settings on page 142 Further information Registering a wireless device on p...

Page 49: ...ooth device you want talk surf only supports devices with the following Bluetooth profiles Headset profile Serial Port profile Dial Up Network profile Handsfree profile to a certain extent Detailed description Register on page 140 Further information Registering a GSM telephone on page 47 Registering a Bluetooth PC or Bluetooth PDA on page 48 Registering a Bluetooth headset on page 49 Deregisterin...

Page 50: ...ection name if you want The maximum length of the Bluetooth connection name is 16 characters ì Confirm successful registration with OK This activates the Bluetooth connection between your base station and the mobile telephone The mobile telephone appears in the device list of the Bluetooth devices tab in the DECT devices dialogue Detailed description Registering a Bluetooth device on page 46 Furth...

Page 51: ...ith the PC or PDA After successful registration the Bluetooth connection name for the registered device will be displayed ì You can change the Bluetooth connection name if you want The maximum length of the Bluetooth connection name is 16 characters ì Confirm successful registration with OK This activates the Bluetooth connection between your base station and the PC or PDA The device appears in th...

Page 52: ... can be from 1 to 16 characters long You can enter both letters and digits ì Confirm your entry with OK This opens the register dialogue The headset s Bluetooth connection name appears ì You can change the Bluetooth connection name if you want The maximum length of the Bluetooth connection name is 16 characters ì Confirm successful registration with OK This activates the Bluetooth connection betwe...

Page 53: ...t Detailed description Device settings on page 142 Further information Registering a Bluetooth device on page 46 Configuring Bluetooth devices on page 52 Configuring registered devices ì Double click Configuration in Folder List This displays the dialogues available ì Click Device settings You will now see the Device settings tab ì In the device list click the device you want to configure This hig...

Page 54: ... when you pick up the receiver Activate the Send MSN selection after seizure option if you want to dial the Send MSN before each call ì Click Apply The new settings will be sent to the base station The device list will now be updated Detailed description Device settings on page 142 Further information Entering multiple subscriber numbers MSN on page 53 Assigning a Bluetooth mobile telephone to an ...

Page 55: ...le settings ì You can change the following settings Enter a name with up to 16 characters for the Bluetooth connection in the Device name field In the Send MSN section click the Name number column Select the MSN the Bluetooth device is to use for setting up a connection ì Click Apply The new settings will be sent to the base station The device list will now be updated Detailed description Device s...

Page 56: ...for the MSN Choose a ringer melody for the selected MSN ì Click Apply The new settings will be sent to the base station The MSN list will now be updated Detailed description MSN settings on page 146 Further information Deleting multiple subscriber numbers MSN on page 54 i A registered Bluetooth mobile telephone is entered in the first line of the MSN list as GSM You cannot delete this entry nor ca...

Page 57: ...ation Select the Reject all option to activate the rejecting of an incoming call for all devices with the same Receive MSN Activate the MSN busy busy on busy option to permit only one call per Receive MSN at the same time A second call to an already connected Receive MSN will be rejected with the busy tone Activate the Withhold no option to suppress the transmitting of your own tele phone number S...

Page 58: ...et In the Country code field enter the access code for your country with up to 2 digits The country code is used for the correct assignment of your calls in inter national mobile telephone networks GSM In the Nat access code field enter an access code with up to 4 digits for making calls to other national local networks The access code 0 is preset In the Dial parameter section activate the option ...

Page 59: ...with up to 32 digits as the destination number in the Con figurable numbers section ì Click Apply The new settings will be sent to the base station Detailed description Dial settings on page 150 Further information Setting dialling parameters on page 55 Using the room monitor function on page 57 Configuring short message service SMS on page 58 i The base station recognises these telephone numbers ...

Page 60: ...tion Dial settings on page 150 Further information Setting dialling parameters on page 55 Entering emergency numbers on page 56 Configuring short message service SMS on page 58 i How to activate the handset s room monitor function ì Enter internal number 99 as the handset destination number for the room monitor call ì Switch the handset room monitor function on When the room monitor alarm is trigg...

Page 61: ...gure the send centres or Activate the SMS send and receive option if you want to send text messages with your base station Enter the telephone number of an SMS service centre in the Service centre field In the factory setting there are default SMS service centres that you can use or change You can enter up to 10 telephone numbers with up to 32 digits Activate the service centre option for one of t...

Page 62: ...ed description Base settings on page 153 Further information Configuring preferred redirection location on page 60 Configuring preferred holding for enquiry calls on page 61 Assigning a device for PC dialling on page 63 Deleting log lists on page 65 Restoring factory settings on page 66 Changing the system PIN on page 67 Activating the waiting melody on page 68 i After every outgoing call that inc...

Page 63: ...on the network The base station then sends the destination telephone numbers for each call for ward to your network provider This will leave both B channels of your ISDN line free when a call is forwarded You can activate several call forward numbers at the same time ì Click Apply The new settings will be sent to the base station Detailed description Base settings on page 153 Further information C...

Page 64: ...he external call is to be held on your network provider s network The base station returns the first external call to the network provider The con nection is held there The second external call enquiry call is made using the same B channel The second B channel is left free ì Click Apply The new settings will be sent to the base station Detailed description Base settings on page 153 Further informa...

Page 65: ...Apply The new settings are sent to the base station If you dial a number from your PC the connection is set up by the assigned device Detailed description Base settings on page 153 Calling with the PC on page 28 Further information Configuring the date and time on page 59 Configuring preferred redirection location on page 60 Configuring preferred holding for enquiry calls on page 61 Deleting log l...

Page 66: ...Action Dial Up menu command ì Click Apply The new settings are sent to the base station If you dial a number from your PC the connection is set up by the assigned device Detailed description Base settings on page 153 Calling with the PC on page 28 Further information Configuring the date and time on page 59 Configuring preferred redirection location on page 60 Configuring preferred holding for enq...

Page 67: ...r of an external answering machine if your network provider s telephone exchange pro vides one You can then set up the remote play call directly via your base station ì Click Apply The new settings are sent to the base station If you dial a number from your PC the connection is set up by the assigned device Detailed description Base settings on page 153 Calling with the PC on page 28 Further infor...

Page 68: ...een activated you will see the Delete button ì Click Delete This opens the Delete tab ì Confirm deletion of the selected options by clicking Yes The entries of the selected log lists are then deleted in the base station The corre sponding folders are updated in talk surf Detailed description Base settings on page 153 Further information Configuring the date and time on page 59 Configuring preferre...

Page 69: ...m restoring of the factory settings with Yes This resets the base station configuration to the factory settings The handsets remain registered but will lose their MSN settings for example Detailed description Base settings on page 153 Further information Configuring the date and time on page 59 Configuring preferred redirection location on page 60 Configuring preferred holding for enquiry calls on...

Page 70: ...N in the PIN confirmation field ì Confirm your entry with OK This closes the PIN dialogue The new PIN will be sent to the base station Detailed description Base settings on page 153 Further information Configuring the date and time on page 59 Configuring preferred redirection location on page 60 Configuring preferred holding for enquiry calls on page 61 Assigning a device for PC dialling on page 6...

Page 71: ...device on an analogue connection ì Click Apply The new settings will be sent to the base station Detailed description Base settings on page 153 Further information Configuring the date and time on page 59 Configuring preferred redirection location on page 60 Configuring preferred holding for enquiry calls on page 61 Assigning a device for PC dialling on page 63 Deleting log lists on page 65 Restor...

Page 72: ...n from a handset when you need it or If you activate the AM all day option the answering machine is available and switched on the whole day You can switch the answering machine off from a handset or If you activate the AM time control option the answering machine is available and switched on as per the settings in the Time control tab You can switch the answering machine off from a handset ì Click...

Page 73: ...to have an announcement with recording or Activate the Announcem only option if you want to have an announcement without recording ì Click Apply The new settings will be sent to the base station The answering machine is available and switched on the whole day An incoming call is answered with the active announcement i The settings displayed apply only to the selected answering machine i The standa...

Page 74: ...vice list you will see the active and changeable settings for the selected answering machine ì If necessary deactivate the Deactivate AM and hide in handset menus option ì In the Default settings section select the AM time control option ì In the Settings section select Active announcement for particular weekdays Section Active Announcement Mo Fr Activate up to 4 active announcements you want for ...

Page 75: ...the answering machine in all day mode on page 70 Configuring record and play on page 73 Configuring remote access on page 75 Changing the answering machine PIN on page 76 Deactivating the answering machine on page 77 i The standard message has been preset in up to three language variants for the country in which your base station is sold With the phrase down load tool you can select a different la...

Page 76: ... available memory free for recording a message Replay Activate the Time stamp option if the date and time the message was received is to be announced before playing the message Select the option Automatic pause for playing several messages The answering machine switches to pause mode after playing back a message If there are no more entries the answering machine switches back to idle after a furth...

Page 77: ...ng the answering machine on page 69 Operating the answering machine in all day mode on page 70 Operating the answering machine in time mode on page 71 Configuring remote access on page 75 Changing the answering machine PIN on page 76 Deactivating the answering machine on page 77 i If you want to configure several answering machines you can select the device list rows without clicking Apply Your ch...

Page 78: ...ote control on option This permits remote operation of the answering machine In the External access section activate the Remote delete on option This permits the remote deleting of messages ì In the Automatic listen in section activate select the listening in with comfort handset option Select the comfort handset to be used During recording new messages will also be played over this handset s loud...

Page 79: ... to 0000 ì Enter a new sequence in the New PIN field The PIN can be from 1 to 8 digits long ì Repeat the new PIN in the PIN confirmation field ì Confirm your entry with OK This closes the PIN dialogue The answering machine s New PIN will be sent to the base station Detailed description Local Answering Machine on page 156 Further information Activating the answering machine on page 69 Operating the...

Page 80: ...ering machine will be deactivated and hidden Any messages on it will be deleted Detailed description Local Answering Machine on page 156 Further information Activating the answering machine on page 69 Operating the answering machine in all day mode on page 70 Operating the answering machine in time mode on page 71 Configuring record and play on page 73 Configuring remote access on page 75 Changing...

Page 81: ...call forward is activated after a short wait unless a different terminal takes the external call ì In the lower section of the tab select the redirecting type you want i If you have entered your base station as preferred redirection location in the System Settings Assignments dialogue the following restrictions apply u Only one external call forward can be activated at any one time This applies ev...

Page 82: ...sent to the base station The MSN list will now be updated Detailed description External call forwarding on page 159 Further information Deactivating external call forwarding on page 80 Configuring automatic call forwarding on page 81 Configuring internal call forwarding on page 82 i If you want to change call forwarding for several MSNs you can select the MSN list rows without clicking Apply Your ...

Page 83: ...st click the MSN with the redirecting type you want to deactivate ì In the lower section of the tab deactivate the redirecting type ì Click Apply The new settings will be sent to the base station The MSN list will now be updated Detailed description External call forwarding on page 159 Further information Configuring external call forwarding on page 78 Configuring automatic call forwarding on page...

Page 84: ...which you want to configure automatic call forwarding ì Enter an external telephone number with up to 32 digits in the external destina tion number field for call forwarding ì Click Apply The new settings will be sent to the base station This activates Automatic call for warding Detailed description External call forwarding on page 159 Further information Configuring external call forwarding on pa...

Page 85: ...tting will be suggested for the device which you can change as necessary ì Select as Internal forwarding destination the device to which the incoming call is to be redirected ì Select a Rings to configure the delay before the call is redirected ì Click Apply The new settings will be sent to the base station The device list will now be updated Detailed description Internal call forwarding on page 1...

Page 86: ...ernal device or an exter nal telephone number For the Forwarding destination Internal choose the appropriate device in the Device name field or For Forwarding destination External enter an external telephone number with up to 32 digits in the Forwarding destination field ì In the Start field enter the time hour minutes for the daily start of Night service ì In the Stop field enter the time hour mi...

Page 87: ...digits in the corresponding Destina tion call number field ì Select Device type for your door intercom Activate the Door 1 option if you have connected a door intercom to your base station as per FTZ 123 With this door type the door is opened via closed circuit current No further set tings are required or Activate the Door 1 option if the door intercom can be operated using DTMF con trol signals W...

Page 88: ...ption Enter the value in the Rate field Enter a currency label with up to three characters in the Currency field ì Activate the option Costs for last call option if you want the charges of the last call to be displayed when you get an outside line ì Click Apply The new settings will be sent to the base station The charge lists in the Costs per MSN total and Costs per device tabs are updated Detail...

Page 89: ...lete the amount shown for that MSN This highlights the row Click Delete This opens the Delete tab Confirm deletion of the charges for the selected MSN with Yes The amount shown is set to zero The total amount and the delete date beneath the charge list are updated The new settings will be sent to the base station or Close the Costs per MSN total tab without making any changes The displayed amounts...

Page 90: ... that device This highlights the row Click Delete This opens the Delete tab Confirm deletion of the charges for the selected MSN with Yes The amount shown is set to zero The total amount and the delete date beneath the charge list are updated The new settings will be sent to the base station or Close the Costs per device tab without making any changes The displayed amounts are left unchanged and i...

Page 91: ...ist filter to suit your requirements u Edit the Calls list entries u Copy all the Calls list entries to the central directory u Print out the Calls list or export it to a file Detailed description CLM on page 132 Operating talk surf on page 37 Overview of the menu commands on page 164 Further information Opening the Calls list on page 89 Calling a Calls list entry on page 90 Configuring the Calls ...

Page 92: ...s are hidden or Click Outgoing calls to display only the outgoing calls made by one of your devices All the other Calls list entries are hidden or Click Missed calls to display only the incoming calls that were not answered All the other Calls list entries are hidden Detailed description Calls list entry and Calls list filter on page 132 Further information Calling a Calls list entry on page 90 Co...

Page 93: ...Detailed description CLM on page 132 Base settings on page 153 Further information Opening the Calls list on page 89 Managing Calls lists on page 88 Copying a Calls list entry to the directory on page 101 Assigning a device for PC dialling on page 63 Calling with the PC on page 28 i Precondition In the Configuration Base settings Assignments dialogue the Link telephone with PC option must be activ...

Page 94: ...eview windows on page 97 Removing columns ì In the Folder list click CLM This opens the Calls list ì In the View menu click Field Chooser This opens the Field Chooser dialogue ì In the Show these fields in this order section click the columns you want to remove from the current view Keep the Ctrl key pressed if you want to select sev eral columns ì Click Remove The selected columns will be shifted...

Page 95: ...he columns you want to add to the current view Keep the Ctrl key pressed if you want to select several columns ì Click Add The selected columns will be shifted to the Show these fields in this order section ì Confirm your entry with OK This closes the Field Chooser dialogue The current Calls list now shows only the columns in the Show these fields in this order section Detailed description Configu...

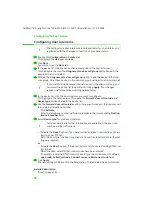
Page 96: ...ired position in the header row of the Calls list When you release the mouse button the column changes its width Detailed description Configuring the Calls list on page 91 Further information Removing columns on page 91 Changing the column sequence on page 94 Sorting Calls list entries on page 95 Grouping Calls list entries on page 96 Opening preview windows on page 97 i You can only change the co...

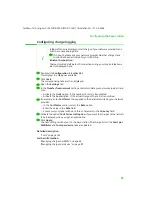
Page 97: ...e Show these fields in this order section click the column you want to move ì Use the arrow buttons to move the selected column Click arrow up to move the selected column one position higher In the Calls list this column will be moved one position to the left Click arrow down to move the selected column one position lower In the Calls list this column will be moved one position to the right ì Conf...

Page 98: ...e sort sequence For sorting in descending order the arrow icon points down For sorting in ascending order the arrow icon points up Detailed description Configuring the Calls list on page 91 Further information Removing columns on page 91 Adding columns on page 92 Changing the column sequence on page 94 Grouping Calls list entries on page 96 Opening preview windows on page 97 i ì Select a Calls lis...

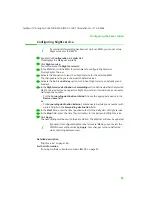
Page 99: ...r of groups depending on the how much the contents in the selected column differ Detailed description Configuring the Calls list on page 91 Further information Removing columns on page 91 Adding columns on page 92 Changing the column sequence on page 94 Sorting Calls list entries on page 95 i ì Select a Calls list filter in the Folder list if you want to change the view for that Calls list filter ...

Page 100: ...scription Configuring the Calls list on page 91 Further information Removing columns on page 91 Adding columns on page 92 Changing the column sequence on page 94 Sorting Calls list entries on page 95 Grouping Calls list entries on page 96 i ì Select a Calls list filter in the Folder list if you want to change the view for that Calls list filter only i You can change the size of the preview window ...

Page 101: ...of the Calls list editor click Save This updates the selected Calls list entry ì In the File menu of the Calls list editor click Exit This closes the Calls list editor Detailed description Calls list editor functions on page 137 Further information Opening the Calls list on page 89 Configuring the Calls list on page 91 Changing the status of a Calls list entry on page 99 Deleting a Calls list entr...

Page 102: ...tatus Read The Status column displays the open envelope icon The entry font is shown as normal or ì In the Edit menu click Mark As Unread The current entries are given the status Unread The Status column displays the sealed envelope icon The entry font is shown as bold Detailed description CLM on page 132 Further information Opening the Calls list on page 89 Configuring the Calls list on page 91 E...

Page 103: ...o select several Calls list entries ì In the Edit menu click Delete The selected entries are removed from the Calls list Detailed description CLM on page 132 Further information Opening the Calls list on page 89 Configuring the Calls list on page 91 Editing a Calls list entry on page 98 Changing the status of a Calls list entry on page 99 Copying a Calls list entry to the directory on page 101 Exp...

Page 104: ...ne number in the Call number field up to 32 digits ì Confirm your entry with OK This adds the name and telephone number as a new entry to the central directory The name entered will be used in all the Calls list entries generated by a call to that telephone number Detailed description CLM on page 132 Directories on page 125 Further information Opening the Calls list on page 89 Opening the director...

Page 105: ...port file ì Click Export to start the exporting of the file Successful export will be shown by a confirmation dialogue ì Click Close to quit the Export dialogue Detailed description CLM on page 132 Further information Opening the Calls list on page 89 Configuring the Calls list on page 91 Editing a Calls list entry on page 98 Changing the status of a Calls list entry on page 99 Deleting a Calls li...

Page 106: ... In the Action menu click Export This opens the Export dialogue ì Click the button next to the To File field This opens the Save As dialogue ì Select the folder path in the Save in field ì Enter a file name ì Select the file type ì Confirm your entry with Save This closes the Save As dialogue Your entries are transferred to the To File field Detailed description Exporting the Calls List on page 10...

Page 107: ...u want to select several columns ì Click the or buttons to move the selected columns to the Fields To Export sec tion Click to move the selected columns or Click to move all the columns Detailed description Exporting the Calls List on page 102 Further information Selecting the export folder on page 103 Sorting the fields to be exported on page 105 i Use the and buttons to undo your field selection...

Page 108: ...her information Selecting the export folder on page 103 Selecting the fields to be exported on page 104 Printing the Calls list ì In the Folder list click CLM This opens the Calls lists ì In the File menu click Print Preview This opens the Print Preview dialogue You will see a print preview of the current Calls list ì If necessary click Print setup to configure the print settings ì Click Print The...

Page 109: ... Dial a telephone number directly from the central directory Detailed description Directories on page 125 Operating talk surf on page 37 Overview of the menu commands on page 164 Further information Opening the directory on page 107 Creating a new central directory on page 108 Calling a Calls list entry on page 109 Creating a new directory entry on page 110 Editing a directory entry on page 111 De...

Page 110: ...e PC tab to display the central directory or In the All section click the Handsets tab to display a mapping of a handset direc tory in the left hand pane of the working area or In the Handsets section double click the All handsets entry to display a map ping of a handset directory in the right hand pane of the working area ì Double click the name of the directory to show its entries Detailed descr...

Page 111: ...or Copy telephone numbers from a handset You will find a detailed description in Chapter Receiving a directory from a hand set on page 115 or Import telephone numbers from an older version You will find a detailed description in Chapter Importing a telephone database from an older version on page 118 or Import telephone numbers from a PC address book You will find a detailed description in Chapter...

Page 112: ...ne button This sets up the connection via the telephone assigned to the PC Detailed description Directories on page 125 Base settings on page 153 Further information Opening the directory on page 107 Assigning a device for PC dialling on page 63 Calling with the PC on page 28 i Precondition In the Configuration Base settings Assignments dialogue the Link telephone with PC option must be activated ...

Page 113: ...tory on page 108 Editing a directory entry on page 111 Deleting a directory entry on page 112 Copying directory entries on page 113 Charac ters Affect Use u With an open connection E g for menu control in automated service announcements or remote access to an answering machine u During the call To control the features of a telephone exchange or PABX dialling feature Dial and must be activated P Di...

Page 114: ...e alphabetical sorting of the directory entries ì Enter the new telephone number for the selected entry up to 32 digits in the Call number field Apart from the digits 0 9 you can also use the special characters P and R ì Confirm the changes with OK This updates the entry in the central directory Detailed description Directories on page 125 Further information Opening the directory on page 107 Crea...

Page 115: ...directory This displays the central directory entries ì Click the entry you want to delete This highlights the entry ì Click Delete entry This opens the Delete entry tab ì Confirm the deleting of the selected entry with OK This removes the entry from the central directory Detailed description Directories on page 125 Further information Opening the directory on page 107 Creating a new directory ent...

Page 116: ...ond handset ì Select the directory entry you want to copy ì Select the directory you want to copy the selected entry to talk surf displays the directories of your handsets These you can edit and copy These directories are only mappings of the directories stored in your handsets Changes you make to these mappings with talk surf are not automatically applied to the handset in question The directory ...

Page 117: ...selected directory entry will be copied to the open directory Detailed description Directories on page 125 Further information Opening the directory on page 107 Receiving a directory from a handset on page 115 Changing a handset directory on page 116 Sending a directory to a handset on page 117 i You can also copy an entire directory Not available for Gigaset C1 ì Select the directory you want to ...

Page 118: ...he directory on page 107 Copying directory entries on page 113 Changing a handset directory on page 116 Sending a directory to a handset on page 117 Use the Receive button to copy a handset directory to talk surf In the Handsets section you will see a mapping of the handset directory This directory mapping is stored in the Handsets section under the device name of the handset where you can also ed...

Page 119: ...he All section Detailed description Directories on page 125 Further information Opening the directory on page 107 Copying directory entries on page 113 Receiving a directory from a handset on page 115 Sending a directory to a handset on page 117 talk surf displays the directories of your handsets These you can edit and copy These directories are only mappings of the directories actually stored in ...

Page 120: ...replaced Detailed description Directories on page 125 Further information Opening the directory on page 107 Copying directory entries on page 113 Receiving a directory from a handset on page 115 Changing a handset directory on page 116 Use the Send button to start updating the directory stored in the hand set The entries of the directory selected in the Handsets section are trans ferred to the cor...

Page 121: ...tion ì Activate the Import data from a saved database option ì Click Next The entries of the telephone database from the older version are added to the cen tral directory Detailed description Directories on page 125 Further information Creating a new central directory on page 108 Receiving a directory from a handset on page 115 Importing directory entries from a file on page 119 i You can only use...

Page 122: ... from which the import wizard is to use for com posing the name of the imported directory entries Confirm your selection with Next You will find a detailed description in Chapter Wizard for importing directories Composition of the name on page 122 ì In the Wizard for importing directories Composition of the telephone number dialogue choose the fields in your import file from which the import wizar...

Page 123: ...rting directories File selection ì Click the button next to the File name field to select the file to be imported This opens the Open dialogue Select the folder path in the Browse in field Enter the name of the import file in the File name field Confirm your selection with Open This closes the Open dialogue Your entries are transferred to the File name field ì Click Next This opens the Wizard for ...

Page 124: ...eparator in the Other field Define which character set is used in your import file In the default setting the ASCII OEM character set has been activated Activate the ANSI character set if you want to import language dependent special charac ters such as ß or à ì Confirm your settings with Next This opens the Wizard for importing directories Composition of the name dia logue Detailed description Im...

Page 125: ...hange your field selection Double click a field in the right hand pane to change the list separator for that field Use the Arrow up and Arrow down buttons to change the order of the selected fields ì Confirm your settings with Next This opens the Wizard for importing directories Composition of the telephone number dialogue Detailed description Importing directory entries from a file on page 119 Fu...

Page 126: ...mposition field ì Change any other settings you want Use the button to change your field selection Use the Arrow up and Arrow down buttons to change the order of the selected fields ì Confirm your settings with Next This opens the Wizard for importing directories Finish dialogue Detailed description Importing directory entries from a file on page 119 Further information Wizard for importing direct...

Page 127: ...cription Directories on page 125 Instructions Managing directories on page 106 u Use the Calls list folder to manage all the outgoing and incoming calls via your base station Detailed description CLM on page 132 Managing Calls lists on page 88 u Use the Configuration folder to configure all the features offered by your base sta tion as the central interface between your ISDN line and the connected...

Page 128: ...ded into different sections The All section The All section maps all the directories that can be configured with talk surf All section Tab PC The PC tab contains the central directory PC directory that is stored on the PC With the Create entry Edit entry and Delete entry buttons you start the editing steps for maintaining and updating the central directory and its entries Use the Import button to ...

Page 129: ...l numbers in the handset The call number can be edited only in the central directory Use the Delete button to remove the selected entry from a handset directory Buttons in the centre of the working area Use the Telephone to dial the selected number This button is only available if the Link telephone with PC option in the folder Configuration System settings Assign ments has been checked Use the an...

Page 130: ...irectory is practically unlimited Since the central directory is stored in the PC the capacity is limited only by the avail able memory on your PC Thus you can store a far greater number of telephone numbers in the central directory than in a handset directory u Import functions reduce the work involved Existing directories can be received from a handset Address files of other programs or the tele...

Page 131: ...irectories stored in the handsets remain unchanged until you transfer the mapping to the handset with the Send function This technical background offers two key advantages u The handset directories can be prepared on the PC and then synchronised without the functioning of the handsets being restricted by permanent data transfer u Any incorrect entries can be spotted and remedied before data transf...

Page 132: ...n The working area in the directory folder on page 125 Central directory on page 127 Mapping of a handset directory on page 128 Copying individual directory entries on page 130 Recommended editing sequence on page 131 Further information Folders and Dialogues on page 124 Directories on page 125 Managing directories on page 106 Data cannot be transferred to or from a handset during an open connec t...

Page 133: ...e working area in the directory folder on page 125 Central directory on page 127 Mapping of a handset directory on page 128 Transferring data to and from handsets on page 129 Recommended editing sequence on page 131 Further information Folders and Dialogues on page 124 Directories on page 125 Managing directories on page 106 Copying directory entries on page 113 Selected source Selected target But...

Page 134: ...er handset directories if the handsets are to have dif ferent directories or Copy the directory of the first handset to the mappings of other handsets if they are to have the same directories 6 Send the mappings to the corresponding handsets so that the updated directories are ready to be used 7 From now on enter new or modified entries only in the central directory to simplify the workload for ma...

Page 135: ...outgoing calls in a Calls list For each call a Calls list entry is created showing the date and time of the call its dura tion and the other number To differentiate the direction and success of the call the Calls list entries are marked with a Calls list filter Your base station distinguished between three Calls list filters Detailed description Using the Calls list on page 133 Saving Calls list e...

Page 136: ...hone bill u Use the Outgoing calls filter to trace particularly frequent or long calls u Use the Missed calls filter to keep track of the calls you were unable to take u Copy the numbers from Calls list entries to your central directory Detailed description Calls list entry and Calls list filter on page 132 Saving Calls list entries on page 134 Rows and columns in the Calls list on page 135 Calls ...

Page 137: ... With talk surf you can print out Calls list entries or export them in a different file format Printing the Calls list Use the Print preview menu command to open a window where you can check the quality of the print out on the screen and make any adjustments before actually printing the list Use the Print menu command to start printing the current Calls list You can print out the entire Calls list...

Page 138: ...This column is only displayed if no Calls list filter has been set Status Status of the Calls list entry read not read Device name Name of the internal device used for the call By Name Name of the person making the call If the number is not in the central directory a ques tion mark appears instead By Number Number of the person making the call If no number was identified a minus sign appears inste...

Page 139: ... 2003 Detailed description Calls list entry and Calls list filter on page 132 Using the Calls list on page 133 Saving Calls list entries on page 134 Calls list editor functions on page 137 Further information Folders and Dialogues on page 124 CLM on page 132 Managing Calls lists on page 88 ...

Page 140: ...es the changes to the current Calls list entry Edit Cut Removes the highlighted text from the Calls list entry and copies it to the Windows clipboard Edit Copy Copies the highlighted text to the Windows clipboard Edit Insert Inserts the contents of the Windows clipboard at the cursor position File Delete Removes the current entry from the Calls list The Calls list editor shows the previous entry V...

Page 141: ...led description Dialogues in the Configuration folder on page 139 Register on page 140 Device settings on page 142 MSN settings on page 146 ISDN settings on page 148 Dial settings on page 150 Base settings on page 153 Local Answering Machine on page 156 External call forwarding on page 159 Internal call forwarding on page 160 Night service on page 160 Door on page 161 Costs on page 162 Further inf...

Page 142: ...ion on page 138 Folders and Dialogues on page 124 Configuring the base station on page 43 Dialogue Description register Registering wireless or Bluetooth devices with the base station Device settings Configuring registered devices MSN settings Entering available MSNs in the base station ISDN settings Using features of the ISDN line Dial settings Presetting dialling parameters and numbers e g emerg...

Page 143: ...The buttons for registering Bluetooth devices are only available for the Gigaset SX3x3isdn i Please bear in mind that you can operate no more than 8 wireless devices e g 4 handsets and 4 PCs with your base station at any one time i You have to carry out registration with the device you want to register You will find a detailed description of the registration procedure in the operating instructions...

Page 144: ...DN settings on page 148 Dial settings on page 150 Base settings on page 153 Local Answering Machine on page 156 External call forwarding on page 159 Internal call forwarding on page 160 Night service on page 160 Door on page 161 Costs on page 162 Further information Configuration on page 138 Folders and Dialogues on page 124 Instructions Registering a wireless device on page 44 Registering a Bluet...

Page 145: ...e registration pro cedure If you want to change a device s internal number you will have to reregister it Depending on the type the following number blocks are reserved in the base sta tion for assigning internal numbers Device name During registration with the base station each device is assigned a device name that you can change as you wish For example you could enter the device s position or th...

Page 146: ...SN For each device however only one Send MSN can be preset at any one time The Send MSN selection after seizure option allows you to decide that the Send MSN for certain devices has to be chosen before the connection is set up Device type Connected device examples Phone Telephone Fax Fax machine Modem Modem connection PC internal or external Local Answering Machine Answering machine Neutral Multif...

Page 147: ...hile the caller continues ringing Depending on your device s fea tures you can accept reject or ignore the second call Autom Set If this option has been activated the outside line will be reserved as soon as you pick up the receiver or press the device s call key Otherwise you will obtain the outside line only after you have entered the first digit of the telephone number This option is only avail...

Page 148: ...ed for PCs PDAs and a mobile telephone De register Use the De register button to deregister a device from the base station and remove it from the device list All the settings for this device are lost Detailed description Dialogues in the Configuration folder on page 139 Register on page 140 MSN settings on page 146 ISDN settings on page 148 Dial settings on page 150 Base settings on page 153 Local...

Page 149: ...in Chapter Assigning a Bluetooth mobile telephone to an internal device on page 23 Call number In the Telephone number field enter your MSN without the local dialling code The maximum length of the telephone number is 20 digits MSN name The MSN name is merely for easier identification of an MSN and has no influence on the functioning of your base station For example you could enter as the MSN name...

Page 150: ...s on page 148 Dial settings on page 150 Base settings on page 153 Local Answering Machine on page 156 External call forwarding on page 159 Internal call forwarding on page 160 Night service on page 160 Door on page 161 Costs on page 162 Further information Configuration on page 138 Folders and Dialogues on page 124 Instructions Entering multiple subscriber numbers MSN on page 53 Deleting multiple ...

Page 151: ...re must be requested from the network provider Transfer ECT With the Transfer ECT option you can use the enquiry call function of your ISDN line for Explicit Call Transfer This feature is only available if your base station is used behind a PABX that can hold enquiry call connections Once this option has been activated you can take a second call in the middle of a first call This first call is hel...

Page 152: ... page 139 Register on page 140 Device settings on page 142 MSN settings on page 146 Dial settings on page 150 Base settings on page 153 Local Answering Machine on page 156 External call forwarding on page 159 Internal call forwarding on page 160 Night service on page 160 Door on page 161 Costs on page 162 Further information Configuration on page 138 Folders and Dialogues on page 124 Setting up ch...

Page 153: ...s The access code 0 is preset Access code Access code with up to 4 digits to get an outside line for all outgoing calls Entering an access code may be necessary if you connect your base station to a PABX Dialling features In the Dialling features tab you can define how key entries are to be interpreted dur ing a call Dialling feature Description Normal dialling Only the digits 0 9 are permitted fo...

Page 154: ... with your base station with the internal number 99 You have to enter this internal number in your handset as the destination number Once the room monitor alarm has been triggered the handset opens an internal line to the base station which is redirected to the external destination number SMS Use the SMS service centres tab to configure the short message service SMS function of your base station Y...

Page 155: ... 148 Base settings on page 153 Local Answering Machine on page 156 External call forwarding on page 159 Internal call forwarding on page 160 Night service on page 160 Door on page 161 Costs on page 162 Further information Configuration on page 138 Folders and Dialogues on page 124 Instructions Setting dialling parameters on page 55 Entering emergency numbers on page 56 Using the room monitor funct...

Page 156: ...r ISDN line free when a call is for warded You can activate several call forward numbers at the same time Preferred holding for enquiry calls On the network The base station sends the first external call back to the network provider The con nection is held there The second external call enquiry call is made using the same B channel The second B channel is left free Automatic call pickup by AM Only...

Page 157: ...red to 0000 PIN protection will be effective once you set a PIN that is not 0000 The PIN can be between 1 8 digits long Only the digits 0 9 are permitted Each digit you enter is shown as Once PIN protection has been activated you will be prompted to enter this PIN every time you open configuration Use the Save PIN option to deactivate PIN protection for the current configuration session You will n...

Page 158: ...older on page 139 Register on page 140 Device settings on page 142 MSN settings on page 146 ISDN settings on page 148 Dial settings on page 150 Local Answering Machine on page 156 External call forwarding on page 159 Internal call forwarding on page 160 Night service on page 160 Door on page 161 Costs on page 162 Further information Configuration on page 138 Folders and Dialogues on page 124 Instr...

Page 159: ...trol If you acti vate time control you will have to configure it in the Time control tab In the lower sec tion of the tab choose which announcement is to be used for the selected answering machine Time control Use the Time control dialogue to define how an answering machine is to respond This assumes that time control has been selected for the answering machine in the All day tab You can define a ...

Page 160: ...nger tones Select the number of ringer tones after which the answer ing machine should record an incoming call If you select the auto 2 4 option the answering machine takes a call after the fourth ringer tone If a new message has been recorded the reaction time is cut to two ringer tones This option enables you to avoid unnecessary connection charges with remote access Cancel the remote access cal...

Page 161: ...g machine Change the answering machine PIN from the factory setting 0000 to a value other than 0000 The PIN can be between 1 8 digits long Instructions Activating the answering machine on page 69 i Resetting the answering machine PIN To permanently deactivate PIN protection reset the answering machine PIN to the factory setting 0000 ì To do this enter 0000 in the Change PIN dialog as New PIN and c...

Page 162: ...forwarding differ If you have entered your base station as preferred redirection location in the System Settings Assignments dialogue the following restrictions apply u Only one external call forward can be activated at any one time This applies even if you set up call forwarding for several Receive MSNs u The call forward when busy option is not available because the base station can only redirec...

Page 163: ...set for the device in question The upper section of the tab shows you a list of the registered devices and the call for warding set In the lower section you can make the settings for the Night service You activate Night service for a selected device and then set the times Night service destination number The call can be forwarded to an internal or external device For internal call forwarding selec...

Page 164: ...om is called Door call forwarding to an external number You can only select this option if you have selected a device of device type door intercom in the device list All the calls of the selected door intercom are redirected to the external telephone number entered in the Destination telephone number field For example you can redirect the door intercom to your mobile phone The maximum length of th...

Page 165: ...isplays the assigned MSNs The second column shows you the corresponding names numbers and the third column the charges incurred Exporting You can export the list regardless of the way it is displayed Exporting with the csv file format produces a comma separated list that you can open and edit in Microsoft Excel or a text editor Deleting Use the Delete button to reset the incurred units or charges ...

Page 166: ...will influence the structure of the lists in the first two tabs Charge factor If necessary enter a charge factor to be applied to the charges incurred If you have activated the Factor option you can enter either a whole number with up to four digits or a decimal number with two decimal places In the currency field you can enter a currency label with up to three characters for the charge factor Cha...

Page 167: ... on page 165 Menu View on page 166 Menu Action on page 167 Menu Help on page 168 Menu File Use Menu File to open the basic functions of talk surf Further information Overview of the menu commands on page 164 Operating talk surf on page 37 Menu Edit on page 165 Menu View on page 166 Menu Action on page 167 Menu Help on page 168 Menu command Description Folder List Exit Closes talk surf The talk sur...

Page 168: ...mand is only available for entries in a handset directory Delete Hand set Entry Removes the selected entry The menu command is only available for entries in a handset directory Copy to Hand set s Copies the selected entry to a handset directory This menu command is only available for entries in a handset directory The handset directory must be selected Copy to Address book Copies the selected entr...

Page 169: ...e options are Directories CLM and Configuration All Folders Outlook Bar Shows the Shortcuts tab Folder List Shows the Folder List Toolbars Shows the tool bar The tool bar contains only those options that are available for the folder selected in the Folder List Handsets Shows the handset directories in the All sec tion Directories Address book Shows the central directory in the All section Preview ...

Page 170: ...elected entry Directories CLM Receive from handset Copies the directory selected in Handsets to the directory opened in All Directories Send to handset Copies the directory open in All to the directory selected in Handsets Import Opens the Wizard for importing directory dia logue for importing an address file stored on the PC to the central directory Add to Phone Directory Opens the Add entry to p...

Page 171: ...Overview of the menu commands on page 164 Operating talk surf on page 37 Menu File on page 164 Menu Edit on page 165 Menu View on page 166 Menu Action on page 167 Menu command Description Folder List Gigaset Help Top ics Opens the start page of the talk surf online help All Folders Info Shows the version number of the firmware installed in the base station Shows the version number of talk surf and...

Page 172: ...pdate the data box firmware you have to deactivate wireless mode with the connection wizard u If the Gigaset data box is not found automatically check and if necessary correct the settings of the virtual COM port Wireless devices from other manufacturers You can register and operate various wireless devices from your base station If you have devices from a different manufacturer that you want to r...

Page 173: ...lways possible B B channel Use channel of an ISDN line with a transmission speed of 64 kbit s As a rule there are two B channels on an ISDN line This allows two calls to be made via the public telephone network at the same time For dial up connections both B channels can be bundled to increase the transmission speed Block dialling You enter the complete number and correct it if necessary Then you ...

Page 174: ...tgoing calls for the base station A Calls list filter differentiated the call types incoming outgoing missed The list stores the number called date and time of the call and in some cases the duration of the call CAPI Common ISDN Application Programming Interface Vendor independent PC device driver for ISDN connections A CAPI driver enables a PC to use an ISDN connection with fax and telephone soft...

Page 175: ...ion to another user If you terminate the connection to this user immediately then this was an enquiry call If you switch to and fro between the first and second user it is called toggling Exchange Node in a public telephone network via which external connections are set up and redirected A distinction is made for example between local exchanges and long distance or trunk exchanges External call fo...

Page 176: ...nternal calls Free calls between devices connected to the base station Internal ringer Special ring tone on PABXs to distinguish between internal and external calls ISDN Integrated Services Digital Network All data including voice is sent digitally with ISDN Network providers normally offer at least two B channels per ISDN line Each B channel can set up an active con nection permitting phone calls...

Page 177: ...on one of the devices Reject all Extended call rejection When an incoming call is rejected on any device that call is rejected for all devices in the same call group The caller continues to hear the ring ing tone but the devices themselves no longer ring Remote check Also remote access Operating the answering machine from any external telephone number After entering a PIN messages can be played ba...

Page 178: ...of purchase Siemens shall at its own option and free of charge either replace the device with another device reflecting the current state of the art or repair the said device In respect of parts subject to wear and tear including but not limited to batteries keypads casing this warranty shall be valid for six months from the date of purchase u This Guarantee shall be invalid if the device defect i...

Page 179: ...ls for special editions u The guarantee provides for devices or components that despite proper care and use have demonstrably developed defects due to faulty workmanship and or faulty materials to be replaced or repaired at our discretion free of charge The guarantee does not cover normal wear and tear Alternatively we reserve the right to replace the defective device with a successor model or rei...

Page 180: ... the information on the packaging and in the operating instructions u Any further claims are excluded Siemens is not liable in any circumstances for downtime loss of profits loss of data or loss of any other information The customer alone is responsible for safeguarding such data and information u Changes to this guarantee require prior approval by Siemens in writing Guarantee period u The guarant...

Page 181: ...g the telephone with the PC 153 Preferred holding for enquiry calls 153 Preferred redirection location 153 Authorisation 143 170 Autom set 144 Automatic pickup by the answering machine 153 Autostart 36 B B channel 170 Block dialling 170 Bluetooth 170 Bluetooth devices tab de registering handsets 145 Send MSN 145 C Call all 144 Call before data incoming call despite channel bundling 148 Call forwar...

Page 182: ...ernal call forwarding 82 Configuring ISDN features 54 Configuring Night service 83 Configuring preferred holding for enquiry calls 61 Configuring preferred redirection location 60 Configuring record and play 73 Configuring registered devices 50 Configuring remote access 75 Configuring short message service SMS 58 Configuring the base station 43 activating the answering machine 69 activating the wa...

Page 183: ...isation 143 Autom set 144 Call all 144 call waiting 144 de registering handsets 144 device name 142 device type 143 internal number 142 Receive MSN 144 ring delay 144 Send MSN 143 Send MSN selection after setting 144 Device type 143 Dialer 172 Dialer blocker 26 Dialling features 150 Dialling parameter 150 Access code 150 ACN International 150 ACN National 150 Country code 150 Dialling features 150...

Page 184: ... launching the talk surf wizard 17 possible problems during installation 20 preconditions for installation 14 preparing the base station 15 uninstalling old versions 16 updating firmware 20 Installing the software and device drivers 13 Internal call forwarding 173 Internal calls 173 Internal number 142 Internal ringer 173 ISDN 173 ISDN settings 148 call before data incoming call despite channel bu...

Page 185: ...n internal device 23 Autostart 36 calling from Outlook 28 calling from talk surf 28 calling from the Windows address book 29 calling with the PC 28 configuring anti dialer protection 25 deactivating Autostart 36 faxing with the PC 30 general information about the phrase download tool 27 how the dialer blocker works 25 launching talk surf 36 launching talk surf manually 36 operating and configuring...

Page 186: ...evice 46 registering a Bluetooth headset 49 registering a Bluetooth PC or Bluetooth PDA 48 registering a GSM telephone 47 Registering a Bluetooth headset 49 Registering a Bluetooth PC or Bluetooth PDA 48 Registering a GSM telephone 47 Registering a wireless device 44 Reject 174 Reject all 148 174 Rejecting configuration changes 40 Remote check 174 Removing columns 91 Repeater 174 Replacing the ans...

Page 187: ...nown call CLIR 148 Updating firmware 20 Updating the base station data 40 Updating the data status in talk surf 40 Updating applying rejecting settings 40 Using Bluetooth connections 23 Using the Bluetooth headset 24 Using the Calls list 133 Using the room monitor function 57 W Wait melody 155 Waiting melody Music on hold 173 Wizard for importing directories Composition of the name 122 Wizard for ...

Page 188: ...7 09 2003 Issued by Information and Communication mobile Haidenauplatz 1 D 81667 Munich Siemens AG 2003 All rights reserved Subject to availability Right of modification reserved Siemens Aktiengesellschaft http www my siemens com No A31008 X100 B100 1 76D1 ...

Reviews: