background image

16

Using a handset as a room monitor

Gigaset S44 / MEA engl / A31008-M1611-A611-1-

76

19 / start_guide_time.fm / 07.06.2005

Using a handset as 
a room monitor

If the room monitor is activated, a previ-

ously stored destination number is called 

as soon as soon as a set noise level is 

reached. You can store an internal or 

external number on your handset as the 

destination number. 
The room monitor call to an external 

number stops after approx. 90 seconds. 

The room monitor call to an internal 

number (handset) stops after approx. 3 

minutes (depending on the base station). 

While the room monitor is activated, all 

keys are locked except the end call key. 

The handset's speaker is muted. 
When the room monitor is activated, 

incoming calls to the handset are indi-

cated 

without a ringtone

 and are only 

shown on the screen. The display and keys 

are not illuminated and advisory tones are 

also turned off.
If you accept an incoming call, the room 

monitor mode is suspended for the dura-

tion of the call, the function 

remains

 acti-

vated.
If you switch off the handset, the room 

monitor mode is ended. You must reacti-

vate the function after switching on the 

handset again. 

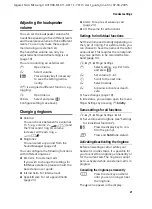
Activating the room monitor and
entering the number to be called

v


¢

í


¢

Room Monitor

¤

Changing multiple line input:

Room M.:

Select 

On

 to activate.

Call to:

Press the display key 

§Edit§

 and enter des-

tination number.

External number:

 select number from 

the directory or enter directly. Only 

the 

last 4 digits

 are displayed. 

Internal number:


§INT§

and depending 

on the base station either 

s

 (select 

handset) or 

~

 (enter number of hand-

set) and

§OK§

. If all handsets registered 

on the base station should be called, 

select 

Call All

.

Store number with 

©

Save Entry

§OK§

.

Level:

Set sensitivity for the noise level (

Low

 or 

High

).

¤

Save changes (page 10).

The function is now activated. With 

v

you can change directly to settings.

Note:

You should always check the operation 

of the room monitor before use. For 

example, test its sensitivity. Check the 

connection, if you are diverting the room 

monitor to an outside number.


– The active room monitor function consider-

ably reduces the operating time of the 

handset. Place the handset in the charging 

cradle if necessary. This ensures that the 

battery does not discharge.

– Ideally the handset should be positioned 1 

to 2 metres away from the baby. The micro-

phone must be directed towards the baby. 

– The connection to which the room monitor 

is diverted must not be blocked by an acti-

vated answering machine.

Summary of Contents for GigasetS44

Page 1: ...nauplatz 1 D 81667 Munich Siemens AG 2004 All rights reserved Subject to availability Rights of modification reserved Siemens Aktiengesellschaft www siemens mobile com gigaset cyan magenta yellow black Liebreich Medienproduktion BA Cover S44 qxd 08 07 2004 11 56 Uhr Seite 1 ...

Page 2: ... Call list key Open Call by Call list 8 Connection socket for headset and PC interface 9 Microphone 10 R key Initiating a consultation call press briefly only on ISDN base stations Insert a dial pause press and hold 11 Star key Ringtones on off press and hold toggles between upper lower case and digits 12 Key 1 Select answering machine T Net box answering machine in network press and hold 13 Talk ...

Page 3: ... redial list 15 Viewing calls and messages list 15 Activating the room monitor and entering the number to be called 16 Changing previously set external destination number 17 Changing previously set internal destination number 17 Deactivating the room monitor remotely 17 Setting the Walky Talky mode 17 Activating Walky Talky mode 18 Deactivating Walky Talky mode 18 Using a handset in Walky Talky mo...

Page 4: ...polarity symbols can be seen in the handset s battery compartments The operation of medical appliances may be affected Be aware of the technical conditions in your particular environment e g doctor s surgery The handset may cause an unpleasant humming noise in hearing aids Do not install the charging cradle in bathrooms or showers The handset and charging cradle are not waterproof page 26 Switch o...

Page 5: ...contains u one Gigaset S44 handset u one charging cradle incl mains adapter u two batteries u one battery cover u one belt clip u one set of operating instructions Connecting up the charging cradle and mounting it on the wall if required is described at the end of these instructions Inserting the batteries Fit the batteries with the correct polar ity see figure The polarity is indicated in on the ...

Page 6: ...e handset returns to idle status The internal number of the handset appears in the display e g INT 1 Otherwise repeat the procedure 1 On the handset v Ð Handset Register H Set s Select base station e g Base 1 and press OK Enter the system PIN of the base station the default is 0000 and press OK You will see e g Base 1 2 On the base station Start registration on the base station within 60 seconds a...

Page 7: ...ss OK Changing the name of the base station The names Base 1 to Base 4 are assigned automatically You can change the name of your base station v Ð Handset Select Base s Select base station and press Edit Enter new name max of 16 characters page 29 Save Press the display key to save the setting a Press and hold idle status Activating deactivating the handset a Press the end call key and hold You he...

Page 8: ... handsets t Press briefly Setting handset ringtones page 21 Press and hold Initiate voice dialling page 14 In the main menu and in input fields Using the control key you can move the cursor up t down s right v or left u In lists and submenus t s Scroll up down line by line v Open submenu or confirm selection u Go back one menu level or cancel During an external call s Open the directory v Open men...

Page 9: ... level Navigate to the function using the con trol key q and r The name of the function is displayed in the screen s header row Press the display key OK Submenus The functions in the submenus are dis played as lists Accessing a function Scroll to the function with the control key q and press OK To return to the previous menu level or to cancel an operation briefly press the end call keya Correctin...

Page 10: ...der H Set Settings is dis played Press OK on the display key to confirm the function H Set Settings You will see the submenu H Set Settings Press the bottom of the control key repeatedly until Display is selected Press OK on the display key to confirm the function Colour Scheme Select and press OK Press the bottom of the control key repeatedly until Colour Scheme is selected Press OK on the displa...

Page 11: ...dsfree talking With handsfree talking instead of holding the handset to your ear you can put it down e g on the table in front of you to allow others to listen and speak to the caller Time Enter hours minutes in 4 digit format Press the s key The third line is marked with to show it is activated Enter the date using the digit keys Notes Press the display key Edit Enter text max of 16 characters an...

Page 12: ...c handset u Initiate internal call Enter the number of the hand set Calling all handsets group call u Initiate internal call Press the star key All handsets are called Ending calls a Press the end call key Using the directory and lists You can store a maximum of 200 entries in the directory call by call list and email directory the actual number depends on the size of the individual entries You cr...

Page 13: ... View Edit Press display keys one after the other Make and save changes Using other functions s C s Select entry v open menu The following functions can be selected with q Display Number Edit or add a stored number Then dial or use other functions by pressing Edit Entry Edit a selected entry Delete Entry Delete a selected entry VIP Entry directory only Mark a directory entry as VIP Very Important ...

Page 14: ...mory of the receiving handset is full Storing anniversaries in the directory You can store an anniversary for every number in the directory and specify a time when you will receive a reminder call on the anniversary s s Select entry page 12 View Edit Press display keys one after the other s Scroll to the Annivers line Edit Press the display key Changing multiple line input Date Enter day month in ...

Page 15: ...ou must delete it page 14 and re record it Using voice dialling t Press and hold Speak the name after the beep If the name corresponds with the recorded voice pattern it will be repeated and the number will be dialled Playing voice patterns s s Select entry with v Open menu Play Pattern Select and press OK The voice pattern will be played in handsfree mode a Press and hold idle status Deleting voi...

Page 16: ...isplaying a name you can have the respective phone number displayed by using the display key View Managing entries in the last number redial list c Press the talk key briefly s Select entry v Open menu The following functions can be selected with q Automatic Redial The number is automatically dialled at regular intervals at least every 50 seconds and the handsfree key flashes open listening is act...

Page 17: ... on the handset again Activating the room monitor and entering the number to be called v í Room Monitor Changing multiple line input Room M Select On to activate Call to Press the display key Edit and enter des tination number External number select number from the directory or enter directly Only the last 4 digits are displayed Internal number INT and depending on the base station either s select...

Page 18: ... other room moni tor settings e g no ringtone on the handset will remain activated until you press the display key Off on the handset To reactivate the room function with the same phone number Turn on the activation again and save with Save page 16 Setting the Walky Talky mode The Walky Talky function allows two hand sets to communicate with each other no matter how far they are from the base sta ...

Page 19: ...itor function remains active after you end the call It must be activated again if the hand set has been switched off Activating deactivating the room monitor Press the display key Room Monitor Select and press OK Room M Select On to activate Select Off to deac tivate Level Set the sensitivity for the desired noise level Low or High Save changes The room monitor has now been acti vated deactivated ...

Page 20: ...he menu for selecting the answering machine mode Withhold No Withhold phone number identification for next call Info Services Assign key to the menu for ordering info services SMS Notific Assign key to the menu for activating SMS notification If the left display key has been assigned a shortcut the selected function or name of the phone number in the directory or call by call list is displayed abb...

Page 21: ...ions e g during a call or when the handset has been deregistered If a screen picture has been activated the menu item ScreenPicture is marked with v Ð Display Screen Picture The current setting is displayed Changing multiple line input Activation Select On screen picture is displayed or Off no screen picture Picture Change screen picture if necessary see below Save changes page 10 If the screen pi...

Page 22: ...de u Internal Calls For internal calls u Appointments For set appointments page 23 u Alarm For a pre set wake up call page 23 u All The same for all functions Settings for individual functions Set the volume and melody depending on the type of ringing For external calls you can choose to have the name of the caller announced This requires the correspond ing voice pattern to be recorded before hand...

Page 23: ...d rename or delete sounds that you have downloaded onto your handset Playing back sounds v Ë q Select entry Play Press the display key Sounds are played Change between entries using the key q End Press the display key Play back is ended a Press and hold idle status Whilst you are playing sounds you can adjust the volume using the display key Volume If you have saved a sound in an invalid data form...

Page 24: ...f Confirm Select On or Off Battery Select On Off or In Call The battery warning tone is activated or deacti vated or only rings during a call Save changes page 10 You cannot deactivate the confirmation tone for placing the handset in the charg ing cradle Setting the alarm clock Requirement the date and time have already been set page 7 Activating deactivating the alarm clock and setting the wake u...

Page 25: ...d with the selected ringtone melody page 21 The appointment reminder will ring for 30 sec onds It will display the entered text or date and time During a call the appointment reminder is signalled by a short tone Managing appointments v ì Set Appoints Appoint Select 1 5 Viewing editing appointments View Press the display key The appointment is displayed Back with OK or Edit Press the display key t...

Page 26: ...isplay key Save Entry Select and press OK The entry is stored Dialling the emergency number You can call the emergency number even when the keypad lock is activated page 6 Enter emergency number c Press the talk key Restoring the handset default settings You can reset individual settings and changes you have made This will not affect entries in the directory call by call list call list email direc...

Page 27: ...TONI predictive text on page 30 Alarm clock appoint ment off page 23 Character set standard page 30 Function Default setting Page The display is blank 1 The handset is not switched on Press and hold the end call key a 2 The batteries are flat Charge or replace the batteries page 4 The handset does not respond to a key press The keypad lock is activated Press and hold the hash key page 6 Base stati...

Page 28: ...11 Estonia 06 30 47 97 Finland 09 22 94 37 00 France 01 56 38 42 00 Germany 01805 333 222 Greece 0 80 11 11 11 16 Hong Kong 28 61 11 18 Hungary 06 14 71 24 44 Iceland 520 3000 India 01 13 73 85 89 98 Indonesia 0 21 46 82 60 81 Ireland 18 50 77 72 77 Italy 02 66 76 44 00 Ivory Coast 80 00 03 33 Jordan 0 64 39 86 42 Kenya 2 72 37 17 Kuwait 2 45 41 78 Latvia 7 50 11 14 Lebanon 01 44 30 43 Libya 02 13...

Page 29: ... of conformity with the essential requirements regarding Council Directive 99 5 EC is ensured Senior Approvals Manager The Declaration of Conformity DoC has been signed In case of need a copy of the original DoC can be made available via the company hotline Specifications Recommended batteries Valid at the time of going to press Nickel metal hydride NiMH u Sanyo Twicell 650 u Sanyo Twicell 700 u P...

Page 30: ... t s u Characters are added to the left of the cursor u Press the star key briefly to switch from Abc mode to 123 and from 123 to abc and from abc to Abc upper case 1st letter upper case all others lower case Press the star key before entering the let ter u Press and hold the star key Shows the selection line of the charac ters assigned to the star key u The first letter of the name of directory e...

Page 31: ...nd copied into the text panel If you press and hold the hash key you will see the selection line of characters that are assigned to the hash key Deactivating activating predictive text Requirement You are writing an SMS Press the display key Predictive Text Select and press OK on a Press the end call key briefly to return to the text panel Enter the text Order of directory entries The directory en...

Page 32: ...rial RS232 interface of your computer Data Cable USB DCA 510 For connecting your phone to the USB interface of your com puter All accessories and batteries are available from your mobile phone retailer Or you can order direct from the Online Shop at www siemens com shop The Online Shop also has the latest product information Only use original accessories This will avoid possible health risks and d...

Page 33: ...on changing 6 Battery charging 5 display 1 inserting 4 recommended batteries 28 Battery icon 5 Battery tone 23 Best base station 6 Brightness display 20 C Call answering 10 end 10 internal 11 Call by Call list 11 key 1 Call by Call numbers 11 Calls list 15 Cancelling operation 7 Care phone 26 Changing destination number 17 display language 20 emergency number 25 name of the base 6 ringtone 21 Char...

Page 34: ...ng to another base station 6 contact with liquid 26 de registering 5 display language 20 idle status returning to 8 list 7 loudspeaker volume 21 muting 11 night mode 20 operating and charging times 28 registering 5 registering on another base station 6 restoring default settings 25 screen picture 20 settings individual 18 using room monitor 16 18 using several 6 Handset charging times 28 Handset o...

Page 35: ...9 Muting handset 11 N Name changing the base station 6 Network provider number list 11 Night mode 20 Not accepted anniversary 24 appointment 24 Number as destination for room monitor 16 saving in directory 11 Number list network provider 11 O On Off key 1 Opening directory 7 menu 7 Operating time for handset 28 Operation preparing to use the phone 4 Order of entries in directory 30 P Pack contents...

Page 36: ... 7 volume melody 21 Setting the date 7 Setting the time 7 Settings handset individual 18 Signal beep see Advisory tones Sound ringtone 21 Sound Manager 22 Specifications 28 29 Star key 1 21 T Talk key 1 10 Text writing editing 29 Troubleshooting 26 V Voice dialling 14 using 14 Voice pattern deleting 14 playing 14 recording 14 Volume earpiece 21 handset loudspeaker 21 loudspeaker 21 ringtone 21 set...

Reviews: