background image

7

Automatic calibration

The boiling temperature of water depends on the air pressure. 

During calibration, the appliance is adapted to the pressure 

conditions in the location where it is installed. This happens 

automatically when you first use the appliance (see section: 

First use). More steam develops than usual.
It is important that the appliance steams without interruption for 

20 minutes at 100 °C. Do not open the appliance door during 

this time.
If the appliance was not able to calibrate itself automatically (for 

example, because the appliance door was opened), the 

calibration process is carried out again during the next cooking 

operation.

After moving house


So that the appliance automatically adjusts itself to its new 

location, you must reset the appliance to the factory settings 

(see section: Basic settings) and repeat the initial start-up 

process (see section: First use).

After a power cut


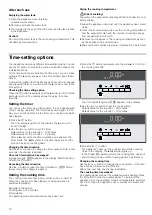
The appliance saves the calibration settings even in the event 

of a power cut or disconnection from the mains. Recalibration 

is not necessary.

Your accessories

The accessories supplied with your appliance are suitable for 

making many dishes. Ensure that you always insert the 

accessories into the cooking compartment the right way round.

Accessories

Use only the accessories supplied with the product or available 

from the after-sales service. They are specially designed for 

your appliance.
Your appliance is equipped with the following accessories:

You can buy accessories from the after-sales service, from 

specialist retailers or online.

Inserting accessories

The accessories are equipped with a locking function. The 

locking function prevents the accessories from tilting when they 

are pulled out. The accessories must be inserted into the 

cooking compartment correctly for the tilt protection to work 

properly.

Note: 

Your appliance will include different accessories, 

depending on the appliance equipment.
When inserting the cooking container, ensure that the lug (a) is 

facing downwards.

When inserting the wire rack, check

that the lug (a) is pointing downwards

that the safety lug on the wire rack is at the back and facing 

upwards.

Cooking compartment

The cooking compartment has four shelf positions. The shelf 

positions are counted from the bottom up.

Caution!

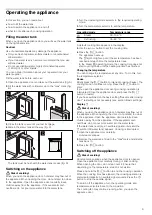
Do not place anything on the cooking compartment floor. Do 

not cover it with aluminium foil. A build-up of heat could 

damage the appliance.
The cooking compartment floor and the evaporator dish must 

always be kept clear. Always place ovenware in a perforated 

cooking container or on a wire rack.

Do not slide any accessories between the shelf positions, or 

they may tip.

Cooking container, solid, GN 

Z

40 mm deep


For catching dripping liquid when 

steaming and for cooking rice, 

pulses and cereals

Cooking container, perforated, 

GN 

Z

, 40 mm deep


for the steaming of whole fish or 

large quantities of vegetables, for 

juicing berries, etc.

D

D

D

D

1

3

2

4

(YDSRUDWRUGLVK

5DLOVIRU

DFFHVVRULHV

7DQNUHFHVV

ZLWKZDWHUWDQN

Summary of Contents for HB24D555W

Page 1: ...Register your product online siemens home bsh group com welcome en Instruction manual Steam oven HB24D555W ...

Page 2: ......

Page 3: ...roof lock 13 Basic settings 14 Care and cleaning 14 cleaning agents 15 Descaling 15 Removing and fitting the appliance door 16 Cleaning the door panels 16 Cleaning the rails 17 Troubleshooting 17 Replacing the cooking compartment bulb 19 Changing the door seal 19 After sales service 19 E number and FD number 19 Environmental protection 20 Environmentally friendly disposal 20 Tips for saving energy...

Page 4: ... compartment Never open the appliance door if there is smoke inside Switch off the appliance and unplug it from the mains or switch off the circuit breaker in the fuse box Risk of burns The appliance becomes very hot Never touch the interior surfaces of the cooking compartment or the heating elements Always allow the appliance to cool down Keep children at a safe distance Risk of serious burns Acc...

Page 5: ...e kept clear Always place ovenware in a perforated cooking container or on a wire rack Aluminium foil in the cooking compartment must not come into contact with the door panel This could cause permanent discolouration of the door panel Ovenware Ovenware must be heat and steam resistant Do not use ovenware that shows signs of rust Even the smallest spots of rust can lead to corrosion in the cooking...

Page 6: ...ht etc h Selects the weight of the food for a programme see section Automatic programmes Switches childproof lock on and off see section Childproof lock Start Stop button J Press briefly starts or interrupts Pause cooking operation Press and hold ends cooking operation Temperature selector Sets the temperature see section Switching on the appliance XQFWLRQ EXWWRQV LVSOD 2SHUDWLQJ PRGH VHOHFWRU 7HP...

Page 7: ...ance Your appliance is equipped with the following accessories You can buy accessories from the after sales service from specialist retailers or online Inserting accessories The accessories are equipped with a locking function The locking function prevents the accessories from tilting when they are pulled out The accessories must be inserted into the cooking compartment correctly for the tilt prot...

Page 8: ...A button to change the water hardness range Possible values 5 Press and hold the 0 button to exit basic settings The change is saved Before first use Before first use heat the empty appliance for 20 minutes at 100 C using Steam é Do not open the appliance door during this time The appliance is automatically calibrated see section Automatic calibration 1 Fill and insert the water tank see section F...

Page 9: ...e cooking time does not start counting down until the heating up time has finished Changing the temperature You can change the temperature at any time To do this turn the temperature selector Pause Briefly press the J button to interrupt cooking Pause The cooling fan can continue running Press the J button to start If you open the appliance door during cooking operation is interrupted Close the ap...

Page 10: ...in the display the N arrow is in front of the V 2 Use the or A button to set the timer Default value for the button 10 minutes Default value for the A button 5 minutes After a few seconds the timer duration set is applied The timer starts The NV symbol for the timer appears and the time can be seen counting down Changing the timer duration Use the or A button to change the timer duration After a f...

Page 11: ...e or A button to change the end time If the timer has been set first press the 0 button repeatedly until the arrow is in front of the End time Ny After a few seconds the change is adopted Do not change the end time if the cooking time has already started to count down The cooking result would no longer be correct The cooking time has elapsed An audible signal sounds The appliance stops heating Pre...

Page 12: ...ogrammes require the weight of the food The total weight must be within the specified weight range Cooking time After the programme is started the cooking time is displayed It may change during the first 10 minutes as the heating up time depends among other things on the temperature of the food and the water Prepare vegetables P1 P6 Do not season vegetables until after cooking Prepare cereal produ...

Page 13: ...beans perforated solid cooking container 3 1 Steam sliced carrots slices approx 3 mm thick perforated solid cooking container 3 1 Steam frozen mixed vegetables perforated solid cooking container 3 1 Unpeeled boiled potatoes medium sized 4 5 cm thick perforated solid cooking container 3 1 ˆ Basmati rice max 0 75 kg solid cooking container 2 Brown rice max 0 75 kg solid cooking container 2 Š Couscou...

Page 14: ...e wash it off immediately with water Caution Risk of surface damage If descaler comes into contact with the front of the appliance or any other sensitive surfaces wash it off immediately with water Remove food residues from the cooking compartment as soon as the appliance has cooled Salts are very corrosive and can cause rust Remove remains of acidic sauces ketchup mustard or salted food from the ...

Page 15: ...ess starts The light in the cooking compartment remains switched off Emptying the evaporator dish and refilling the water tank A signal sounds after approx 30 minutes The symbol Fill water tank and Nx min are displayed 1 Open the appliance door 2 Rinse the water tank thoroughly fill with water and reinsert The symbol empty evaporator dish appears 3 Remove the descaling solution from the evaporator...

Page 16: ...bed You can also descale the evaporator dish manually Removing and fitting the appliance door You can remove the appliance door to clean it more thoroughly Risk of injury The hinges of the appliance door may snap shut with great force Always open the hinge locking lever fully when removing the appliance door and close it fully after refitting Do not reach into the hinge Risk of injury If the appli...

Page 17: ...he rails with washing up liquid and a sponge brush or Clean the rails in the dishwasher Attaching the rail 1 Position the rail so that the indentations are facing upwards 2 Hook the rail in at the back and push it towards the rear until it engages fig C 3 Hook the front of the rail onto the holder and press down until it engages and is fixed level in place in the appliance once more fig D Each set...

Page 18: ...ugh the water tank is full The water tank has not been inserted properly Slide in the water tank until it locks into place The feed line is blocked Descale the appliance Check whether the water hardness range is set correctly The indicator appears The appliance has not been used for at least 2 days and the water tank is full Empty and clean the water tank Always empty the water tank after cooking ...

Page 19: ... Pull off the old seal 3 Push in the new door seal at one point and pull it in all the way round The joint must be at the side 4 Check again that the seal is correctly fitted in the corners After sales service Our after sales service is there for you if your appliance needs to be repaired We will always find the right solution in order to avoid unnecessary visits from a service technician E number...

Page 20: ... smaller pieces and increased for larger ones Cooking time is also influenced by the quality and ripeness of the food The values quoted can therefore only serve as a guideline Distributing food evenly Always distribute the food evenly in the ovenware It will not cook evenly if the layers are of different depths Pressure sensitive food When layering delicate foods in the cooking container do not pi...

Page 21: ...12 Food Size Accessories Operating mode Temperature in C Cooking time in min Preheat the appliance Food Ratio Accessories Level Operating mode Temperature in C Cooking time in min Unpeeled boiled pota toes medium size perforated solid 3 1 Steam 100 35 45 Boiled potatoes quartered perforated solid 3 1 Steam 100 20 25 Brown rice 1 1 5 solid Steam 100 30 40 Long grain rice 1 1 5 solid Steam 100 20 30...

Page 22: ...80 90 15 20 Food Amount Accessories Level Operating mode Temperature in C Cooking time in min Sea bream whole per 0 3 kg perforated solid 3 1 Steam 80 90 15 25 Sea bream fillet per 0 15 kg perforated solid 3 1 Steam 80 90 10 20 Fish terrine Bain marie 1 5 l solid 2 Steam 70 80 40 80 Trout whole per 0 2 kg perforated solid 3 1 Steam 80 90 12 15 Cod fillet per 0 15 kg perforated solid 3 1 Steam 80 9...

Page 23: ...ure Health risk When defrosting food from animal sources you must remove the liquid that escapes during defrosting It must never come into contact with other food Bacteria could be transferred After defrosting operate the steam oven for 15 minutes at 100 C using the Steam type of heating Defrost meat Allow pieces of meat which are to be breadcrumbed to defrost to the point where seasoning and brea...

Page 24: ...mpletely cooled down Frozen products Observe the instructions on the packaging The cooking times indicated apply to dishes placed in a cold cooking compartment Dish Amount Accessories Temperature in C Cooking time in min Yeast dough 1 kg Bowl perforated container 35 20 30 Sourdough 1 kg Bowl perforated container 35 20 30 Food Accessories Level Operating mode Temperature in C Cooking time in min Ra...

Page 25: ...ty Standards complies with GB 4706 1 2005 Household and similar electrical appliances Safety Part 1 General requirements GB 4706 22 2008 Household and similar electrical appliances Safety Part 2 25 Particular requirements for microwave ovens including combination microwave ovens Food Accessories Level Type of heating Temperature in C Cooking time in min Broccoli Steam distribution Perforated solid...

Page 26: ......

Page 27: ......

Page 28: ...BSH Hausgeräte GmbH Carl Wery Straße 34 81739 München GERMANY 9001300243 9001300243 971207 siemens home bsh group com 0DQXIDFWXUHG E 6 DXVJHUlWH PE XQGHU 7UDGHPDUN LFHQVH RI 6LHPHQV ...

Reviews: