background image

en 

Familiarising yourself with your appliance

6

4  Familiarising yourself with your appliance

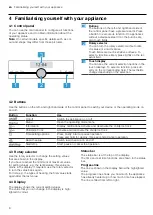
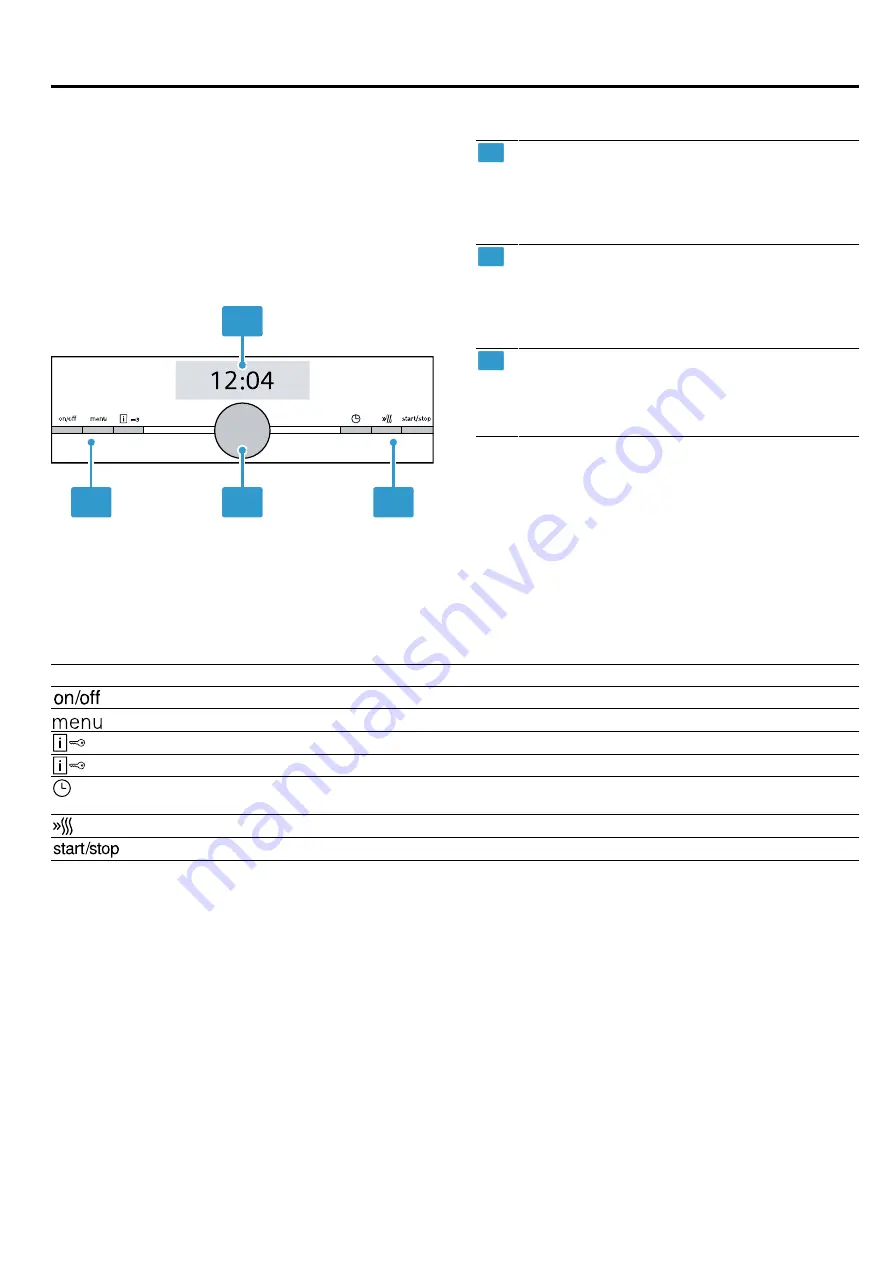
4.1 Control panel

You can use the control panel to configure all functions
of your appliance and to obtain information about the
operating status.

Note: 

On certain models, specific details such as col-

our and shape may differ from those pictured.

1

2

3

1

1

Buttons

The buttons on the left- and right-hand side of
the control panel have a pressure point. Press
a button to execute its function. On appliances
without a stainless steel front, the buttons are
also touch fields.

2

Rotary selector

You can turn the rotary selector without limits
clockwise or anti-clockwise.
Touch fields are touch-sensitive surfaces. To
select a function, simply press lightly on the rel-
evant field.

3

Touch display

You can see the current selection options in the
touch displays. To select a function, press dir-
ectly on the corresponding field. The text fields
change depending on the selection.

4.2 Buttons

Use the buttons on the left- and right-hand side of the control panel to switch your device or the operating mode on
and off.

Button

Function

Use

On/off

Switch the appliance on or off.

Menu

Open the operating mode menu

Information

Display notifications Activate and deactivate the childproof lock

Childproof lock

Activate and deactivate the childproof lock

Time-setting options

Press briefly: Start or pause operation.
Press and hold for approx. three seconds: Cancel operation.

Rapid heat-up

Switch rapid heat-up on and off

Start/stop

Start, pause or cancel the operation

4.3 Rotary selector

Use the rotary selector to change the setting values
that are shown in the display.
If you have reached the minimum or maximum value
for setting values, e.g. the temperature, this value re-
mains in the display. If required, use the rotary selector
to turn the value back again.
For lists, e.g. the types of heating, the first value starts
again after the last value.

4.4 Display

The display shows the current setting values.
The value that you can change in the display is high-
lighted in colour.

Status bar

The status bar is at the top of the display.
The time and set time functions are shown in the status
bar.

Progress line

The line is shown in the display below the highlighted
value.
The progress line shows you how much the appliance
has already heated up or how much time has elapsed.
The line is filled from left to right.

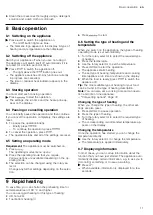
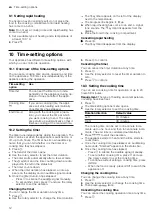
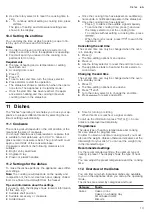
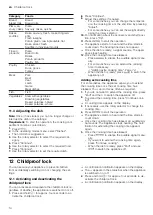
Summary of Contents for HB676G0.6M

Page 1: ...6G0 6M en User manual and installation instructions Register your product on My Siemens and discover exclusive ser vices and offers siemens home bsh group com welcome The future moving in Siemens Home Appliances ...

Page 2: ...a licensed professional may connect ap pliances without plugs Damage caused by in correct connection is not covered under the warranty Only use this appliance To prepare meals and drinks In private households and in enclosed spaces in a domestic environment Up to an altitude of max 4000 m above sea level 1 3 Restriction on user group This appliance may be used by children aged 8 or over and by peo...

Page 3: ...RNING Risk of injury Scratched glass in the appliance door may develop into a crack Do not use any harsh or abrasive cleaners or sharp metal scrapers to clean the glass on the oven door as they may scratch the surface The hinges on the appliance door move when the door is opened and closed which could trap your fingers Keep your hands away from the hinges Components inside the appliance door may h...

Page 4: ...s membranes Keep the kitchen well ventilated while the cleaning function is running Do not remain in the room for long periods Keep children and pets away WARNING Risk of burns The cooking compartment gets very hot when the cleaning function is in progress Never open the appliance door Allow the appliance to cool down Keep children at a safe distance The outside of the appliance gets very hot when...

Page 5: ... 1 Disposing of packaging The packaging materials are environmentally compat ible and can be recycled Sort the individual components by type and dispose of them separately 3 2 Saving energy If you follow these instructions your appliance will use less power Only preheat the appliance if the recipe or the recom mended settings tell you to do so Not preheating the appliance can reduce the en ergy us...

Page 6: ...n and off Button Function Use On off Switch the appliance on or off Menu Open the operating mode menu Information Display notifications Activate and deactivate the childproof lock Childproof lock Activate and deactivate the childproof lock Time setting options Press briefly Start or pause operation Press and hold for approx three seconds Cancel operation Rapid heat up Switch rapid heat up on and o...

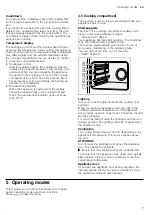
Page 7: ... compartment make your appliance easier to use Shelf supports The rails in the cooking compartment enable you to place accessories at different heights Accessories Page 9 Your appliance has five shelf positions The shelf posi tions are numbered from bottom to top The rails are equipped with pull out rails on one or more levels depending on the appliance type You can remove the rails e g for cleani...

Page 8: ...without preheating The fan distributes the heat from the ring shaped heating element in the back wall evenly around the cooking compartment The food is cooked in phases using residual heat This type of heating is most effective between 125 and 275 C Always keep the appliance door closed when cooking This type of heating is used to determine the energy consump tion in air recirculation mode and the...

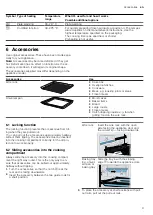
Page 9: ...Large roasts Frozen meals Catch dripping liquids e g fat when grilling food on the wire rack 6 1 Locking function The locking function prevents the accessories from tilt ing when they are pulled out You can pull out the accessories approximately halfway without them tipping The accessories must be inserted into the cooking compartment correctly for the tilt pro tection to work properly 6 2 Sliding...

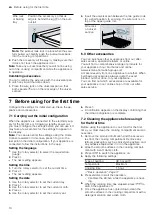
Page 10: ...ly for the first time or following a lengthy power cut you must configure the settings before you can use it It may take a few seconds for the settings to appear on the display Note You can also enter the settings using the Home Connect assistant In this case press to go to the last point in the initial configuration If your appliance is connected follow the instructions in the app Setting the lan...

Page 11: ...g on the selec tion 4 Press to start 8 6 Setting the type of heating and the temperature When you switch on the appliance the types of heating operating mode is set automatically 1 Turn the rotary selector to select the required type of heating 2 Press the temperature 3 Use the rotary selector to set the temperature 4 Press to start the operation a The appliance starts heating a The set type of he...

Page 12: ... the timer duration a The timer starts automatically after a few seconds a The symbol and the time counting down are dis played on the left in the status bar a The timer counts down a When the timer duration has elapsed a note ap pears on the display and an audible signal sounds 3 Once the timer duration has elapsed Press to silence the audible signal manually To set another timer press and use th...

Page 13: ...or to change the end time 4 Press to resume operation 11 Dishes The Dishes operating mode helps you to use your ap pliance to prepare different meals by selecting the op timum settings automatically 11 1 Cookware The cooking result depends on the composition of the meat and the size of cookware You should therefore use heat resistant cookware that is suitable for temperatures up to 300 C Glass or ...

Page 14: ...elapsed Press to silence the audible signal manu ally For some dishes you can extend the cooking time if necessary Adding extra cooking time Page 14 When the dish is ready press to switch the appliance off Adding extra cooking time For some dishes the appliance allows you to extend the cooking time once the set cooking time has elapsed You can do this as often as required 1 If you do not want to e...

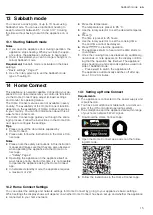
Page 15: ... basic settings and monitor its operating status The Home Connect services are not available in every country The availability of the Home Connect function depends on the availability of Home Connect services in your country You can find information about this at www home connect com The Home Connect app guides you through the entire login process Follow the instructions in the Home Con nect app t...

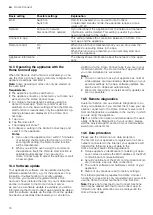
Page 16: ...pdate function e g for the purposes of op timisation troubleshooting or security updates To do this you must be a registered Home Con nect user have installed the app on your mobile device and be connected to the Home Connect server As soon as a software update is available you will be informed via the Home Connect app and will be able to start the software update via the app Once the update has b...

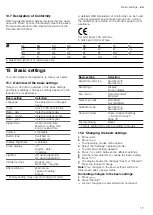
Page 17: ... cooking time1 Long cooking time Volume Five levels Button tone Switched on Switched off1 Display brightness 5 settings Clock display off Digital date1 Analogue Lighting Off during operation On during operation1 Childproof lock Keylock only 1 Door lock keylock After switch on Main menu Types of heating1 Dishes 1 Factory setting may vary according to model Basic setting Selection Night time dimming...

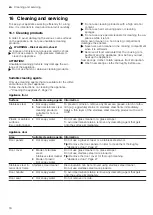
Page 18: ... instructions on cleaning the appliance Cleaning the appliance Page 19 Appliance front Surface Suitable cleaning agents Information Stainless steel Hot soapy water Special stainless steel cleaning products suitable for hot sur faces To prevent corrosion remove any limescale grease starch or albu min e g egg white stains on stainless steel fronts immediately Apply a thin layer of the stainless stee...

Page 19: ...reas and use a brush or steel wool Enamelled accessories are dishwasher safe 16 2 Cleaning the appliance In order to avoid damaging the appliance you must clean your appliance only as specified and with suit able cleaning products WARNING Risk of burns The appliance and its parts that can be touched be come hot during use Caution should be exercised here in order to avoid touching heating elements...

Page 20: ...unning Do not remain in the room for long periods Keep children and pets away WARNING Risk of burns The cooking compartment gets very hot when the cleaning function is in progress Never open the appliance door Allow the appliance to cool down Keep children at a safe distance The outside of the appliance gets very hot when the cleaning function is in progress Never touch the appliance door Allow th...

Page 21: ...e status bar 10 Use to switch the appliance off and leave the cooking compartment to cool for approx 20 minutes 18 2 Wiping down the cooking compartment ATTENTION The prolonged presence of moisture in the cooking compartment leads to corrosion After using the cleaning assistance wipe the cook ing compartment and allow it to dry completely Requirement The cooking compartment must have cooled down 1...

Page 22: ...s away from the hinges When the hinges are not secured they can snap shut with great force Make sure that the locking levers are always either fully closed or when detaching the oven door fully open 1 Note Ensure that the appliance door slides onto the hinges without any resistance If you feel any resist ance check whether you are sliding it in at the cor rect opening Slide the appliance door stra...

Page 23: ...d glass in the appliance door may develop into a crack Do not use any harsh or abrasive cleaners or sharp metal scrapers to clean the glass on the oven door as they may scratch the surface Clean the removed door panes on both sides with glass cleaner and a soft cloth 11 Clean the appliance door Suitable cleaning agents Page 18 12 Dry the door panes and refit them 19 4 Fitting the door panes WARNIN...

Page 24: ...it 2 Pull the whole rail to the front and remove it 3 Clean the rail Cleaning products Page 18 20 2 Attaching the rails Notes The rails only fit on the right or left For both pull out rails ensure that you can pull them forwards and out 1 First push the rail into the middle of the rear socket until the rail rests against the cooking compartment wall and then push this back 2 Push the rail into the...

Page 25: ...pears in the display The cooking compartment is too hot for the selected dish or type of heating Allow the cooking compartment to cool down and start again The time is not dis played when the ap pliance is switched off Basic setting has been changed Change the basic setting for the time display Basic settings Page 17 Appliance door can not be opened The cleaning function locks the appliance door l...

Page 26: ...nce with European Directive 2012 19 EU concerning used elec trical and electronic appliances waste electrical and electronic equip ment WEEE The guideline determines the frame work for the return and recycling of used appliances as applicable throughout the EU 23 Customer Service If you have any queries on use are unable to rectify faults on the appliance yourself or if your appliance needs to be ...

Page 27: ... on two or more levels Shelf position 2 levels Universal pan Baking tray 3 1 2 levels Baking tins on two wire racks 3 1 Baking on two or more levels Shelf position 3 levels Baking tray Universal pan Baking tray 5 3 1 4 levels 4 wire racks with greaseproof pa per 5 3 2 1 Use the 4D hot air heating function Note Items that are placed in the appliance on baking trays or in baking tins dishes at the s...

Page 28: ... frozen products may be unevenly pre baked Uneven browning may remain even after baking 24 5 Cooking ready meals Take ready meals out of the packaging If you are warming or cooking the ready meal in cookware make sure that the cookware is heat res istant 24 6 List of foods Recommended settings for a variety of foods sorted into food categories Recommended settings for various types of food Food Ac...

Page 29: ...ck 2 160 180 120 150 Joint of pork without rind e g neck 1 5 kg Uncovered cookware 2 180 190 110 130 Joint of pork without rind e g neck 1 5 kg Uncovered cookware 2 190 200 120 140 Fillet of beef medium 1 kg Wire rack 2 210 220 40 50 Pot roasted beef 1 5 kg Covered cookware 2 200 220 130 160 Pot roasted beef 1 5 kg Covered cookware 2 200 220 140 160 Sirloin medium 1 5 kg Wire rack 2 220 230 60 70 ...

Page 30: ...Searing time in mins Heating function Page 7 Temperature in C Cooking time in mins Duck breast medium rare 300 g each Uncovered cook ware 2 6 8 90 1 45 60 Fillet of pork whole Uncovered cook ware 2 4 6 80 1 45 70 Fillet of beef 1 kg Uncovered cook ware 2 4 6 80 1 90 120 Veal medallions 4 cm thick Uncovered cook ware 2 4 80 1 30 50 Saddle of lamb bone less 200 g each Uncovered cook ware 2 4 80 1 30...

Page 31: ...ing tray Shelf position 5 Universal pan Shelf position 3 Baking tray Shelf position 1 Hot water sponge cake When baking on two levels place the springform tins at diagonally opposite corners of the wire racks Recommended settings for baking Food Accessory cookware Shelf pos ition Heating function Page 7 Temperature in C Cooking time in mins Viennese whirls Baking tray 3 140 150 1 25 40 Viennese wh...

Page 32: ...its must be heat resistant up to 95 C and adjacent unit fronts up to 70 C Do not install the appliance behind a decor ative door or the door of a kitchen unit There is a risk of overheating Cut out work on the units should be carried out before installing the appliance Remove any shavings Otherwise the correct opera tion of electrical components may be ad versely affected The mains socket for the ...

Page 33: ...ventilation cut out The worktop must be secured to the built in unit Observe any available installation instructions for the hob 25 4 Installation underneath a hob If the appliance is installed under a hob the following minimum dimensions must be adhered to including substructure if applicable The minimum worktop thickness a is based on the required minimum clearance Hob type a raised in mm a flus...

Page 34: ...a clicking sound A 3 m power cable can be obtained from the after sales service The power cable must only be replaced with a cable from the original manufacturer This is available from after sales service Contact protection must be ensured during the in stallation Electrically connect the appliance with the protective contact plug Note The appliance must only be connected to a pro tective contact ...

Page 35: ... the appliance must not be closed by additional battens Thermal insulation strips must not be fitted to the side panels of the surround unit 25 9 Removing the appliance 1 Disconnect the appliance from the power supply 2 Undo the fastening screws 3 Lift the appliance slightly and pull it out completely ...

Page 36: ...9001618933 9001618933 010617 en BSH Hausgeräte GmbH Carl Wery Straße 34 81739 München GERMANY www siemens home bsh group com Manufactured by BSH Hausgeräte GmbH under the trademark licence of Siemens AG ...

Reviews: