background image

13

Energy and environment tips

Here you can find tips on how to save energy when baking and 

roasting and how to dispose of your appliance properly.

Saving energy

Preheat the oven only if this is required by a recipe or is 

indicated in the tables.

Use dark, lacquered or black enamel baking tins. These are 

more efficient at absorbing heat.

Keep the oven door closed during cooking, baking and 

roasting cycles.

When baking several cakes, these should be preferably 

baked one after the other. The oven will still be hot, thereby 

reducing the cooking time for the second cake. Two 

rectangular baking tins can be placed side-by-side.

For long cooking times, the oven may be turned off 

10 minutes prior to the specified time, allowing the item to 

continue to cook but taking advantage of the oven's residual 

heat.

Environmentally-friendly disposal

Dispose of packaging in an environmentally-friendly manner.

Tested for you in our cooking studio

Here you will find a selection of dishes and the ideal settings for 

them. We will show you which type of heating and which 

temperature are best suited for your dish. You can find 

information about suitable accessories and the height at which 

they should be inserted. There are also tips about cookware 

and preparation methods.

Notes

The values in the table always apply to dishes placed into the 

cooking compartment when it is cold and empty.
Only preheat the appliance if the table specifies that you 

should do so. Do not line the accessories with greaseproof 

paper until after they have been preheated.

The times specified in the tables are guidelines only. They will 

depend on the quality and composition of the food.

Use the accessories supplied. Additional accessories may be 

obtained as special accessories from specialist retailers or 

from the after-sales service.
Before using the oven, remove any unnecessary accessories 

and ovenware from the cooking compartment.

Always use oven gloves when taking hot accessories or 

ovenware out of the cooking compartment.

Cakes and pastries

Baking on one level

The best method for baking a cake is to place it on one level 

with top and bottom heating 

%

.

When baking using the 3D 

:

 Hot air function, the following 

levels are recommended for the accessories:

Cakes in tins: level 2

Cakes on the tray: level 3

Baking at different levels

Using the 3D 

:

 Hot air mode.

Baking on two levels:

Universal tray: level 3.

Oven tray: level 1.

Baking on three levels:

Universal tray: level 5.

Oven tray: level 3.

Oven tray: level 1.

Trays put in the oven at the same time are not necessarily 

ready at the same time.
In these tables you will find numerous tips for your dishes.
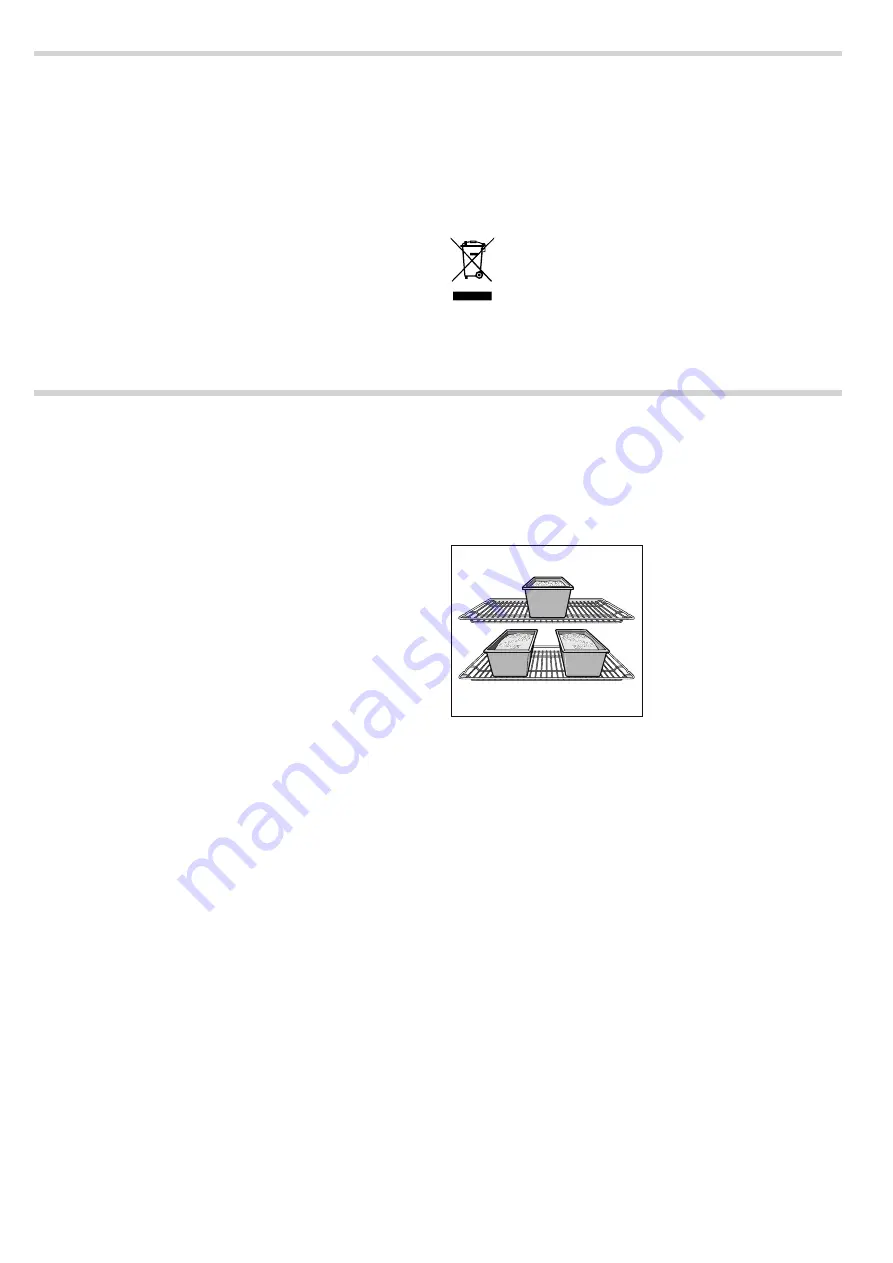
If 3 rectangular cake tins are used at the same time, place on 

the wire shelf as shown in the diagram.

Baking tins

It is best to use dark-coloured metal baking tins.
Baking times are increased when light-coloured baking tins 

made of thin metal or glass dishes are used, and cakes do not 

brown so evenly.
If you wish to use silicone baking tins, use the information and 

recipes provided by the manufacturer as a guide. Silicone 

baking tins are often smaller than normal tins. The amount of 

mixture and recipe instructions may differ.

Tables

The table shows the optimum heating methods for each type of 

cake or dessert. The temperature and cooking time will depend 

on the amount and the consistency of the dough. For this 

reason the cooking tables always provide approximate cooking 

times. Always begin by trying the lowest value. The items will be 

more evenly browned at a lower temperature. If necessary, this 

can be increased next time.
If the oven is preheated, cooking times are reduced by 5 to 10 

minutes.

Additional information is provided in the Tips for baking section 

as an appendix to the tables.

To bake a cake only on one level, place the mould on the 

enamel tray.
When baking several cakes at the same time, the moulds can 

be placed together on the wire shelf.

This appliance is labelled in accordance with 

European Directive 2012/19/EU concerning used 

electrical and electronic appliances (waste electrical 

and electronic equipment - WEEE). The guideline 

determines the framework for the return and recycling 

of used appliances as applicable throughout the EU.

Summary of Contents for HE23BC 0 Series

Page 1: ... HQ QVWUXFWLRQ PDQXDO XLOW LQ RYHQ ...

Page 2: ...21 Acrylamide in food 21 Test dishes 22 Baking 22 Grilling 22 Produktinfo Additional information on products accessories replacement parts and services can be found at www siemens home com and in the online shop www siemens eshop com Important safety information Read these instructions carefully Only then will you be able to operate your appliance safely and correctly Retain the instruction manual...

Page 3: ...iance door with care Keep children at a safe distance Risk of scalding Water in a hot cooking compartment may create hot steam Never pour water into the hot cooking compartment Risk of injury Scratched glass in the appliance door may develop into a crack Do not use a glass scraper sharp or abrasive cleaning aids or detergents Risk of electric shock Incorrect repairs are dangerous Repairs may only ...

Page 4: ... cannot support the weight of the appliance and could break Your new cooker Here you will learn about your new cooker The control panel and the individual operating controls are explained You will find information on the cooking compartment and the accessories Control panel Here you will see an overview of the control panel All of the symbols never appear in the display at the same time Depending ...

Page 5: ...Off position The oven switches off 3D hot air For cakes and pastries on one to three levels The fan distributes the heat from the heating ring in the back panel evenly around the cooking compartment Top bottom heating For cakes bakes and lean joints of meat e g beef or game on one level Heat is emitted evenly from the top and bottom 4 Hot air grilling For roasting meat poultry and whole fish The g...

Page 6: ...pans baking tins roasts grilled items and frozen meals Flat enamel oven tray For cakes pastries and biscuits Place the tray in the oven with its raised lip facing the door Universal deep enamel tray For runny cakes pastries frozen meals and large joints for roasting This can also be used as a tray to collect the fat when roasting directly on the shelf Place the tray in the oven with its raised lip...

Page 7: ... and extensive information on care and cleaning Setting the oven There are various ways in which you can set your oven Here we will explain how you can select the desired type of heating and temperature or grill setting You can select the oven cooking time and end time for your dish Please refer to the section on Setting the time setting options Type of heating and temperature Example in the pictu...

Page 8: ...to the relevant symbol The display shows the value for a few seconds Cooking time The cooking time for your dish can be set on the oven When the cooking time has elapsed the oven switches itself off automatically This means that you do not have to interrupt other work to switch off the oven The cooking time cannot be accidentally exceeded Example in the picture cooking time 45 minutes 1 Use the fu...

Page 9: ... adopted The oven starts If the timer has been set first press the 0 button twice Checking the time settings If several time setting options are set the relevant symbols are illuminated on the display The time setting options symbol is in the foreground and preceded by the N arrow To call up the V timer x cooking time y end time or 0 clock press the 0 button repeatedly until the N arrow is next to...

Page 10: ...ly before use Light The oven light can be turned on manually to facilitate cleaning Turning on the oven light Turn the function control knob to the setting The light will come on The temperature control knob must be turned off Turning the oven light off Turn the function control knob to the Ûposition Basic setting Selection 1 Selection 2 Selection 3 c1 Clock display always only with the 0 but ton ...

Page 11: ... removed from the oven carriage In doors with three glass panels the following step will also be necessary 4 Unscrew the clips from the right and left and remove them figure C Remove the top glass panel Clean the glass panels using a glass cleaning product and a soft cloth Risk of injury Scratched glass in the appliance door may develop into a crack Do not use a glass scraper sharp or abrasive cle...

Page 12: ...s service is there for you if your appliance needs to be repaired We will always find the right solution in order to avoid unnecessary visits from a service technician E number and FD number When calling us please give the product number E no and the production number FD no so that we can provide you with the correct advice The rating plate containing these numbers can be found on the right hand s...

Page 13: ...mpartment Cakes and pastries Baking on one level The best method for baking a cake is to place it on one level with top and bottom heating When baking using the 3D Hot air function the following levels are recommended for the accessories Cakes in tins level 2 Cakes on the tray level 3 Baking at different levels Using the 3D Hot air mode Baking on two levels Universal tray level 3 Oven tray level 1...

Page 14: ...niversal tray 2 170 190 25 35 Universal tray oven tray 3 1 140 160 40 50 Dry layer yeast dough Universal tray 3 170 180 25 35 Universal tray oven tray 3 1 150 170 35 45 Fruit or liquid layer yeast dough Universal tray 3 160 180 40 50 Universal tray oven tray 3 1 150 160 50 60 Lattice topped shortcrust tart with dry layer Universal tray 1 180 200 20 30 Lattice topped shortcrust tart with fruit or l...

Page 15: ...dy when the skewer comes out clean with no traces of cake mix The cake is too flat Next time try using less liquid or reduce the oven temperature by 10 degrees Ensure you mix the dough according to the times given in the recipe The cake has a peaked centre but the edges are lower Do not grease the cake tin Once the cake is ready use a knife to carefully remove it from the cake tin If the cake is t...

Page 16: ...use pieces of the same thickness This will help them brown evenly and remain juicy Salt the fillets after grilling Turn the pieces after Z the time has elapsed The grill resistance switches on and off automatically This is normal The frequency depends on the chosen power level Meat Turn pieces of meat halfway through the cooking time When the roast is ready turn off the oven and allow it to rest f...

Page 17: ...3 10 Lamb Shoulder of lamb with bone 1 5 kg uncovered 2 4 190 210 60 Leg of lamb no bone medium rare 1 5 kg uncovered 1 4 160 180 120 Game Sirloin steak with bone 1 5 kg uncovered 2 200 220 50 Leg of dear without bone 1 5 kg covered 2 210 230 100 Roast boar 1 5 kg covered 2 180 200 140 Roast dear 1 5 kg covered 2 180 200 130 Rabbit 2 0 kg covered 2 220 240 60 Mince meat Mince meat casserole 500 g ...

Page 18: ... covered 2 210 230 25 30 The table does not contain information for the weight of the joint Select the next lowest weight from the instructions and extend the time How to tell when the roast is ready Use a meat thermometer available from specialist shops or carry out a spoon test Press down on the roast with a spoon If it feels firm it is ready If the spoon can be pressed in it needs to be cooked ...

Page 19: ...e shelf 3 1 180 200 25 35 Thick base pizza Universal tray 2 180 200 20 30 Universal tray wire shelf 3 1 170 190 30 40 Pizza baguette Universal tray 3 190 200 20 25 Mini pizza Universal tray 3 190 210 10 20 Pizza frozen Pizza preheat Universal tray 1 190 210 10 20 Potato based products deep frozen Chips Universal tray 3 190 210 20 30 Universal tray oven tray 3 1 190 200 35 45 Croquettes Universal t...

Page 20: ...rst Drain well and dry thoroughly Place the universal tray on level 3 and the shelf on level 1 Cover the universal tray and shelf with special baking parchment or greaseproof paper Note If the fruit or vegetables contain a lot of juice or water they will have to be turned over several times Once dried remove them from the paper immediately Food Cookware Level Type of heating Temperature Time Yoghu...

Page 21: ...begin to form in the jars adjust the temperature to approximately 120 140 C About 35 70 minutes depending on the type of vegetables After this time turn off the oven to use the residual heat Remove the jars from the oven Remove the jars from inside the oven when cooking is finished Caution Do not place hot jars on a cold or wet surface They could explode Acrylamide in food Acrylamide is produced p...

Page 22: ...Food Accessories and tins Level Type of heating Temperature in C Time in min utes Butter cookies preheating Universal tray 3 150 160 20 30 Universal tray 3 140 150 20 30 Universal tray oven tray 3 1 140 150 25 35 2 oven trays universal tray 5 3 1 140 150 25 35 Small cakes pre heating Universal tray 3 150 170 20 30 Universal tray oven tray 3 1 140 160 25 35 Universal tray 3 150 160 25 30 2 oven tra...

Page 23: ......

Page 24: ...BSH Hausgeräte GmbH Carl Wery Straße 34 81739 München GERMANY 9001195319 9001195319 00 960308 BOVGBDUVSFE CZ 4 BVTHFS UF NC VOEFS 5SBEFNBSL JDFOTF PG 4JFNFOT ...

Reviews: