background image

en

    Operating the appliance

16

1

Operating the appliance

Operating the appliance

You have already learnt about the controls and how 

they work. Now we will explain how to apply settings on 

your appliance.

Switching the appliance on and off

Use the function selector to switch the appliance on or 

off. Turning the function selector to any position other 

than the "Off" position switches on the appliance. To 

switch off the appliance, always turn the function 

selector to the "Off" position.

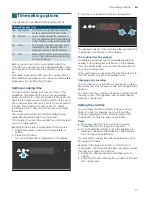
Setting the type of heating and temperature

It is very easy to apply the settings you require to your 

appliance using the function and temperature selector. 

To find out which heating function is best for which type 

of food, refer to the beginning of the instruction manual. 

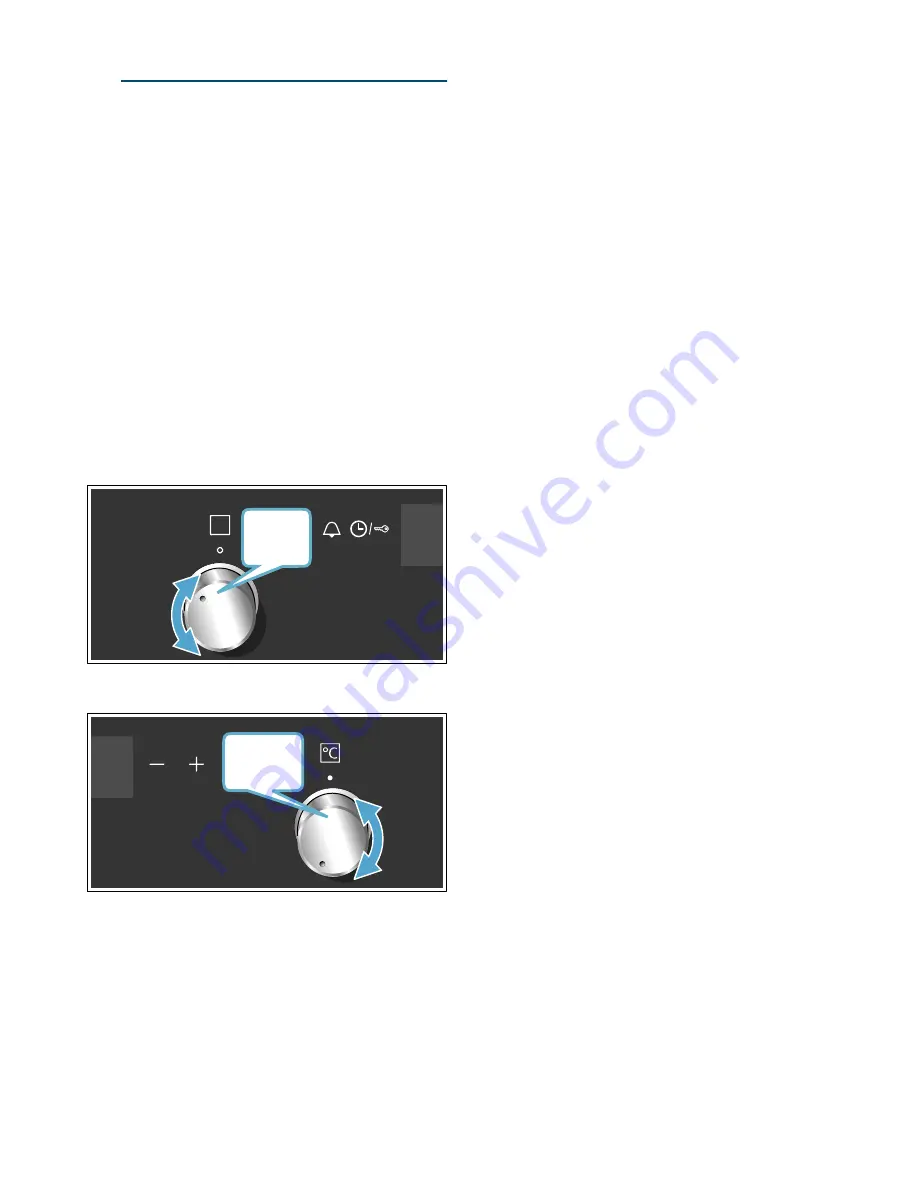
Example in the picture: Top/bottom heating 

%

 at 

190 °C.

1.

Use the function selector to set the heating function.

2.

Use the temperature selector to set the temperature 

or grill setting.

The appliance starts to heat up after a few seconds.

Once the food is cooked, turn the function selector to 

the "Off" position to switch the appliance off.

Note: 

On the appliance, you can set a cooking time and 

an end time for the operation. 

~

 "Time-setting options" 

on page 17

Changing

The heating function and temperature can be changed 

at any time using the relevant selector.

Rapid heating

With Rapid heating, you can shorten the heat-up time.

Then, for best results, use:

:

 3D hot air

Only use Rapid heating when a temperature of over 

100 °C has been selected.
To achieve an even cooking result, do not place your 

food into the cooking compartment until Rapid heating 

is complete.

1.

Set the function selector to 

I

.

2.

Use the temperature selector to set the temperature.

The oven will start heating after a few seconds.

Once Rapid heating is complete, an audible signal will 

sound. Place your food in the cooking compartment.

ƒ&

Summary of Contents for HK9R30020

Page 1: ...5HJLVWHU RXU SURGXFW RQOLQH VLHPHQV KRPH EVK JURXS FRP ZHOFRPH en Instruction manual Free standing cooker HK9R30020 ...

Page 2: ......

Page 3: ...d off 16 Setting the type of heating and temperature 16 Rapid heating 16 O Time setting options 17 Setting a cooking time 17 Setting the end time 17 Setting the timer 18 Setting the time 18 A Childproof lock 19 Activating and deactivating 19 D Cleaning 19 Cleaning agents 19 Keeping the appliance clean 21 p Rails 21 Detaching and refitting the rails 21 q Appliance door 22 Detaching and attaching th...

Page 4: ...cooking compartment the right way round Accessories on page 13 Important safety information Importantsafetyinformation Warning Risk of fire Combustible items stored in the cooking compartment may catch fire Never store combustible items in the cooking compartment Never open the appliance door if there is smoke inside Switch off the appliance and unplug it from the mains or switch off the circuit b...

Page 5: ...se Risk of injury The hinges on the appliance door move when opening and closing the door and you may be trapped Keep your hands away from the hinges Risk of injury If you leave the appliance door open people may bump into it resulting in injury The appliance door must be kept closed both while the appliance is in operation and when it has finished Warning Risk of tipping Warning In order to preve...

Page 6: ...ft open a crack the front of nearby furniture may become damaged over time Only leave the cooking compartment to dry with the door open if a lot of moisture was produced whilst the oven was operating Fruit juice when baking particularly juicy fruit pies do not pack the baking tray too generously Fruit juice dripping from the baking tray leaves stains that cannot be removed If possible use the deep...

Page 7: ...king compartment Use baking tins that are dark coloured painted black or have an enamel coating These absorb the heat particularly well Remove any unnecessary accessories from the cooking compartment Open the appliance door as infrequently as possible when the appliance is in use It is best to bake several cakes one after the other The cooking compartment stays warm This reduces the baking time fo...

Page 8: ... of death There is a risk of electric shock if you touch live components Always make sure your hands are dry when you touch or hold the mains plug Only pull out the mains cable by taking hold of the plug and removing the plug never pull it out by the mains cable itself as this could damage it Never unplug the mains plug when the appliance is in operation Please note the following information and e...

Page 9: ... Secure all mobile parts in and on the appliance using an adhesive tape that can be removed without leaving any traces Push all accessories e g baking tray into the corresponding slots with cardboard at the edges in order to avoid damaging the appliance Place cardboard or similar between the front and rear side to prevent knocks against the inside of the glass door Secure the door and if available...

Page 10: ... design depends on the respective appliance model Residual heat indicator The hob has a residual heat indicator for each hotplate It shows which hotplates are still hot Even if the hob is switched off the display remains lit until the hotplate has cooled down sufficiently You can save energy by using the residual heat to keep a small dish warm for example Explanations 1 Hob 2 Control panel 3 Cooli...

Page 11: ... roasting on one or more levels The fan distributes the heat from the ring heating element in the back panel evenly around the cooking compartment 7 Hot air gentle An intelligent heating type for the gentle preparation of meat fish and pastries The appliance optimally controls the supply of energy to the cooking compartment The food is prepared in phases using residual heat This means that it rema...

Page 12: ...you open the appliance door when the appliance is in operation the appliance will continue to operate as before Interior lighting With most heating functions and other functions the interior lighting in the cooking compartment will remain lit while the oven is in operation When the function selector is turned to bring operation to an end the lighting will go out By turning the function selector to...

Page 13: ...essories into the cooking compartment the right way round Always insert the accessories fully into the cooking compartment so that they do not touch the appliance door Take any accessories that you will not be using out of the cooking compartment Optional accessories You can buy optional accessories from our after sales service from specialist retailers or online You will find a comprehensive rang...

Page 14: ...on Operating the appliance on page 16 Switch off the appliance after the time indicated Once the cooking compartment has cooled down clean the smooth surfaces with soapy water and a dish cloth Cleaning the accessories Clean the accessories thoroughly using soapy water and a dish cloth or soft brush Baking tray non stick For tray bakes and small baked items Allows baked items to be removed more eas...

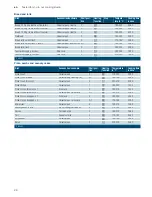
Page 15: ...inutes Melting Chocolate cooking chocolate gelatine Butter 1 1 2 Heating and keeping warm Stew e g lentil stew Milk 1 2 1 2 Poaching simmering Dumplings Fish White sauces e g béchamel sauce 4 3 1 20 30 mins 10 15 mins 3 6 mins Boiling steaming stewing Rice with double the quantity of water Unpeeled boiled potatoes Boiled potatoes Pasta noodles Stew soups Vegetables Vegetables frozen Cooking in a p...

Page 16: ...tion selector to set the heating function 2 Use the temperature selector to set the temperature or grill setting The appliance starts to heat up after a few seconds Once the food is cooked turn the function selector to the Off position to switch the appliance off Note On the appliance you can set a cooking time and an end time for the operation Time setting options on page 17 Changing The heating ...

Page 17: ...to set a new cooking time Once your food is cooked turn the function selector to the Off position to switch the appliance off Changing and cancelling You can use the A or button to change the cooking time at any time After a few seconds the change will be applied To cancel use the A button to reset the cooking time all the way to zero The appliance will continue heating without a cooking time Sett...

Page 18: ...crements Above 10 minutes the time increments become longer the higher the value The timer duration will start at a different default value depending on which button you touch first 5 minutes if you touch the A button and 10 minutes if you touch the button 1 Touch the M button 2 Use the A or button to set the timer duration After a few seconds the timer duration will start to count down Tip If the...

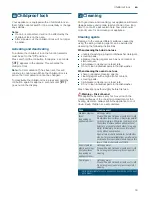
Page 19: ... high pressure cleaners or steam jets Do not clean individual parts in the dishwasher When cleaning the oven do not use sharp or abrasive cleaning agents cleaning agent with a high alcohol content scouring pads high pressure cleaners or steam jets Do not clean individual parts in the dishwasher Wash new sponges thoroughly before first use Warning Risk of burns The appliance becomes very hot Never ...

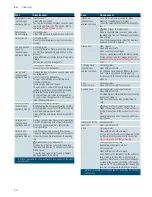
Page 20: ...over the blade again after cleaning Replace damaged blades immediately Zone Cleaning agent Optional available for some appliances depending on the appli ance model Glass hob depending on appliance model Care Protective care products for glass Cleaning Cleaning agents for glass Follow the cleaning instructions on the packag ing Glass scraper for stubborn dirt Remove the protective cover and clean u...

Page 21: ... tell you how to remove the shelves and clean them Detaching and refitting the rails The rails can be removed for cleaning The oven must have cooled down Detaching the rails 1 Lift up the front of the rail 2 and unhook it figure A 3 Then pull the whole rail forward 4 and remove it Fig B Clean the rails with cleaning agent and a sponge For stubborn deposits of dirt use a brush Refitting the rails 1...

Page 22: ...n door fully 2 Fold up the two locking levers on the left and right figure A 3 Close the oven door as far as the limit stop With both hands grip the door on the left and right hand sides Close the door a little further and pull it out figure B Attaching the door Reattach the oven door in the reverse sequence to removal 1 When attaching the oven door ensure that both hinges are inserted straight in...

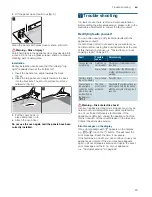
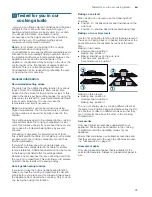
Page 23: ...his instruction manual Tested for you in our cooking studio on page 25 Warning Risk of electric shock Incorrect repairs are dangerous Repairs may only be carried out and damaged power cables replaced by one of our trained after sales technicians If the appliance is defective unplug the appliance from the mains or switch off the circuit breaker in the fuse box Contact the after sales service Error ...

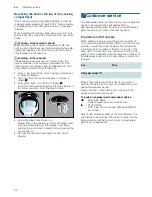
Page 24: ... glass cover has a sealing ring put it back in place before screwing the cover back on 5 Remove the tea towel and switch on the circuit breaker 4Customer service CustomerserviceOur after sales service is there for you if your appliance needs to be repaired We will always find an appropriate solution also in order to avoid after sales personnel having to make unnecessary visits E number and FD numb...

Page 25: ...ot place your food and accessory into the cooking compartment until it has finished preheating If you wish to follow one of your own recipes you should use the settings listed in the table for similar food as reference Additional information can be found in the baking tips listed after the settings tables Remove any accessories that are not being used from the cooking compartment This will allow y...

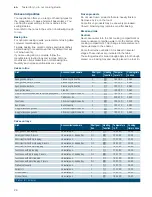
Page 26: ...ating function Tempera ture in C Cookingtime in mins Sponge cake simple Vienna ring tin loaf tin 2 7 160 180 50 60 Sponge cake simple 2 levels Vienna ring tin loaf tin 3 1 140 160 60 80 Sponge cake delicate Vienna ring tin loaf tin 2 150 170 60 80 Sponge flan base Flan tin 3 160 180 30 40 Fruit tart or cheesecake with shortcrust pastry base 26 cm springform cake tin 2 160 180 70 90 Tart Tart dish ...

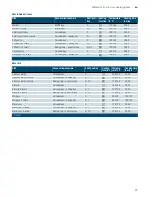
Page 27: ...houx pastry 2 levels Universal pan baking tray 3 1 190 210 35 45 Dish Accessories cookware Shelf position Heating function Tempera ture in C Cookingtime in mins Viennese whirls Universal pan 3 140 150 30 40 Viennese whirls 2 levels Universal pan baking tray 3 1 140 150 30 45 Viennese whirls 3 levels Baking trays universal pan 5 3 1 130 140 40 55 Biscuits Universal pan 3 140 160 20 30 Biscuits 2 le...

Page 28: ... rack 3 200 220 15 20 Toast with topping 12 slices Wire rack 3 220 240 15 25 Preheat Dish Accessories cookware Shelf posi tion Heating function Temperature in C Cookingtime in mins Pizza fresh Universal pan 3 170 190 20 30 Pizza fresh 2 levels Universal pan baking tray 3 1 160 180 35 45 Pizza fresh thin crust Universal pan 2 250 270 20 30 Pizza chilled Universal pan 1 180 200 10 15 Pizza frozen th...

Page 29: ...he cake one level higher in the oven the next time The baked item is too dark on top and too light underneath Bake the cake one level lower in the oven the next time Select a lower temperature and extend the baking time The baked item is too dark in a tin or loaf tin Place the baking tray in the middle of the accessory not directly against the back wall The baked item is too dark in colour overall...

Page 30: ...a covered roasting dish Simply use a roasting dish with a glass lid and set a higher temperature Grilling Keep the appliance door closed when using the grill Never grill with the appliance door open Place the food to be grilled on the wire rack In addition slide the universal pan in at least one shelf position lower with the slanted edge facing the appliance door Any dripping fat will be caught Wh...

Page 31: ...g meat in an enamelled or dark metal roasting dish it will need a little more liquid than if cooked in glass cookware The steam evaporates in the cookware when roasting Carefully pour in more liquid if required The distance between the meat and the lid should be at least 3 cm The meat may rise If necessary braise the meat first by searing it Add water wine vinegar or a similar liquid to the braisi...

Page 32: ... 1 5 kg Cookware uncovered 2 4 200 220 60 70 Burger 3 4 cm thick Wire rack 4 3 25 30 Joint of veal 1 5 kg Cookware uncovered 2 180 200 120 140 Knuckle of veal 1 5 kg Cookware uncovered 2 210 230 130 150 Leg of lamb boned medium 1 5 kg Cookware uncovered 2 4 170 190 70 80 Saddle of lamb on the bone medium 1 5 kg Wire rack 2 4 180 190 45 55 Grilling sausages Wire rack 3 3 20 25 Meat loaf 1 kg Cookwa...

Page 33: ...cial accessory The roast is too dark and the crack ling is burned in places and or the roast is too dry Check the shelf position and temperature Select a lower temperature the next time and reduce the roasting time if necessary The crackling is too thin Increase the temperature or switch on the grill briefly at the end of the roasting time The roast looks good but the juices are burnt Next time us...

Page 34: ...e the dried food from the paper immediately In the table you will find settings for drying various foodstuffs The temperature and drying time are dependent on the type moisture ripeness and thickness of the food The longer you leave the food to be dried the better it will be preserved The more thinly you slice the food the more quickly it will dry and the more flavour it will retain For this reaso...

Page 35: ...0 180 C Preserving Fruit After approx 40 to 50 minutes small bubbles begin to form at short intervals Switch off the oven After 25 to 35 minutes of residual heat remove the preserving jars from the cooking compartment If they are allowed to cool for longer in the cooking compartment germs could multiply promoting acidification of the preserved fruit Vegetables As soon as bubbles begin to form in t...

Page 36: ...ce The temperature and proving time are dependent on the type and quantity of the ingredients For this reason the values indicated in the settings table are intended as a guide only Defrosting For defrosting frozen fruit vegetables and baked items Poultry meat and fish should ideally be defrosted in the refrigerator Not suitable for cream cakes or cream gateaux Use the following shelf positions wh...

Page 37: ... Also slide in the universal pan The liquid will be caught and the cooking compartment stays cleaner Baking Grilling 2 1 Dish Accessories cookware Shelf posi tion Heating function Temperature in C Cooking time in mins Viennese whirls Universal pan 3 140 150 25 35 Viennese whirls 2 levels Universal pan baking tray 3 1 140 150 30 45 Viennese whirls 3 levels Baking trays universal pan 5 3 1 130 140 3...

Page 38: ...6 ...

Page 39: ...6 ...

Page 40: ...0DQXIDFWXUHG E 6 DXVJHUlWH PE XQGHU 7UDGHPDUN LFHQVH RI 6LHPHQV 6 DXVJHUlWH PE DUO HU 6WU 0 QFKHQ VLHPHQV KRPH EVK JURXS FRP 50 1 9001306759 9001306759 280397 A ...

Reviews: