


Customer Service
en
39
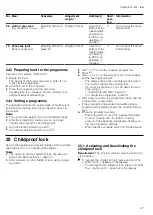
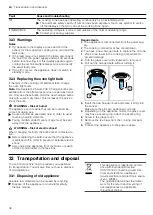
33.2 Transporting the appliance
Keep the original appliance packaging. Only transport
the appliance in the original packaging. Observe the
transport arrows on the packaging.
1.
Secure all moving parts in and on the appliance us-
ing adhesive tape that can be removed without leav-
ing any traces.
2.
Slide all accessories, such as baking trays, into the
corresponding slots with thin cardboard at the
edges, in order to avoid damaging the appliance.
3.
Place cardboard or similar between the front and
rear side to prevent knocks against the inside of the
door glass.
4.
Secure the door and, if available, the top cover to
the appliance sides using adhesive tape.
If the original packaging is no longer available
1.
In order to guarantee sufficient protection against
any transport damage, pack the appliance in pro-
tective packaging.
2.
Always transport the appliance upright.
3.
Do not hold the appliance by the door handle or the
connections on the rear, as these could be dam-
aged.
4.
Do not place any heavy objects on the appliance.
34 Customer Service
If you have any queries on use, are unable to rectify
faults on the appliance yourself or if your appliance
needs to be repaired, contact Customer Service.
Function-relevant genuine spare parts according to the
corresponding Ecodesign Order can be obtained from
Customer Service for a period of at least 10 years from
the date on which your appliance was placed on the
market within the European Economic Area.
Note:
Under the terms of the manufacturer's warranty
the use of Customer Service is free of charge.
Detailed information on the warranty period and terms
of warranty in your country is available from our after-
sales service, your retailer or on our website.
If you contact Customer Service, you will require the
product number (E-Nr.) and the production number
(FD) of your appliance.
The contact details for Customer Service can be found
in the enclosed Customer Service directory or on our
website.
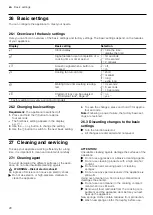
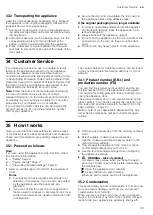
34.1 Product number (E-Nr.) and
production number (FD)
You can find the product number (E-Nr.) and the pro-
duction number (FD) on the appliance's rating plate.
You will see the rating plate with these numbers if you
open the appliance door.
The product number (E no.) can also be found on the
glass ceramic. You can also display the customer ser-
vice index (KI) and the production number (FD) in the
basic settings. →
Make a note of your appliance's details and the Cus-
tomer Service telephone number to find them again
quickly.
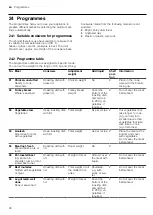
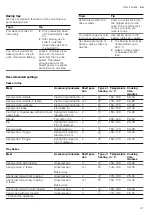
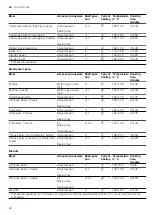
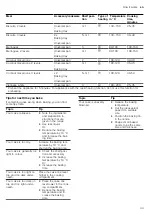
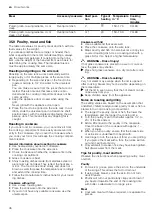
35 How it works
Here, you can find the ideal settings for various types
of food as well as the best accessories and cookware.
These recommendations are perfectly tailored to your
appliance.
35.1 Proceed as follows:
Note:
If you are using the appliance for the first time, follow
this important information:
¡
¡
¡
"Preventing material damage", Page 6
1.
Select a suitable type of food from the overview of
food.
Notes
¡
Your appliance has programmed settings for a
selection of food types. If you want to be guided
by the appliance, use the automatic pro-
grammes.
¡
If you do not find the exact food or application
that you want to prepare or implement, look for a
similar dish and take the general information into
consideration.
2.
Remove any accessories from the cooking compart-
ment.
3.
Select suitable cookware and accessories.
Use the cookware and the accessory listed in the
recommended settings.
4.
Only preheat the appliance if the recipe or the re-
commended settings tell you to do so.
5.
Use the recommended settings when configuring
the appliance settings.
6.
WARNING ‒ Risk of scalding!
Hot steam may escape when you open the appli-
ance door. Steam may not be visible, depending on
the temperature.
▶
Open the appliance door carefully.
▶
Keep children at a safe distance.
When the dish is ready, switch off the appliance.
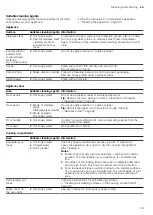
35.2 Condensation
This section tells you how condensation is formed, how
you can prevent damage, and how you can prevent
condensation from forming.
When you are cooking food in the cooking compart-
ment, a lot of steam may form in the cooking compart-
ment. Since your appliance is extremely energy-effi-


