en
Rails
26
humidClean cleaning aid
The cleaning aid is a quick alternative for occasionally
cleaning the cooking compartment. The cleaning aid
softens dirt by vaporising the soapy water. It can then
be removed more easily.
Setting the cleaning aid
Prerequisite:
The cooking compartment has cooled
down completely.
:
Warning – Risk of scalding!
Water in a hot cooking compartment may create hot
steam. Never pour water into the cooking compartment
when the cooking compartment is hot.
1.
Remove any accessories from the cooking
compartment.
2.
Mix 0.4 litres water with a drop of washing-up liquid
and pour into the centre of the cooking compartment
floor.
Do not use distilled water.
3.
Use the function selector to set the
Bottom
heating
$
type of heating.
4.
Use the temperature selector to set 80 °C.
5.
Press the
v
button repeatedly until
x
is highlighted
in the display.
6.
Use the
A
or
@
button to set the duration to 4 .
After a few seconds, the appliance starts heating
and the time counts down.
Once the time has elapsed, an audible signal
sounds and the display shows the time as zero.
7.
Switch off the appliance and leave it to cool down for
approx. 20 minutes.
Cleaning the cooking compartment after use
Caution!
The prolonged presence of moisture in the cooking
compartment leads to corrosion.
After using the cleaning aid, wipe the cooking
compartment clean and allow it to cool down
completely.
Prerequisite:
The cooking compartment has cooled
down.
1.
Open the appliance door and remove the remaining
water with an absorbent sponge cloth.
2.
Clean the smooth surfaces in the cooking
compartment with a dish cloth or a soft brush.
Remove stubborn food remnants using a stainless
steel scouring pad.
3.
Remove limescale with a cloth soaked in vinegar.
Then wipe with clean water and rub dry with a soft
cloth (including under the door seal).
4.
Once the cooking compartment is cleaned
sufficiently:
– To allow the cooking compartment to dry, open
the appliance door halfway (approx. 30°) and
leave it open for approx. one hour.
– To dry the cooking compartment quickly, use
3D
hot air
:
to heat up the appliance for approx.
five minutes at 50 °C while the door is open.
p
Rails
Rails
With good care and cleaning, your appliance will retain
its appearance and remain fully functional for a long
time to come. This will tell you how to remove the
shelves and clean them.
Detaching and refitting the rails
The rails can be removed for cleaning. The oven must
have cooled down.
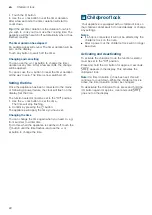
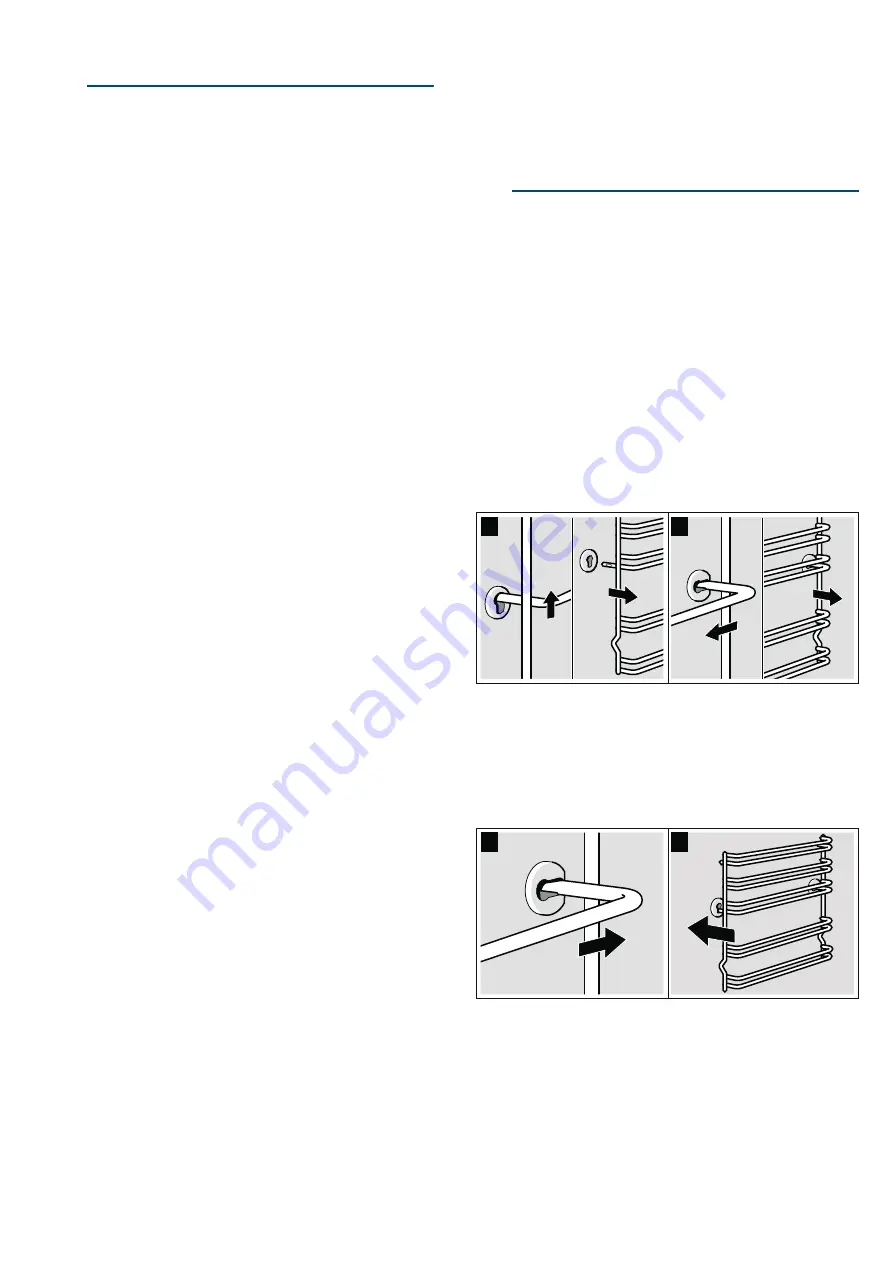
Detaching the rails
1.
Lift up the front of the rail
2.
and unhook it (figure A).
3.
Then pull the whole rail forward
4.
and remove it (Fig. B).
Clean the rails with cleaning agent and a sponge. For
stubborn deposits of dirt, use a brush.
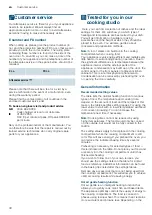
Refitting the rails
1.
First insert the rail into the rear socket, press it to the
back slightly (figure A),
2.
and then hook it into the front socket (figure B).
The rails fit both the left and right sides. Ensure that, as
shown in figure B, levels 1 and 2 are below and levels
3, 4 and 5 are above.
%
$
%
$


