background image

7

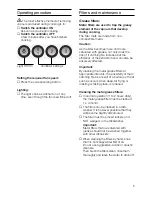
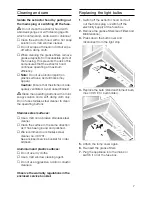
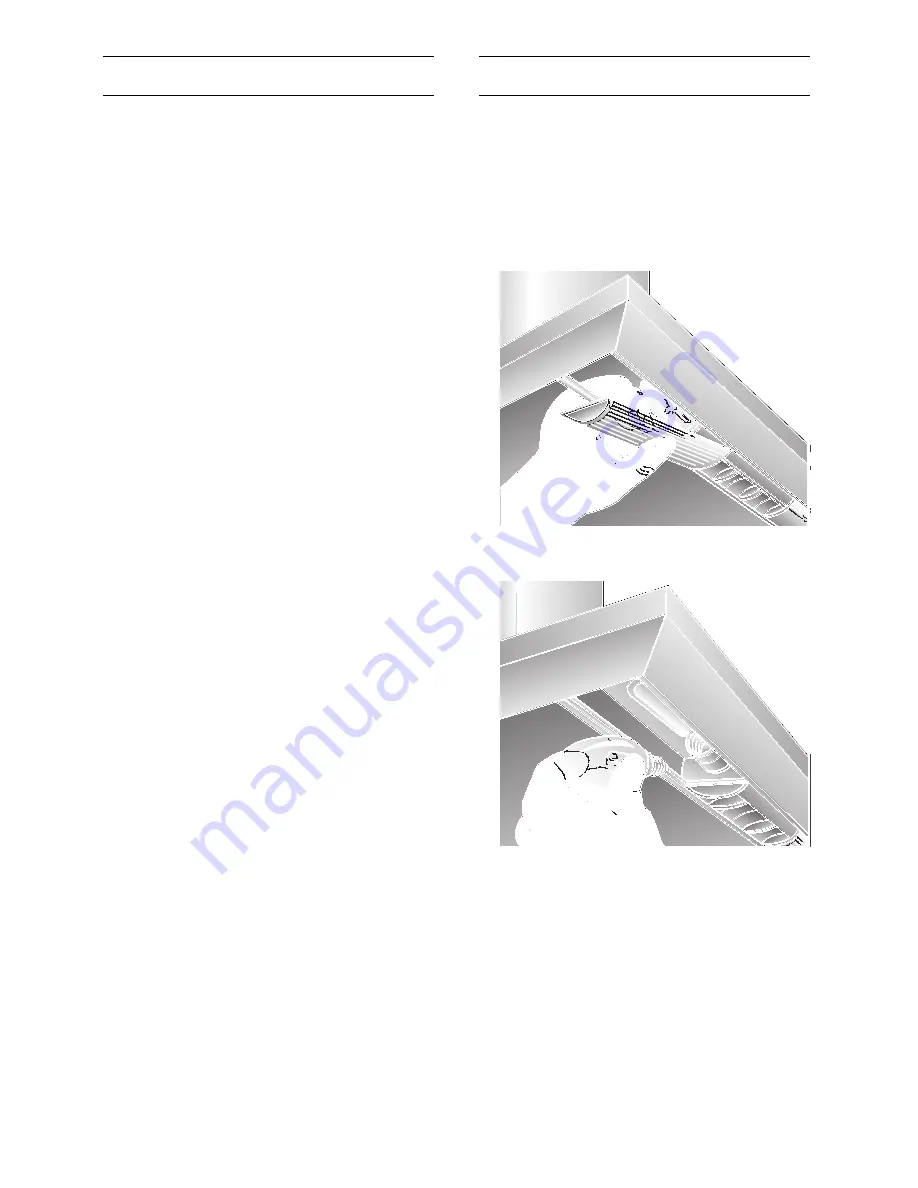
Replacing the light bulbs

1.

Switch off the extractor hood and pull
out the mains plug or switch off the 
electricity supply at the fuse box.

2.

Remove the grease filters (see Filters and
Maintenance).

3.

Press down the bulb cover and 
disconnect from the light strip.

4.

Replace the bulb (standard filament bulb,
max 40 W, E14 bulb holder).

5.

Attach the lamp cover again.

6.

Re-insert the grease filters.

7.

Plug the appliance into the mains or
switch it on at the fuse box.

Cleaning and care

Isolate the extractor hood by pulling out
the mains plug or switching off the fuse.

Do not clean the extractor hood with

abrasive sponges or with cleaning agents
which contain sand, soda, acid or chlorine!

Clean the extractor hood with a hot soap
solution or a mild window cleaner.

Do not scrape off dried-on dirt but wipe
off with a damp cloth.

When cleaning the grease filters, remove
grease deposits from accessible parts of
the housing. This prevents the risk of fire
and ensures that the extractor hood
continues operating at maximum 
efficiency.

Note: 

Do not use alcohol (spirit) on 

plastic surfaces, as dull marks may
appear.

Caution: 

Ensure that the kitchen is ade-

quately ventilated. Avoid naked flames!

Clean the operating buttons with a mild

soapy solution and a soft, damp cloth only.
Do not use stainless-steel cleaner to clean
the operating buttons.

Stainless steel surfaces:

Use a mild non-abrasive stainless steel
cleaner.

Clean the surface in the same direction
as it has been ground and polished.

We recommend our stainless steel 
cleaner no. 461731.
See enclosed service booklet for order
address.

Aluminium and plastic surfaces:

Do not use dry cloths.

Use a mild window cleaning agent.

Do not use aggressive, acidic or caustic
cleaners.

Observe the warranty regulations in the
enclosed service booklet.

Summary of Contents for LC45 Series

Page 1: ...LC 75 LC 90 LC 45 Operatingand installationinstructions ...

Page 2: ...2 mind 650 mind 550 Abb 1 ELECTRO Fig 1 GAZ ...

Page 3: ...f poisoning from combustion gases which are drawn back into the room An air intake exhaust air wall box by itself is no guarantee that the limiting value will not be exceeded Note When assessing the overall requirement the combined ventilation system for the entire household must be taken into consideration This rule does not apply to the use of cooking appliances such as hobs and ovens Unrestrict...

Page 4: ...or infirmed persons without supervision Young children should be supervised to ensure they do not play with the appliance If the connecting cable for this appliance is damaged the cable must be replaced by the manufacturer or his customer service or a similarly qualified person in order to prevent serious injury to the user Dispose of packaging materials properly see Installation instructions This...

Page 5: ...but the efficiency of the extractor hood can also be adversely affected Important By cleaning the metal grease filters at appropriate intervals the possibility of them catching fire as a result of a build up of heat such as occurs when deep fat frying or roasting is taking place is reduced Cleaning the metal grease filters In normal operation 1 to 2 hours daily the metal grease filter must be clea...

Page 6: ... the metal filters see Removing and inserting the metal grease filters 2 Insert an activated carbon filter on the right and left of the fan motor and rotate the filters until they lock into position 1 2 Filters and maintenance 2 Clean the filters 3 Insert the clean filters back into the hood Activated carbon filter For neutralizing odours in recirculating mode Caution As the filter becomes more an...

Page 7: ...rt but wipe off with a damp cloth When cleaning the grease filters remove grease deposits from accessible parts of the housing This prevents the risk of fire and ensures that the extractor hood continues operating at maximum efficiency Note Do not use alcohol spirit on plastic surfaces as dull marks may appear Caution Ensure that the kitchen is ade quately ventilated Avoid naked flames Clean the o...

Page 8: ...liance render it unusable You received your new appliance in a protective shipping carton All packaging materials are environmentally friendly and recyclable Please contribute to a better environment by disposing of packaging materials in an environmentally friendly manner Please ask your dealer or inquire at your local authority about current means of disposal The extractor hood can be used in ex...

Page 9: ...e supply of fresh air which will be needed by the burner for combustion Safe operation is possible provided that the underpressure in the room where the burner is installed does not exceed 4 Pa 0 04 mbar This can be achieved if combustion air can flow through non lockable openings e g in doors windows and via the air intake exhaust air wall box or by other technical measures such as reciprocal int...

Page 10: ...m level and there will be an increase in noise The manufacturer of the extractor hoods accepts no liability for complaints which can be attributed to the design and layout of the pipework If pipes have different diameters Insert sealing strip For exhaust air mode ensure that there is an adequate supply of fresh air Round pipes Internal diameter Flat ducts Cross section l 100 mm 179 cm2 l 120 mm 11...

Page 11: ...ly into the mains The extractor hood should only be connected to the electricity supply by a properly qualified electrician A separator must be installed in the household circuit A suitable separator is a switch that has a contact gap of more than 3 mm and interrupts all poles Such devices include circuit breakers and contactors If the connecting cable for this appliance is damaged the cable must ...

Page 12: ...tric hob and 650 mm for a gas hob The bottom edge of the template equates to the lower edge of the extractor hood 4 Drill 5 holes dia 8 mm for the extractor hood and 4 holes dia 8 mm for the brackets for fixing the flue ducts and insert wall plugs flush with the wall Note Take into account any special accessories that are going to be fitted 5 Screw on the 2 brackets for fixing the upper and lower ...

Page 13: ...revent scratching the upper duct when pushing on the lower duct cover the edge of the lower duct with the installation template or other protective material Then screw the flue duct to the sides of the fixing bracket with 2 short screws Before tightening the 2 screws align the flue duct 14 Re insert the grease filter see operating instructions 1 2 11 Stainless steel model Remove the protective fil...

Page 14: ...14 Notes ...

Page 15: ...15 353121 1 2 1 LZ 51450 ...

Page 16: ...9000 159 007 Printed in Germany 0306 Es Siemens Electrogeräte GmbH Family Line 01805 2223 3 0 12 min DTAG Siemens Hausgeräte Besuchen Sie uns im Internet http www siemens de hausgeraete ...

Reviews: