LMV
Series
Technical
Instructions
Document
No.
LV5
‐
1000
SCC
Inc.
Page
31
Section
6
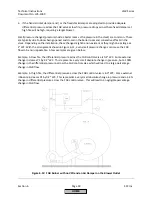
Method
shown
in
Figure
6
‐
13:
Pressure
P1
relative
to
pressure
P2
(differential
pressure
across
the
FGR
damper)
is
more
constant
with
firing
rate.
Differential
pressure
will
be
generated
across
the
FGR
damper
at
low
fire
by
using
the
suction
of
the
blower
against
the
air
damper.
The
differential
pressure
across
the
FGR
damper
can
also
be
adjusted
with
the
speed
of
the
VFD.
As
firing
rate
increases,
P2
will
increase
(less
vacuum)
and
P1
will
increase
due
to
increased
pressure
behind
the
stack
damper,
yielding
a
more
consistent
differential
pressure.
As
a
result,
the
FGR
damper
can
be
sized
more
appropriately
and
should
offer
better
control.
Other
points
to
consider:
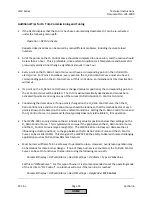
1.
If
using
O
2
trim,
the
effect
that
the
trim
has
on
FGR
flow
can
be
adjusted.
Three
possibilities:
a.
If
only
the
air
damper
is
trimmed
(set
to
“air
influenced”),
trimming
closed
and
reducing
air
flow
will
increase
the
vacuum
at
P2
and
increase
FGR
flow
relative
to
air
flow.
b.
If
only
the
VFD
is
trimmed
(set
to
“air
influenced”),
trimming
slower
and
reducing
air
rate
will
reduce
the
vacuum
at
P2
and
reduce
the
FGR
flow
relative
to
the
air
flow.
c.
If
both
the
air
damper
and
VFD
are
trimmed
(set
to
“air
influenced”),
trimming
closed
should
keep
the
vacuum
at
P2
relatively
constant
and
keep
the
FGR
flow
constant
relative
to
the
air
flow.
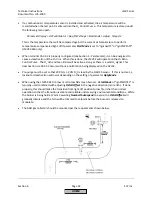
2.
Differential
pressure
across
the
FGR
damper
is
significant
even
at
low
fire
due
to
the
vacuum
provided
by
the
blower.
Small
changes
in
the
differential
pressure
across
the
FGR
damper
will
cause
small
changes
in
FGR
flow.
FGR
flow
will
be
more
repeatable
as
compared
to
the
method
in
Figure
6
‐
12,
especially
at
low
to
mid
fire.
3.
No
fixed
air
dampers
exist
for
the
blower
intake,
and
the
fixed
damper
in
the
stack
may
be
able
to
be
opened
further,
reducing
the
blower
pressure
requirements.
HOME
Summary of Contents for LMV 5 Series
Page 2: ...Intentionally Left Blank ...
Page 41: ...LMV Series Technical Instructions Document No LV5 1000 SCC Inc Page 7 Section 2 HOME ...
Page 42: ...Technical Instructions LMV Series Document No LV5 1000 Section 2 Page 8 SCC Inc HOME ...
Page 43: ...LMV Series Technical Instructions Document No LV5 1000 SCC Inc Page 9 Section 2 HOME ...
Page 44: ...Technical Instructions LMV Series Document No LV5 1000 Section 2 Page 10 SCC Inc HOME ...
Page 45: ...LMV Series Technical Instructions Document No LV5 1000 SCC Inc Page 11 Section 2 HOME ...
Page 46: ...Technical Instructions LMV Series Document No LV5 1000 Section 2 Page 12 SCC Inc HOME ...
Page 47: ...LMV Series Technical Instructions Document No LV5 1000 SCC Inc Page 13 Section 2 HOME ...
Page 48: ...Technical Instructions LMV Series Document No LV5 1000 Section 2 Page 14 SCC Inc HOME ...
Page 49: ...LMV Series Technical Instructions Document No LV5 1000 SCC Inc Page 15 Section 2 HOME ...
Page 50: ...Technical Instructions LMV Series Document No LV5 1000 Section 2 Page 16 SCC Inc HOME ...
Page 51: ...LMV Series Technical Instructions Document No LV5 1000 SCC Inc Page 17 Section 2 HOME ...
Page 52: ...Technical Instructions LMV Series Document No LV5 1000 Section 2 Page 18 SCC Inc HOME ...
Page 53: ...LMV Series Technical Instructions Document No LV5 1000 SCC Inc Page 19 Section 2 HOME ...
Page 54: ...Technical Instructions LMV Series Document No LV5 1000 Section 2 Page 20 SCC Inc HOME ...
Page 55: ...LMV Series Technical Instructions Document No LV5 1000 SCC Inc Page 21 Section 2 HOME ...
Page 373: ...Intentionally Left Blank ...

