Siemens Industry, Inc.
Building Technologies Division
P/N 315-048553-5
5
The PSX-12 can occupy any
position in one row in the
backbox or on the mounting
plate, but it should be installed
in the row and position that is
located directly above the PTB
to which it is connected.
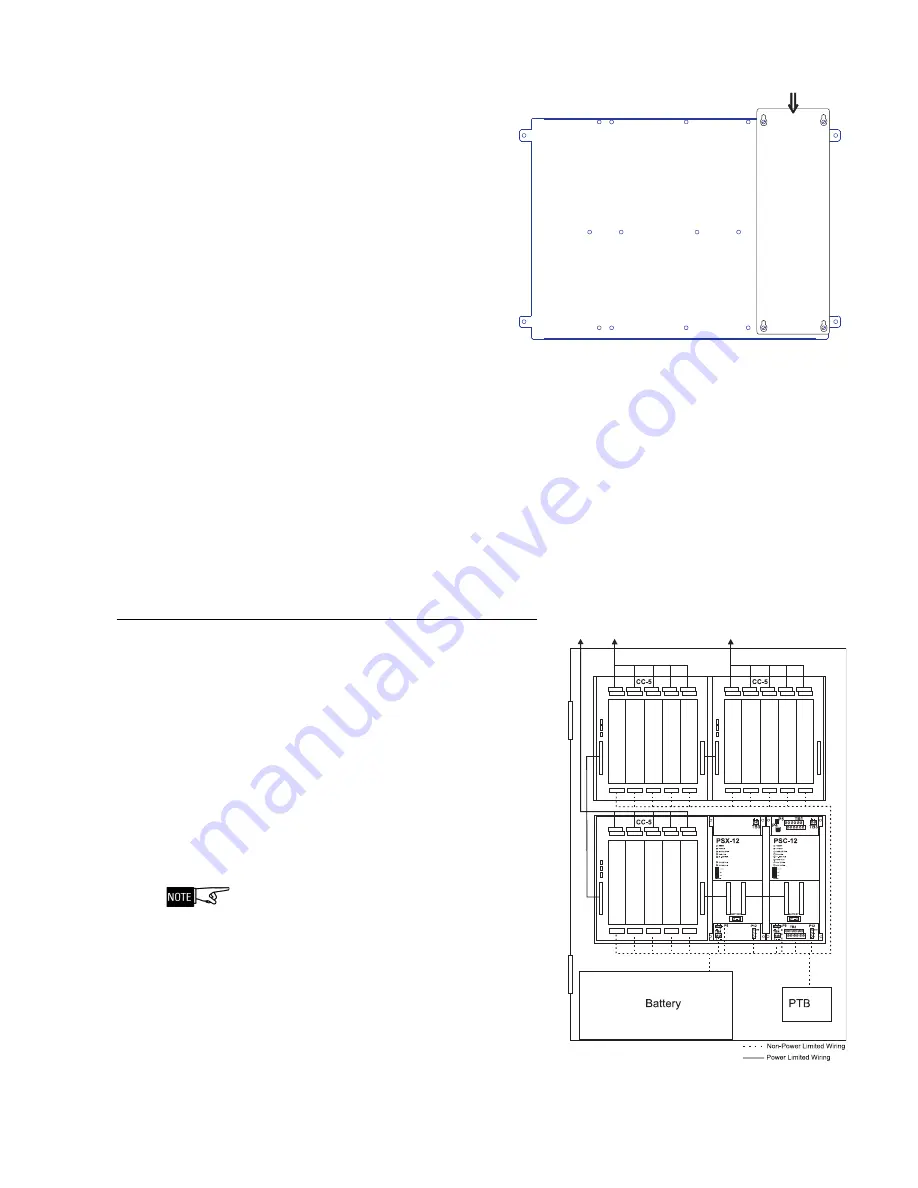
(Refer to Figures 3 and 5).
When the PSX-12 is mounted
correctly on the optional
Mounting Plate it will be flush
on the top, bottom, and right
with the Mounting Plate and
the mounting screw holes of
the PSX-12 will align with the
threaded posts.
1.
Install four 10-32 screws
in the threaded posts at
the mounting position. Screw each of the 10-32 screws into the threaded posts
5-6 turns.
2.
Place the PSX-12 over the four screws on the Mounting Plate and slide it down or
towards you to rest on the four screws. (Refer to Figure 4.) When the PSX-12 is in
the correct position it will be flush with the top, bottom and right side of the
Mounting Plate.
3.
Tighten the four screws.
WIRING
The PSX-12 has removable terminal
blocks and connectors at the top
and bottom of the module. The
terminal block at the top of the PSX-
12 is power limited. The terminals
and connectors at the bottom of the
PSX-12 are non-power limited.
(Refer to Figure 5.)
Use a separate or dedicated circuit
breaker and run the earth ground
from a suitable source to the PSX-
12. Check local requirements.
Conduit is not an acceptable Earth
Ground Conductor.
TOP
SLIDE DOWN UNTIL
FLUSH ON TOP,
RIGHT, AND BOTTOM
CAB-MP
PSX-12
Figure 4
Mounting The PSX-12 On The Optional CAB-MP
Figure 5
PSX-12 Wiring In The CAB Enclosures


