


RUGGEDCOM i802
Installation Guide
Chapter 2
Installing the Device
Connecting to the Device
9
• Do not expose the microSD/microSDHC card to large magnetic or static electric fields.
• Do not bend or drop the microSD/microSDHC card.
CAUTION!
Security hazard – risk of unauthorized access and/or exploitation. Make sure to remove the microSD/
microSDHC card before decommissioning the device or sending the device to a third-party.
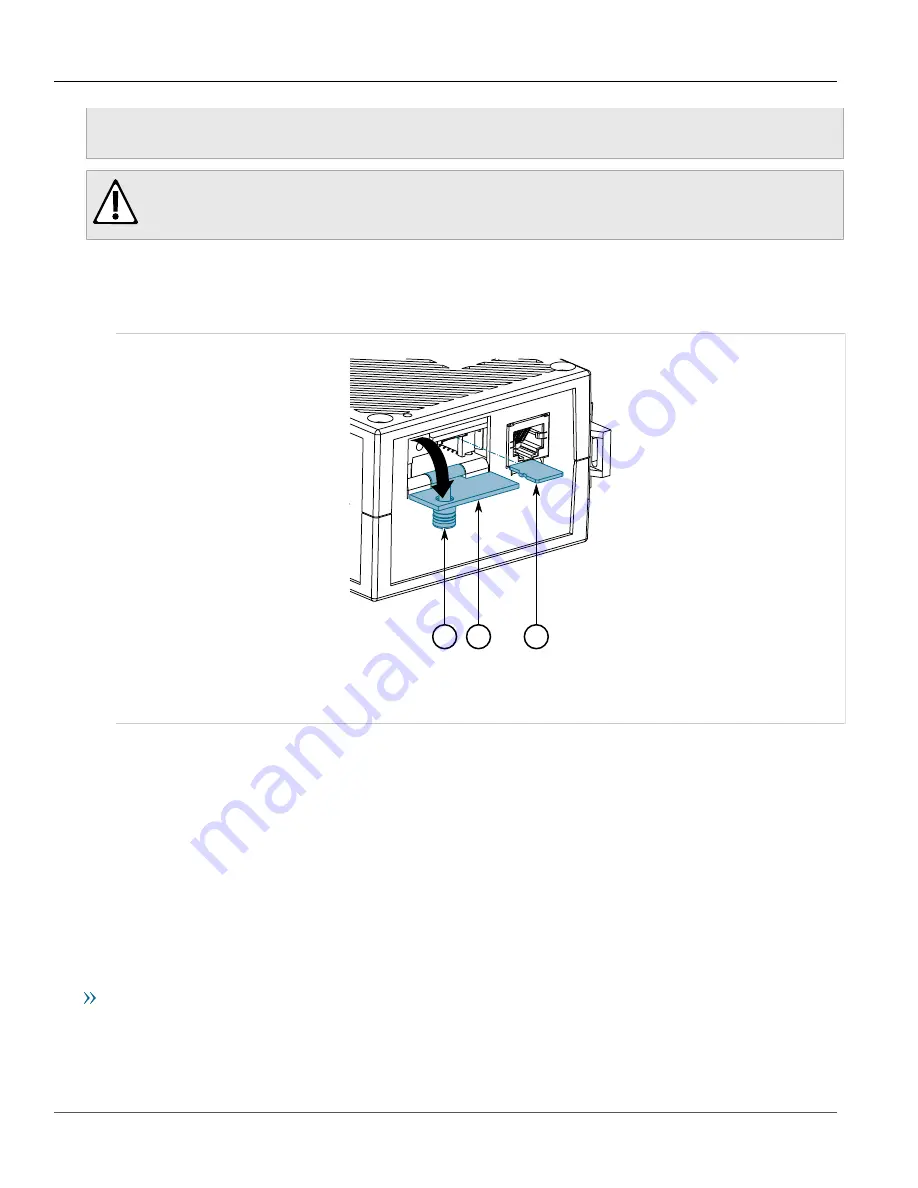
To insert or remove a microSD/microSDHC card, do the following:
1. Power down the device.
2. Unscrew the retention screw and remove the access plate.
1
2
3
Figure 6: Inserting/Removing a MicroSD/MicroSDHC Card
1.
Retention Screw
2.
Access Plate
3.
MicroSD/MicroSDHC Card
3. Without touching the contacts on the card, insert or remove the microSD/microSDHC card.
4. Install the access plate and finger-tighten the retention screw.
5. Power up the device.
Section 2.5
Connecting to the Device
The following describes the various methods for accessing the ROS console and Web interfaces on the device.
For more detailed instructions, refer to the
ROS User Guide
for the RUGGEDCOM i802.
RS232 Console Port
Connect a PC or terminal directly to the RS232 console port to access the boot-time control and ROS interfaces.
The console port provides access to ROS's console and Web interfaces.
Summary of Contents for RUGGEDCOM i802
Page 4: ...RUGGEDCOM i802 Installation Guide iv ...
Page 12: ...RUGGEDCOM i802 Installation Guide Chapter 1 Introduction Description 4 ...
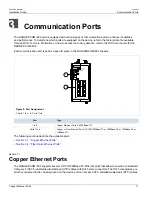
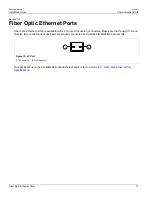
Page 22: ...RUGGEDCOM i802 Installation Guide Chapter 3 Communication Ports Fiber Optic Ethernet Ports 14 ...
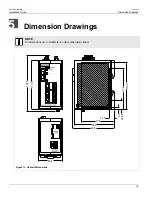
Page 28: ...RUGGEDCOM i802 Installation Guide Chapter 5 Dimension Drawings 20 ...
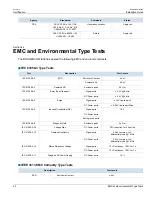
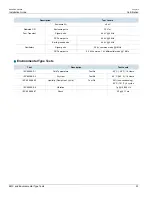
Page 32: ...RUGGEDCOM i802 Installation Guide Chapter 6 Certification EMC and Environmental Type Tests 24 ...


