Chapter 6
CPE Management Interface
RUGGEDCOM WiN5100/WiN5200
User Guide
88
WiMAX Authentication
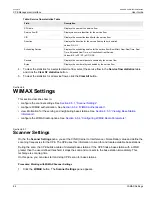
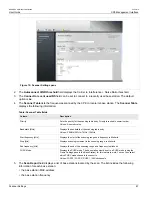
• the base station bandwidth
• the transmission preamble
• the CINR R1 value
• the RSSI value, in dBm
6. To add an entry to the
Scanner Table
, click the button. A new row appears in the table. You can add up to
32 rows to the table.
Set the values for the new scanning range in the
Priority
,
Bandwidth [MHz]
,
Start frequency [kHz]
,
Step
[kHz]
, and
End frequency [kHz]
fields.
7. To remove a row from the table, select the row and click the button. The row is removed from the table.
8. After adding or editing rows in the
Scan Report
table, or after changing the values in the
Autoconnect
CINR threshold
or
Connect to recent used BS
fields, click the
Apply
button.
9. To begin scanning for base stations, click the
Connect
button.
10. To stop scanning for base stations, click the
Disconnect
button.
11. To delete all scanning configuration information, click the
Delete All
button.
Section 6.5.2
WiMAX Authentication
On the the
Authentication
panes, you set view and set the WiMAX authentication parameters. The CPE
supports EAP-TLS (Extensible Authentication Protocol - Transport Layer Security) and EAP-TTLS (Extensible
Authentication Protocol - Tunneled Transport Layer Security) authentication. You can also set the CPE to use null
(no) authentication.
This section describes how to:
• view the current CPE authentication setting. See
Section 6.5.2.1, “Viewing the CPE Authentication Method”
• configure EAP-TLS authentication. See
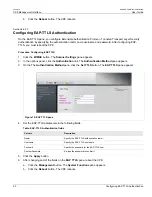
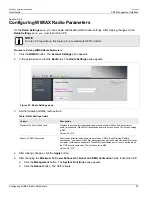
Section 6.5.2.2, “Configuring EAP-TLS Authentication”
• configure EAP-TLLS authentication. See
Section 6.5.2.3, “Configuring EAP-TTLS Authentication”
.
• configure null authentication. See
Section 6.5.2.4, “Configuring Null Authentication”
• view the authentication certificate filenames. See
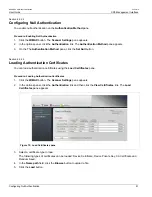
Section 6.5.2.5, “Loading Authentication Certificates”
.
Section 6.5.2.1
Viewing the CPE Authentication Method
The
Authentication Setting
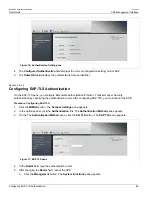
pane displays the current CPE WiMAX authentication configuration. The
Authentication Setting
pane is read-only; there are no parameters to set on this pane.
Procedure: Viewing CPE Authentication
1. Click the
WiMAX
button. The
Scanner Settings
pane appears.
2. In the options panel, click the
Authentication
link. The
Authentication Method
pane appears.
3. On the
Authentication Method
pane, click the
Show Settings
button. The
Authentication Setting
pane
appears.
Summary of Contents for RUGGEDCOM WiN5100
Page 2: ...RUGGEDCOM WiN5100 WiN5200 User Guide ii ...
Page 8: ...RUGGEDCOM WiN5100 WiN5200 User Guide FCC Statement And Cautions viii ...
Page 26: ...RUGGEDCOM WiN5100 WiN5200 User Guide Chapter 2 Product Description LED Indicators 18 ...
Page 28: ...RUGGEDCOM WiN5100 WiN5200 User Guide Chapter 3 Mounting Wall Mounting 20 ...
Page 106: ...RUGGEDCOM WiN5100 WiN5200 User Guide Appendix A WiN5100 WiN5200 Specifications 98 ...
Page 114: ...RUGGEDCOM WiN5100 WiN5200 User Guide Appendix D RUGGEDCOM CPE Warranty 106 ...

