Siemens Building Technologies / Landis & Staefa Division
4 319 2697 0 c
16.04.1999
9/12
Installing and wiring the base
Wall mounting
1. Separate base from the controller.
2. Hold base against the wall. Marking "TOP" must
be at the top!
3. Mark fixing holes on the wall.
4. Drill holes.
5. If required, knock out holes on the base for fitting
cable entry glands.
6. Secure base.
7. Wire up base.
Rail mounting
1. Fit rail.
2. Separate base from the controller.
3. If required, knock out holes on the base for fitting
cable entry glands.
4. Fit base to the rail. Marking "TOP" must be at
the top!
5. If required, secure the base (depending on type
of rail used).
6. Wire up base.
Flush panel mounting
•
Maximum thickness: 3 mm
•
Panel cutout required:
138 x 92 mm (+1 mm / –0 mm)
1. Separate base from the controller.
2. If required, knock out holes on the base for fitting
cable entry glands.
3. Insert base in the panel cutout from behind until
stop is reached. Marking "TOP" must be at the
top!
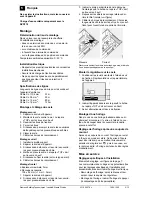
4. Push lateral tongues behind the front panel (see
illustration).
5. Wire up base. Make sure the cable lengths will
be adequate so that the control panel door can
be opened.
24
62
Z
0
6
Wrong
Correct
Place tongues correctly on the left and on the right. They must
not be inside the cutout!
Fitting the controller to the base
1. Make sure that position and orientation of the
turning levers are correct, using the fixing screws
(illustration below shows the lateral wall of the
controller casing).
252
2Z
13
2. Insert controller in the base until stop is reached.
Marking "TOP" must be at the top!
3. Tighten fixing screws gradually.
Fitting the time switch
If a time switch is to be fitted (weekly or digital time
switch), the respective opening in the cover must be
cut out with a knife.
Readjusting the clock after a power failure
When power returns after a power failure, the clock
will be readjusted. Automatic readjustment can be
aborted by briefly setting the operating mode se-
lector to manual operation
and then back to the
required operating mode, allowing manual adjust-
ment of the clock.
Commissioning
Plant-specific settings
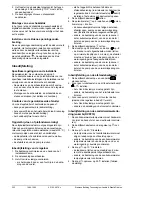
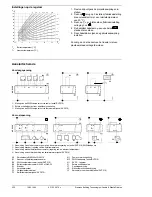
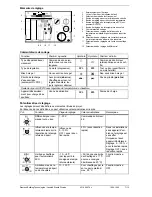
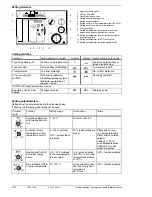
Setting elements: please refer to illustration on page
10.
The coding switches and setting potentiometers for
the plant-specific settings are accessible after re-
moval of the time switch.
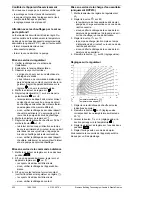
-
Removing the time switch: pull dial away from the
controller.
-
Fitting the time switch: insert time switch and push
it down (audible click).
Checking the motorized valve
Check the seat or slipper valve: see if
-
it is correctly installed (observe direction of flow
indicated on the valve body)
-
the slipper moves in the correct angular range
(note position indicator)
-
the manual level is disengaged
Exercise caution with underfloor and ceil-
ing heating systems!
The limit thermostat must be correctly set. During
the functional check, the flow temperature may not
exceed the maximum permissible level (usually
55 °C). If it does, proceed immediately as follows:
-
Either close the seat or slipper valve manually, or
-
Switch off the pump, or
-
Close the pump isolating valve


