background image


74 319 0817 0

G2546

Siemens Building Technologies 

74 319 0817 0 a 

CE1G2546en 

28.02.2011 

1/12 

en


Installation Instructions


Heating controller for 


2 heating circuits and d.h.w. 


RVP36..


  Keep these instructions with the controller! 


Installation 

Place of installation 

  In a dry room (e.g. in the boiler room)  

  Installation choices:  

– In a compact station  
– In a control panel (panel front, inner wall,  

or on a top hat rail)  

– In a control cabinet  
– In the sloping front of a control desk 

  Permissible ambient temperature: 0...50 °C  

Electrical installation 

  Local regulations for electrical installations must be 

complied with  

  Only qualified personnel may carry out the electrical 

installation 

  Cable strain relief must be ensured  

  Cable glands must be made of plastic  

  Cables from the controller to the actuating devices  

and pumps carry mains voltage  

  Sensor cables must not be run parallel to mains  

carrying cables  

  A defective or apparently damaged unit must  

immediately be disconnected from power 

Permissible cable lengths 

  For all sensors and thermostats:  

Copper cable 0.6 mm dia. 

max. 20 m  

Copper cable 1.0 mm

max. 80 m  

Copper cable 1,5 mm

2


max. 120 m  

  For room units:  

Copper cable 0.25 mm

2


max. 25 m  

Copper cable from 0.5 mm

2

  max. 50 m  

  For data buses: 

As per Siemens specification in


Basic System Data N2030 and  


Basic Engineering Data N2032 

Mounting and wiring the base 

Wall mounting  

1.  Remove base from controller.  
2.  Hold base against the wall. Marking TOP must  

be at the top!  

3.  Mark fixing holes on the wall.  
4.  Drill holes.  
5.  If required, knock out holes on the base to fit  

the cable glands.  

6.  Screw base to the wall.  
7.  Wire up the base.  
 

Rail mounting  

1.  Fit top hat rail.  
2.  Remove base from controller.  
3.  If required, knock out holes on the base to fit the  

cable glands.  

4.  Fit base to the rail. Marking TOP must be at the top!  
5.  If required, secure the base (depending on type  

of rail used).  

6.  Wire up the base.  

Flush-panel mounting 

  Maximum thickness of front panel: 3 mm.  

  Required panel cutout: 138 × 92 mm.  

1.  Remove base from controller.  
2.  If required, knock out holes on the base to fit the  

cable glands.  

3.  Insert base in the panel cutout from behind until  

stop is reached. Marking TOP must be at the top!  

4.  Push lateral tongues behind the front panel (see  

illustration). 

246

2Z

06


Wrong  

Correct 

Place left and right tongue correctly – must not protrude  
inside the cutout!  

5.  Wire up the base. Cable lengths should be chosen 

such that sufficient space is left to open the control 
panel door.  

Securing the controller to the base 

1.  Ensure correct position and location of the levers  

by turning the fixing screws. Symbol on lateral wall  
of the controller:  

25

40Z

04


2.  Insert controller in the base until stop is reached.  

Marking TOP must be at the top!  

3.  Tighten fixing screws alternately.  

Summary of Contents for RVP36

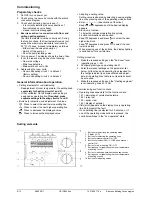
Page 1: ...ystem Data N2030 and Basic Engineering Data N2032 Mounting and wiring the base Wall mounting 1 Remove base from controller 2 Hold base against the wall Marking TOP must be at the top 3 Mark fixing holes on the wall 4 Drill holes 5 If required knock out holes on the base to fit the cable glands 6 Screw base to the wall 7 Wire up the base Rail mounting 1 Fit top hat rail 2 Remove base from controlle...

Page 2: ...ating line or by pressing one of the operating mode buttons Enter deactivation of function Keep or depressed until the desired display appears Block jump function To select an individual operating line quickly 2 button combinations can be used Keep depressed and press to select the next higher line block Keep depressed and press to select the next lower line block When pressing one of the buttons ...

Page 3: ...rage tank sensor thermostat M1 Circulating pump B32 D h w storage tank sensor thermostat M2 Heating circuit pump heating circuit 1 B5 Room sensor heating circuit 1 M3 Storage tank charging pump B52 Room sensor heating circuit 2 M6 Heating circuit pump heating circuit 2 B6 Collector sensor N1 Controller RVP36 B7 Return sensor Y1 Actuator heating circuit 1 B9 Outside sensor Y7 Actuator heating circu...

Page 4: ...7 2nd heating phase start of NORMAL heating 00 00 24 00 8 2nd heating phase end of NORMAL heating 00 00 24 00 9 3rd heating phase start of NORMAL heating 00 00 24 00 10 3rd heating phase end of NORMAL heating 00 00 24 00 Scheduler program for heating circuit phase deactivated 12 Date of first day of holiday 01 01 31 12 13 Date of last day of holiday 01 01 31 12 dd mm holiday period deactivated 14 ...

Page 5: ...t flow sensor B12 heating circuit 2 40 fault primary return sensor B7 50 fault storage tank sensor B31 52 fault storage tank sensor B32 60 fault room sensor B5 heating circuit 1 61 fault room unit A6 heating circuit 1 62 device with wrong PPS identification connected heating circuit 1 65 fault room sensor B52 heating circuit 2 66 fault room unit A6 heating circuit 2 67 device with wrong PPS identi...

Page 6: ...er program 2 in the Operating Instructions Configuring the plant type Select the required plant type on operating line 51 see the following plant diagrams This activates all functions needed for the particular type of plant and the required operating lines appear Example 2477Z02 Display for plant type 5 1 51 Operating line 5 Heating circuit type 1 D h w type Plant types For meaning of symbols refe...

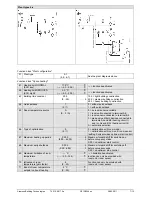
Page 7: ...rminal B5 3 mean value of both devices connected to terminals A6 and B5 heating circuit 1 and or A6 and B52 heating circuit 2 A automatic selection 66 Type of optimization 0 0 optimization with room model 0 1 1 optimization with room unit room sensor setting 0 only provides optimum start control 67 Maximum heating up period 0 00 h h Maximum forward shift for switching on 0 00 42 00 h before occupa...

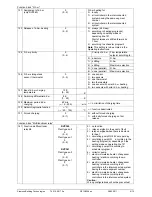
Page 8: ...of actuator 1 0 2 position control 0 1 1 3 position control 89 Switching differential 2 K K Setting only required for 2 postion control 1 20 K Note Operating lines 83 through 89 with plant type 6 x can only be set for heating circuit 2 Function block Boiler 91 Boiler operating mode 0 0 2 0 with manual shutdown button 1 with automatic shutdown OFF when there is no demand for heat 2 without shutdown...

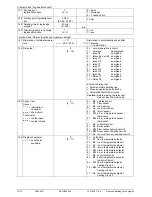
Page 9: ... 10 K 0 50 K 128 Switching differential d h w 8 K 1 20 K 129 Maximum period d h w charging 60 min 5 250 min no limitation of charging time 130 Setpoint legionella function C 20 100 C function deactivated 131 Forced charging 0 0 1 0 without forced charging 1 with daily forced charging on first release Function block Multifunctional relay 141 Function multifunctional relay K6 RVP360 Plant types x 0 ...

Page 10: ...lect another operating line Press an operating mode button Automatically after 30 minutes Caution Before making the relay test always close the main valve 163 Sensor test Sensor interruption no sensor o o o short circuit Thermostat contact open o o o contact closed 0 0 11 0 B9 outside sensor 1 B1 Flow sensor 2 B5 room sensor 3 A6 room unit sensor 4 B7 return sensor 5 B31 d h w storage tank sensor ...

Page 11: ... central clock master 179 Bus power supply operating mode and status indication A 0 1 A 0 OFF no bus power supply 1 bus power supply ON A automatic bus power supply 180 Outside temperature source A A 00 01 14 16 A automatic or segment and device number 194 Hours run counter Display function 195 Software version Display function Function block Solar d h w 201 Temperature differential solar ON 8 K 0...

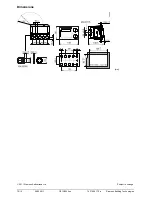
Page 12: ...12 12 28 02 2011 CE1G2546en 74 319 0817 0 a Siemens Building Technologies Dimensions mm 2011 Siemens Switzerland Ltd Subject to change ...

Reviews: