58
Internal Accessories
Electronic Bell Alarm - Display Module Relay
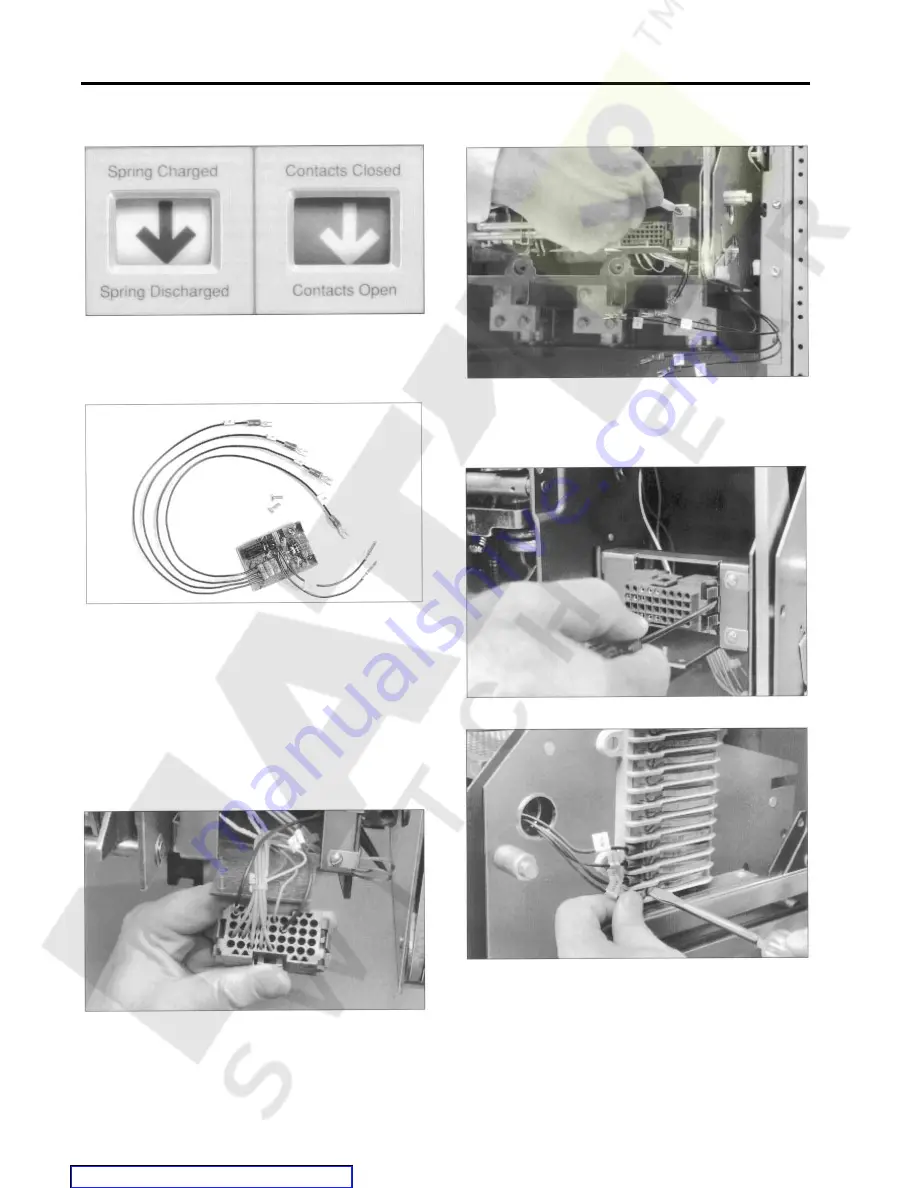
CAUTION: Do not attempt to install an accessory with
the breaker “Closed” or “Charged”. Make certain breaker
is “Open” and “Discharged” as shown above. Personal
injury or mechanical damage may occur. Preliminary
installation procedures are outlined on pages 36-37.
Electronic Bell Alarm Kit
Electronic Bell Alarm or Display Module Relay
The electronic bell alarm module is an internally mounted
accessory which interfaces directly with the Electronic Trip
Unit. It provides a solid state relay contact for remote Indica-
tion of breaker tripping due to overload, short time, short
circuit, or ground fault. The bell alarm contact is a latching type
and remote reset capability is provided.
To install the bell alarm, first remove the breaker front cover
and trip unit, if previously installed (see page 37).
1.)
With a small screwdriver, press in tab on right side of 36-
pin trip unit connector and release from mounting bracket.
2. ) Connect bell alarm lead wires (# 1 and #22) to corre-
sponding numbered holes in pin connector. (Note: If a
display module relay is being installed instead of a bell
alarm connect lead wires to #4 and #22 holes respec-
tively. )
3.)
Align bell alarm mounting holes as shown
4.)
Route bell alarm lead wires RT9 through RT12 through
right side of the circuit breaker.
5.)
Connect the four lead wires, in numerical sequence. to
the bottom four positions of the secondary disconnect or
terminal block, with RT12 installed on the bottom posi-
tion.
Summary of Contents for SBA 1200
Page 68: ...66 External Accessories Ground Fault Sensing and Relaying Courtesy of NationalSwitchgear com ...
Page 94: ...92 Outline Dimension Drawing 2000A Fixed Mounted Courtesy of NationalSwitchgear com ...
Page 95: ...93 Outline Dimension Drawing 2000A Fixed Mounted Courtesy of NationalSwitchgear com ...
Page 100: ...98 Courtesy of NationalSwitchgear com ...
Page 101: ...Electrical Diagrams 99 Courtesy of NationalSwitchgear com ...
Page 102: ...100 Electrical Diagrams Courtesy of NationalSwitchgear com ...


