5. Clean dust from the detector cover, foam screen, sens-
ing chamber and labyrinth using a brush, or by blowing
with compressed air.
Do not use a compressed air supply that may
contain an oil residue.
Do not remove or loosen the two screws on
the rear of the detector, or calibration data will
be lost.
The insect screen and labyrinth may be
replaced with new parts, rather than be
cleaned. Contact Siemens Building Technolo-
gies, Inc. Product Service to order Detector
Maintenance Kit, Model DMK-11. Do not
disconnect the thermal wires from the
detector.
6. Reassemble the detector by reversing the steps used for
disassembly, and reinstall in its base.
7.
Test the detector. (See Detector Testing section of this
instruction.)
8. When all service has been completed, notify personnel
(See Step 1) that system service has been completed.
No field repair of the detectors should be
attempted. The detectors are factory repair-
able only.
ELECTRICAL RATINGS
CX-2 (FDLC) Addressable Device Loop ratings:
Voltage: 18-31V (pulsing)
Current: 1mA
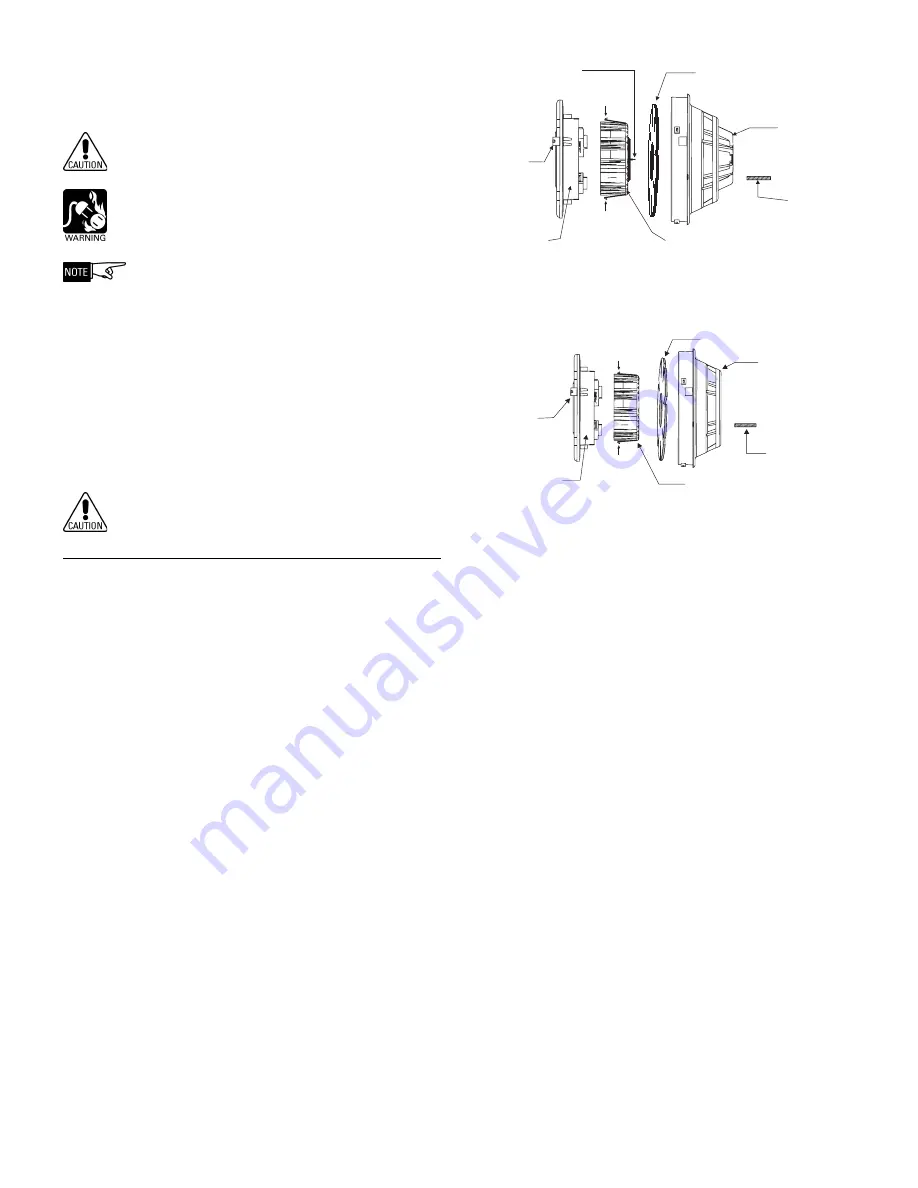
Figure 4
Disassembling of SFP-11 Photochamber
P/N 315-033290C-7
Siemens Building Technologies, Ltd.
2 Kenview Boulevard
Brampton, Ontario L6T 5E4 Canada
COVER
LABYRINTH
LOCKING
SCREW
(OPTIONAL)
COVER TAB
SENSING
CHAMBER
RELEASE
AXIS
RELEASE
AXIS
(MATCHES AXIS
OF REAR SCREWS)
THERMAL
FOAM
SCREEN
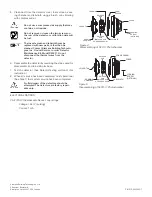
Figure 5
Disassembling of SFPO-11 Photochamber
COVER
FOAM SCREEN
LABYRINTH
SENSING
CHAMBER
RELEASE
AXIS
RELEASE
AXIS
(MATCHES AXIS
OF REAR SCREWS)
LOCKING
SCREW
(OPTIONAL)
COVER TAB


