Mounting
4.9 Installing and removing the shaft-mounted gearbox
SIMOTICS S-1FG1 servo geared motor
Operating Instructions, 07/2019, A5E47360747B AA
93
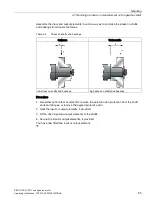
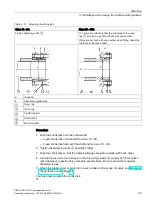
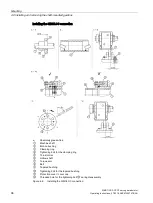
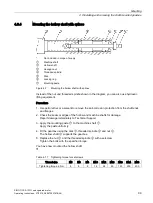
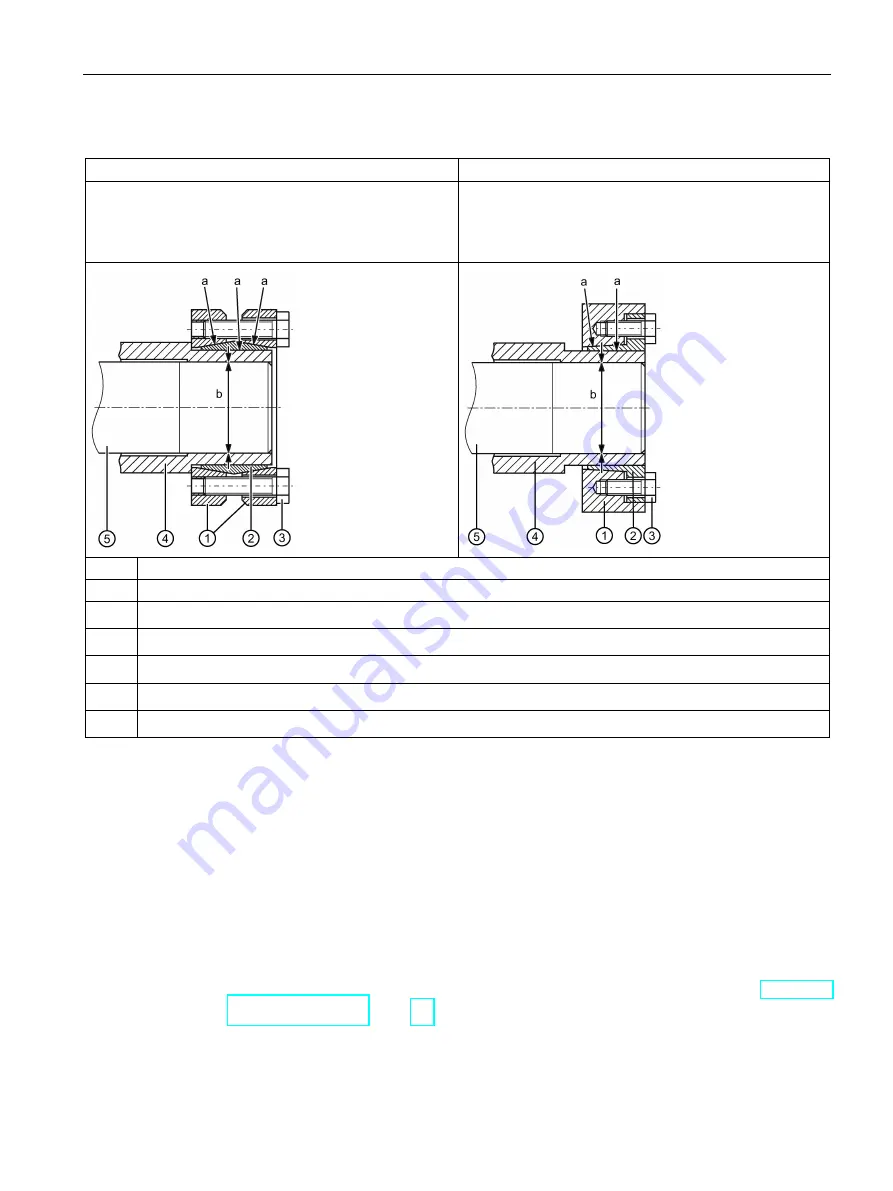
Table 4- 12 Mounting the shrink disk
Sizes 19 - 69:
Sizes 79 - 149:
Tighten tightening bolts
③
.
The prime importance is that the end faces of the outer
ring
①
and inner ring
②
are flush with one another.
If they are not flush with one another when fitting, check the
tolerance of the insert shaft.
a
Greased
b
Absolutely grease-free
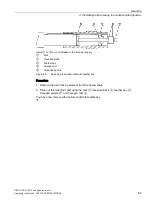
①
Outer ring
②
Inner ring
③
Tightening bolt
④
Hollow shaft
⑤
Machine shaft
Procedure
1.
Push the shrink disk onto the hollow shaft.
–
3-part shrink disk until the limit for sizes 19 - 69.
–
2-part shrink disk flush with the shaft end for sizes 79 - 149.
2.
Tighten the tightening bolts
③
handtight initially.
3.
Align the shrink disk so that the clamping flanges are plane-parallel with each other.
4.
Use the torque wrench to turn each of the clamping screws
③
equally by 1/6 revolution
(not crosswise), repeating this procedure several times. Do not exceed the maximum
tightening torque.
5.
Attach the rubber cover or protection cover included in the scope of supply, see Mounting
the protection cover (Page 86).
You have now mounted the shrink disk.
❒
Summary of Contents for SIMOTICS S-1FG1
Page 1: ...SIMOTICS S 1FG1 servo geared motor ...
Page 2: ......
Page 140: ...Faults SIMOTICS S 1FG1 servo geared motor 138 Operating Instructions 07 2019 A5E47360747B AA ...
Page 168: ......
Page 170: ......

