background image


Drive converter cabinet units 
Operating Instructions, 07/07, A5E00288214A 

259


Setpoint channel and closed-loop control 

7

7.1


Chapter content 

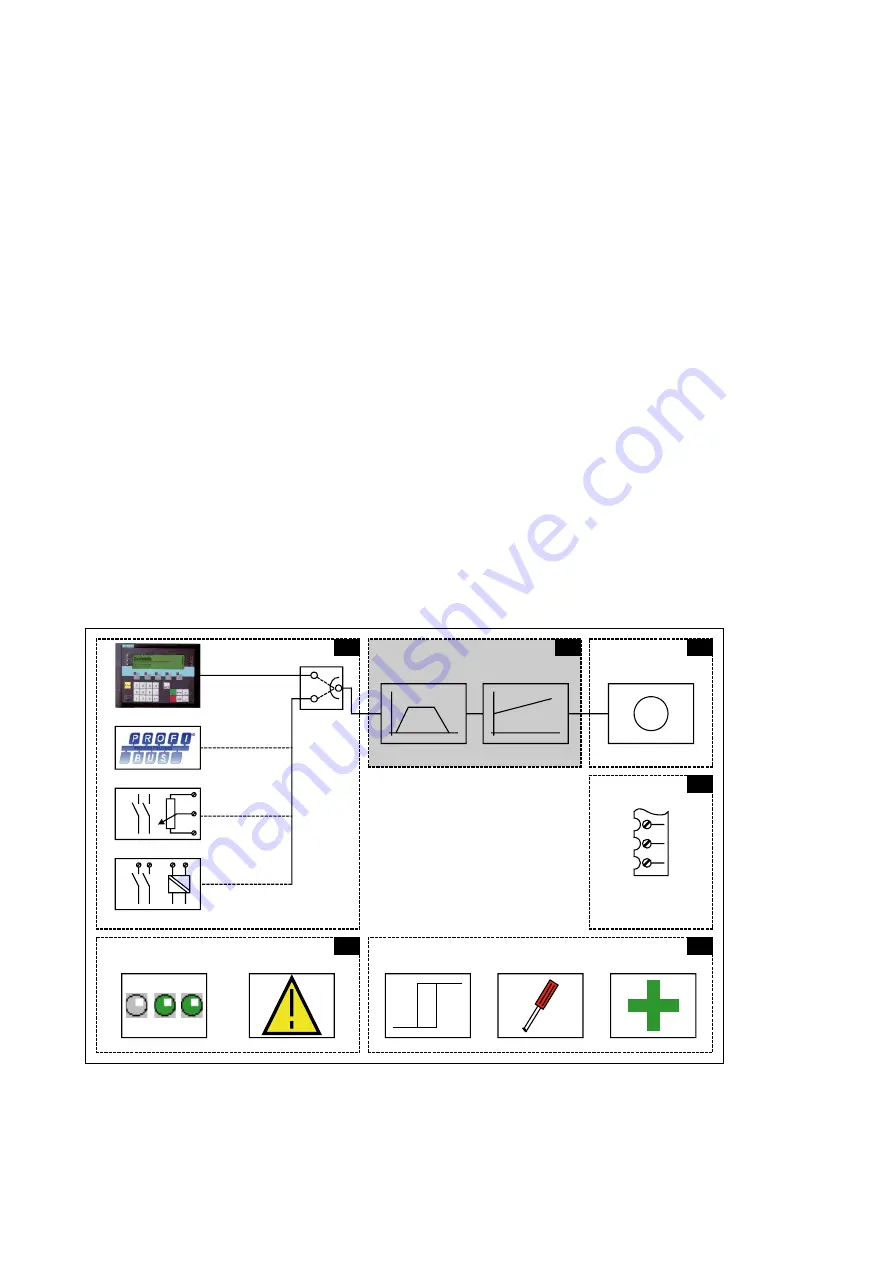
This chapter provides information on the setpoint channel and closed-loop control functions. 


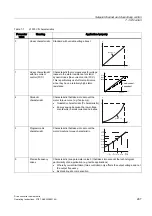
Setpoint channel 


Direction reversal 


Skip speed 


Minimum speed 


Speed limitation 


Ramp-function generator 


V/f control 


Speed control with / without encoder 

-A60 

10 

3URWHFWLYHIXQFWLRQV

2XWSXWWHUPLQDOV

0RQLWRULQJIXQFWLRQV

)XQFWLRQV

)DXOWVDODUPV

'LDJQRVLV

1DPXUWHUPLQDOV;

,QSXWWHUPLQDOV$70

352),%86

&DELQHWRSHUDWRUSDQHO

6HWSRLQWFKDQQHO &ORVHGORRSFRQWURO


Summary of Contents for SINAMICS S150

Page 1: ...sinamics s SINAMICS S150 Converter cabinet units 75 kW to 1200 kW Operating Instructions 07 2007 Edition ...

Page 2: ......

Page 3: ...6 Setpoint channel and closed loop control 7 Output terminals 8 Functions monitoring and protective functions 9 Diagnosis faults and alarms 10 Maintenance and servicing 11 Technical specifications 12 Appendix A SINAMICS SINAMICS S150 Drive converter cabinet units Operating Instructions 07 07 A5E00288214A Control version V2 5 ...

Page 4: ...ation Commissioning and operation of a device system may only be performed by qualified personnel Within the context of the safety notes in this documentation qualified persons are defined as persons who are authorized to commission ground and label devices systems and circuits in accordance with established safety practices and standards Prescribed Usage Note the following WARNING This device may...

Page 5: ...ly including the warning labels on the equipment itself The warning labels must always be legible Missing or damaged labels must be replaced Further information is available from Technical support Tel 49 0 180 50 50 222 Fax 49 0 180 50 50 223 Internet http www siemens de automation support request Internet address Information about SINAMICS can be found on the Internet at the following address htt...

Page 6: ...Preface Drive converter cabinet units 6 Operating Instructions 07 07 A5E00288214A ...

Page 7: ...chanical installation checklist 33 3 3 2 Preparation 33 3 3 3 Installation 35 3 3 4 Fitting additional canopies option M21 or hoods option M23 M43 M54 35 3 3 5 Infeed from above option M13 motor connection from above option M78 38 4 Electrical installation 41 4 1 Chapter content 41 4 2 Checklist for electrical installation 42 4 3 Important safety precautions 47 4 4 Introduction to EMC 48 4 5 EMC c...

Page 8: ... SMC10 Sensor Module for determining the actual motor speed and the rotor position angle option K46 92 4 9 16 1 Description 92 4 9 16 2 Connection 93 4 9 16 3 Connection example 94 4 9 17 SMC20 Sensor Module for determining the actual motor speed and the path length option K48 96 4 9 17 1 Description 96 4 9 17 2 Connection 97 4 9 17 3 Connection example 98 4 9 18 SMC30 Sensor Module for detecting ...

Page 9: ...97 6 5 3 Fixed speed setpoints 198 6 6 PROFIBUS 200 6 6 1 PROFIBUS connection 200 6 6 2 Control via Profibus 203 6 6 3 Monitoring Telegram failure 204 6 6 4 Telegrams and process data 205 6 6 5 Description of control words and setpoints 207 6 6 6 Description of status words and actual values 211 6 6 7 Creating an S150 in SIMATIC Manager 217 6 7 Control via the operator panel 219 6 7 1 Operator pan...

Page 10: ...5 PROFINET IO with IRTflex 242 6 8 4 6 PROFINET IO with IRTtop 242 7 Setpoint channel and closed loop control 242 7 1 Chapter content 242 7 2 Setpoint channel 242 7 2 1 Setpoint addition 242 7 2 2 Direction of rotation changeover 242 7 2 3 Skip speeds and minimum speeds 242 7 2 4 Speed limitation 242 7 2 5 Ramp function generator 242 7 3 V f control 242 7 3 1 Voltage boost 242 7 3 2 Slip compensat...

Page 11: ...5 9 3 6 4 Parameters 326 9 3 7 Friction characteristic curve 326 9 3 8 Increasing the output frequency 328 9 3 8 1 Increasing the pulse frequency 329 9 3 8 2 Parameters 330 9 3 9 Runtime operating hours counter 331 9 3 10 Simulation operation 332 9 3 11 Direction reversal 333 9 3 12 Unit changeover 334 9 3 13 Derating behavior at increased pulse frequency 336 9 4 Extended functions 338 9 4 1 Techn...

Page 12: ...ng lugs to transport power blocks 429 11 4 Replacing components 431 11 4 1 Replacing the filter mats 431 11 4 2 Replacing the power block frame size FX 432 11 4 3 Replacing the power block frame size GX 434 11 4 4 Replacing the power block frame size HX 436 11 4 5 Replacing the power block frame size JX 440 11 4 6 Replacing the Control Interface Board frame size FX 442 11 4 7 Replacing the Control...

Page 13: ...rading the cabinet unit firmware 473 11 8 Loading the new operator panel firmware from the PC 474 12 Technical specifications 475 12 1 Chapter content 475 12 2 General technical specifications 476 12 2 1 Derating data 477 12 2 2 Overload capability 481 12 3 Technical specifications 482 12 3 1 Cabinet unit version A 380 V 480 V 3 AC 483 12 3 2 Cabinet unit version A 660 V 690 V 3 AC 487 12 3 3 Cabi...

Page 14: ...Table of contents Drive converter cabinet units 14 Operating Instructions 07 07 A5E00288214A ...

Page 15: ...ese personnel must be thoroughly familiar with all warning and maintenance procedures described in these operating instructions The successful and safe operation of this device is dependent on correct transport proper storage and installation as well as careful operation and maintenance National safety guidelines must be observed Certification The following certificates can be found under Safety a...

Page 16: ...plant and the transport assembly installation commissioning maintenance and repair work is carried out by qualified personnel and or checked by experts responsible The operating manual and machine documentation are always available The technical specifications regarding the applicable installation connection environmental and operating conditions are always observed The plant specific assembly and...

Page 17: ...to contact with highly insulating materials such as plastic parts insulated desktops articles of clothing manufactured from man made fibers Boards must only be placed on conductive surfaces Boards and components should only be stored and transported in conductive packaging such as metalized plastic boxes or metal containers If the packaging material is not conductive the boards must be wrapped wit...

Page 18: ...roller External influences damage 2 Exceptional temperatures as well as emissions of light noise particles or gas caused by for example Component malfunctions Software errors Operating and or ambient conditions not within the scope of the specification External influences damage 3 Hazardous shock voltages caused by for example Component malfunctions Influence of electrostatic charging Induction of...

Page 19: ...s 07 07 A5E00288214A 19 Device overview 2 2 1 Chapter content This chapter provides information on the following Introduction to the cabinet units The main components and features of the cabinet unit The cabinet unit wiring Explanation of the type plate ...

Page 20: ...S S150 include Test bay drives Centrifuges Elevators and cranes Paper and rolling mill drives Cross cutters and shears Conveyor belts Presses Cable winches 2 2 2 Features quality service Features The self commutating pulsed feed feedback unit which is based on IBGT technology and is equipped with a clean power filter makes the minimum of demands on the line The innovative clean power filter minimi...

Page 21: ...y This concept builds on configuration communication and data management procedures that are consistent throughout the product range SINAMICS is fully integrated in the TIA concept Separate S7 PCS7 blocks and faceplates for WinCC are available Integration in SIMATIC H systems is possible via a Y link Quality The SINAMICS S150 drive converter cabinet units are manufactured to meet high standards of...

Page 22: ... can be installed in the converter cabinet units A wide range of electrical and mechanical components enable the drive system to be optimized in line with prevailing requirements The cabinet unit comprises up to two cabinet panels with a total width of between 1400 mm and 2800 mm depending on the output RRU LQWHUORFN PHUJHQF VWRS 2SHUDWRU SDQHO 9HQWLOLDWLRQ JULOOHV GHSHQGLQJ RQ GHJUHH RI SURWHFWLR...

Page 23: ...07 07 A5E00288214A 23 XVWRPHU 7HUPLQDO ORFN 0RWRU FRQQHFWLRQ LQH FRQQHFWLRQ RQWURO 8QLW 8 0RWRU 0RGXOH 8 0DLQ FLUFXLW EUHDNHU ZLWK XVHV 4 FWLYH LQH 0RGXOH FWLYH QWHUIDFH 0RGXOH LQH RQQHFWLRQ 0RGXOH Figure 2 2 Example of a cabinet unit e g 132 kW 400 V 3 AC certain components optional ...

Page 24: ...QO 0DLQ FRQWDFWRU IRU RXWSXW FXUUHQW FLUFXLW EUHDNHU IRU RXWSXW FXUUHQW DYDLODEOH DV VWDQGDUG 0RWRU FRQQHFWLRQ 0RWRU 0RGXOH LQH VXSSO FRQQHFWLRQ FWLYH LQH 0RGXOH 9ROWDJH OLQN 0DLQ FLUFXLW EUHDNHU RSWLRQDO XVHV RSWLRQDO 0DLQ FRQWDFWRU FWLYH QWHUIDFH 0RGXOH LWK OHDQ 3RZHU LOWHU DELQHW XQLW ป 3 3 ป Figure 2 3 Wiring principle of the cabinet unit NOTICE The motor earth must be fed back directly to the...

Page 25: ...Q LVW RI GHYLFH RSWLRQV 0RQWK RI PDQXIDFWXUH HDU RI PDQXIDFWXUH Figure 2 4 Type plate for the cabinet unit Date of manufacture The date of manufacture can be determined as follows Table 2 1 Production year and month Letter number Year of manufacture Letter number Month of manufacture T 2005 1 to 9 January to September U 2006 O October V 2007 N November W 2008 D December ...

Page 26: ...orced cooling drive unit fan in the device Weight Weight of the cabinet unit Explanation of the option short codes Table 2 3 Explanation of the option short codes Input options L26 Main circuit breaker incl fuses for output currents 800 A Output options L08 Motor reactor L10 dV dt filter with Voltage Peak Limiter L15 Sinusoidal filter only for the voltage range 380 V 480 V 3 AC to 200 kW Input and...

Page 27: ...or Module for determining the actual motor speed K51 VSM10 K82 Terminal module for activation of Safe Torque Off and Safe STOP 1 L19 Connection for external auxiliary equipment controlled max 10 A L50 Cabinet illumination with service socket L55 Cabinet anti condensation heating L61 25 kW braking unit 380 V 480 V 660 V 690 V L62 50 kW braking unit 380 V 480 V 660 V 690 V L64 25 kW braking unit 500...

Page 28: ...Device overview 2 5 Type plate Drive converter cabinet units 28 Operating Instructions 07 07 A5E00288214A ...

Page 29: ...structions 07 07 A5E00288214A 29 Mechanical installation 3 3 1 Chapter content This chapter provides information on the following The conditions for transporting storing and installing the cabinet unit Preparing and installing the cabinet unit ...

Page 30: ...ing transit and in the recipient country The notes on the packaging for transportation storage and proper handling must be observed For transportation using forklifts the devices must be set down on a wooden pallet When the devices are unpacked they can be transported using the optional transport eyebolts option M90 or rails on the cabinet unit The load must be distributed evenly Heavy blows or im...

Page 31: ...en subject to unreasonable stress The electrical safety of the device can no longer be ensured It must not be connected until a thorough high voltage test has been carried out Non observance can result in death severe personal injury or substantial property damage Storage The devices must be stored in clean dry rooms Temperatures between 25 C and 70 C are permissible Temperature variations greater...

Page 32: ...d personnel taking into account the warnings provided in these operating instructions In particular the general and national installation and safety guidelines for high voltage installations e g VDE the Union of German Technical Engineers as well as the guidelines relating to the proper use of tools and personal protective equipment must be observed Death serious injury or substantial material dam...

Page 33: ... installation Fitting additional canopies option M21 or hoods option M23 M43 M54 4 The clearance around an open door escape route specified in the applicable accident prevention guidelines must be observed 5 With option M13 M78 Choose the required metric screw connections or conduit thread connections on the basis of the cable cross section and drill the required holes in the blanking plates When ...

Page 34: ...r is expelled through the perforated top cover or the ventilation grilles in the top cover with option M13 M23 M43 M54 M78 Cooling air can also be supplied from below through raised floors or air ducts for example To allow this you have to create openings in the 3 section bottom plate According to EN 61800 3 the cabinet units are not suitable for use in low voltage public networks that supply resi...

Page 35: ...scape even if the cabinet is wall mounted Air escapes from the front and back The hood is secured by means of the four holes for the crane hooks in the cabinet Fitting hoods increases the height of the cabinet by 400 mm Cabinet units with degree of protection IP43 are supplied with additional hoods as well as plastic ventilation grilles and close meshed braided plastic in the air inlet doors and o...

Page 36: ... to the roof of the cabinet at the positions specified You may have to remove the protective grille 3 Fit the canopy to the spacers NOTICE In order to prevent water dripping into the spaces between the cabinet units connected in series there are drain channels on the sides of the canopies When fitting the canopies make sure that the drain channels interlock QVHUW WKH HQFORVHG VFUHZV IURP DERYH QVH...

Page 37: ... on the top of the cabinet depending on production requirements this can be fitted at a later stage 3 Options M43 and M54 only Use the sealing tape provided to attach the contact surfaces of the hood to the top of the cabinet 4 Fit the hood to the roof of the cabinet at the positions specified fixing points for the crane transport assembly QVHUW WKH RULJLQDO KRRG VFUHZV 0 IURP DERYH QVHUW WKH HQFO...

Page 38: ...must be mounted on site With options M23 M43 and M54 plastic ventilation grilles and filter mats are also supplied A 5 mm aluminum mounting plate with no holes is fitted in the roof of the cover for feeding in the cables Depending on the number of cables and the cross sections used holes for attaching cable glands for feeding in the cables must be drilled in this mounting plate on site Note The co...

Page 39: ...et units Operating Instructions 07 07 A5E00288214A 39 QVHUW WKH RULJLQDO KRRG VFUHZV 0 IURP DERYH QVHUW WKH HQFORVHG VFUHZV DQG SODLQ ZDVKHUV 0 IURP EHORZ GGLWLRQDO VFUHZV KHUH IRU ZLGH KRRGV 0RXQWLQJ SODWH IRU FDEOH HQWU Figure 3 3 Attaching the hood with M13 M78 ...

Page 40: ...Mechanical installation 3 3 Installation Drive converter cabinet units 40 Operating Instructions 07 07 A5E00288214A ...

Page 41: ...1 Chapter content This chapter provides information on the following Establishing the electrical connections for the cabinet unit Adjusting the fan voltage and the internal power supply to local conditions supply voltage The customer terminal block and its interfaces The interfaces for additional options ...

Page 42: ...es 3 For strain relief the cables must be clamped on the cable propping bar C type mounting bar 4 When EMC shielded cables are used screwed glands that connect the shield to ground with the greatest possible surface area must be provided on the motor terminal box On the cabinet the cables must be grounded with the clips supplied with the EMC shield bus with the greatest possible surface area shiel...

Page 43: ...xiliary equipment option L19 Set value _________________ 13 Option L50 Cabinet illumination with socket The 230 V auxiliary supply for the cabinet illumination with an integrated service socket must be connected to terminal X390 and protected with a fuse max 10 A on the line side Electrical installation Cabinet illumination with socket option L50 14 Option L55 Anti condensation heating for cabinet...

Page 44: ...ction with option L45 If the cabinet unit is integrated in an external safety circuit however the contact must be looped in via terminal block X120 Electrical installation EMERGENCY STOP category 0 230 V AC 24 V DC option L57 21 Option L59 EMERGENCY STOP category 1 230 V AC EMERGENCY STOP category 1 stops the drive in a controlled manner No additional wiring is necessary when implemented in conjun...

Page 45: ...ption L86 This must be taken into account for the evaluation factory setting 27 Option L87 Insulation monitoring The insulation monitor can only be operated from an insulated network Only one insulation monitor can be used in an electrically connected network For line side control the signaling relays must be connected accordingly or with individual drives the cabinet unit is fed via a converter t...

Page 46: ...7 A5E00288214A Required tools To install the connections you will require Spanner or socket spanner w f 10 Spanner or socket spanner w f 13 Spanner or socket spanner w f 16 17 Spanner or socket spanner w f 18 19 Hexagon socket spanner size 8 Torque wrench up to 50 Nm Screwdriver size 2 Screwdriver Torx T20 Screwdriver Torx T30 ...

Page 47: ...ponsible for ensuring that the motor converter and other devices are installed and connected in accordance with recognized engineering practice in the country of installation and in compliance with applicable regional regulations Special attention should be paid to cable dimensioning fuses grounding shutdown disconnection and overcurrent protection If an item of protective gear trips in a branch c...

Page 48: ...ure and the EMC of the system Operational reliability and noise immunity In order to achieve the greatest possible operational reliability and immunity to noise of a complete system converter automation drive machines etc measures must be taken by the converter manufacturer and the user Only when all of these measures have been taken are the satisfactory function of the converter and compliance wi...

Page 49: ...supply network without a transformer Environment 2 Industrial locations supplied by a medium voltage network via a separate transformer Table 4 2 Definition of categories C1 to C4 Definition of categories C1 to C4 Category C1 Rated voltage 1000 V unrestricted use in environment 1 Category C2 Rated voltage for stationary drive systems 1000 V for use in environment 2 For use in environment 1 only wh...

Page 50: ...flexible cables Laying the motor supply cable separately The distance between the motor supply cable and signal cable should be 20 cm Do not lay power cables and motor supply cables in parallel to each other Securing the potential to ground between modules with widely differing interference potential Lay an equalizing cable parallel to the control cable the cable cross section must be at least 16 ...

Page 51: ...duce the effectiveness of the shield by up to 90 Attach the shield to a shield bar directly after the line inlet into the cabinet Insulate the entire shielded cable and route the shield up to the device connection but do not connect it again I O interfacing Create a low impedance ground connection for additional cabinets system components and distributed devices with the largest possible cross sec...

Page 52: ...standard cable types or cable types recommended by SIEMENS Longer cables can only be used after consultation The listed cable length represents the actual distance between the converter and the motor taking account factors such as parallel laying current carrying capacity and the laying factor Unshielded cable e g Protodur NYY max 450 m Shielded cable e g Protodur NYCWY Protoflex EMV 3 Plus max 30...

Page 53: ...M12 at the points provided in the cabinet 4 Connect the motor and power cables to the terminals Make sure that you connect the conductors in the correct sequence U2 T1 V2 T2 W2 T3 and U1 L1 V1 L2 W1 L3 CAUTION Tighten the screws with the appropriate torque 50 Nm for M12 otherwise the terminal contacts could be destroyed by burning during operation Note The motor ground must be fed back directly to...

Page 54: ... generated from the main supply system by means of transformers The locations of the transformers are indicated in the layout diagrams supplied The transformers are fitted with primary taps so that they can be fine tuned to the rated supply voltage When delivered the taps are always set to the highest level With a low supply voltage the appropriate transformer tap must be activated Note Two transf...

Page 55: ...e setting on the fan transformer are indicated in the following tables Note With the 660 V 690 V 3 AC or 500 V 600 V 3 AC fan transformer a jumper is inserted between terminal 600 V and terminal CON The 600V and CON terminals are for internal use NOTICE If the terminals are not reconnected to the actual supply voltage The required cooling capacity cannot be provided because the fan rotates too slo...

Page 56: ...T10 380 V 10 380 V 400 V 10 400 V 440 V 10 440 V 480 V 10 480 V Table 4 5 Supply voltage assignments for setting the fan transformer 660 V 690 V 3AC Supply voltage Fan transformer tap G1 T10 U1 T10 660 V 10 660 V 690 V 10 690 V Table 4 6 Supply voltage assignments for setting the fan transformer 500 V 600 V 3 AC Supply voltage Fan transformer tap G1 T10 U1 T10 500 V 10 500 V 525 V 10 525 V 575 V 1...

Page 57: ...will not be correct Table 4 7 Supply voltage assignments for the internal power supply 380 V 480 V 3 AC Supply voltage range Tap Matching transformer taps A1 T10 LH1 LH2 342 V to 390 V 380 V 1 2 391 V to 410 V 400 V 1 3 411 V to 430 V 415 V 1 4 431 V to 450 V 440 V 1 5 451 V to 470 V 460 V 1 6 471 V to 528 V 480 V 1 7 Table 4 8 Supply voltage assignments for the internal power supply 660 V 690 V 3...

Page 58: ... from an ungrounded supply IT system the connection bracket for the interference suppression capacitor of the active interface modules A2 must be removed 8QVFUHZ WKH VFUHZV 0 7RU 7 DQG UHPRYH WKH FRQQHFWLRQ EUDFNHW Figure 4 5 Removing the connection bracket for the interference suppression capacitor WARNING Failing to remove the connection bracket for the interference suppression capacitor on a no...

Page 59: ... warnings and fault messages may still be displayed on the operator panel and internal protection and monitoring devices if the main supply fails DANGER When the external auxiliary supply is connected dangerous voltages are present in the cabinet unit even when the main circuit breaker is open NOTICE An external auxiliary supply infeed must always be used if the automatic restart WEA function is t...

Page 60: ... control cables on the customer terminal block A60 is established in the immediate vicinity of the terminal block For this purpose the customer terminal block A60 and the mounting plates have cut out sections which are used to snap the enclosed shield springs into place The shields of incoming and outgoing cables must be applied directly to these shield connections It is important here to establis...

Page 61: ...5 6 1 2 3 4 5 6 7 8 1 2 3 4 5 6 7 8 1 2 3 4 5 6 1 2 3 4 5 6 7 8 X541 X540 X542 X530 X520 RDY SIEMENS S5 1 V V I I 1 2 3 4 5 6 X LOLDU SRZHU VXSSO 3 9 LJLWDO RXWSXWV 5HOD 5HOD 3URWHFWLYH FRQGXFWRU FRQQHFWLRQ 0 6KLHOG FRQQHFWLRQ QDORJ RXWSXWV 7HPSHUDWXUH VHQVRU QDORJ LQSXWV XUUHQW YROWDJH VZLWFKRYHU RI DQDORJ LQSXWV LJLWDO LQSXWV Figure 4 7 Customer terminal block TM31 ...

Page 62: ...ter cabinet units 62 Operating Instructions 07 07 A5E00288214A XVWRPHU WHUPLQDO VWULS 0 0 9 9 9 9 9 9 9 9 3 0 1 0 2 9 2 2 9 2 2 2 7HPS 7HPS 9 9 9 0 0 0 0 0 0 0 2 2 9 2 2 2 2 0 0 6 6 9 9 2XW Q 2 3 9 Figure 4 8 Connection overview of customer terminal block TM31 ...

Page 63: ... M must be removed in order to avoid potential rounding The external ground must then be connected to terminals M1 and M2 X520 4 digital inputs Table 4 10 Terminal block X520 Terminal Designation1 Technical specifications 1 DI 0 2 DI 1 3 DI 2 4 DI 3 5 M1 6 M Voltage 3 V to 30 V Current input typical 10 mA up to 24 V With electrical isolation reference potential is terminal M1 Level High signal lev...

Page 64: ... To enable the digital inputs to work terminal M2 must be connected The following options are available 1 The provided ground reference of the digital inputs or 2 a jumper to terminal M notice this removes isolation for these digital inputs X521 2 analog inputs differential inputs Table 4 12 Terminal block X521 Terminal Designation1 Technical specifications 1 AI 0 2 AI 0 3 AI 1 4 AI 1 10 V 10 V Ri...

Page 65: ...al block X522 Terminal Designation1 Technical specifications 1 AO 0 V 2 AO 0 ref 3 AO 0 A 4 AO 1 V 5 AO 1 ref 6 AO 1 A 10 V 10 V 4 mA 20 mA 20 mA 20 mA 0 mA 20 mA 7 KTY 8 KTY KTY84 0 200 C PTC Rcold 1 5 kΩ 1 AO analog output KTY temperature sensor connection Max connectable cross section 1 5 mm AWG 14 X 540 Joint auxiliary voltage for the digital inputs Table 4 15 Terminal block X540 Terminal Desi...

Page 66: ...ernally generated 24 V DC signals are connected the ground must also be connected CAUTION Due to the limitation of the aggregate of the output currents an over current can cause a short circuit on an output terminal or even intrusion of the signal of a different terminal X542 2 relay outputs two way contact Table 4 17 Terminal block X542 Terminal Designation1 Technical specifications 1 DO 0 NC 2 D...

Page 67: ...tions in the documentation folder 4 9 1 dV dt filter with Voltage Peak Limiter option L10 Description The dV dt filter with Voltage Peak Limiter comprises two components the dV dt reactor and the Voltage Peak Limiter which limits transients and returns the energy to the DC link The dV dt filter with Voltage Peak Limiter is designed for use with motors for which the voltage strength of the insulati...

Page 68: ...6SL3710 7LH33 3AA0 6SL3710 7LH34 1AA0 6SL3710 7LH34 7AA0 6SL3710 7LH35 8AA0 6SL3710 7LH37 4AA0 6SL3710 7LH38 1AA0 6SL3710 7LH38 8AA0 6SL3710 7LH41 0AA0 6SL3710 7LH41 3AA0 500 V to 690 V 3 AC 6SL3710 7LG28 5AA0 6SL3710 7LG31 0AA0 6SL3710 7LG31 2AA0 6SL3710 7LG31 5AA0 6SL3710 7LG31 8AA0 6SL3710 7LG32 2AA0 6SL3710 7LG32 6AA0 6SL3710 7LG33 3AA0 6SL3710 7LG34 1AA0 6SL3710 7LG34 7AA0 6SL3710 7LG35 8AA0 ...

Page 69: ...ulation This reduces the maximum output voltage to approx 85 of the rated output voltage Maximum permissible motor cable lengths Unshielded cable max 150 m Shielded cable max 100 m During commissioning the pulse frequency rises to double the factory setting This induces current derating which must be applied to the cabinet unit rated currents listed in the technical specifications Note If a filter...

Page 70: ... 4 20 Parameter settings for sinusoidal filters with SINAMICS S150 Parameter Name Setting p0233 Power module motor reactor Filter inductance p0234 Power module sinusoidal filter capacitance Filter capacitance p0290 Power module overload response Disable pulse frequency reduction p1082 Maximum speed Fmax filter pole pair number p1800 Pulse frequency Nominal pulse frequency of the filter see previou...

Page 71: ...nd therefore has the same level as the supply voltage The outgoing circuit can be switched within the converter or externally Connection Table 4 21 Terminal block X155 Connection for external auxiliary equipment Terminal Designation Technical activities 1 L1 2 L2 3 L3 380 480 V 3 AC 660 690 V 3 AC 500 690 V 3 AC 11 12 Contactor control 230 V AC 13 14 Checkback from circuit breaker 230 V AC 0 5 A 2...

Page 72: ...it for example can be used if the auxiliary contactor is to be controlled from within the converter The Operation message is then no longer available for other purposes 2SHUDWLRQ LUFXLW SURSRVDO 1 70 Figure 4 9 Circuit proposal for controlling the auxiliary contactor from within the converter Note If 230 V AC is applied to the relay outputs the customer terminal block must also be grounded via a 6...

Page 73: ...nection Table 4 22 Terminal block X50 checkback contact main circuit breaker closed Terminal Designation1 Technical specifications 1 NO 2 NC 3 COM Max load current 10 A Max switching voltage 250 V AC Max switching capacity 250 VA Required minimum load 1mA 1 NO normally open contact NC normally closed contact COM mid position contact Max connectable cross section 4 mm AWG 10 DANGER At currents of m...

Page 74: ...n heating may still be present Voltage is also present within certain sections of the converter e g the closed loop controller or any auxiliary equipment If all the voltages have to be completely disconnected the EMERGENCY STOP pushbutton must be integrated in a protection concept which must be implemented on the line side For this purpose an NC contact is installed at terminal X120 Connection Tab...

Page 75: ...y for the cabinet illumination and socket must be provided externally and fused at max 10 A The cabinet illumination is switched on manually via a slide switch or automatically by means of an integrated motion detector factory setting The mode is selected via the switch on the light Connection Table 4 24 Terminal block X390 connection for cabinet illumination with service socket Terminal Designati...

Page 76: ... two 100 W heaters for an 800 1000 and 1200 mm cabinet panel The power supply for the heating 110 V 230 V AC must be provided externally and fused at max 16 A DANGER When the supply voltage for the cabinet anti condensation heating is connected dangerous voltages are present in the cabinet unit even when the main circuit breaker is open Connection Table 4 25 Terminal block X240 connection for cabi...

Page 77: ...resent Certain sections of the converter e g the closed loop controller or any auxiliary equipment may also remain live If all the voltages have to be completely disconnected the EMERGENCY STOP button must be integrated in a protection concept which must be implemented on the system side For this purpose an NC contact is installed at terminal X120 Connection Table 4 26 Terminal block X120 connecti...

Page 78: ...20 A121 Connection Table 4 27 Terminal block X120 connection for EMERGENCY STOP category 1 230 V AC Terminal Technical specifications 7 8 Loop in EMERGENCY STOP button from line side remove jumpers 7 8 15 16 On for monitored start Remove jumpers 15 16 and connect button 17 18 Checkback trip safety combination Max connectable cross section 4 mm AWG 10 Setting When the quick stop function OFF3 ramp ...

Page 79: ...20 Connection Table 4 28 Terminal block X120 connection for EMERGENCY STOP category 1 24 V DC Terminal Technical specifications 7 8 Loop in EMERGENCY STOP button from line side remove jumpers 7 8 15 16 On for monitored start Remove jumpers 15 16 and connect button 17 18 Checkback trip safety combination Max connectable cross section 4 mm AWG 10 Setting When the quick stop function OFF3 ramp down t...

Page 80: ... A 660 V 690 V 25 kW 125 kW 100 kW 50 kW 9 8 Ω 7 5 127 A 660 V 690 V 50 kW 250 kW 200 kW 100 kW 4 9 Ω 7 5 255 A 500 V 690 V 25 kW 125 kW 100 kW 50 kW 6 8 Ω 7 5 153 A 500 V 690 V 50 kW 250 kW 200 kW 100 kW 3 4 Ω 7 5 306 A 4 9 11 1 Installing the braking resistor Installing the braking resistor The braking resistor should not be installed in the vicinity of the converter The installation location mu...

Page 81: ...n grilles Table 4 30 Dimensions of the braking resistors Unit 25 kW resistor option L61 L64 50 kW resistor option L62 L65 Length mm 740 810 Width mm 485 485 Height mm 605 1325 URXQG FRQQHFWLRQ 0 7 SH SODWH 7 7 6FUHZ WHUPLQDO PPt 7KUHDGHG EROW 0 0 0 Figure 4 10 Dimension drawing for braking resistor 25 kW 0 0 7 SH SODWH URXQG FRQQHFWLRQ 0 7 7 6FUHZ WHUPLQDO PPt 7KUHDGHG EROW 0 Figure 4 11 Dimension...

Page 82: ...ng resistor must not exceed 50 m Table 4 31 Terminal block X5 connection for external braking resistor Terminal Description of function 1 Braking resistor connection 2 Braking resistor connection Max connectable cross section 70 mm AWG 2 0 Recommended cable cross sections For L61 L64 25 kW 35 mm AWG 1 For L62 L75 50 kW 50 mm AWG 1 0 Table 4 32 Installing the thermostatic switch for the external br...

Page 83: ...e CU320 Cabinet unit settings If the braking resistor thermostatic switch is connected to digital input 11 on the customer terminal block appropriate settings have to be made so that the drive is brought to a standstill if a fault occurs Once the device has been successfully commissioned you have to make the following changes SHUW DFFHVV OHYHO Set the Expert access level on the operator panel Key ...

Page 84: ...esistors Threshold switch The response threshold at which the braking unit is activated and the DC link voltage generated during braking are specified in the following table Note Since the braking energy is normally supplied back to the line and the braking chopper is only to be activated in the event of a power failure the default threshold value setting should be retained rather than reduced WAR...

Page 85: ...he maximum possible braking power is therefore 75 841 V 1 500 V 600 V 967 V 2 967 V is the default factory setting With a supply voltage of 500 V the response threshold can be set to 841 V to reduce the voltage stress on the motor and converter This does however reduce the possible braking power with the square of the voltage 841 967 0 75 The maximum possible braking power is therefore 75 1070 V 1...

Page 86: ...850 if a fault occurs Option L84 triggers the external fault 1 F7860 if a fault occurs Connection Table 4 34 F127 F125 connection for thermistor motor protection unit Equipment designation Description of Functions F127 T1 T2 Thermistor motor protection alarm F125 T1 T2 Thermistor motor protection shutdown The PTC thermistor sensors are connected directly to terminals T1 and T2 of the evaluation un...

Page 87: ... is not possible however the sensor cables should at least be twisted in pairs In the factory setting the measurement channels are divided into two groups of three channels With motors for example this means that three PT100s in the stator windings and two PT100s in the motor bearings can be monitored Unused channels can be suppressed via parameters The output relays are integrated in the internal...

Page 88: ... 90 240 V AC DC PT100 sensor 2 group 2 T61 T63 90 240 V AC DC PT100 sensor 3 group 2 51 52 54 90 240 V AC DC Relay output limit value group 1 reached changeover contact 61 62 64 90 240 V AC DC Relay output limit value group 2 reached changeover contact Ground _ OUT 1 U1 OUT 1 I1 OUT 1 0 4 20 mA 0 2 10V Analog output out 1 sensor group 1 Ground _ OUT 2 U2 OUT 2 I2 OUT 2 0 4 20 mA 0 2 10V Analog out...

Page 89: ...tegrated in the fault warning train of the cabinet unit on the system side providing the plant configuration and protection philosophy permit this Note When the insulation monitor is used the connection bracket for the interference suppression capacitor must be removed see Electrical installation Removing the connection bracket for the interference suppression capacitor with operation from an ungr...

Page 90: ...ary pack on the CU320 Control Unit and must be installed line side in the option slot of the CU320 Control Unit 4 Ethernet interfaces are available on the module Diagnosis of the function mode and communication are possible via LEDs Interface overview 3RUW LQWHUIDFHV WKHUQHW LQWHUIDFHV 3RUW 3RUW 3RUW V 6 QF JUHHQ DXOW UHG Figure 4 13 Communication Board Ethernet CBE20 MAC address The MAC address o...

Page 91: ...ta 3 TX Transmit data 4 Reserved do not use 5 Reserved do not use 6 TX Transmit data 7 Reserved do not use 8 Reserved do not use Screened backshell M_EXT Screen permanently connected Assembly CAUTION The Option Board should only be inserted and removed when the Control Unit and Option Board are disconnected from the power supply 5HOHDVH DQG UHPRYH WKH SURWHFWLYH FRYHU L LQJ VFUHZV 0 1P 7RU 7 QWURG...

Page 92: ... for determining the actual motor speed and the rotor position angle The signals emitted by the resolver are converted here and made available to the closed loop controller via the DRIVE CLiQ interface for evaluation purposes The following encoders can be connected to the SMC10 Sensor Module Resolver 2 pole Multipole resolver V 0 1P 5 9 L4 LQWHUIDFH OHFWURQLFV SRZHU VXSSO QFRGHU V VWHP FRQQHFWRU 3...

Page 93: ...shield 9 RESP Resolver excitation positive 10 Reserved do not use 11 RESN Resolver excitation negative 12 Reserved do not use 13 Temp Motor temperature measurement KTY 14 Reserved do not use 15 Reserved do not use 16 Reserved do not use 17 Reserved do not use 18 Reserved do not use 19 Reserved do not use 20 Reserved do not use 21 Reserved do not use 22 Reserved do not use 23 Reserved do not use 24...

Page 94: ...mple Connection example Resolver 8 pole RXV LQJ 3 1 HV 3 1 9SS 9SS 7HPS 7HPS QQHU VKLHOG 2XWHU VKLHOG RQ KRXVLQJ 6LJQDO QDPH 6 1 6 1 QQHU VKLHOG 26 26 QQHU VKLHOG 5 63 5 61 7HPS URXQG LQWHUQDO VKLHOG 7HPS URXQG H WHUQDO VKLHOG 6LJQDO QDPH VLQ VLQ URXQG LQWHUQDO VKLHOG FRV FRV URXQG LQWHUQDO VKLHOG Figure 4 16 Connection example Resolver 8 pole ...

Page 95: ... 2 Multiturn encoder No p0404 0 3 Track A B square wave No p0404 0 4 Track A B sinusoidal Yes p0404 0 5 Track C D No p0404 0 6 Hall sensor No p0404 0 8 EnDat encoder No p0404 0 9 SSI encoder No p0404 0 12 Equidistant zero mark No p0404 0 13 Irregular zero mark No p0404 0 14 Distance coded zero mark No p0404 0 15 Commutation with zero mark No p0404 0 16 Acceleration No p0404 0 20 Voltage level 5 V ...

Page 96: ...otor speed and the path length The signals emitted by the rotary pulse encoder are converted here and made available closed loop controller via the DRIVE CLiQ interface for evaluation purposes The following encoders can be connected to the SMC20 Sensor Module Incremental encoder sin cos 1Vpp Absolute value encoder for EnDat and SSI with 5 V operating voltage V 0 1P 5 9 L4 LQWHUIDFH OHFWURQLFV SRZH...

Page 97: ...nDat_Clock SSI_Clock Inverted clock EnDat interface inverted SSI clock 13 Temp Motor temperature measurement KTY PTC 14 5 V Sense Sense input encoder power supply 15 EnDat_Data SSI_Data Data EnDat interface SSI data 16 0 V Sense Ground sense input encoder power supply 17 R Reference signal R 18 R Inverted reference signal R 19 C Absolute track signal C 20 C Inverted absolute track signal C 21 D Ab...

Page 98: ...n example Connection example Incremental encoder sin cos 1 Vpp 2048 3 1 7HPS 7HPS URXQG H WHUQDO VKLHOG 6LJQDO QDPH b b URXQG LQWHUQDO VKLHOG URXQG LQWHUQDO VKLHOG 3 HQFRGHU 0 HQFRGHU 9 6HQVH 9 6HQVH 5 5 QQHU VKLHOG 5 6LJQDO QDPH 3 1 2XWHU VKLHOG RQ KRXVLQJ 5 8 8 RXV LQJ Figure 4 18 Connection example Incremental encoder sin cos 1 Vpp 2048 ...

Page 99: ...No p0404 0 4 Track A B sinusoidal Yes p0404 0 5 Track C D No p0404 0 6 Hall sensor No p0404 0 8 EnDat encoder No p0404 0 9 SSI encoder No p0404 0 12 Equidistant zero mark Yes p0404 0 13 Irregular zero mark No p0404 0 14 Distance coded zero mark No p0404 0 15 Commutation with zero mark No p0404 0 16 Acceleration No p0404 0 20 Voltage level 5 V Yes p0404 0 21 Voltage level 24 V No p0404 0 22 Remote ...

Page 100: ...connected to the SMC30 Sensor Module TTL encoder HTL encoder SSI encoder KTY or PTC temperature sensor Table 4 43 Connectable encoders with supply voltage Encoder type Remote sense X520 D Sub X521 terminal X531 terminal Open circuit monitoring HTL bipolar 24 V No No Yes Yes No HTL unipolar 24 V No No Yes Yes No TTL bipolar 24 V No Yes Yes Yes Yes TTL bipolar 5 V To X520 Yes Yes Yes Yes TTL unipola...

Page 101: ...ructions 07 07 A5E00288214A 101 For encoders with a 5 V supply at X521 X531 the cable length is dependent on the encoder current this applies cable cross sections of 0 5 mm QFRGHU SRZHU FRQVXPSWLRQ DEOH OHQJWK P Figure 4 19 Signal cable length as a function of the sensor current consumption ...

Page 102: ...r cabinet units 102 Operating Instructions 07 07 A5E00288214A 6KLHOG FRQQHFWLRQ OHFWURQLFV SRZHU VXSSO 5 9 L4 LQWHUIDFH 77 ZLWK RSHQ FLUFXLW PRQLWRULQJ 66 7 77 ZLWK 2SHQ FLUFXLW PRQLWRULQJ 66 3URWHFWLYH FRQGXFWRU FRQQHFWLRQ 0 1P V Figure 4 20 SMC30 Sensor Module ...

Page 103: ... Encoder power supply 5 P_Encoder 5 V 24 V Encoder power supply 6 P_Sense Sense input encoder power supply 7 M_Encoder M Ground for encoder power supply 8 Reserved do not use 9 M_Sense Ground sense input 10 R Reference signal R 11 R Inverted reference signal R 12 B Inverted incremental signal B 13 B Incremental signal B 14 A SSI_XDAT Inverted incremental signal A inverted SSI data 15 A SSI_DAT Inc...

Page 104: ...y Max connectable cross section 1 5 mm AWG 14 Note When unipolar HTL encoders are used A B and R on the terminal block must be jumpered with M_Encoder X531 Table 4 47 Encoder connection X531 Terminal Signal name Technical specifications 1 P_Encoder 5 V 24 V Encoder power supply 2 M_Encoder Ground for encoder power supply 3 Temp 4 Temp Temperature sensor connection KTY84 1C130 PTC 5 SSI_CLK SSI clo...

Page 105: ...DFN 7UDFN HUR SXOVH QYHUWHG HUR SXOVH 75 URXQG QFRGHU SRZHU VXSSO 9 URXQG IRU HQFRGHU SRZHU VXSSO 8E 0 Figure 4 21 Connection example 1 HTL encoder bipolar without zero marker Connection example 2 TTL encoder unipolar without zero marker p0405 A hex 7UDFN 7UDFN 7UDFN 7UDFN QFRGHU SRZHU VXSSO 9 URXQG IRU HQFRGHU SRZHU VXSSO HUR SXOVH QYHUWHG HUR SXOVH URXQG 75 8E 0 Figure 4 22 Connection example 2 ...

Page 106: ...erminals on the voltage recording module are pre assigned in the factory and must not be changed at the plant 4 9 20 Customer terminal block extension option G61 Description A TM31 interface module customer terminal block A60 is already installed in standard A second module A61 provides the following additional digital and analog inputs outputs in the drive system 8 digital inputs 4 bidirectional ...

Page 107: ...ed SI input terminals of the SINAMICS components Control Unit Power Module Motor Module satisfy the requirements in accordance with the equipment directive 98 37 EC the EN 60204 1 DIN EN ISO 13849 1 category 3 formerly EN954 1 as well as the requirements for Performance Level PL d and IEC 61508 SIL2 These are certified by the BGIA In combination with the option K82 the requirements specified in ma...

Page 108: ... switched in series of the relay Wiring of the checkback signal can be executed optionally and is not part of the safety concept Note The checkback signal is not necessary to satisfy the DIN EN ISO 13849 1 formerly EN 954 1 cat 3 standard The selection of the safety function must be executed over two channels A switch in accordance with ISO ISO 13850 EN 418 positive opening in accordance with EC 6...

Page 109: ...lengths and or the permissible cable capacity is exceeded then due to the couple capacity of the cable and the associated residual current it may be the case that the relay remains tightened in spite of opened activation element Operational voltage max 250 V DC AC Max connectable cross section 2 5 mm AWG 12 Fuse Max 4 A Load side Operational voltage max 250 V DC AC Rated operating currents AC 15 i...

Page 110: ...DO IHHGEDFN Figure 4 23 Circuit terminal module for option K82 A switch in accordance with ISO ISO 13850 EN 418 positive opening in accordance with EC 60947 5 1 or a certified safety controller must be used as activation element Note The terminal X41 10 is permanently connected to the digital input DI7 Wiring The control lines must be permanently laid Signal cables and encoder cables should be ins...

Page 111: ...e of explosion proof motors option B00 features a PTC thermistor release mechanism with PTB approval Shutdown if limit value is exceeded The associated PTC sensor is connected to terminal A1 X3 90 91 The terminal block is divided into three sections X1 X2 for the power connections A1 X2 for signal cables which must fulfill PELV requirements with electrical separation A1 X3 for connecting the motor...

Page 112: ... motor PTC thermistor sensor Terminal Designation Default value Comments 90 91 AI Connection for a PTC thermistor Shutdown if limit value is exceeded Max connectable cross section 2 5 mm AWG 12 Adapting the analog inputs and outputs If the setting ranges of the analog inputs and outputs are to be changed the associated interface converters U401 U402 U403 must be set The corresponding interface con...

Page 113: ...xiliary equipment for NAMUR option B03 Description If power is to be supplied to a motor fan on site option B03 provides an uncontrolled fuse protected 10 A outgoing section As soon as the supply voltage is present at the converter input it is also present at these terminals The voltage is the same as the converter input voltage You must take this into account when configuring the separately drive...

Page 114: ...Electrical installation 4 9 Other connections Drive converter cabinet units 114 Operating Instructions 07 07 A5E00288214A ...

Page 115: ...ioning of the cabinet initialization Entering the motor data drive commissioning Entering the most important parameters basic commissioning concluding with the motor ID Data backup Parameter reset to factory settings M A60 5 7 6 8 9 10 3URWHFWLYH IXQFWLRQV 2XWSXW WHUPLQDOV 0RQLWRULQJ IXQFWLRQV XQFWLRQV DXOWV DODUPV LDJQRVLV 1DPXU WHUPLQDOV QSXW WHUPLQDOV 70 352 86 DELQHW RSHUDWRU SDQHO 6HWSRLQW FK...

Page 116: ...nations of all the processes and available system settings For this reason this chapter only describes the individual commissioning steps Prerequisites for installing STARTER Hardware requirements PG or PC with Windows 2000 Pentium II 400 MHz 256 MB RAM 512 MB recommended Windows XP Pentium III 500 MHz 256 MB RAM 512 MB recommended 1024 x 768 pixel screen resolution Software requirements Either Wi...

Page 117: ...ure 5 1 STARTER operating areas Operating area Explanation 1 Toolbars In this area you can access frequently used functions via the icons 2 Project navigator The elements and projects available in the project are displayed here 3 Working area In this area you can change the settings for the drive units 4 Detail view Detailed information about faults and alarms for example is displayed this area ...

Page 118: ...d configuration This is intentional because By taking time to consider what configuration data you enter you can prevent inconsistencies between the project data and drive unit data identifiable in online mode 5 3 1 Creating a project Click the STARTER icon on your desktop or choose the following menu path in the Windows start menu to call up STARTER Start Simatic STEP 7 STARTER The first time you...

Page 119: ...ed Drive Commissioning screen by choosing HTML Help Close Note When you deactivate the Display Wizard during start checkbox the project Wizard is no longer displayed the next time you start STARTER You can call up the project Wizard by choosing Projec New with Wizard To deactivate the online help for Getting Started follow the instructions provided in Help You can call up the online help at any ti...

Page 120: ...g via STARTER Drive converter cabinet units 120 Operating Instructions 07 07 A5E00288214A The STARTER project Wizard Figure 5 3 STARTER project Wizard 2 Click Arrange drive units offline in the STARTER project Wizard Figure 5 4 Create new project ...

Page 121: ...if necessary the author memory location and a comment 4 Click Continue to set up the PG PC interface Figure 5 5 Set up interface Note The online connection to the drive unit can only be established via PROFIBUS 5 Click Change and test and set up the interface in accordance with your device configuration The Properties Copy and Select pushbuttons are now active ...

Page 122: ...missioning via STARTER Drive converter cabinet units 122 Operating Instructions 07 07 A5E00288214A Figure 5 6 Setting the interface Note To parameterize the interface you must install an appropriate interface card e g PC adapter PROFIBUS ...

Page 123: ...aster on bus if no other master PC S7 etc is available on the bus Note Projects can be created and PROFIBUS addresses for the drive objects assigned even if a PROFIBUS interface has not been installed on the PC To prevent bus addresses from being assigned more than once only the bus addresses available in the project are proposed 6 Once you have done this click OK to confirm the settings and retur...

Page 124: ... commissioning via STARTER Drive converter cabinet units 124 Operating Instructions 07 07 A5E00288214A Figure 5 8 Setting the interface 7 Click Continue to set up a drive unit in the project Wizard Figure 5 9 Inserting the drive unit ...

Page 125: ...ng data from the list fields Device Sinamics Type S150 Version v2 5 Bus address the corresponding bus address for the cabinet unit The entry in field Name field is user defined 9 Click Insert The selected drive unit is displayed in a preview window in the project wizard Figure 5 10 Inserting the drive unit 10 Click Continue A project summary is displayed ...

Page 126: ...ioning 5 3 Procedure for commissioning via STARTER Drive converter cabinet units 126 Operating Instructions 07 07 A5E00288214A Figure 5 11 Summary 11 Click Complete to finish creating a new drive unit project ...

Page 127: ...roject navigator open the component that contains your drive unit Figure 5 12 Project navigator configuring the drive unit 1 In the project navigator click the plus sign next to the drive unit that you want to configure The plus sign becomes a minus sign and the drive unit configuration options are displayed as a tree below the drive unit 2 Double click Configure drive unit ...

Page 128: ...ive unit 3 Under Voltage selection choose the correct voltage Under Cooling type choose the correct cooling type for your drive unit Note In this step you make a preliminary selection of the cabinet units You do not define the supply voltage yet 4 A list is now displayed under Drive unit selection Choose the corresponding drive unit according to type order no see type plate 5 Click Continue ...

Page 129: ... the options Figure 5 14 Choosing the options 6 In the Options selection combination field choose the options that belong to your drive unit by clicking the appropriate checkboxes see type plate CAUTION If a sinusoidal filter option L15 is connected it must be activated when the options are selected to prevent the filter from being destroyed ...

Page 130: ...gainst the options specified on the type plate Internal interconnections are established by the Wizard on the basis of the options selected which means that you cannot change the selected options with Back If you made an incorrect entry delete the complete drive unit from the project navigator and create a new one 7 Check your options carefully and then click Continue ...

Page 131: ...g Instructions 07 07 A5E00288214A 131 Configure the infeed Figure 5 15 Configure the infeed 8 Choose whether the line and DC link identification function is to be activated during initial start up Recommendation Activate identification Yes 9 Specify the Device connection voltage 10 Click Continue ...

Page 132: ...ive converter cabinet units 132 Operating Instructions 07 07 A5E00288214A Selecting the control structure Figure 5 16 Selecting the control structure 11 Select the required data Function modules Technology controller Basic positioner Extended messages monitoring ...

Page 133: ...h encoder Speed control sensorless Speed control with encoder I f control with fixed current V f control for drive requiring a precise frequency e g textiles V f control for drive requiring a precise frequency with FCC V f control with linear characteristic V f control with linear characteristic and FCC V f control with parabolic characteristic V f control with parameterizable characteristic V f c...

Page 134: ... following is defined IEC motor 50 Hz SI unit line frequency 50 Hz motor data in kW NEMA motor 60 Hz US unit line frequency 60 Hz motor data in hp 14 Under Supply voltage the DC link voltage of the cabinet unit is specified this should not be changed 15 Under Power unit application choose the appropriate application for your drive unit Load duty cycle with high overload condition for vector drives...

Page 135: ...ructions 07 07 A5E00288214A 135 Configuring the motor and selecting the motor type Figure 5 18 Configuring the motor and selecting the motor type 17 In the Name field enter a name of your choice for the motor 18 From the selection box next to Motor type select the appropriate motor for your application ...

Page 136: ...nits 136 Operating Instructions 07 07 A5E00288214A Note The steps described below also apply to induction motors When commissioning a permanent field synchronous motor there are a few special conditions which are detailed in a separate chapter see Closed loop control 19 Click Continue ...

Page 137: ...7 07 A5E00288214A 137 Configuring the motor and entering motor data Figure 5 19 Configuring the motor and entering motor data 20 Enter the motor data see motor type plate 21 If necessary check Do you want to enter the optional data 22 If necessary activate Do you want to enter the equivalent circuit diagram data ...

Page 138: ...a long list of standard motor types Select a motor from the list to enter the data stored in the system for that motor automatically in the data fields NOTICE You should only check the Do you want to enter equivalent circuit diagram data box if the data sheet with equivalent circuit diagram data is available If any data is missing an error message will be output when the system attempts to load th...

Page 139: ...ng via STARTER Drive converter cabinet units Operating Instructions 07 07 A5E00288214A 139 Configuring the motor and entering optional data Figure 5 20 Entering optional motor data 24 If necessary enter the optional motor data 25 Click Continue ...

Page 140: ...nverter cabinet units 140 Operating Instructions 07 07 A5E00288214A Configuring the motor and entering the equivalent circuit diagram data Figure 5 21 Entering equivalent circuit diagram data 26 If necessary enter the equivalent circuit diagram data 27 Click Continue ...

Page 141: ...lculating the motor controller data 28 In Calculation of the motor controller data choose the appropriate default settings for your device configuration Note If the equivalent circuit diagram data was entered manually see Entering the equivalent circuit diagram data the motor controller data should be calculated without calculating the equivalent circuit diagram data 29 Click Continue ...

Page 142: ...nverter cabinet units 142 Operating Instructions 07 07 A5E00288214A Configuring the motor holding brake Figure 5 23 Configuring the motor holding brake 30 Under Holding brake configuration choose the appropriate settings for your device configuration 31 Click Continue ...

Page 143: ...ating Instructions 07 07 A5E00288214A 143 Entering the encoder data option K46 K48 K50 Note If you have specified option K46 K48 or K50 SMC10 SMC20 or SMC30 Sensor Module the following screen is displayed in which you can enter the encoder data Figure 5 24 Entering the encoder data option K46 ...

Page 144: ...Commissioning 5 3 Procedure for commissioning via STARTER Drive converter cabinet units 144 Operating Instructions 07 07 A5E00288214A Figure 5 25 Entering the encoder data option K48 ...

Page 145: ...our choice 33 Click the Select standard encoder from list radio button and select one of the available encoders Standard encoders with code numbers 1xxx can be selected when encoder module SMC10 is fitted option K46 Standard encoders with code numbers 2xxx can be selected when encoder module SMC20 is fitted option K48 Standard encoders with code numbers 3xxx can be selected when encoder module SMC...

Page 146: ...n this case an example for the HTL encoder is displayed in which you can enter the required data Figure 5 27 Entering encoder data user defined encoder data example HTL encoder 35 Enter the required encoder data 36 Click OK CAUTION Option K50 once the encoder has been commissioned the supply voltage 5 24 V set for the encoder is activated on the SMC30 module If a 5 V encoder is connected and the s...

Page 147: ... cabinet units Operating Instructions 07 07 A5E00288214A 147 Default settings for setpoints command sources Figure 5 28 Default settings for setpoints command sources 33 Under Command sources and Setpoint sources choose the appropriate settings for your device configuration ...

Page 148: ...nt sources Fixed setpoint Note With SINAMICS S150 only CDS0 is normally used as a default setting for the command and setpoint sources Make sure that the selected default setting is compatible with the actual system configuration You cannot retrospectively change the selected default setting with Back unless the current value is No selection If you made an incorrect entry delete the complete drive...

Page 149: ...ining the technological application motor identification 35 Select the required data Technological application Pumps and fans edge modulation is enabled Standard drive VECTOR edge modulation is not enabled default Motor identification Motor data identification with motor running is normally the appropriate default setting for SINAMICS S150 especially if an encoder is used for speed control 36 Clic...

Page 150: ...frame Figure 5 30 Selecting the PROFIBUS message frame 37 In the PROFIBUS PZD message frame field select the PROFIBUS message frame type Message frame types Standard message frame 1 Standard message frame 2 Standard message frame 3 Standard message frame 4 VIK NAMUR message frame 20 PCS7 message frame 352 Free message frame configuration with BICO 38 Click Continue ...

Page 151: ...units Operating Instructions 07 07 A5E00288214A 151 Entering important parameters Figure 5 31 Important parameters 39 Enter the required parameter values Note STARTER provides tool tips if you position your cursor on the required field without clicking in the field 40 Click Continue ...

Page 152: ...A Summary of the drive unit data Figure 5 32 Summary of the drive unit data 41 You can use the Copy text to clipboard function to copy the summary of the drive unit data displayed on the screen to a word processing program so that you can edit it further 42 Click Finish 43 Save your project to the hard disk by choosing Project Save ...

Page 153: ...ry out the following steps Step Selection in toolbar 1 Choose Project Connect to target system 2 Choose Target system Load project to target system NOTICE The project has now been loaded to the drive unit The data is currently only stored in the volatile memory of the drive unit and not on the CompactFlash card To store the project data on the CompactFlash card so that it is protected in the event...

Page 154: ...ate a new project in STARTER using the appropriate configuration data for your application 5 3 4 Connection via serial interface In addition to using the PROFIBUS connection data can also be exchanged via a serial interface Prerequisites The PC from which the connection is to be made must be equipped with a serial interface COM Settings 1 In STARTER choose Project Set PC PG interface and select th...

Page 155: ...oning via STARTER Drive converter cabinet units Operating Instructions 07 07 A5E00288214A 155 Figure 5 33 Setting the interface 3 On CU320 set bus address 3 on the Profibus address switch 4 When creating the drive unit also set bus address 3 ...

Page 156: ...s 07 07 A5E00288214A Figure 5 34 Setting the bus address Note The bus addresses on CU320 and on the PC must not be set the same 5 The connecting cable from CU320 to AOP30 must be disconnected on CU320 A null modem cable must be used here to connect the PC COM interface and CU320 This interface must not be switched ...

Page 157: ...ts and alarms Keypad for controlling drives during operation LOCAL REMOTE switchover for selecting the control terminal master control assigned to operator panel or Customer Terminal Block PROFIBUS Numeric keypad for entering setpoint or parameter values Function keys for prompted navigation through the menus Two stage security concept to protect against accidental or unauthorized changes to setti...

Page 158: ...parameter descriptions are loaded into the operating field from the CompactFlash card 0 50 100 127 RDG SDUDPHWHU GHVFULSWLRQ 3 6 7 Figure 5 37 Load the parameter descriptions while booting up the system Selecting the language When the system is first booted up a screen for selecting the language appears QJOLVK HXWVFK UDQ DLV VSD RO WDOLDQR KLQHVH 6SUDFKDXVZDKO DQJXDJH VHOHFWLRQ You can select the ...

Page 159: ...frame When they are selected they are highlighted with a white text on a black background The present value of a highlighted selection box can usually be changed by pressing F5 OK and or Change Another entry box then appears and the value you want is entered directly using the numerical keypad or can be selected from a list You can change from one interactive screen to the next or previous screen ...

Page 160: ...anel Use the data shown on the motor type plate Figure 5 38 Example of a motor type plate Table 5 1 Motor data Parameter no Values Unit System of units for line frequency and entering motor data p0100 0 1 IEC 50 Hz kW NEMA 60 Hz hp Motor Rated voltage Rated current Rated output Rated power factor Cos at p0100 0 only Rated efficiency at p0100 1 only Rated frequency Rated speed p0304 p0305 p0307 p03...

Page 161: ...H IUHTXHQF S 1 GHQWBW SH 5HV 5HJ S F21 2 HOS KDQJH Enter the line infeed voltage in V and the line frequency in Hz Select the line identification do not change the default setting Entry for the origin of the ON OFF1 command LQH GDWD LGHQW I QHFHVVDU VWDUW ZLWK 2 DQG 21 NH Navigate within the selection fields with F2 and F3 Activate your selection with F5 Once you have entered the final value choos...

Page 162: ... 725 0RWRU SDUDPHWHUV S 6XSSO YROWDJH S P0RW 8BUDWHG 9UPV 9 S P0RW BUDWHG UPV S P0RW 3BUDWHG N HOS 2 9 725 0RWRU SDUDPHWHUV S P0RW FRVSKLBUDWHG S P0RW IBUDWHG S P0RW QBUDWHG USP S P0RWRU FRROLQJ W SH HOS 2 Entering motor data specified on the type plate To navigate through the selection fields choose F2 or F3 To activate a selection choose F5 To change a parameter value navigate to the required se...

Page 163: ...ur selection with F5 Predefined encoders can be easily set by selecting parameter p0400 encoder type selection Encoders for SMC10 1001 Resolver 1 speed 1002 Resolver 2 speed 1003 Resolver 3 speed 1004 Resolver 4 speed Encoders for SMC20 2001 2048 1 Vpp A B C D R 2002 2048 1 Vpp A B R 2003 256 1 Vpp A B R 2004 400 1 Vpp A B R 2005 512 1 Vpp A B R 2010 18000 1 Vpp A B R interval coded 2050 Encoder w...

Page 164: ...Electrical installation contains connection examples for standard encoders Note If the connected encoder does not match any of the encoders predefined in p0400 follow the simple procedure below for entering the encoder data Via p0400 select an encoder type whose data is similar to that of the connected encoder Select User defined p0400 9999 Previously set values are stored here Adjust the bit fiel...

Page 165: ...ns 07 07 A5E00288214A 165 CAUTION Once the encoder has been commissioned the supply voltage 5 24 V set for the encoder is activated on the SMC30 module If a 5 V encoder is connected and the supply voltage has not been set correctly via p0404 bit 20 Yes bit 21 No the encoder may be damaged ...

Page 166: ...Idrive 6 TM31 terminals 7 Namur 10 PROFIdrive Namur p1000 Preset setpoint source 1 PROFIdrive 2 TM31 terminals 3 Motorized potentiometer 4 Fixed setpoint Once a setpoint source has been selected p1000 the main setpoint p1070 is defaulted accordingly To navigate through the selection fields choose F2 or F3 To activate a selection choose F5 To change a parameter value navigate to the required select...

Page 167: ...YH ZLWK 2 DQG 21 NH HOS ERUW Selecting motor identification To navigate through the selection fields choose F2 or F3 To activate a selection choose F5 Stationary measurements increase control performance as deviations in the electrical characteristic values are minimized on account of deviations in the material properties and manufacturing tolerances Rotary measurements determine the data required...

Page 168: ...n 5 6 Status after commissioning LOCAL mode control via operator panel You switch to LOCAL mode by pressing the LOCAL REMOTE key Control ON OFF is carried out via the ON and OFF keys You specify the setpoint using the increase and decrease keys or by entering the appropriate numbers using the numeric keypad Analog outputs The actual speed r0063 is output as a current output in the range 0 to 20 mA...

Page 169: ...ry prevents the system from exiting the commissioning program or outputs an error message Sign bit p0410 inverts the calculated encoder angle and the speed thereby yielding a negative gear factor 5 8 Parameter reset to factory settings The factory settings represent the defined original status of the device on delivery Resetting the parameters to the factory settings means that all the parameter s...

Page 170: ...on in toolbar Choose Project Connect to target system Click the drive unit whose parameters you want to reset to the factory settings and click Restore factory settings icon in the toolbar To confirm click OK Choose Target system Copy from RAM to ROM Note The Copy from RAM to ROM icon is only active when the drive unit is selected in the project navigator When the parameters have been reset to the...

Page 171: ...ting command sources via PROFIdrive Terminal strip NAMUR terminal block Specifying setpoints via PROFIdrive Analog inputs Motorized potentiometer Fixed setpoints Control via the AOP30 operator panel M A60 5 7 6 8 9 10 3URWHFWLYH IXQFWLRQV 2XWSXW WHUPLQDOV 0RQLWRULQJ IXQFWLRQV XQFWLRQV DXOWV DODUPV LDJQRVLV 1DPXU WHUPLQDOV QSXW WHUPLQDOV 70 352 86 DELQHW RSHUDWRU SDQHO 6HWSRLQW FKDQQHO ORVHG ORRS F...

Page 172: ...efault settings you choose during commissioning are compatible with the cabinet configuration see Commissioning Emergency STOP signals L57 L59 and L60 and motor protection signals L83 and L84 are always active regardless of the command source Function diagrams To supplement these operating instructions the documentation folder contains simplified function diagrams describing the operating principl...

Page 173: ...R commissioning tool via PROFIBUS The user friendly AOP30 Operator Panel Parameter types The following adjustable and visualization parameters are available Adjustable parameters write read These parameters have a direct impact on the behavior of a function Example Ramp up and ramp down time of a ramp function generator Visualization parameters read only These parameters are used to display intern...

Page 174: ... various types of data set CDS Command data set By parameterizing several command data sets and switching between them the drive can be operated with different pre configured signal sources DDS Drive Data Set The drive data set contains the parameters for switching between different drive control configurations The CDS and DDS can be switched over during normal operation Further types of data set ...

Page 175: ...igure 6 3 Drive objects Standard drive objects Infeed Infeed control for Active Line Module If an Active Line Module is used for the infeed in a drive system open loop closed loop control is implemented on the Control Unit within a corresponding drive object Drive control Drive control handles closed loop control of the motor 1 Motor Module and at least 1 motor and up to 3 sensors are assigned to ...

Page 176: ...e software based drive objects which are processed on the Control Unit Various drive objects can be created within a Control Unit The drive objects are configurable function blocks and are used to execute specific drive functions If you need to configure additional drive objects or delete existing ones after initial commissioning the drive system must be switched to configuration mode The paramete...

Page 177: ...mand data set The BICO parameters binector and connector inputs are grouped together in a command data set These parameters are used to interconnect the signal sources of a drive see Operation BICO technology Interconnecting signals By parameterizing several command data sets and switching between them the drive can be operated with different pre configured signal sources A command data set contai...

Page 178: ...aracteristic data of controller p1240 ff The parameters that are grouped together in the drive data set are identified in the SINAMICS parameter list by Data Set DDS and are assigned an index 0 n It is possible to parameterize several drive data sets You can switch easily between different drive configurations control type motor encoder by selecting the corresponding drive data set One drive objec...

Page 179: ...ex 0 n A separate encoder data set is required for each encoder controlled by the Control Unit Up to 3 encoder data sets are assigned to a drive data set via parameters p0187 p0188 and p0189 An encoder data set can only be changed using a DDS changeover Each encoder may only be assigned to one drive and within a drive must in each drive data set either always be encoder 1 always encoder 2 or alway...

Page 180: ...ontrol Unit via a Motor Module The motor data set is assigned to a drive data set via parameter p0186 A motor data set can only be changed using a DDS changeover The motor data set changeover is for example used for Changing over between different motors Changing over between different windings in a motor e g star delta changeover Motor data adaptation If several motors are operated alternately on...

Page 181: ...S Set parameter p0819 as follows 1 p0819 0 Number of the drive data set to be copied source 2 p0819 1 Number of the drive data set to which the data is to be copied target 3 p0819 2 1 Start copying Copying is finished when p0819 2 0 Copy motor data set MDS Set parameter p0139 as follows 1 p0139 0 Number of the motor data set that is to be copied source 2 p0139 1 Number of the motor data set which ...

Page 182: ...Command data set selection CDS bit 3 p0819 0 2 Copy drive data set DDS p0820 BI Drive data set selection bit 0 p0821 BI Drive data set selection bit 1 p0822 BI Drive data set selection bit 2 p0823 BI Drive data set selection bit 3 p0824 BI Drive data set selection bit 4 6 3 4 BICO technology Interconnecting signals Description Every drive contains a large number of interconnectable input and outpu...

Page 183: ...2 bits or analog signals Connectors are subdivided into connector inputs signal sink and connector outputs signal source The options for interconnecting connectors are restricted to ensure that performance is not adversely affected Table 6 4 Connectors Abbreviation and symbol Name Description Connector input Connector input signal sink Can be interconnected to a connector output as source The numb...

Page 184: ...er be connected to one signal source BO The BICO parameter interconnection can be implemented in different command data sets CDS The different interconnections are activated by switching data sets Interconnections across drive objects are also possible Internal encoding of the binector connector output parameters The internal codes are needed for example to write BICO input parameters via PROFIdri...

Page 185: ... The OFF3 signal is to be connected to two drives via terminal DI 2 on the Control Unit Each drive has a binector input 1 OFF3 and 2 OFF3 The two signals are processed via an AND gate to STW1 2 OFF3 2 LQHFWRU RXWSXW 6LJQDO VRXUFH LQHFWRU LQSXW 6LJQDO VLQN ULYH ULYH 2 2 2 2 2 2 U 9 S S S S Figure 6 8 Connection of OFF3 to several drives example BICO interconnections to other drives The following pa...

Page 186: ...it serial Connector binector converter A 32 bit integer double word or a 16 bit integer word is converted to individual digital signals p2099 0 1 CI PROFIdrive PZD selection receive bit serial Fixed values for interconnection using BICO technology The following connector outputs are available for interconnecting any fixed value settings p2900 0 n CO Fixed value_ _1 p2901 0 n CO Fixed value_ _2 p29...

Page 187: ...rive Command sources U 0DVWHU FRQWURO DFWLYH 5 027 352 86 2 2SHUDWRU SDQHO 2 5 027 NH QWHUQDO FRQWURO DELQHW RSHUDWRU SDQHO 352 86 QSXW WHUPLQDOV 70 Figure 6 9 Command sources AOP30 PROFIdrive Priority The command source priorities are shown in the diagram Command sources AOP30 PROFIdrive Note The EMERGENCY STOP and motor protection signals are always active regardless of the command source All of...

Page 188: ...OW IUHH IUHH IUHH IUHH IUHH IUHH IUHH FNQRZOHGJH IDXOW IUHH 70 3 0 1 0 2 2 9 2 2 2 2 0 6 6 0 0 0 0 P P 2 9 2 2 9 2 2 2 7HPS 7HPS 9 9 9 9 9 9 9 9 Figure 6 10 TM31 terminal assignment with PROFIdrive default setting Control word 1 The bit assignment for control word 1 is described in Description of the control words and setpoints Status word 1 The bit assignment for status word 1 is described in Des...

Page 189: ...Command sources U 0DVWHU FRQWURO DFWLYH 5 027 70 2 2SHUDWRU SDQHO 2 5 027 NH QWHUQDO FRQWURO DELQHW RSHUDWRU SDQHO 352 86 QSXW WHUPLQDOV 70 Figure 6 11 Command sources AOP30 terminal TM31 Priority The priority of the command sources is shown in the diagram Command sources AOP30 terminal TM31 Note The emergency OFF and motor protection signals are always active regardless of the command source For ...

Page 190: ...or TM31 is as follows QYHUWHU HQDEOH IUHH IUHH IUHH 21 2 023 6 023 6 FNQRZOHGJH IDXOW IUHH XUUHQW DFWXDO YDOXH 6SHHG DFWXDO YDOXH 5HDG WR VWDUW IUHH IUHH IUHH QDEOH SXOVHV 1R IDXOW 70 3 0 1 0 2 2 9 2 2 2 2 0 6 6 0 0 0 0 P P 2 9 2 2 9 2 2 2 7HPS 7HPS 9 9 9 9 9 9 9 9 P Figure 6 12 TM31 terminal assignment with TM31 Terminals default setting Switching the command source The command source can be swit...

Page 191: ...AMUR Command sources U 0DVWHU FRQWURO DFWLYH 5 027 1 085 WHUPLQDO VWULS 2 2SHUDWRU SDQHO 2 5 027 NH QWHUQDO FRQWURO DELQHW RSHUDWRU SDQHO 1DPXU WHUPLQDOV Figure 6 13 Command sources AOP30 NAMUR terminal block Priority The priority of the command sources is shown in the diagram Command sources AOP30 NAMUR terminal block Note The EMERGENCY STOP and motor protection signals are always active regardle...

Page 192: ... 1 1 085 WHUPLQDO EORFN 21 G QDPLF 21 2 VWDWLF 2 G QDPLF 6ORZHU DVWHU 5 6 7 QWHUORFN RXQWHUFORFNZLVH 3RZHU GLVFRQQHFWLRQ 5HDG 0RWRU UXQQLQJ 6SHHG VHWSRLQW P 0RWRU IUHTXHQF P 0RWRU FXUUHQW P DXOW 37 VHQVRU VLJQDO FORFNZLVH SKDVH VHTXHQFH VLJQDO FRXQWHUFORFNZLVH SKDVH VHTXHQFH 0 3 9 2 2 Figure 6 14 TM31 terminal assignment with NAMUR terminal block default setting Switching the command source The co...

Page 193: ...Namur AOP30 10 PROFIdrive Namur Command sources U 0DVWHU FRQWURO DFWLYH 5 027 352 GULYH 1 085 2 2SHUDWRU SDQHO 2 5 027 NH QWHUQDO FRQWURO DELQHW RSHUDWRU SDQHO 352 86 1DPXU WHUPLQDOV Figure 6 15 Command sources AOP30 PROFIdrive NAMUR Priority The priority of the command sources is shown in the diagram Command sources AOP30 PROFIdrive NAMUR Note The EMERGENCY STOP and motor protection signals are a...

Page 194: ...ZHU GLVFRQQHFWLRQ 5HDG 0RWRU UXQQLQJ 6SHHG VHWSRLQW P 0RWRU IUHTXHQF P 0RWRU FXUUHQW P DXOW 37 VHQVRU VLJQDO FORFNZLVH SKDVH VHTXHQFH VLJQDO FRXQWHUFORFNZLVH SKDVH VHTXHQFH 0 3 9 2 2 Figure 6 16 Terminal assignment for the PROFIdrive NAMUR default setting Control word 1 The bit assignment for control word 1 is described in Description of the control words and setpoints Status word 1 The bit assign...

Page 195: ...ting for analog inputs was chosen during commissioning STARTER TM31 Terminals AOP30 2 TM31 terminals 6FDOLQJ KDU KDU KDU KDU 6PRRWKLQJ 7 SH LUH EUHDNDJH DQDORJ LQSXW XUU 8 XUUHQW YDOXH 2IIVHW RQO ZKHQ S S S S S S S 6 U 6 6 9 9 U S Figure 6 17 Signal flow diagram analog input 0 Function diagram FP 9566 TM31 analog input 0 AI 0 FP 9568 TM31 analog input 1 AI 1 Parameters r4052 Actual input voltage c...

Page 196: ... Current voltage switchover Set current voltage selector to Voltage V Set analog input type 0 to 10 V 10 V Note The new analog input must then be stored on the CompactFlash card so that it is protected in the event of a power failure F3505 Fault Analog input wire breakage The fault is triggered when analog input type p4056 is set to 3 4 20 mA with open circuit monitoring and the input current of 2...

Page 197: ... using parameter p1048 Configuration parameter p1030 0 1 default setting 0 is used to activate that the actual motorized potentiometer is saved in a non volatile fashion when powering down the drive unit When powering up the drive unit the starting initial value of the motorized potentiometer is set to the last actual value that was present when the drive unit was powered down Prerequisites The de...

Page 198: ...ime r1050 Motorized potentiometer setpoint after the ramp function generator 6 5 3 Fixed speed setpoints Description Three variable fixed speed setpoints are available They can be selected via terminals or PROFIBUS Prerequisites The default setting for the fixed speed setpoints was chosen during commissioning STARTER Fixed setpoint AOP30 4 Fixed setpoint Signal flow diagram L HG VSHHG VHWSRLQW L H...

Page 199: ...4A 199 Function diagram FD 3010 Fixed speed setpoints Parameters p1001 Fixed speed setpoint 01 p1002 Fixed speed setpoint 02 p1003 Fixed speed setpoint 03 r1024 Fixed speed setpoint effective Note Other fixed speed setpoints are available using p1004 to p1015 They can be selected using p1020 to p1023 ...

Page 200: ...6 1 PROFIBUS connection PROFIBUS Connection Position Address Switch and Diagnostic LED The PROFIBUS connection address switch and diagnostics LED are located on the Control Unit CU320 352 86 GGUHVV VZLWFKHV 352 86 RQQHFWLRQ V 352 86 LDJQRVWLFV 5 3 237 02 Figure 6 20 View of the Control Unit with PROFIBUS interface ...

Page 201: ...V 8 RxD TxD N Receive transmit data N A A RS485 9 not assigned Connectors The cables must be connected via PROFIBUS connectors as they contain the necessary terminating resistors The figure below shows suitable PROFIBUS connectors with without a PG PC connector PROFIBUS connector without PG PC connection 6ES7972 0BA41 0XA0 PROFIBUS connector with PG PC connection 6ES7972 0BB41 0XA0 Bus terminating...

Page 202: ...YLRXV EXV QRGH DVW EXV QRGH RQ RII RQ RII RQ RII Figure 6 21 Posisition of the bus terminating resistors Cable routing QVHUW WKH 352 86 FDEOH LQWR WKH HOHFWURQLFV PRGXOH IURP DERYH 6KLHOG VXSSRUW 5RXWH WKH FRQQHFWLQJ FDEOH DORQJ WKH H LVWLQJ FDEOH VWUDQG DQG VHFXUH LW XVLQJ FDEOH WLHV 7KH FDEOH PXVW EH LQVWDOOHG ZLWKRXW XVLQJ EXV FRQQHFWRUV Figure 6 22 Cable routing ...

Page 203: ...g setpoints Red Steady light Cyclic communication has been interrupted Setting the PROFIBUS Address Two methods are available for setting the PROFIBUS address The address switches DIP switches on the front of the Control Unit behind the cover plate see PROFIBUS connection In this case p0918 is read only and shows the address setting A change to the switch only becomes effective after the Control U...

Page 204: ...tally Integrated Automation TIA can only be utilized when selecting 0 6 6 3 Monitoring Telegram failure Description Following a telegram failure and after a monitoring time has elapsed t_An bit r2043 0 is set to 1 and alarm A01920 is output Binector output r2043 0 can be used for an emergency stop for example Once a delay time p2044 has elapsed fault F01910 is output and fault reaction OFF3 quick ...

Page 205: ... default settings Free telegram p0922 999 is selected The receive message frame is parameterized as follows as a result of the default setting plan 622 STW 1 N_SETP The send telegram is parameterized as follows factory setting plan 623 ZSW 1 N_ACT I_IST M_ACT P_ACT Fault You do not have to make any further settings in order to use these telegrams User defined telegram selection a Standard telegram...

Page 206: ...though it can be changed or supplemented at any time To maintain compliance with the PROFIdrive profile however the following assignments should be retained Interconnect PZD receive word 1 as control word 1 CTW 1 Interconnect PZD send word 1 as status word 1 STW 1 For more information about possible interconnections see function diagrams FD2460 and FD2470 and the simplified diagrams 620 to 622 Str...

Page 207: ...2038 0 Bit Meaning Explanation Betriebsbedi ngung BICO 0 OFF1 OFF1 0 Deceleration on the deceleration ramp p1121 then pulse block main contactor if fitted is opened 0 1 ON 1 BI p0840 0 Coast to stop OFF2 0 Pulse block main contactor if fitted is opened 1 BI p0844 BI p0845 1 Do not coast to stop 1 Note Control signal OFF2 is generated by ANDing BI p0844 and BI p0845 0 Emergency stop OFF3 0 Decelera...

Page 208: ...appropriate status via STW1 9 1 1 CCW phase sequence 11 1 Direction of rotation changeover 0 CW phase sequence BI p1113 12 Reserved 13 1 Increase motorized potentiometer BI p1035 1 Decrease motorized potentiometer BI p1036 14 Note If motorized potentiometer raise and lower are 0 or 1 simultaneously the current setpoint is frozen 15 Reserved Control word 1 STW 1 interface mode PROFIdrive VIK NAMUR ...

Page 209: ... setpoint 0 The speed setpoint at the input of the ramp function generator is set to zero The drive brakes in accordance with the ramp down time set in p1121 1 BI p1142 0 1 Acknowledge error A positive signal transition acknowledges all the current faults BI p2103 7 Note Acknowledgement is realized with a 0 1 edge via BI p2103 or BI p2104 or BI p2105 8 Reserved 9 Reserved 1 PROFIBUS control words ...

Page 210: ...00 Speed setpoint N_Set_B Speed setpoint with 32 bit resolution incl sign bit Bit 31 determines the setpoint sign Bit 0 positive setpoint Bit 1 negative setpoint The speed setpoint is normalized via parameter p2000 N_set_B 4000 0000 hex or 1073741824 dec speed in p2000 PCS7 specific setpoints PCS7 x Depending on the configuration KP adaptation values for the speed controller and acceleration value...

Page 211: ...SMOOTH Actual speed smoothed r0063 1 FP4715 Ia_act_SMOOTH Current actual value smoothed r0068 1 FP6714 M_act_SMOOTH Torque actual value smoothed r0080 1 FP6714 P_act_SMOOTH Power actual value smoothed r0082 1 FP6714 MELD_NAMUR VIK NAMUR message bit bar r3113 see table NAMUR message bit bar WARN_CODE Alarm code r2132 FP8065 ERROR_CODE Error code r2131 FP8060 Status word 1 interface mode SINAMICS MI...

Page 212: ...larm buffer 7 Alarm present 0 No alarm present No active alarm is present in the alarm buffer BO r2139 7 1 Setpoint actual value monitoring within tolerance bandwidth Actual value within tolerance band dynamic overshoot or shortfall permitted for t tmax tmax can be parameterized See FP8010 8 Speed setpoint actual value deviation within tolerance bandwidth 0 Setpoint actual value monitoring not wit...

Page 213: ...9 1 1 Operation enabled Enable electronics and pulses then ramp up to active setpoint 2 Operation enabled 0 Operation inhibited BO r0899 2 1 Fault active The drive is faulty and is therefore out of service The drive switches to Power on inhibit once the fault has been acknowledged and the cause has been remedied The active faults are stored in the fault buffer 3 Fault active 0 No fault present The...

Page 214: ...r2197 7 1 Control from the PLC 9 Control requested for PLC 1 is always present 0 Local operation BO r0899 9 1 f or n comparison value reached or exceeded f or n comparison value reached or exceeded 0 f or n comparison value not reached BO r2199 1 10 Note The message is parameterized as follows p2141 Threshold value p2142 Hysteresis 1 I M or P limit not reached 11 I M or P limit not reached I M or ...

Page 215: ...her faults errors No Yes Actual speed value N_Act_A N_Act_SMOOTH Actual speed value with 16 bit resolution incl sign bit Bit 15 determines the actual value sign Bit 0 positive actual value Bit 1 negative actual value The actual speed value is normalized via parameter p2000 N_act_A 4000 hex or 16384 dec speed in p2000 Actual speed N_act_B Actual speed value with 32 bit resolution incl sign bit Bit ...

Page 216: ...power value P_Act P_Act_SMOOTH Actual power value with 16 bit resolution incl sign bit Bit 15 determines the actual value sign Bit 0 positive actual value Bit 1 negative actual value The actual power value is normalized via parameter p2004 P_act 4000 hex or 16384 dec power in p2004 Alarm code WARN_CODE The number of the current alarm and the last alarm to occur are output here Decimal notation is ...

Page 217: ... 24 SIMATIC screen in HWConfig DP slave properties S150 The number 1 is entered in the first field under Object Standard telegram 1 is defaulted in the field under Telegram selection To display a selection field in which you can select different telegram types click the standard telegram To display or change details e g addresses for peripheral equipment for the selected telegram choose the Detail...

Page 218: ...8 index 0 and a 2 in p0978 index 1 To exit the device configuration use p0009 0 You must ensure that the new parameters are saved to the EEPROM in online mode Using the STARTER and DRIVE ES software tools If the DRIVE_ES program is installed in addition to the SIMATIC Step 7 program and the STARTER commissioning tool you can access STARTER directly from SIMATIC Manager You have to configure the SI...

Page 219: ...n commissioning Monitoring status variables Controlling the drive Diagnosing faults and alarms All the functions can be accessed via a menu Your starting point is the main menu which you can always call up using the yellow MENU key 2SHUDWLRQ VFUHHQ DXOW DODUP PHPRU RPPLVVLRQLQJ VHUYLFH 6SUDFKDXVZDKO DQJXDJH VHOHFWLRQ 3DUDPHWHUL DWLRQ 0 1 0 18 2 HOS Dialog screen for the main menu It can be accesse...

Page 220: ...GLRPD LQJXD 0DLQ PHQX 0 18 0 18 5HVHW 23 VHWWLQJV 6HW GDWH WLPH DWH IRUPDW HILQH RSHUDWRU VFUHHQ LVSOD VHWWLQJV RQWURO VHWWLQJV 5HVHW IDQ RSHUDWLQJ WLPH 0RWRU LGHQWLILFDWLRQ RPSOHWH FRPPLVVLRQLQJ DVLF FRPPLVVLRQLQJ 23 VHWWLQJV HYLFH FRPPLVVLRQLQJ ULYH FRPPLVVLRQLQJ DXOW KLVWRU DXOW KLVWRU DXOWV ODUPV HOS WH WV FDQ EH FDOOHG XS IRU DOO DODUPV DQG IDXOWV 6DIHW LQKLELWV 2SHUDW LQKLELW 3DUDP LQKLELW F...

Page 221: ... 8B 9 725 23 5 7 21 LDJ HOS KDQJH VHO SDU Figure 6 27 Operation screen If a fault occurs the system automatically displays the fault screen see Faults and alarms In LOCAL control mode you can choose to enter the setpoint numerically F2 setpoint The Define operation screen menu can be selected directly using F3 Change The individual parameters of the operation screen can be selected using F4 Sel pa...

Page 222: ...he device are listed here The DO to which the parameter currently selected belongs inverted is displayed in curly brackets in the top left of the screen 2 DO selection In this display you can pre select a DO Only the parameters for this DO are then listed The expert list display in STARTER only uses this DO view In both cases the set access level governs which parameters are displayed You can set ...

Page 223: ... Fault alarm memory When you navigate to the line with active alarms faults and then press the F5 Diag key the system displays a screen in which you have to select the current or old alarms faults XUUHQW IDXOWV XUUHQW DODUPV 2OG IDXOWV 2OG DODUPV 9 725 LVSOD GLDJQRVWLFV DFN 2 Diagnosis display When you navigate to the required line and then press the F5 OK key the corresponding faults alarms are d...

Page 224: ...motor data The parameter values calculated during previous commissioning are lost In a subsequent motor identification procedure the calculated values are overwritten Motor identification The selection screen for motor identification appears Resetting the fan runtime After a fan replacement the time counter for monitoring the fan runtime must be reset 6 7 5 2 Device commissioning Device commission...

Page 225: ...HHQ YDOXHV 6FUHHQ W SH HOS DFN KDQJH 2SHUDWLRQ VFUHHQ UY 8BRXWS VPRRWK 6HWSW DIWHU OLPLW 3RZHU IDFWRU VPWK 9GF VPRRWK HOS DFN KDQJH Figure 6 29 Defining the operation screen The following image shows how the entries are assigned to the screen positions 6 6 6 6 6 QWU QWU QWU QWU QWU QWU QWU QWU QWU QWU QWU QWU QWU QWU QWU QWU QWU QWU QWU QWU QWU QWU QWU QWU QWU QWU QWU QWU 23 5 7 21 23 5 7 21 23 5 ...

Page 226: ...smoothed r0028 AUSST Reference modulation depth Field producing current component r0029 IDACT A p2002 Torque producing current component r0030 IQACT A p2002 Converter overload Degree of thermal overload r0036 LTI2T 100 Shutdown Speed actual value motor encoder r0061 N_ACT 1 min p2000 Speed setpoint after filter r0062 NSETP 1 min p2000 Actual speed smoothed r0063 N_ACT 1 min p2000 Control deviation...

Page 227: ...bject A_INF Signal Parameters Short name Unit Scaling 100 See table below DC link voltage smoothed 1 r0026 U_DC V p2001 Input voltage 2 r0025 U_IN V p2001 Active current 3 r0030 IACTV A p2002 Line frequency 4 r0024 FLINE Hz p2000 Active power 5 r0032 PACTV kW r2004 Actual value of current 6 r0027 I_IST A p2002 Temperature of power unit 7 r0037 T_LT C Reference temperature Power factor smoothed 8 r...

Page 228: ...ables error messages to be date and time stamped None factory setting The times for the AOP and drive unit are not synchronized AOP Drive If you activate this option the AOP and drive unit are synchronized immediately whereby the current AOP time is transferred to the drive unit The current AOP time is transferred to the drive unit every time the AOP is started At 02 00 AOP time every day the curr...

Page 229: ...ou can display the battery voltage numerically in Volts or as a bar display The battery ensures that the data in the database and the current time are retained When the battery voltage is represented as a percentage a battery voltage of 2 V is equal to 0 and a voltage of 3 V to 100 The data is secure up to a battery voltage of 2 V If the battery voltage is 2 45 V the message Replace battery is dis...

Page 230: ...texts for the different languages from the drive You can change the language of the operator panel via the Language Sprache Langue Idioma Lingua menu Note Additional languages for the display Languages in addition to the current available languages in the display are available on request 6 7 7 Operation via the operator panel LOCAL mode You activate the control keys by switching to LOCAL mode If t...

Page 231: ...P function No The OFF key is only effective in LOCAL mode LOCAL REMOTE also during operation factory setting no Yes You can switch between LOCAL and REMOTE when the drive is switched on motor is running No Before the system switches to LOCAL a check is carried out to determine whether the drive is in the operational status If so the system does not switch to LOCAL and outputs the message Local not...

Page 232: ... Yes The jog key is effective in the LOCAL mode in the state ready to power up not in operation The speed that is set in parameter p1058 is approached No The JOG key has no effect in LOCAL mode 6 7 7 5 Increase setpoint decrease setpoint You can use the increase and decrease keys to set the setpoint with a resolution of 1min 1 of the maximum speed You can also enter the setpoint numerically To do ...

Page 233: ...eter setpoint that was last saved is used No On power up in LOCAL mode the speed is always set to the value entered under AOP starting setpoint When the system is switched from REMOTE to LOCAL mode while the drive is switched on motor is running the actual value that was last present is set as the output value for the AOP setpoint AOP setpoint ramp up time factory setting 10 s AOP setpoint ramp do...

Page 234: ...erator input parameters disable using a key pushbutton Two key icons appear in the top right of the display when these inhibit functions are enabled Table 6 23 Display of operator input parameters disable Inhibit type Online operation Offline operation No inhibit Operator input inhibit Parameters disable Operator input inhibit parameters disable Settings KDQJH KDQJH QRWBDFWLYH QRWBDFWLYH 6WDQGDUG ...

Page 235: ...d alarms If a fault occurs the drive displays the fault and or alarm on the operator panel Faults are indicated by the red FAULT LED and a fault screen is automatically displayed You can use the F1 Help function to call up information about the cause of the fault and how to remedy it You can use F5 Ack to acknowledge a stored fault Alarms are indicated by means of the yellow ALARM LED The system a...

Page 236: ...en you press F4 Next The function required can be selected using F2 and F3 and executed by pressing F5 OK The Acknowledge function sends an acknowledgement signal to each drive object The red FAULT LED extinguishes once all the faults have been acknowledged DXOW YDOXH KH DXVH 7KH 2 VLJQDO IRU H WHUQDO IDXOW KDV EHHQ WULJJHUHG 5HPHG WHUQDO IDXOW 9 725 DXOWV DFN FN HOS WHUQDO IDXOW DFN Figure 6 32 F...

Page 237: ...ters that have been changed To store the parameters permanently choose MENU Parameterization OK Permanent parameter transfer When confirming a parameter setting with OK press the OK key for 1 s The system displays a message asking you whether the setting is to be saved in the EEPROM If you press Yes the system saves the setting in the EEPROM If you press No the setting is not saved permanently and...

Page 238: ... version 2 5 1 CBE20 STARTER via PROFINET IO example WKHUQHW DGDSWHU 352 1 7 LQWHUIDFH 3 3 67 57 5 8 HYLFH 3 352 1 7 Figure 6 34 STARTER via PROFINET example Procedure establishing online operation with PROFINET 1 Set the IP address in Windows XP The PC PG is referred here to a fixed free IP address 2 Settings in STARTER 3 Assignment of the IP address and the name for the PROFINET interface of the...

Page 239: ...E00288214A 239 Set the IP address in Windows XP On the desktop right click on Network environment Properties double click on Network card and choose Properties Internet Protocol TCP IP Properties Enter the freely assignable addresses Figure 6 35 Properties of the Internet Protocol TCP IP ...

Page 240: ... Assignment of the IP address and the name for the PROFINET interface of the drive unit Use the STARTER to assign an IP address and a name to the PROFINET interface e g CBE20 Requirement Connect the direct Ethernet cable from the PG PC to the PROFINET interface of the CU320 Control Unit Switch on Control Unit CU320 The accessible nodes must be searched in the STARTER Project Accessible nodes Subse...

Page 241: ...g Instructions 07 07 A5E00288214A 241 Figure 6 37 STARTER Accessible nodes The selected node is edited by selecting the field for the node with the right mouse button and selecting the option Edit Ethernet node Figure 6 38 STARTER Accessible nodes Edit Ethernet node ...

Page 242: ...ubnet mask The subnet screens must match before STARTER can be run Figure 6 39 STARTER Edit Ethernet nodes After selecting the Assign name button the following confirmation will appear if the assignment was successful Figure 6 40 STARTER Successful assignment of the device name After selecting the Assign IP configuration button the following confirmation will appear if the assignment was successfu...

Page 243: ...ignment of the IP configuration After closing the Edit Ethernet node interactive screen the successful christening of the node is displayed in the node overview after updating F5 Figure 6 42 STARTER Accessible nodes update completed Note The IP address and device name for the Control Unit are stored on the CompactFlash Card non volatile ...

Page 244: ...bus for the cell level Experience gained from both systems was and is being integrated into PROFINET As an Ethernet based automation standard defined by PROFIBUS International PROFIBUS user organization PROFINET is a manufacturer independent communication and engineering model When a CBE20 Communication Board is inserted SINAMICS S150 becomes an IO device in terms of PROFINET SINAMICS S150 and CBE...

Page 245: ...uaranteed within the same network Definition Isochronous real time communication IRT Isochronous Real Time Ethernet Real time properties of PROFINET IO where IRT telegrams are transmitted deterministically via planned communication paths in a defined sequence to achieve the best possible synchronism and performance This is also known as time scheduled communications whereby knowledge about the net...

Page 246: ... a prerequisite for establishing a connection and parameterization This is the reason that an IP address is required The IP addresses of IO devices can be assigned by the IO controller and always have the same sub network mask as the IO controller The can be consecutively assigned from the IP address of the IO controller The IP address can be changed manually if necessary and is saved in a volatil...

Page 247: ...work address is obtained by an AND operation on the IP address and sub network mask The node address is obtained by an AND NOT operation on the IP address and sub network mask Example of the sub network mask Sub network mask 255 255 0 0 decimal 11111111 11111111 00000000 00000000 binary IP address 140 80 0 2 significance The first 2 bytes of the IP address decide the sub network in other words 140...

Page 248: ... in a drive unit Sequence of drive objects in the data transfer The sequence of drive objects is displayed via a list in p0978 0 15 where it can also be changed Note The sequence of drive objects in HW Config must be the same as that in the drive p0978 NOTICE A ring type topology is not permissible 6 8 3 Hardware setup 6 8 3 1 Configuring SINAMICS drives with PROFINET Communication Board Ethernet ...

Page 249: ...WUROOHU H J 6 38 6XSHUYLVRU H J 3 6XSHUYLVRU RQ FRQWUROOHU 352 86 7RSRORJ 352 1 7 2 VXSHUYLVRU 7RSRORJ 6XSHUYLVRU H J 3 HYLFH H J 8 3 3 3 31 3 3 3 31 3 7 Figure 6 44 Connecting the supervisor NOTICE SINAMICS does not support routing from PROFIBUS to PROFINET and vice versa NOTICE If a CBE20 module fails e g due to a power failure then communication with the subsequent nodes is interrupted at this ...

Page 250: ...s be further optimized or minimized compared with IRTflex In addition to the isochronous data transfer with IRT even the application position control cycle IPO cycle can be synchronized in the devices This is an essential requirement for closed loop axis control and synchronization via the bus Table 6 24 Comparison between RT IRTflex and IRTtop RT class RT IRTflex IRTtop Transfer mode Switching ba...

Page 251: ...zation accuracy Forwarding of the sync telegram in software Forwarding of the sync telegram in software accuracy 1 µs Possible transmission cycle clocks observe any device specific restrictions 1 000 2 000 4 000 µs 500 planned as of FW2 5 SP1 1 000 2 000 4 000 µs 500 planned as of FW2 5 SP1 1 000 4 000 µs in increments of 125 µs The increment depends on the controller Set the RT class The IO contr...

Page 252: ...iority over IT telegrams in accordance with IEEE802 1q This ensures the required determinism in the automation technology Data exchange Communication is possibly only within a network subnet Refresh time The refresh time is in the range 1 ms 2 ms and 4 ms The real refresh time depends on the bus load the devices used and the quality structure of the I O data The refresh time is a multiple of the s...

Page 253: ...T IO with RT sub network has been configured and a drive inserted via the GSD file SINAMICS S120 CBE20 Now drives and drive objects DOs are to be parameterized For this version of the GSDML file the telegrams can be inserted one after the other Note The sequence of the telegram structure must match the sequence of the drive objects in the configuration screen of the drive in STARTER Procedure 1 Se...

Page 254: ...with RT For a list of SIMATIC S7 modules that use Device OM please contact SIEMENS Product Service 1 In the hardware catalog open PROFINET IO Drives SINAMICS Relevant drive The available SINAMICS Device OM drive objects are listed If GSD files have already been installed a GSD directory is listed too 2 Select the relevant drive object DO and drag it to the appropriate slot in the station window Th...

Page 255: ... and TCP IP communication This is safeguarded by high precision hardware based cycle monitoring 57 FRPSRQHQW 57 FRPSRQHQW 57 FRPSRQHQW 7 3 3 FRPSRQHQW 7 3 3 FRPSRQHQW 7 3 3 FRPSRQHQW 6HQG FORFN LQWHUYDO 6HQG FORFN LQWHUYDO 6HQG FORFN LQWHUYDO H J PV SRVLWLRQ FRQWUROOHU F FOH VRFKURQRXV FRPPXQLFDWLRQ 7 3 3 FRPPXQLFDWLRQ 2 GDWD 7 3 3 GDWD Figure 6 45 IRT Communication Overview PROFINET IO with IRT i...

Page 256: ... are transmitted based on a schedule Sync domain The sync domain can be configured in HW Config SINAMICS S120 is an IO device and has to be assigned to a sync master as a sync slave 6 8 4 5 PROFINET IO with IRTflex Description For PROFINET IO with IRTflex the largest IRT bandwidth requirement of a device plus a reserve for the complete network is reserved It is not defined when which telegram in t...

Page 257: ...fresh time Within this time all cyclic and acyclic data IRTtop data is transferred The send clock of 500 µs planned as of FW2 5 SP1 1 ms 4 ms is the maximum range in which the send clock can be set The actual send clock that can be set depends on various factors The bus traffic load The type of devices used The computing power available in the controller The supported send clocks on the PROFINET d...

Page 258: ...uit In order for scheduled communication not to be put at risk by spontaneously transmitted IT telegrams a certain proportion of cyclic communication is reserved exclusively for IRTtop transmission This is called bandwidth reservation The rest of the communication cycle can be used for RT and IT communication Data exchange Communication is generally also possible via network limits via routers How...

Page 259: ...nel and closed loop control functions Setpoint channel Direction reversal Skip speed Minimum speed Speed limitation Ramp function generator V f control Speed control with without encoder M A60 5 7 6 8 9 10 3URWHFWLYH IXQFWLRQV 2XWSXW WHUPLQDOV 0RQLWRULQJ IXQFWLRQV XQFWLRQV DXOWV DODUPV LDJQRVLV 1DPXU WHUPLQDOV QSXW WHUPLQDOV 70 352 86 DELQHW RSHUDWRU SDQHO 6HWSRLQW FKDQQHO ORVHG ORRS FRQWURO ...

Page 260: ... CD in the SINAMICS List Manual which provides experienced users with detailed descriptions of all the functions 7 2 Setpoint channel 7 2 1 Setpoint addition Description The supplementary setpoint can be used to enter correction values from higher level closed loop controls This can be implemented using the summing point of the main supplementary setpoint in the setpoint channel Both variables are...

Page 261: ...or cables it can be corrected when commissioning the drive via p1821 rotating field direction reversal by changing the rotating field and thus enabling a direction reversal see section Direction reversal Prerequisites Direction of rotation changeover is triggered via PROFIBUS by means of control word 1 bit 11 via the cabinet operator panel LOCAL mode with the direction of rotation changeover key N...

Page 262: ...e operation Because the points at which critical whirling speeds occur in a drive train can vary depending on age or thermal factors a broader control range must be blocked To ensure that the speed does not constantly increase and decrease in the suppression bandwidth speeds the bands are assigned a hysteresis Specifying a minimum speed allows a specific range to be disabled around speed rpm for s...

Page 263: ...ing 7 2 4 Speed limitation Description Speed limitation aims to limit the maximum permissible speed of the entire drive train to protect the drive and load machine process against damage caused by excessive speeds Signal flow diagram 6SHHG OLPLW QHJDWLYH 6SHHG OLPLW SRVLWLYH QVHWSBDIWHU0LQ LP 6HWSBEHIRUHB5 S S U U Figure 7 2 Signal flow diagram Speed limitation Function diagram FP 3050 Suppression...

Page 264: ... quality Notice if rounding times are too long this can cause the setpoint to be overshot if the setpoint is reduced abruptly during ramp up Rounding is also effective in the zero crossover in other words when the direction is reversed the ramp function generator output is reduced to zero via initial rounding the ramp down time and final rounding before the new inverted setpoint is approached via ...

Page 265: ...time p1130 Ramp function generator initial rounding time p1131 Ramp function generator final rounding time p1134 Ramp function generator rounding type p1135 OFF3 ramp down time p1136 OFF3 initial rounding time p1137 OFF3 final rounding time r1150 Ramp function generator speed setpoint at the output p1151 Ramp function generator configuration Note The effective ramp up time increases when you enter...

Page 266: ...s is in turn proportional to the product or more precisely the vector product Φ x I of the flux and current M Φ x I To generate as much torque as possible with a given current the motor must function using the greatest possible constant flux To maintain a constant flux Φ therefore the voltage V must change in proportion to the frequency f to ensure a constant magnetization current Iµ V f character...

Page 267: ...U S S I PD RDG FXUUHQW GHSHQGHQW 2 Parabolic characteristic Characteristic that takes into account the motor torque curve e g fan pump Quadratic characteristic f characteristic Energy saving because the low voltage also results in small currents and losses Vn 0 fn V f S 3 Programmable characteristic Characteristic that takes into account the motor machine torque characteristic V V p1325 f1 p1320 m...

Page 268: ...s the output voltage and not the output frequency By disabling slip compensation Voltage losses in the stator resistance for static dynamic loads are also compensated flux current control FCC This is particularly useful for small motors since they have a relatively high stator resistance 19 Independent voltage setpoint The user can define the output voltage of the Power Module independently of the...

Page 269: ...ratio The output voltage may however be too low to Magnetize the induction motor Maintain the load Compensate for the voltage losses ohmic losses in the winding resistors in the system Induce a breakaway accelerating braking torque You can choose whether the voltage boost is to be active permanently p1310 or only during acceleration p1311 U S U U S S S 9ROWDJH ERRVW RQ DFFHOHUDWLRQ 3HUPDQHQW YROWD...

Page 270: ...voltage boost is active across the entire frequency range whereby the value decreases continuously as the frequency increases SHUPDQHQW 9 I QRUP DO 2XWSXW YROWDJH S 5DWHG PRWRU FXUUHQW U XUUHQW VWDWRU UHVLVWDQFH S 3HUPDQHQW YROWDJH ERRVW 9 I OLQHDU S 3ROH SDLU QR 9PD SHUPDQHQW PD 9 9 9Q S IQ S I I 9 U Figure 7 6 Permanent voltage boost example p1300 0 p1310 0 p1311 0 ...

Page 271: ...HO 9 I QRUP DO 2XWSXW YROWDJH S 5DWHG PRWRU FXUUHQW U XUUHQW VWDWRU UHVLVWDQFH S b 9ROWDJH ERRVW RQ DFFHOHUDWLRQ FFHOHUDWLRQ 9 I OLQHDU S 3ROH SDLU QR 9PD PD VHWS 9Q S IQ I S I I 9 9 9 U Figure 7 7 Voltage boost during acceleration example p1300 0 p1310 0 p1311 0 Function diagram FP 6300 V f characteristic and voltage boost Parameters p0304 Rated motor voltage p0305 Rated motor current r0395 Stato...

Page 272: ...ion means that the speed of induction motors is essentially kept constant independent of the load I 0 0 I I 0 ෙ Figure 7 8 Slip compensation Function diagram FP 6310 Resonance damping and slip compensation Parameters p1335 Slip compensation p1335 0 0 slip compensation is deactivated p1335 100 0 slip is fully compensated p1336 Slip compensation limit value r1337 Actual slip compensation ...

Page 273: ...otor protection due to variable torque limitation in motor and regenerative mode Drive and braking torque controlled independently of the speed These benefits are available without speed feedback Vector control can be used with or without an encoder The following criteria indicate when an encoder is required Maximum speed accuracy requirements Maximum dynamic response requirements Better command b...

Page 274: ...imultaneously IBDFW W S PLQ S S USP S W 2SHQ FRQWURO ORRS ORVHG FRQWURO ORRS Figure 7 9 Switchover conditions In open loop operation the calculated actual speed value is the same as the setpoint value For vertical loads and acceleration processes parameters p1610 constant torque boost and p1611 acceleration torque boost must be modified in order to generate the static or dynamic load torque of the...

Page 275: ...tem remains in the 0 Hz range for too long 2 s or p1758 Permanent magnet synchronous motors are always started and reversed in open loop operation The changeover speeds are set to 10 or 5 of the rated motor speed Changeover is not subject to any time condition p1758 is not evaluated Prevailing load torques motor or regenerative are adapted in open loop operation facilitating constant torque crosso...

Page 276: ...ccuracy depends on whether thermal tracking of the rotor resistance is carried out correctly In the observer model range and at speeds of less than approx 20 of the rated speed torque accuracy depends primarily on whether thermal tracking of the stator resistance is carried out correctly If the resistance of the supply cable is greater than 20 to 30 of the total resistance this should be entered i...

Page 277: ... by the PI controller and in conjunction with the pre control results in the torque setpoint When the load torque increases the speed setpoint is reduced proportionately when the droop function is active which means that the single drive within a group two or more mechanically connected motors is relieved when the torque becomes too great RQO DFWLYH LI SUH FRQWURO LV DFWLYH S FWXDO VSHHG YDOXH 6SH...

Page 278: ...ually only necessary to increase the smoothing time in p1452 for operation without an encoder or p1442 for operation with an encoder or reduce the controller gain The integral output of the speed controller can be monitored via r1482 and the limited controller output via r1508 torque setpoint Note In comparison with speed control with an encoder the dynamic response of drives without an encoder is...

Page 279: ...pumps and fans Stone mills separators large centrifugal masses Kp p1470 12 20 Tn p1472 500 1000 ms Kneader drives Kp p1470 10 Tn p1472 200 400 ms Note We recommend checking the effective speed control gain r1468 during operation If this value changes during operation Kp adaptation is being used p1400 5 1 Kp adaptation can if necessary be deactivated or its behavior changed Examples of speed contro...

Page 280: ... mv is calculated from mv p1496 x J x dω dt p1496 x p0341 x p0342 x dω dt ω 2πf The motor moment of inertia p0341 is calculated when commissioning the drive system The factor p0342 between the total moment of inertia J and the motor moment of inertia must be determined manually or by optimizing the speed controller Note When speed controller optimization is carried out the ratio between the total ...

Page 281: ...speed setpoint r0062 is delayed with the same smoothing time p1442 or p1452 as the actual value r1445 This ensures that no target actual difference r0064 occurs at the controller input during acceleration which would be attributable solely to the signal propagation time When speed pre control is activated the speed setpoint must be specified continuously or without a higher interference level avoi...

Page 282: ...rameters p0311 Rated motor speed r0333 Rated motor torque p0341 Motor moment of inertia p0342 Ratio between the total and motor moment of inertia r0345 Rated motor startup time p1400 2 Acceleration pre control source p1428 Speed pre control balancing dead time p1429 Speed pre control balancing time constant p1496 Acceleration pre control scaling r1518 Acceleration torque ...

Page 283: ...tions can be suppressed The reference model can also be externally emulated and the external signal entered via p1437 r1547 0 r1538 r1547 1 r1539 SLVC VC p1452 p1442 p1470 p1460 p1472 p1462 Kp Tn Kp Tn r1084 r0079 Ti Ti p1437 r1436 r1515 p1433 p1435 I P p1434 FWXDO VSHHG YDOXH 6SHHG VHWSRLQW 5HIHUHQFH PRGHO SUH FRQWURO 5HIHUHQFH PRGHO SUH FRQWURO 3 6SHHG FRQWUROOHU 7RUTXH VHWSRLQW URRS LQMHFWLRQ F...

Page 284: ...n value p1459 y x p1456 p1457 1 p1466 0 p1455 p1458 x p1400 0 1 0 1 0 1 0 p1400 6 p1460 p1470 p1462 p1472 1 0 1 1 p1464 p1465 p1461 p1463 1 0 p1400 5 0 1 p1400 5 SBQBDGDSW GDSWDWLRQ VLJQDO WR VSHHG FRQWUROOHU 6SHHG GHSHQGHQW 7QBQ DGDSWDWLRQ 5HGXFWLRQ LQ G QDPLF UHVSRQVH LHOG ZHDNHQLQJ QFRGHUOHVV YHFWRU FRQWURO RQO 6SHHG GHSHQGHQW SBQ DGDSWDWLRQ QFRGHUOHVV YHFWRU FRQWURO DFWLYH GDSWDWLRQ VLJQDO UHI...

Page 285: ...455 Speed controller P gain adaptation signal p1456 Speed controller P gain adaptation lower starting point p1457 Speed amplifier P gain adaptation upper starting point p1458 Adaptation factor lower p1459 Adaptation factor upper p1470 Speed controller encoderless operation P gain Speed dependent Kp_n Tn_n adaptation VC only p1460 Speed controller P gain adaptation speed lower p1461 Speed controlle...

Page 286: ...ed extent for drives that are accelerated and braked with significant changes in speed The droop feedback is used for example in applications in which two or more motors are connected mechanically or operate with a common shaft and fulfill the above requirements It limits the torque differences that can occur as a result of the mechanical connection between the motors by modifying the speeds of th...

Page 287: ... to closed loop torque control using BICO parameter p1501 It is not possible to change over between closed loop speed and torque control if closed loop torque control is directly selected with p1300 22 or 23 The torque setpoint and or supplementary setpoint can be entered using BICO parameter p1503 CI torque setpoint or p1511 CI supplementary torque setpoint The supplementary torque acts both for ...

Page 288: ...y possible in the closed loop control range but not in the open loop control range of the sensorless closed loop vector control In the open loop controlled range the torque setpoint changes the setpoint speed via a ramp up integrator integrating time p1499 x p0341 x p0342 This is the reason that sensorless closed loop torque control close to standstill is only suitable for applications that requir...

Page 289: ...ed when the motor brake closing time p1217 has elapsed Standstill is detected when the speed actual value of the speed threshold p1226 is undershot or when the monitoring time p1227 started when speed setpoint speed threshold p1226 expires Switching on inhibited is activated Function diagram FP 6060 Torque setpoint Parameters p0341 Motor moment of inertia p0342 Ratio between the total and motor mo...

Page 290: ...1 Power limit regenerating The currently active torque limit values are displayed in the following parameters r0067 Maximum drive output current r1526 Torque limit upper motoring without offset r1527 Torque limit lower regenerative without offset All of the following limits act on the torque setpoint that is either available at the speed controller output for closed loop speed control or as torque...

Page 291: ...mens complete torque motors from the 1FW3 series When these drives are used gear units and mechanical parts subject to wear can be dispensed with if the application allows this WARNING As soon as the motor starts to rotate a voltage is generated When work is carried out on the converter the motor must be safely disconnected If this is not possible the motor must be locked by a holding brake for ex...

Page 292: ...inst overheating using a temperature sensor PTC We recommend that the motor temperature is measured using a temperature sensor KTY in order to achieve a high level of torque accuracy Commissioning The following sequence is recommended for commissioning Configure the drive When the drive is being commissioned using STARTER or the AOP30 operator panel the permanent field synchronous motor must be se...

Page 293: ...ype plate or in the data sheet you can calculate them as follows from the rated motor data or from the zero speed current I0 and zero speed torque M0 N N N min s N N T I n 2 P 60 I M k π or 0 0 T I M k The optional motor data can be entered if it is known Otherwise this data is estimated from the type plate data or determined by means of motor identification or speed controller optimization Table ...

Page 294: ...rotective circuit against overvoltage on the motor side so that the motor winding is not damaged as a result of the shutdown Control signal r0863 1 is used to control the contactor via a free digital output the checkback contact of the contactor is connected to parameter p0864 via a free digital input This means that if the drive converter develops a fault with a shutdown response at the instant i...

Page 295: ...O ORVHG ORRS FRQWURO Function diagrams To supplement this operating manual the documentation folder contains simplified function diagrams describing the operating principle The diagrams are arranged in accordance with the chapters in the operating manual The page numbers 8xx describe the functionality in the following chapter At certain points in this chapter reference is made to function diagrams...

Page 296: ...WKLQJ 2 VLJQDO XUU 8 FWXDO VSHHG YDOXH 2XWSXW SRZHU 2XWSXW FXUUHQW 6FDOLQJ KDU KDU KDU KDU OLQN YROWDJH 9ROWDJH RXWSXW S 9 P S S U U U U U S S S S Figure 8 1 Signal flow diagram analog output 0 Function diagram FD 1840 FD 9572 TM31 analog outputs AO 0 AO 1 Parameters p4071 Analog outputs signal source p4073 Analog outputs smoothing time constant r4074 Analog outputs actual output voltage current p...

Page 297: ...dulation depth r0074 Reference modulation depth Torque generating current setpoint r0077 A p2002 Torque generating actual current r0078 A p2002 Flux setpoint r0083 Reference flux Actual flux r0084 Reference flux For further diagnostic purposes Speed controller output r1480 Nm p2003 I component of speed controller r1482 Nm p2003 Scalings for vector object Table 8 2 Scalings for vector object Variab...

Page 298: ...rque generating actual current r0078 A p2002 Output power r0082 kW r2004 Scalings for object A_INF Table 8 4 Scalings for object A_INF Variable Scaling parameter Default for quick commissioning Reference frequency 100 p2000 p2000 p0211 Reference voltage 100 p2001 p2001 r0206 r0207 Reference current 100 p2002 p2002 r0207 Reference power 100 r2004 r2004 r0206 Reference modulation depth 100 Maximum o...

Page 299: ...o 10 V 10 V Set TM31 AO_char x1 to 0 00 Set TM31 AO_char y1 to 0 000 V Set TM31 AO_char x2 to 100 00 Set TM31 AO_char y2 to 10 000 V 8 3 Digital outputs Description Four bi directional digital outputs terminal X541 and two relay outputs terminal X542 are available These outputs are for the most part freely parameterizable Signal flow diagram QYHUVLRQ 5HDG WR VWDUW 2SHUDWLRQ HQDEOHG 5DPS XS UDPS GR...

Page 300: ...Fault present 3 r2139 3 0 Coast to stop active OFF2 4 r0889 4 0 Fast stop active OFF3 5 r0889 5 1 Power on disable 6 r0889 6 1 Alarm present 7 r2139 7 1 Speed setpoint actual deviation in the tolerance bandwidth p2163 p2166 8 r2197 7 1 Control required to PLC 9 r0899 9 1 f or n comparison value reached or exceeded p2141 p2142 10 r2199 1 1 I M or P limit reached p0640 p1520 p1521 11 r1407 7 Reserve...

Page 301: ... Active Infeed functions line and DC link identification harmonics controller Extended functions Technology controller bypass function extended brake control extended monitoring functions position control basic positioner Monitoring and protective functions Power unit protection thermal monitoring functions and overload responses blocking protection stall protection thermal motor protection M A60 ...

Page 302: ...ion diagrams describing the operating principle The diagrams are arranged in accordance with the chapters in the operating instructions The page numbers 9xx describe the functionality in the following chapter At certain points in this chapter reference is made to function diagrams with a 4 digit number These can be found on the documentation CD in the SINAMICS List Manual which provides experience...

Page 303: ...This identification method can be used to check the data in parameters p3421 and p3422 active for closed loop control p3410 2 copies the data r3411 and r3412 determined during identification p3410 1 to p3421 and p3422 volatile Calculations for the controller are then repeated p0977 1 can be used to store the parameters in a non volatile memory When p3410 3 an identification run for the total induc...

Page 304: ...n the supply voltage cause harmonics in the line currents Current harmonics can be reduced by activating the harmonics controller Example setting the harmonics controller The 5th and 7th harmonic are to be compensated Table 9 1 Sample parameters for the harmonics controller Index p3624 Infeed harmonics controller order p3625 scaling 0 5 100 1 7 100 0 scaling means that the harmonics controller has...

Page 305: ...reactive current allows the power factor of the cabinet unit to be set as capacitive or inductive The reactive current can be changed by specifying a parameterizable supplementary setpoint for the reactive current by means of higher level cos control Function diagram FD 8946 Power pre control current controller gating unit Parameters p3610 Infeed reactive current fixed setpoint p3611 Infeed reacti...

Page 306: ...0285 Min line supply frequency not maintained alarm threshold 75 Start supply ID p3410 5 4 If 3 is not successful then in addition Reduction in excitation current p3415 0 4 p3415 1 8 Start supply ID p3410 5 5 If 4 is not successful then in addition for FW 2 4 only Gradual increase in value of infeed inductance between supply and filter p0225 initial value 0 3 0 5 0 7 x p0223 Limit p3421 to 2 x p02...

Page 307: ...change phase failure detection 15 30 p3458 1 Infeed PLL smoothing time 8 ms 25 ms both parameters only visible at service access level Run load test 4 If 3 is not successful then in addition Change controller gain p3560 10 300 and if necessary integral action time p3562 50 Vdc controller Run load test 5 If 4 is not successful then in addition Change voltage setpoint p3510 increase or decrease depe...

Page 308: ...rol with encoder The measurements parameterized using p1900 are started in the following sequence after the corresponding drive has been enabled Standstill static measurement after the measurement has been completed the pulses are inhibited and parameter p1910 is reset to 0 Encoder adjustment after the measurement has been completed the pulses are inhibited and parameter p1990 is reset to 0 Rotati...

Page 309: ...ted for the first time the following data is determined with p1910 1 on the basis of the data on the type plate rated data Equivalent circuit diagram data Total resistance of Power cable resistance Rcable and Stator resistance RS IGBT on state voltage compensation for the IGBT lockout time Since the type plate data provides the initialization values for identification you must ensure that it is en...

Page 310: ...0600 p0601 and read r0035 This is the reference point for the thermal motor model and thermal RS RR adaptation In addition to the equivalent circuit diagram data motor data identification p1910 3 can be used for induction motors to determine the magnetization characteristic of the motor Due to the higher accuracy the magnetization characteristic should if possible be determined during rotating mea...

Page 311: ... 3 1 2 Rotating measurement and speed controller optimization Description Rotating measurement can be activated via p1960 or p1900 1 The main difference affecting rotating measurement is speed controller optimization for determining the drive moment of inertia and setting of the speed controller On induction motors the saturation characteristic and rated magnetization current are also measured If ...

Page 312: ...issued in accordance with the settings in p1959 and p1960 Encoder test If a speed controller is in use the direction of rotation and pulse number per revolution are checked Only for induction motors Measurement of the magnetization characteristic p0362 to p0369 Measurement of the magnetization current p0320 and determination of the offset voltage of the converter for offset compensation Measuremen...

Page 313: ...est Parameters r0047 Status identification p1300 Open loop closed loop control operating mode p1900 Motor data identification and rotating measurement p1959 Speed controller optimization configuration p1960 Speed controller optimization selection p1961 Saturation characteristic speed for calculation p1965 Speed controller optimization speed p1967 Speed controller optimization dynamic factor r1969 ...

Page 314: ...ons is reduced to half of the setpoint reference flux p1570 2 As soon as load is connected to the drive the setpoint reference flux increases linearly with the load and reaching the setpoint set in p1570 at approx r0077 r0331 x p1570 In the field weakening range the final value is reduced by the actual degree of field weakening The smoothing time p1582 should be set to approx 100 to 200 ms Flux di...

Page 315: ...stabilizing the voltage in the DC link This process is known as kinetic buffering Kinetic buffering is only possible as long as energy is generated by the movement of the drive Features Vdc control This comprises Vdc_max control and Vdc_min control kinetic buffering which are independent of each other It includes a joint PI controller The dynamic factor is used to set Vdc_min and Vdc_max control t...

Page 316: ... an external power supply When Vdc_min control is enabled with p1240 2 3 p1280 it is activated if the power fails when the Vdc_min switch in level r1246 r1286 is undershot In general the regenerative power braking energy of the drive machine generated when the motor speed is reduced is used to buffer the DC link voltage of the converter in other words when Vdc_min control is active the motor speed...

Page 317: ...m controller active is issued while the Vdc_min controller is active If the drive can no longer generate any regenerative energy because for example it is almost at a standstill the DC link voltage continues to drop If the minimum DC link voltage is undershot see Switching Vdc_min control on off 1 the drive is switched off with fault F30003 power unit DC link undervoltage If a speed threshold set ...

Page 318: ...sent are acknowledged and the drive is restarted automatically The drive can be restarted using The standard procedure starting from standstill or The flying restart function For drives with low moments of inertia and load torques facilitating the stopping of the drive within a matter of seconds e g pump drives with water gauges starting from standstill is recommended Note The flying restart funct...

Page 319: ... the Motor Module or there is a high signal at binector input p1208 1 or in the case of an infeed drive object A_Infeed F06200 is pending If additional faults are pending then these faults will also be acknowledged if this is successful the startup attempt will be resumed The failure of the CU s 24 V power supply will be interpreted as a line supply failure 6 Restart after any fault with additiona...

Page 320: ...otor magnetization must have been completed r0056 4 1 fault F07320 is output Monitoring is deactivated by setting p1213 0 If p1213 is set to a value lower than the sum of p1212 the magnetization time r0346 and the additional delay time due to flying restart then fault F07320 will be generated on every restart attempt If for p1210 1 the time in p1213 is set to a value lower than p1212 then fault F0...

Page 321: ...case the drive can also rotate against the direction of rotation 2 The drive rotates as a result of a previous shutdown e g OFF 2 or a power failure The drive slowly coasts to a standstill as a result of the kinetic energy stored in the drive train example induced draft fan with a high moment of inertia and a steeply descending load characteristic in the lower speed range In accordance with the se...

Page 322: ...ristic see Flying restart Vector control without encoder The motor speed is determined using the speed adaptation control loop for the electric motor model To begin with the search current p1202 is injected and then the controller is activated starting from the maximum search frequency The dynamic response of the controller can be altered using the search speed factor p1203 If the deviation of the...

Page 323: ... the drive may still be accelerated by the detection current despite the fact that it is at standstill and the setpoint is 0 For this reason entering the area around the drive when it is in this condition can cause death serious injury or considerable material damage 9 3 5 3 Parameters p1200 Flying restart operating mode 0 Flying restart inactive 1 Flying restart is always active start in the setp...

Page 324: ... be activated 9 3 6 2 Example of changing over between two motors Prerequisites The drive has been commissioned for the first time 2 motor data sets MDS p0130 2 2 drive data sets DDS p0180 2 2 digital outputs to control the auxiliary contactors 2 digital inputs to monitor the auxiliary contactors 1 digital input to select the data set 2 auxiliary contactors with auxiliary contacts 1 NO contact 2 m...

Page 325: ...ed p0833 00 and 01 0 0 The drive controls the contactors and pulse suppression Motor changeover sequence 1 Start condition For synchronous motors the actual speed must be lower than the speed at the start of field weakening This prevents the regenerative voltage from exceeding the terminal voltage 2 Pulse suppression The pulses are suppressed following the selection of a new drive data set using p...

Page 326: ...tus p0831 Motor changeover contactor feedback signal p0833 Data set changeover configuration 9 3 7 Friction characteristic curve Description The friction characteristic is used to compensate for the frictional torque of the motor and driven load A friction characteristic allows the speed controller to be pre controlled and improves the control response 10 points along the characteristic are used f...

Page 327: ...aracteristic is plotted in both directions of rotation The result of the positive and negative measurement is averaged and entered into p383x p3845 2 Friction characteristic plot activated positive direction of rotation p3845 3 Friction characteristic plot activated negative direction of rotation DANGER When the friction characteristic is plotted the drive can cause the motor to move As a result t...

Page 328: ...cluded in the calculation for power unit protection Note Use of a sine wave filter option L15 must be selected using p0230 3 when commissioning This setting fixes the pulse frequency to 4 kHz or 2 5 kHz and it cannot be changed The following maximum output frequencies can be achieved with the default pulse frequencies listed below Table 9 4 Maximum output frequency with default pulse frequency Con...

Page 329: ...converted to a recommended pulse frequency by reversing the above formula The recommended pulse frequency must be rounded up to 3 digits after the decimal place and entered in parameter p0113 3 The scanning time for the customer terminal block TM31 p4099 x must then be set to an integer multiple of the scanning time of p0115 0 The minimum limit for the setting range must be taken into account here...

Page 330: ...ulse frequency with integers the following output frequencies can be achieved taking into account the derating factors Table 9 5 Maximum output frequency achieved by increasing the pulse frequency Pulse frequency kHz Maximum output frequency Hz 1 25 100 2 160 2 5 200 4 300 1 5 300 1 1 The maximum output frequency is limited to 300 Hz due to the closed loop control 9 3 8 2 Parameters p0009 Device c...

Page 331: ... The value is in milliseconds and the counter is reset to 0 after 49 days Actual motor operating hours The motor operating hours counter p0650 drive resumes when the pulses are enabled When the pulse enable is withdrawn the counter is stopped and the value saved To store the value you need a CU320 with order number 6SL3040 0AA1 and version C or higher The counter is deactivated with p0651 0 If the...

Page 332: ...igher power ratings 75 kW 690 V and 110 kW 400 V after repairs it is necessary to test the gating of the power semiconductors This is done by injecting a low DC voltage as DC link voltage e g 12 V The drive unit is then powered up and the pulses enabled It must be possible to run through all of the pulse patterns of the gating unit software This means that the software must allow the pulses to be ...

Page 333: ...and actual value torque setpoint and actual value remain unchanged as does the relative position change A pulse inhibit must be set prior to attempting reversal Reversing can be set differently for each drive data set Note When changing over the drive data set to differently set reversing and with pulse approval fault F7434 is issued Reversing can be observed by checking parameters r0069 phase cur...

Page 334: ...ts p0595 for the representation of technological variables in the technology controller If a changeover is made to referenced variables and the reference variable is subsequently changed the value entered in a parameter will not change Example A fixed speed of 80 corresponds for a reference speed of 1500 rpm to a value of 1200 rpm If the reference speed is changed to 3000 rpm the value of 80 is re...

Page 335: ...upload Load project to PG have been completed Unit groups Each parameter that can be switched is assigned to a unit group which can be switched within certain limits depending on the group This assignment and the units groups for each parameter appear in the parameter list in the SINAMICS Parameter Manual The unit groups can be individually switched using 4 parameters p0100 p0349 p0505 and p0595 P...

Page 336: ...cy until it has dropped to rated pulse frequency then reduce the output frequency if overload continues to persist Reduction of the pulse frequency is executed in whole multiples based on the rated pulse frequency 5 kHz 2 5 kHz 1 25 kHz or 4 kHz 2 kHz After entering the maximum speed in p1082 the system automatically calculates whether the pulse frequency is sufficient for the entered maximum spee...

Page 337: ...7 Function diagram FD 8014 Signals and monitoring functions thermal monitoring power unit Parameter r0036 Power unit overload I2t r0037 CO Power unit temperatures p0230 Drive filter type motor side p0290 Power unit overload response p1082 Maximum speed r2135 13 Fault thermal overload power unit r2135 15 Thermal overload in power unit alarm ...

Page 338: ...annel The motorized potentiometer of the technology controller is only active when the drive pulses are enabled The technology controller is designed as a PID controller whereby the differentiator can be switched to the control deviation channel or the actual value channel factory setting The P I and D components can be set separately A value of 0 deactivates the corresponding component Setpoints ...

Page 339: ...263 1 unlike in the factory setting This is always necessary when the D component is to be effective even if the reference variable changes The D component can only be activated when p2274 0 Note With the entry 0 sec as power up time or ramp down time for the ramp function generator of the technology controller the current values of the respective ramp function generator will be frozen Commissioni...

Page 340: ...riable is used as the setpoint for the speed controller In this example a Terminal Module TM31 is used 6HQVRU DFW Figure 9 7 Level control Application 7HFBFWU W SH 7HFBFWU S 7HFBFWU 7Q 7HFBFWU 6HWSRLQW FWXDO YDOXH 5DPS IXQFWLRQ JHQHUDWRU 6HWS FWXDO QBVHWS S G GW S S S S S Figure 9 8 Level control Controller structure Key control parameters p1155 r2294 n_setp1 downstream of RFG FD 3080 p2253 r2224 ...

Page 341: ... OFF the status of the bypass contactors is evaluated After powering up the converter can thereby change straight into Ready to start and bypass status This is only possible if the bypass is activated via a control signal the control signal p1266 is still present once the system has been ramped up and the automatic restart function p1200 4 is active Changing the converter into Ready to start and b...

Page 342: ... the changeover both contactors K1 and K2 are closed at the same time for a period phase lock synchronization A restrictor is used to disconnect the converter and supply voltage The uk value for the restrictor is 10 2 M K1 K2 5HDFWRU LQH VXSSO RQYHUWHU ZLWK 9ROWDJH 6HQVLQJ 0RGXOH 960 3URWHFWLYH GHYLFH Figure 9 9 Typical circuit diagram for bypass with synchronizer with degree of overlapping Activa...

Page 343: ...2 r1261 2 Synchronizer activation is triggered by the bypass function Transfer process S RQWDFWRU FORVHG U ORVH FRQWDFWRU S RQWDFWRU FORVHG U ORVH FRQWDFWRU U 6 QFKURQL HG U 5HTXHVW WR V QFKURQL H VHQW E E SDVV IXQFWLRQ S SDVV FRPPDQG 0RWRU RQ FRQYHUWHU RQYHUWHU LQH VXSSO FKDQJHRYHU 0RWRU RQ OLQH VXSSO 0RWRU RQ FRQYHUWHU LQH VXSSO RQYHUWHU FKDQJHRYHU Figure 9 10 Signal diagram bypass with synchron...

Page 344: ... pulse enable the converter interprets this as a command to retrieve the motor from the line supply Once converter synchronization to line frequency line voltage and line phasing is complete the synchronization algorithm reports this state The bypass mechanism evaluates this signal and closes contactor K1 The signal is evaluated internally BICO wiring is not required Once contactor K1 has reported...

Page 345: ...hreshold or a fault Parameterization Once the bypass with synchronizer without degree of overlapping p1260 2 function has been activated the following parameters must be set Table 9 7 Parameter settings for bypass function with synchronizer without degree of overlapping Parameters Description p1266 Control signal setting when p1267 0 1 p1267 0 1 p1267 1 0 Bypass function is initiated by the contro...

Page 346: ...m the supply by the converter initially contactor K2 is opened and after the excitation time contactor K1 is closed The converter then captures the rotating motor and the motor is operated on the converter Contactor K2 must be designed for switching under load Contactors K1 and K2 must be interlocked against closing at the same time The flying restart function must be activated p1200 1 M K1 K2 RQY...

Page 347: ...hing back to converter operations The bypass time debypass time bypass speed variables and the command source for changing over are set using parameters Parameterization Once the bypass without synchronizer p1260 3 function has been activated the following parameters must be set Table 9 8 Parameter settings for bypass function with synchronizer without degree of overlapping Parameter Description p...

Page 348: ... feedback signal p1274 BI Bypass switch monitoring time Synchronization p3800 Sync supply drive activation p3801 Sync supply drive drive object number p3802 BI Sync supply drive enable r3803 CO BO Sync supply drive control word r3804 CO Sync supply drive target frequency r3805 CO Sync supply drive frequency difference p3806 Sync supply drive frequency difference threshold r3808 CO Sync supply driv...

Page 349: ... r0108 14 indicates whether the function module has been activated Parameter p1215 must be set to 3 and the brake controlled via a digital output on customer terminal strip TM31 Function diagram FP 2704 Zero speed detection FP 2707 Release apply brake FP 2711 Signal outputs Example 1 Starting against applied brake When the device is switched on the setpoint is enabled immediately if other enable s...

Page 350: ...ed The motor is magnetized The magnetization time generally applicable for three phase motors 1 2 seconds is therefore eliminated Now only the brake opening time will delay the motor starting to rotate following activation of the master switch Movement of the master switch generates a setpoint enable from the control bit interconnected with p1142 p1229 2 p1224 0 The speed controller is enabled imm...

Page 351: ... or chains that loop around the belt pulleys or cog wheels for drive and outgoing shafts and transfer the peripheral speeds and forces Load monitoring can be used here to identify blockages in the working machine and interruptions to the power transmission During load monitoring the current speed torque curve is compared with the programmed speed torque curve p2182 p2190 If the current value is ou...

Page 352: ... activated Function diagram FD 8010 Speed messages FD 8013 Load monitoring Parameters p2150 Hysteresis speed 3 p2151 CI Speed setpoint p2161 Speed threshold 3 p2181 Load monitoring response p2182 Load monitoring speed threshold 1 p2183 Load monitoring speed threshold 2 p2184 Load monitoring speed threshold 3 p2185 Load monitoring speed threshold 1 upper p2190 Load monitoring speed threshold 3 lowe...

Page 353: ...ner function module r0108 4 1 is activated the closed loop position control function module r0108 3 is automatically activated The current configuration can be checked in parameter r0108 3 The position controller can be parameterized in a user friendly fashion using the screen forms in STARTER The closed loop position control function module is essential for operating the basic positioner Note If ...

Page 354: ... actual position value The following connection is run automatically after assignment p0480 0 G1_STW encoder control word r2520 0 p0480 1 G2_STW encoder control word r2520 1 p0480 2 G3_STW encoder control word r2520 2 S RDG URWDWLRQV QFRGHUV S SRVLWLRQ FRQWURO RQ PRWRU HQFRGHU S 8 SHU ORDG URWDWLRQ S 0RWRU URWDWLRQV Figure 9 15 Actual position value preparation with rotary encoders The link betwee...

Page 355: ...n the actual position value is set p2514 1 signal the actual position value of the position controller is kept at the value of connector p2515 as standard Incoming encoder increments are not evaluated A difference in position cannot be compensated for in this situation An inversion of the actual position value resulting from the encoder is undertaken using parameter p0410 An inversion of the axis ...

Page 356: ...sing range is 0 smaller than half the encoder range because beyond this range no unique reference remains after switch on and switch off see description on parameter p2507 This traversing range can be extended using the virtual multiturn p2721 The absolute encoder in this example can count 8 encoder revolutions p0421 8 3RVLWLRQ DEVROXWH HQFRGHU QFRGHU UHYROXWLRQV WHQGHG SRVLWLRQ DUHD WKURXJK YLUWX...

Page 357: ...ltiturn resolution p2721 is preset as p0421 and can be changed If as a result of extension of the multiturn information the displayable area of r2723 232 bits is exceeded the fine resolution p0419 must be reduced accordingly Tolerance window p2722 After switching on the difference between the stored position and the actual position is ascertained and depending on the result the following is trigge...

Page 358: ...4 LR motor load motor revolutions p2505 LR motor load load revolutions p2506 LR length unit LU per load revolution r2520 CO LR actual position value preparations encoder control word r2521 CO LR actual position value r2522 CO LR actual velocity value r2523 CO LR measured value r2524 CO LR LU revolutions r2525 CO LR encoder adjustment offset r2526 CO BO LR status word p2720 Load gearbox configurati...

Page 359: ...2533 position setpoint filter time constants is a PT1 element the balancing filter a dead time element p2535 balancing filter speed feedforward control dead time and PT1 member p2536 balancing filter speed feedforward control PT1 The speed feedforward control p2534 speed feedforward control factor can be deactivated using the value 0 Note We recommend that only experts use the functions of the pos...

Page 360: ...hed once the monitoring time p2543 has lapsed fault F07450 is triggered Zero speed monitoring is deactivated with value 0 in p2542 The zero speed window should be greater than or equal to the positioning window p2542 p2544 The zero speed monitoring time should be less than or equal to the positioning monitoring time p2543 p2545 Position monitoring Positioning monitoring is activated via binector i...

Page 361: ...BDFW Figure 9 19 Following error monitoring Following error monitoring is activated via p2546 following error tolerance If the value specified for the following error r2563 is greater than p2546 fault F07452 is triggered and bit r2648 8 is reset Cam controllers 1 r2683 8 s s r2683 9 1 p2547 0 0 p2548 DP VZLWFKLQJ VLJQDO DP VZLWFKLQJ VLJQDO DP VZLWFKLQJ SRVLWLRQ DP VZLWFKLQJ SRVLWLRQ Figure 9 20 Ca...

Page 362: ...e the mode for measurement probe evaluation The probe signals are recorded via the encoder encoder status and control word To speed up signal processing direct measuring probe evaluation can be activated by selecting the input terminals for probes 1 2 via p2517 and p2518 Measuring probe evaluation is carried out in the position controller cycle whereby the set send clock cycle of the controller r2...

Page 363: ... alarm is also generated if a fault is signaled during an activated function reference mark search or measurement probe evaluation by the encoder status word If the position controller function module is selected these parameters p2508 to p2511 are preassigned with 0 If the basic positioner function module is selected the reference mark search for search for reference point and measurement probe e...

Page 364: ...l r0108 3 1 must also be activated This occurs automatically when the basic positioner is activated by the commissioning Wizard in STARTER The required internal connections BICO technology are also established automatically CAUTION The basic positioner requires the position controller functions The BICO interconnections established by the basic positioner must be changed by experienced users only ...

Page 365: ...n Job number Task e g position wait GOTO set jump set binary outputs Motion parameters target position override speed for acceleration and deceleration Mode e g skip block continuation conditions such as Continue_with_stop and Continue_flying Job parameters e g wait time block step conditions Direct setpoint specification mode MDI Positioning absolute relative and setting up endless closed loop po...

Page 366: ... Note The backlash compensation is active after the axis has been referenced for incremental measuring systems the axis has been adjusted for absolute measuring systems In order to compensate the backlash the determined backlash must be specified in p2583 with the correct polarity At each direction of rotation reversal the axis actual value is corrected dependent on the actual traversing direction...

Page 367: ...corresponding binector connector input of actual position value preparations Absolute positioning details e g in a traversing block must always be within the modulo range The traversing range cannot be restricted by software limit switches With active modulo offset and the application of absolute encoders as a result of potential encoder overflows it must be ensured that there is an integer ratio ...

Page 368: ...2578 p2579 p2580 p2581 p2582 STOP cams p2568 p2569 p2570 Jerk limit Jerk limitation p2574 Activation of jerk limitation p2575 Maximum velocity The maximum velocity of an axis is defined using parameter p2571 The velocity should not be set to be greater than the maximum speeds in r1084 and r1087 The drive is limited to this velocity if a higher velocity is specified or programmed via the override p...

Page 369: ...imum acceleration and delay In direct setpoint specification MDI for positioning and setting up operating mode the acceleration delay override assignment of 4000Hex 100 is specified Note A maximum acceleration and or delay dependent on current velocity zigzag acceleration is not supported Note When using the PROFIdrive message frame 110 the velocity override is already connected and has to be supp...

Page 370: ...am active minus or r2684 14 stop cam active plus set If the stop cams are approached only motion away from the stop cam is permitted if both stop cams are active motion cannot be undertaken Motion away from the stop cam in the permitted travel direction is detected by the 0 1 edge and the corresponding status bits r2684 13 and or r2684 14 are therefore reset Jerk limit Acceleration and deceleratio...

Page 371: ...ctive jerk limitation to 1 In this case limitation cannot be activated or deactivated in traversing block mode by means of the command JERK as this would require parameter p2575 Activate jerk limitation to be set to zero The status signal r2684 6 Jerk limitation active indicates whether or not jerk limitation is active Limitation is effective In jog mode When traversing blocks are processed When s...

Page 372: ...switches p2578 CI EPOS software limit switch minus signal source p2579 CI EPOS software limit switch plus signal source p2580 CO EPOS software limit switch minus p2581 CO EPOS software limit switch plus p2582 BI EPOS software limit switch activation r2683 CO BO EPOS status word 1 STOP cams p2568 BI EPOS STOP cam activation p2569 BI EPOS STOP cam minus p2570 BI EPOS STOP cam plus r2684 CO BO EPOS s...

Page 373: ...erence point coordinates This setting parameter p2599 is connected to connector input p2598 as standard Note Homing of distance coded zero marks is not supported Set reference point The reference point can be set by a 0 1 edge on binector input p2596 set reference point if no other traversing block is active or has been interrupted by an interim stop The current actual position of the drive is set...

Page 374: ...during adjustment Otherwise it is set to a corrected value in the encoder range Search for reference point of incremental measuring systems The search for reference point when using an incremental measuring system is used to move the drive to its reference point The entire referencing cycle is controlled and monitored by the drive Incremental measuring systems require the absolute dimensional refe...

Page 375: ...reference step 1 travel to reference cam If there is no reference cam present p2607 0 go to step 2 When the homing process is started the drive accelerates at maximum acceleration p2572 to the reference cam approach velocity p2605 The direction of the approach is determined by the signal of binector input p2604 search for reference start direction The drive is informed that the reference cam has b...

Page 376: ...ence zero mark encoder zero mark or external zero mark Reference mark present p2607 1 In step 2 the drive accelerates to the velocity specified in p2608 zero mark approach velocity in the direction opposite to that specified by binector input p2604 search for reference start direction The zero mark is expected at distance p2609 max distance to zero mark The search for the zero mark is active statu...

Page 377: ...tion values and the 1 0 edge with falling actual position values as standard This can be inverted for an equivalent zero mark using parameter p0490 measurement probe or equivalent zero mark Search for reference step 3 travel to reference point Travel to the reference point is started when the drive has successfully synchronized to the reference zero mark see step 2 Once the reference zero mark has...

Page 378: ...obe edge evaluation can be used to set which measurement probe 1 or 2 and which measurement edge 0 1 or 1 0 is to be used The measurement probe pulse is used to supply connector input p2660 home measurement value with the measurement via parameter r2523 The validity of the measurement is reported to binector input p2661 measurement valid feedback via r2526 2 Note The following must always apply to...

Page 379: ...e data set switching DDS motor data sets p0186 and encoder data sets p0187 to p0189 can be switched The following table shows when the reference bit r2684 11 or the status of the adjustment with absolute encoders p2507 is reset In the following cases when a DDS switch takes place the current actual position value becomes invalid p2521 0 and the reference point r2684 11 0 is reset The EDS that is e...

Page 380: ...ence bit 2 is reset 3 0 EDS0 EDS1 EDS2 encoder_2 xxx disabled 4 0 EDS0 EDS3 EDS2 encoder_2 xxx disabled 5 1 EDS4 EDS1 EDS2 encoder_1 xxx disabled 6 2 EDS5 EDS6 EDS7 encoder_1 zzz disabled Pulse disabling Position actual value preprocessing is newly initiated 1 and reference bit 3 is reset Operation Error message is generated Actual position value conditioning newly set 1 and reference bit 3 is res...

Page 381: ...tracking Description Due to the adjustment of the encoder p2507 absolute value encoder the actual position value in the reference point adjustment point is set to the position value stored in parameter p2599 The position zero point is calculated from this axis position Each half of the encoder range is placed to the left and right of this position zero point this is the range in which the position...

Page 382: ...er configuration of the following parameters it cannot be activated p2504 DDS LR motor load motor revolutions p2505 DDS LR motor load load revolutions p2720 DDS Load gearbox configuration p2721 DDS Load gearbox absolute encoder rotary revolutions virtual p2722 DDS Load gearbox position tracking tolerance window Thus with a DDS switchover position tracking is simply continued if position tracking i...

Page 383: ...ulse disable operation Position tracking is continued and referencing bit is reset 7 3 EDS0 EDS1 EDS2 encoder_1 xxx enabled MDS switching alone during pulse disable or operation has no effect 8 0 EDS0 EDS1 EDS2 encoder_1 xxx disabled Pulse disable operation Position tracking for EDS0 of the DDS0 is newly initiated and referencing bits are reset 9 4 EDS6 EDS0 EDS2 encoder_1 www Not significa nt Pul...

Page 384: ...mum number of traversing blocks All parameters which describe a traversing order are effective during a block change i e if the corresponding block number is selected using binector inputs p2625 to p2630 block selection bits 0 5 and is started using the signal at binector input p2531 activate traversing block A block change is made in a sequence of traversing tasks An external block change p2632 e...

Page 385: ...ramming the traversing blocks in STARTER Value 0000 cccc bbbb aaaa aaaa Display hide 0000 Block is not hidden 0001 Block is hidden A hidden block cannot be selected binary coded via binector inputs p2625 to p2630 An alarm is output if you attempt to do so bbbb Continuation condition 0000 END 0 1 edge at p2631 0001 CONTINUE_WITH_STOP The position parameterized in the block is approached accurately ...

Page 386: ...is the same as for CONTINUE_EXTERNAL_WAIT but warning A07463 External traversing block change in traversing block x not requested is output if an external block change has not been triggered before standstill is reached The alarm can be converted to an alarm with a stop response so that block processing can be aborted if the control signal is not issued cccc Positioning mode With the POSITION task...

Page 387: ...ERNAL_ALARM causes a message to be output immediately FIXED STOP The FIXED STOP task triggers a traversing movement with reduced torque to fixed stop The following parameters are relevant p2616 x Block Number p2617 x position p2618 x Velocity p2619 x Acceleration override p2620 x Deceleration override p2623 x Task mode p2622 x Clamping torque in Nm task parameter with rotary motors Possible contin...

Page 388: ... can be used to define a waiting period which should expire before the next task is executed The following parameters are relevant p2616 x Block Number p2622 x Task parameter wait time in milliseconds 0 ms p2623 x Task mode The delay time is entered in milliseconds but is rounded off to a multiple of the interpolator clock cycles p0115 5 The minimum delay time is one interpolation clock cycle this...

Page 389: ...polation cycle and a subsequent POSITION and WAIT task can be started SET_O RESET_O Tasks SET_O and RESET_O allow up to two binary signals output 1 or 2 to be simultaneously set or reset The number of the output 1 or 2 is specified bit coded in the task parameter The following parameters are relevant p2616 x Block Number p2622 x Task parameter output bit encoded 0x1 Output 1 0x2 Output 2 0x3 Outpu...

Page 390: ...p2622 An adjustable monitoring window for travel to fixed stop prevents the drive from traveling beyond the window if the fixed stop should break away In positioning mode traversing to a fixed stop is started when a traversing block is processed with the FIXED STOP command In this traversing block in addition to the specification of the dynamic parameterized position speed acceleration override an...

Page 391: ... stop reached message is set The speed control holds the target torque on the basis of the available speed setpoint The target torque is output for diagnosis via the connector output r2687 torque setpoint In the fixed stop if the parameterized clamping torque has been reached the status bit r2683 13 fixed stop clamping torque reached is set Once the fixed stop reached status has been detected the ...

Page 392: ...e drive is correspondingly braked When canceling occurs it is ensured that an almost achieved fixed stop setpoint already beyond the fixed stop but still within the threshold for fixed stop detection will not result in damage To do this the setpoint is updated after the standstill position setpoint actual position value As soon as the fixed stop is reached the drive remains in fixed stop even afte...

Page 393: ...n allows for positioning absolute relative and setup endless position controlled by means of direct setpoint input e g via the PLC using process data During traversing the motion parameters can also be influenced on the fly setpoint acceptance and an on the fly change can be undertaken between the Setup and Positioning modes The direct setpoint specification operating mode MDI can also be used in ...

Page 394: ...rection specification If both inputs have the same status the shortest distance is traveled during absolute positioning p2648 1 of modulo axes p2577 1 To use the positioning function the drive must be in operating mode r0002 0 The following options are available for starting positioning p2649 is 1 and positive edge on p2647 p2649 is 0 and p2647 is 1 positive edge on p2650 or positive edge on p2649...

Page 395: ...e intermediate stop and cancel traversing task functions are only effective in the modes traversing blocks and direct setpoint input MDI Function diagram FD 3618 EPOS direct setpoint specification mode MDI dynamic values FD 3620 EPOS direct setpoint specification mode MDI Parameter p2577 BI EPOS modulo offset activation p2642 CI EPOS direct setpoint input MDI position setpoint p2643 CI EPOS direct...

Page 396: ...nd p2586 The travel distances are only effective when the 1 signal is at p2591 incremental jog When p2591 0 the travel range start or the travel range end is approached at the specified velocity 0 0 0 1 1 0 1 1 p2587 p2588 0 0 0 0 1 1 0 1 1 p2585 p2586 0 p2591 0 0 1 0 1 x y Store 100 100 r2674 r2673 r2672 x y Store 3650 1 p2657 1 0 1 1 0 D Q Q p2589 0 p2590 0 r2671 1 0 1 RJ RJ SRVLWLRQ FWXDO SRVLW...

Page 397: ...tpoint actual position value Setpoint stationary r2683 2 The Setpoint stationary status signal indicates that the setpoint velocity has a value of 0 The actual velocity may deviate from zero due to a following error A traversing block is being processed while the status signal has the value 0 Motion command active r2684 15 The Motion command active status signal indicates that a motion command is ...

Page 398: ...r2683 9 The function of the electronic cams can be implemented by means of these signals Cam switch signal 1 is 0 when the actual position is greater than p2547 otherwise the signal is 1 Cam switch signal 2 is 0 when the actual position is greater than p2548 otherwise the signal is 1 The signal is therefore canceled when the drive is beyond the cam switch position These signals are triggered by th...

Page 399: ...tionary message Reference point set r2684 11 The signal is set as soon as a homing process has been successfully completed It is canceled as soon as a reference is no longer present or when homing is started Traversing block acknowledgement active r2684 12 A positive edge is used to acknowledge that a new motion command or setpoint has been accepted in Traversing blocks mode same signal level as f...

Page 400: ...econd threshold exceeded F30001 Overcurrent OFF2 Overvoltage1 Comparison of DC link voltage with hardware shutdown threshold F30002 Overvoltage OFF2 Undervoltage1 Comparison of DC link voltage with hardware shutdown threshold F30003 Undervoltage OFF2 Short circuit1 Second monitoring threshold checked for overcurrent Uce monitoring for IGBT module F30001 Overcurrent OFF2 F30022 Monitoring Uce OFF2 ...

Page 401: ... IGBT and the heatsink These differences are taken into account and monitored by the chip temperature r0037 If an overload occurs with respect to any of these three monitoring functions an alarm is first output The alarm threshold p0294 i t monitoring can be parameterized relative to the shutdown trip values Example The factory setting for the alarm threshold for chip temperature monitoring is 15 ...

Page 402: ...ion if it is neither possible to reduce the pulse frequency nor reduce the output current The converter does not change its operating point once an alarm threshold has been overshot which means that the drive can be operated until it reaches its shutdown values Once it reaches its shutdown threshold the converter switches itself off and the Overtemperature overload fault is output The time until s...

Page 403: ... limit With V f control the current limit must already have been reached Once the ON delay p2177 has elapsed the message Motor blocked and fault F7900 are generated XUUHQW OLPLW UHDFKHG 6SHHG FRQWUROOHU DW OLPLW QBDFW QBDFW S S 9HFWRU FRQWUROV S 9 I FKDUDFWHULVWLFV RQWURO PRGH 21 GHOD 0RWRU ORFNHG 0 00 210 000 00 rpm r2169 p2175 120 00 T 0 p2177 1 000 0 000 65 000 s F7900 r2198 6 r1407 7 20 20 r13...

Page 404: ...elay time in p2178 fault F7902 motor stalled is output UURU WKUHVKROG VWDOO GHWHFWLRQ 6WDOO PRQLWRULQJ 6SHHG WKUHVKROG VWDOO GHWHFWLRQ 6SHHG DGDSWDWLRQ VSHHG GHYLDWLRQ 0RWRU VWDOOHG VSHHG FRQWURO ZLWK HQFRGHU RQO 21 GHOD 0RWRU VWDOOHG T 0 F7902 r2198 7 p2178 0 010 0 000 1 000 s 1 r1408 12 r1408 11 0 00 210 000 00 1 min p1744 100 00 p1745 5 0 0 0 1000 0 Figure 9 30 Stall protection Function diagram...

Page 405: ...l Block in the forward direction of the diode The measured temperature is limited to between 48 C and 248 C and is made available for further evaluation Set the KTY temperature sensor type p4100 2 Activate motor temperature measurement via the external sensor p0600 10 When the alarm threshold is reached set via p0604 factory setting 120 C alarm A7910 is triggered Parameter p0610 can be used to set...

Page 406: ...an be suppressed by p0607 0 If an induction motor is connected the drive continues operating with the data calculated in the thermal motor model If the system detects that the motor temperature sensor set in p0600 is not connected alarm A07820 Temperature sensor not connected is triggered Function diagram FD 8016 Thermal monitoring motor FD 9576 TM31 temperature evaluation KTY PTC FD 9577 TM31 sen...

Page 407: ...ontent This chapter provides information on the following Troubleshooting Service and support offered by Siemens AG M A60 5 7 6 8 9 10 3URWHFWLYH IXQFWLRQV 2XWSXW WHUPLQDOV 0RQLWRULQJ IXQFWLRQV XQFWLRQV DXOWV DODUPV LDJQRVLV 1DPXU WHUPLQDOV QSXW WHUPLQDOV 70 352 86 DELQHW RSHUDWRU SDQHO 6HWSRLQW FKDQQHO ORVHG ORRS FRQWURO ...

Page 408: ...s of problems and the measures you need to take to rectify them Note If errors or malfunctions occur in the device you must carefully check the possible causes and take the necessary steps to rectify them If you cannot identify the cause of the problem or you discover that components are defective your regional office or sales office should contact Siemens Service and describe the problem in more ...

Page 409: ...ware update in progress RDY ready Orange 2 Hz flashing light Component firmware update complete Waiting for POWER ON of relevant components OFF Cyclic communication is not yet running Note The PROFIdrive is ready for communication when the Control Unit is ready for operation see RDY LED Steady light Cyclic communication is running Green 0 5 Hz flashing light Cyclic communication is not yet fully u...

Page 410: ... DRIVE CLiQ communication is taking place Orange Steady light DRIVE CLiQ communication is being established Red Steady light At least one fault is pending on this component Note LED is driven irrespective of the corresponding messages being reconfigured 0 5 Hz flashing light Firmware is being downloaded Green red 2 Hz flashing light Firmware download is complete Waiting for POWER ON RDY Green oran...

Page 411: ...ponent is ready for operation and cyclic DRIVE CLiQ communication is taking place The DC link voltage is too high Orange Orange DRIVE CLiQ communication is being established Red At least one fault is pending on this component Note LED is driven irrespective of the corresponding messages being reconfigured Flashing light 0 5 Hz Green Red Firmware is being downloaded Flashing light 2 Hz Green Red Fi...

Page 412: ...n Red The component is ready for operation and cyclic DRIVE CLiQ communication is taking place The DC link voltage is too high Orange Orange DRIVE CLiQ communication is being established Red At least one fault is pending on this component Note LED is driven irrespective of the corresponding messages being reconfigured 0 5 Hz flashing light green red Firmware is being downloaded 2 Hz flashing light...

Page 413: ... or red orange 2 Hz flashing light Detection of the components via LED is activated p0144 Note Both options depend on the LED status when module recognition is activated via p0144 1 SMC10 encoder evaluation A83 Table 10 6 Description of the LEDs on the SMC10 LEDs Color Status Description OFF The electronics power supply is missing or lies outside the permissible tolerance range Green Continuous Th...

Page 414: ...s on the SMC30 LED Color State Description OFF The electronics power supply is missing or lies outside permissible tolerance range Green Steady light The component is ready for operation and cyclic DRIVE CLiQ communication is taking place Orange Steady light DRIVE CLiQ communication is being established Red Steady light At least one fault is pending on this component Note LED is driven irrespectiv...

Page 415: ...t CBE20 bus fault No physical connection to a subnet switch Incorrect transmission rate Full duplex transmission not activated OFF If the link port LED is green Control Unit task system is not synchronized with the IRT clock An internal substitute clock is generated Flashing Control Unit task system has synchronized with the IRT clock and data is being exchanged Sync Green Steady light Task system...

Page 416: ...ormation about the fault This information is required for detailed fault diagnosis Fault time removed in milliseconds r2109 Displays the system runtime in ms at which the fault was rectified Alarm time received in milliseconds r2123 Displays the system runtime in ms at which the alarm occurred Alarm value r2124 Displays additional information about the alarm This information is required for detail...

Page 417: ...ory utilization of the data and program memory is displayed Supply key diagnostic parameters details in List Manual Name Parameters Description Status display r0002 The value provides information about the current operating status and the conditions necessary to reach the next status Infeed input voltage smoothed r0025 Displays the smoothed actual value of the input voltage This voltage is present...

Page 418: ...s valid An KTY sensor is connected If using an asynchronous motor the thermal motor model is activated p0600 0 or p0601 0 If r0035 equals 200 0 C the following applies This temperature indicator is invalid temperature sensor fault An PTC sensor is connected If using a synchronous motor the thermal motor model is activated p0600 0 or p0601 0 Power Module temperatures r0037 Displays the measured tem...

Page 419: ...rminal value r4021 Displays the actual value at the digital input terminals on the TM31 This parameter shows the actual value uninfluenced by simulation mode of the digital inputs Status of digital inputs r4022 Displays the status of the digital inputs on the TM31 This parameter shows the status of the digital inputs under the influence of simulation mode of the digital inputs Status of digital ou...

Page 420: ...r along with time the error occurred The time stamp refers to the relative system time in milliseconds r0969 Activate the Set date time AOP synchronization Drive setting to date and time stamp errors on the AOP30 What is a fault A fault is a message from the drive indicating an error or other exceptional unwanted status This could be caused by a fault within the converter or an external fault trig...

Page 421: ...been rectified Note The list of faults and alarms is contained on the documentation CD It also contains descriptions of the responses OFF1 OFF2 etc 10 3 1 External alarm 1 Causes Alarm A7850 External alarm 1 is triggered by the following optional protection devices in the cabinet unit Thermistor motor protection unit alarm option L83 PT100 Evaluation Unit Option L86 Remedy When a fault is indicate...

Page 422: ...stablish the fault 3 Rectify the displayed fault with the help of the appropriate operating instructions provided in Additional Operating Instructions 10 3 3 External fault 2 Causes Fault code F7861 External Fault 2 is triggered when the braking resistor available with options L61 L62 L64 L65 is subject to thermal overload thereby activating the thermostat The drive is switched off with OFF2 Remed...

Page 423: ... The comprehensive Internet based information system which is available round the clock provides product support services and support tools in the shop Online support provides a wide range of technical information FAQs tips and tricks downloads current news Manual Helpful programs and software products http www siemens de automation service support Field service If your plant is down and you need ...

Page 424: ...airs or spare parts please call the following number in Germany Tel 0180 50 50 448 You can call this number outside office hours and at the weekend to contact our emergency spare parts service Technical support We offer technical support in both German and English for deploying products systems and solutions in drive and automation technology In special cases help is available from professional tr...

Page 425: ...nel firmware from the PC DANGER Before carrying out any maintenance or repair work on the de energized cabinet unit wait for 5 minutes after switching off the supply voltage This allows the capacitors to discharge to a harmless level 25 V after the supply voltage has been switched off Before starting work you should also measure the voltage after the 5 minutes have elapsed The voltage can be measu...

Page 426: ...rsonnel in line with the relevant safety regulations The unit must be cleaned using a brush and vacuum cleaner and dry compressed air max 1 bar for areas that cannot be easily reached Ventilation The ventilation openings in the cabinet must never be obstructed The fan must be checked to make sure that it is functioning correctly Cable and screw terminals Cable and screw terminals must be checked r...

Page 427: ... spanner w f 10 Spanner or socket spanner w f 13 Spanner or socket spanner w f 16 17 Spanner or socket spanner w f 18 19 Hexagon socket spanner size 8 Torque wrench up to 50 Nm Screwdriver size 1 2 Screwdriver Torx T20 Screwdriver Torx T30 Tightening torques for current carrying parts When securing connections for current carrying parts DC link motor connections busbars you must observe the follow...

Page 428: ...n front of and secured to the module The telescopic guide support allows the withdrawable device to be adjusted according to the height at which the power blocks are installed Once the mechanical and electrical connections have been removed the power block can be removed from the module whereby the power block is guided and supported by the guide rails on the withdrawable devices Figure 11 1 Insta...

Page 429: ...gs for transportation on a lifting harness in the context of replacement The positions of the crane lifting lugs are illustrated by arrows in the figures below WARNING A lifting harness with vertical ropes or chains must be used to prevent any risk of damage to the housing CAUTION The power block busbars must not be used to support or secure lifting harnesses for the purpose of transportation Figu...

Page 430: ... 3 Maintenance Drive converter cabinet units 430 Operating Instructions 07 07 A5E00288214A Figure 11 3 Crane lifting lugs on HX JX power block Note On HX and JX power blocks the front crane lifting lug is located behind the busbar ...

Page 431: ...nnel only Non observance of these warnings can result in death serious personal injury or substantial property damage Work on an open device must be carried out with extreme caution because external supply voltages may be present The power and control terminals may be live even when the motor is not running Dangerously high voltage levels are still present in the device up to five minutes after it...

Page 432: ... 11 4 Replacing components Drive converter cabinet units 432 Operating Instructions 07 07 A5E00288214A 11 4 2 Replacing the power block frame size FX Replacing the power block Figure 11 4 Replacing the power block frame size FX ...

Page 433: ...mounts 1 screw and 2 nuts If necessary remove the PROFIBUS plug and connection to the operator panel X140 on the CU320 and remove the CU320 7 Disconnect the plugs for the fiber optic cables and signal cables 5 plugs 8 Disconnect the plug for the thermocouple 9 Unscrew the two retaining screws for the fan and attach the tool for de installing the power block at this position You can now remove the ...

Page 434: ... 11 4 Replacing components Drive converter cabinet units 434 Operating Instructions 07 07 A5E00288214A 11 4 3 Replacing the power block frame size GX Replacing the power block Figure 11 5 Replacing the power block frame size GX ...

Page 435: ...ction to the operator panel X140 on the CU320 and carefully remove the CU320 6 Disconnect the connectors for the fiber optic cables 5 plugs and release the cable connection for the signal cables 2 connectors 7 Disconnect the plug for the thermocouple 8 Unscrew the two retaining screws for the fan and attach the tool for de installing the power block at this position You can now remove the power bl...

Page 436: ...components Drive converter cabinet units 436 Operating Instructions 07 07 A5E00288214A 11 4 4 Replacing the power block frame size HX Replacing the left hand power block Figure 11 6 Replacing the power block frame size HX left hand power block ...

Page 437: ...e plugs for the fiber optic cables and signal cables 2 plugs 6 Remove the connection for the current transformer and associated PE connection 1 plug 7 Unscrew the two retaining screws for the fan and attach the tool for de installing the power block at this position You can now remove the power block CAUTION When removing the power block ensure that you do not damage any signal cables Installation...

Page 438: ...vicing 11 4 Replacing components Drive converter cabinet units 438 Operating Instructions 07 07 A5E00288214A Replacing the right hand power block Figure 11 7 Replacing the power block frame size HX right hand power block ...

Page 439: ...he plugs for the fiber optic cables and signal cables 3 plugs 6 Remove the connection for the current transformer and associated PE connection 2 plug 7 Unscrew the two retaining screws for the fan and attach the tool for de installing the power block at this position You can now remove the power block CAUTION When removing the power block ensure that you do not damage any signal cables Installatio...

Page 440: ...ing 11 4 Replacing components Drive converter cabinet units 440 Operating Instructions 07 07 A5E00288214A 11 4 5 Replacing the power block frame size JX Replacing the power block Figure 11 8 Replace power block frame size JX ...

Page 441: ...s 5 Disconnect the plugs for the fiber optic cables and signal cables 3 plugs 6 Remove the connection for the current transformer and associated PE connection 1 plug 7 Unscrew the two retaining screws for the fan and attach the tool for de installing the power block at this position You can now remove the power block CAUTION When removing the power block ensure that you do not damage any signal ca...

Page 442: ...mponents Drive converter cabinet units 442 Operating Instructions 07 07 A5E00288214A 11 4 6 Replacing the Control Interface Board frame size FX Replacing the Control Interface Board Figure 11 9 Replacing the control interface board frame size FX ...

Page 443: ...de in electronics unit you have to disconnect 5 further plugs one after the other 2 at the top 3 at the bottom CAUTION When removing the fan ensure that you do not damage any signal cables The Control Interface Board can then be removed from the slide in electronics unit CAUTION When removing the connector of the ribbon cable make sure that you actuate the locking lever on the connector very caref...

Page 444: ...ponents Drive converter cabinet units 444 Operating Instructions 07 07 A5E00288214A 11 4 7 Replacing the Control Interface Board frame size GX Replacing the Control Interface Board Figure 11 10 Replacing the Control Interface Board frame size GX ...

Page 445: ... in electronics unit you have to disconnect 5 further plugs one after the other 2 at the top 3 at the bottom CAUTION When removing the fan ensure that you do not damage any signal cables The Control Interface Board can then be removed from the slide in electronics unit CAUTION When removing the connector of the ribbon cable make sure that you actuate the locking lever on the connector very careful...

Page 446: ...ponents Drive converter cabinet units 446 Operating Instructions 07 07 A5E00288214A 11 4 8 Replacing the Control Interface Board frame size HX Replacing the Control Interface Board Figure 11 11 Replacing the Control Interface Board frame size HX ...

Page 447: ... in electronics unit you have to disconnect 5 further plugs one after the other 2 at the top 3 at the bottom CAUTION When removing the fan ensure that you do not damage any signal cables The Control Interface Board can then be removed from the slide in electronics unit CAUTION When removing the connector of the ribbon cable make sure that you actuate the locking lever on the connector very careful...

Page 448: ...ponents Drive converter cabinet units 448 Operating Instructions 07 07 A5E00288214A 11 4 9 Replacing the Control Interface Board frame size JX Replacing the Control Interface Board Figure 11 12 Replacing the Control Interface Board frame size JX ...

Page 449: ... in electronics unit you have to disconnect 5 further plugs one after the other 2 at the top 3 at the bottom CAUTION When removing the fan ensure that you do not damage any signal cables The Control Interface Board can then be removed from the slide in electronics unit CAUTION When removing the connector of the ribbon cable make sure that you actuate the locking lever on the connector very careful...

Page 450: ...d servicing 11 4 Replacing components Drive converter cabinet units 450 Operating Instructions 07 07 A5E00288214A 11 4 10 Replacing the fan frame size FX Replacing the fan Figure 11 13 Replacing the fan frame size FX ...

Page 451: ...ply Allow unimpeded access Remove the protective cover Removal The steps for the removal procedure are numbered in accordance with the diagram 1 Remove the retaining screws for the fan 2 screws 2 Disconnect the supply cables 1 x L 1 x N You can now carefully remove the fan CAUTION When removing the fan ensure that you do not damage any signal cables Installation For re installation carry out the a...

Page 452: ...d servicing 11 4 Replacing components Drive converter cabinet units 452 Operating Instructions 07 07 A5E00288214A 11 4 11 Replacing the fan frame size GX Replacing the fan Figure 11 14 Replacing the fan frame size GX ...

Page 453: ...ply Allow unimpeded access Remove the protective cover Removal The steps for the removal procedure are numbered in accordance with the diagram 1 Remove the retaining screws for the fan 3 screws 2 Disconnect the supply cables 1 x L 1 x N You can now carefully remove the fan CAUTION When removing the fan ensure that you do not damage any signal cables Installation For re installation carry out the a...

Page 454: ...cing components Drive converter cabinet units 454 Operating Instructions 07 07 A5E00288214A 11 4 12 Replacing the fan frame size HX Replacing the fan left hand power block Figure 11 15 Replacing the fan frame size HX left hand power block ...

Page 455: ...ded access Remove the protective cover Removal The steps for the removal procedure are numbered in accordance with the diagram 1 Remove the copper bar 6 screws 2 Remove the retaining screws for the fan 3 screws 3 Disconnect the supply cables 1 x L 1 x N You can now carefully remove the fan CAUTION When removing the fan ensure that you do not damage any signal cables Installation For re installatio...

Page 456: ...ervicing 11 4 Replacing components Drive converter cabinet units 456 Operating Instructions 07 07 A5E00288214A Replacing the fan right hand power block Figure 11 16 Replacing the fan frame size HX right hand power block ...

Page 457: ...ed access Remove the protective cover Removal The steps for the removal procedure are numbered in accordance with the diagram 1 Remove the copper bar 12 screws 2 Remove the retaining screws for the fan 3 screws 3 Disconnect the supply cables 1 x L 1 x N You can now carefully remove the fan CAUTION When removing the fan ensure that you do not damage any signal cables Installation For re installatio...

Page 458: ...d servicing 11 4 Replacing components Drive converter cabinet units 458 Operating Instructions 07 07 A5E00288214A 11 4 13 Replacing the fan frame size JX Replacing the fan Figure 11 17 Replacing the fan frame size JX ...

Page 459: ...ded access Remove the protective cover Removal The steps for the removal procedure are numbered in accordance with the diagram 1 Remove the copper bar 8 screws 2 Remove the retaining screws for the fan 3 screws 3 Disconnect the supply cables 1 x L 1 x N You can now carefully remove the fan CAUTION When removing the fan ensure that you do not damage any signal cables Installation For re installatio...

Page 460: ...onents Drive converter cabinet units 460 Operating Instructions 07 07 A5E00288214A 11 4 14 Replacing the fan in the Active Interface Module frame size FI Replacing the fan Figure 11 18 Replacing the fan in the Active Interface Module frame size FI ...

Page 461: ...wer supply Allow unimpeded access Remove the protective cover Removal The steps for the removal procedure are numbered in accordance with the diagram 1 Remove the retaining screws for the fan unit 2 screws 2 Unplug connector X630 You can now carefully remove the fan unit CAUTION When removing the fan unit ensure that the cables are not damaged Installation For re installation carry out the above s...

Page 462: ...onents Drive converter cabinet units 462 Operating Instructions 07 07 A5E00288214A 11 4 15 Replacing the fan in the Active Interface Module frame size GI Replacing the fan Figure 11 19 Replacing the fan in the Active Interface Module frame size GI ...

Page 463: ...wer supply Allow unimpeded access Remove the protective cover Removal The steps for the removal procedure are numbered in accordance with the diagram 1 Remove the retaining screws for the fan unit 3 screws 2 Unplug connector X630 You can now carefully remove the fan unit CAUTION When removing the fan unit ensure that the cables are not damaged Installation For re installation carry out the above s...

Page 464: ...onents Drive converter cabinet units 464 Operating Instructions 07 07 A5E00288214A 11 4 16 Replacing the fan in the Active Interface Module frame size HI Replacing the fan Figure 11 20 Replacing the fan in the Active Interface Module frame size HI ...

Page 465: ...r supply Allow unimpeded access Remove the protective cover Removal The steps for the removal procedure are numbered in accordance with the diagram 1 Remove the retaining screws for the fan 3 screws 2 Disconnect the supply cables 1 x L 1 x N You can now carefully remove the fan CAUTION When removing the fan ensure that the cables are not damaged Installation For re installation carry out the above...

Page 466: ...onents Drive converter cabinet units 466 Operating Instructions 07 07 A5E00288214A 11 4 17 Replacing the fan in the Active Interface Module frame size JI Replacing the fan Figure 11 21 Replacing the fan in the Active Interface Module frame size JI ...

Page 467: ...r supply Allow unimpeded access Remove the protective cover Removal The steps for the removal procedure are numbered in accordance with the diagram 1 Remove the retaining screws for the fan 3 screws 2 Disconnect the supply cables 1 x L 1 x N You can now carefully remove the fan CAUTION When removing the fan ensure that the cables are not damaged Installation For re installation carry out the above...

Page 468: ...power supply A1 F11 A1 F12 The order numbers for replacing auxiliary power supply fuses that have blown can be found in the spare parts list WARNING You must carry out the following First disconnect the auxiliary power supply Then rectify the cause of the fault Replace the fuse 11 4 20 Replacing the main fuses Preparatory steps Disconnect the cabinet unit from the power supply Open the cabinet doo...

Page 469: ...tery Type CR2032 3 V lithium battery Manufacturer Maxell Sony Panasonic Nominal capacity 220 mAh Maximum permissible charging current 10 mA restricted to 2 mA in operator panel Self discharge at 20 C 1 year Service life in backup mode 1 year at 70 C 1 5 years at 20 C Service life in operation 2 years Replacement 1 Switch the unit into a no voltage condition 2 Open the cabinet 3 Disconnect the 24 V...

Page 470: ...Maintenance and servicing 11 4 Replacing components Drive converter cabinet units 470 Operating Instructions 07 07 A5E00288214A Figure 11 22 Replacing the backup battery for the cabinet operator panel ...

Page 471: ...om the date of manufacture and not from the date that the equipment was shipped Procedure The DC link capacitors are re formed by applying the rated voltage without load for at least 30 minutes at room temperature Operation via PROFIBUS Set bit 3 of control word 1 operation enable permanently to 0 Switch on the converter by means of an ON signal bit 0 of the control word all the other bits must be...

Page 472: ...occurred A Control Interface Board with different firmware data was installed When connecting up DRIVE CLiQ cables connections were interchanged Automatic firmware update As of firmware 2 5 an automatic firmware update can be carried out once the electronics have been powered up on replacement DRIVE CLiQ components The following LEDs will flash slowly to indicate that an automatic firmware update ...

Page 473: ...flashes slowly orange 0 5 Hz 2 The firmware update is performed automatically and in sequence on the DRIVE CLiQ components during the update process an LED on the component whose firmware is being updated will flash slowly green red 0 5 Hz 3 Once the firmware update on an individual DRIVE CLiQ component is complete the LED on that component will flash quickly green red 2 Hz 4 Once the firmware upd...

Page 474: ...e operator panel and the following dialog screen will appear 6 0 16 6 1 0 6 6RIWZDUH EHLQJ ORDGHG 3OHDVH GR QRW GLVFRQQHFW WKH SRZHU VXSSO Figure 11 23 Dialog screen loading firmware If the firmware cannot be loaded successfully it can be loaded using the following manual method The load program LOAD_AOP30 and the firmware file can be found on the CD Loading the firmware 1 Establish the RS232 conn...

Page 475: ...475 Technical specifications 12 12 1 Chapter content This chapter provides information on the following General and specific technical specifications for the devices Information on restrictions that apply when the devices are used in unfavorable ambient conditions derating ...

Page 476: ...andards EN 60 146 1 EN 61 800 2 EN 61 800 3 EN 50 178 EN 60 204 1 EN 60 529 CE mark To EMC directive No 89 336 EC and low voltage directive No 73 23 EC RI suppression In accordance with EMC product standard for variable speed drives EN 61 800 3 category C3 category C2 on request 1 Ambient conditions Operation Storage Transport Ambient temperature 0 C to 40 C up to 50 C with derating 25 C to 55 C 2...

Page 477: ... air inlet of the cabinet unit and site altitude for cabinet units with degree of protection IP20 IP21 IP23 IP43 Ambient temperature in C Site altitude above sea level in m 20 25 30 35 40 45 50 0 to 2000 100 95 0 87 0 Up to 2500 100 96 3 91 4 83 7 Up to 3000 100 96 2 92 5 87 9 80 5 Up to 3500 100 96 7 92 3 88 8 84 3 77 3 Up to 4000 100 97 8 92 7 88 4 85 0 80 8 74 0 Table 12 3 Current derating as a...

Page 478: ...0 to 3000 100 95 91 88 to 3250 100 97 93 89 85 to 3500 100 98 93 89 85 82 to 3750 100 95 91 87 83 79 to 4000 96 92 87 83 80 76 Table 12 5 Voltage derating as a function of the site altitude 660 V 690 V 3 AC Rated converter input voltage Site altitude above sea level in m 660 V 690 V 0 to 2000 100 to 2250 100 96 to 2500 98 94 to 2750 94 90 to 3000 91 88 to 3250 89 85 to 3500 85 82 to 3750 to 4000 T...

Page 479: ...A0 160 310 88 7LE33 8AA0 200 380 87 7LE35 0AA0 250 490 78 Table 12 8 Derating factor of the output current as a function of the pulse frequency for units with a rated pulse frequency of 1 25 kHz Order no 6SL3710 Power kW Output current at 1 25 kHz A Derating factor at 2 5 kHz Derating factor at 5 kHz Supply voltage 380 480 V 3 AC 7LE36 1AA0 315 605 72 60 7LE37 5AA0 400 745 72 60 7LE38 4AA0 450 840...

Page 480: ...15 330 82 55 7LG34 1AA0 400 410 82 55 7LG34 7AA0 450 465 87 55 7LG35 8AA0 560 575 85 50 7LG37 4AA0 710 735 79 55 7Lg38 1AA0 800 810 95 55 7LG38 8AA0 900 910 87 55 7LG41 0AA0 1000 1025 86 50 7LG41 3AA0 1200 1270 79 40 For pulse frequencies in the range between the fixed values the relevant derating factors can be determined by means of linear interpolation The following formula applies for this Exa...

Page 481: ...d with its base load current before and after the overload occurs a load duration of 300 s is used as a basis here Low overload The base load current for low overload IL is based on a load duty cycle of 110 for 60 s or 150 for 10 s 5DWHG FXUUHQW FRQWLQXRXV DVH ORDG FXUUHQW IRU ORZ RYHUORDG 6KRUW WLPH FXUUHQW RQYHUWHU FXUUHQW 6KRUW WLPH FXUUHQW V W V V Figure 12 2 Low overload High overload The bas...

Page 482: ...bles to the cabinet unit are protected by fuses with gL characteristic The connection cross sections are calculated for three core copper cables installed horizontally in free air at an ambient temperature of 30 C 86 F in accordance with DIN VDE 0298 Part 2 Group 5 and the recommended line protection in accordance with DIN VDE 0100 Part 430 AWG American Wire Gauge for cross sections 120 mm MCM Mil...

Page 483: ...pprox weight standard version kg 708 708 892 Frame sizes Active Interface Module Active Line Module Motor Module FI FX FX FI FX FX GI GX GX Dimensions standard version Width x height x depth mm 1400 x 2 000 x 600 1400 x 2 000 x 600 1400 x 2 000 x 600 Recommended protection Line protection with option L26 Rated current Frame size to DIN 43620 1 Line and semi cond protection without option L26 Rated...

Page 484: ...d version kg 980 980 1716 Frame sizes Active Interface Module Active Line Module Motor Module GI GX GX GI GX GX HI HX HX Dimensions standard version Width x height x depth mm 1800 x 2 000 x 600 1800 x 2 000 x 600 2200 x 2 000 x 600 Recommended protection Line protection with option L26 Rated current Frame size to DIN 43620 1 Line and semi cond protection without option L26 Rated current Frame size...

Page 485: ...version kg 1731 1778 2408 Frame sizes Active Interface Module Active Line Module Motor Module HI HX HX HI HX HX JI JX JX Dimensions standard version Width x height x depth mm 2200 x 2 000 x 600 2200 x 2 000 x 600 2800 x 2 000 x 600 Recommended protection Line protection with option L26 Rated current Frame size to DIN 43620 1 Line and semi cond protection without option L26 Rated current Frame size...

Page 486: ...ctive Interface Module Active Line Module Motor Module JI JX JX JI JX JX Dimensions standard version Width x height x depth mm 2800 x 2 000 x 600 2800 x 2 000 x 600 Recommended protection Line protection with option L26 Rated current Frame size to DIN 43620 1 Line and semi cond protection without option L26 Rated current Frame size to DIN 43620 1 A A Circuit breaker Circuit breaker Circuit breaker...

Page 487: ... Frame sizes Active Interface Module Active Line Module Motor Module FI FX FX FI FX FX FI FX FX Dimensions standard version Width x height x depth mm 1400 x 2 000 x 600 1400 x 2 000 x 600 1400 x 2 000 x 600 Recommended protection Line protection with option L26 Rated current Frame size to DIN 43620 1 Line and semi cond protection without option L26 Rated current Frame size to DIN 43620 1 A A 3NA31...

Page 488: ... Active Interface Module Active Line Module Motor Module FI FX FX GI GX GX GI GX GX Dimensions standard version Width x height x depth mm 1400 x 2 000 x 600 1600 x 2 000 x 600 1600 x 2 000 x 600 Recommended protection Line protection with option L26 Rated current Frame size to DIN 43620 1 Line and semi cond protection without option L26 Rated current Frame size to DIN 43620 1 A A 3NA3240 6 200 2 3...

Page 489: ...Frame sizes Active Interface Module Active Line Module Motor Module GI GX GX GI GX GX HI HX HX Dimensions standard version Width x height x depth mm 1600 x 2 000 x 600 1600 x 2 000 x 600 2200 x 2 000 x 600 Recommended protection Line protection with option L26 Rated current Frame size to DIN 43620 1 Line and semi cond protection without option L26 Rated current Frame size to DIN 43620 1 A A 3NA335...

Page 490: ...e sizes Active Interface Module Active Line Module Motor Module HI HX HX HI HX HX JI JX JX Dimensions standard version Width x height x depth mm 2200 x 2 000 x 600 2200 x 2 000 x 600 2800 x 2 000 x 600 Recommended protection Line protection with option L26 Rated current Frame size to DIN 43620 1 Line and semi cond protection without option L26 Rated current Frame size to DIN 43620 1 A A 3NA3352 6 ...

Page 491: ...08 Frame sizes Active Interface Module Active Line Module Motor Module JI JX JX JI JX JX JI JX JX Dimensions standard version Width x height x depth mm 2800 x 2 000 x 600 2800 x 2 000 x 600 2800 x 2 000 x 600 Recommended protection Line protection with option L26 Rated current Frame size to DIN 43620 1 Line and semi cond protection without option L26 Rated current Frame size to DIN 43620 1 A A Cir...

Page 492: ... Dimensions standard version Width x height x depth mm 2800 x 2 000 x 600 Recommended protection Line protection with option L26 Rated current Frame size to DIN 43620 1 Line and semi cond protection without option L26 Rated current Frame size to DIN 43620 1 A A Circuit breaker Circuit breaker 1 The currents are based on a power factor of cos ϕ 1 and include 10 A for the external auxiliary equipmen...

Page 493: ... Frame sizes Active Interface Module Active Line Module Motor Module FI FX FX FI FX FX FI FX FX Dimensions standard version Width x height x depth mm 1400 x 2 000 x 600 1400 x 2 000 x 600 1400 x 2 000 x 600 Recommended protection Line protection with option L26 Rated current Frame size to DIN 43620 1 Line and semi cond protection without option L26 Rated current Frame size to DIN 43620 1 A A 3NA31...

Page 494: ... Active Interface Module Active Line Module Motor Module FI FX FX GI GX GX GI GX GX Dimensions standard version Width x height x depth mm 1400 x 2 000 x 600 1600 x 2 000 x 600 1600 x 2 000 x 600 Recommended protection Line protection with option L26 Rated current Frame size to DIN 43620 1 Line and semi cond protection without option L26 Rated current Frame size to DIN 43620 1 A A 3NA3240 6 200 2 3...

Page 495: ...Frame sizes Active Interface Module Active Line Module Motor Module GI GX GX GI GX GX HI HX HX Dimensions standard version Width x height x depth mm 1600 x 2 000 x 600 1600 x 2 000 x 600 2200 x 2 000 x 600 Recommended protection Line protection with option L26 Rated current Frame size to DIN 43620 1 Line and semi cond protection without option L26 Rated current Frame size to DIN 43620 1 A A 3NA335...

Page 496: ...e sizes Active Interface Module Active Line Module Motor Module HI HX HX HI HX HX JI JX JX Dimensions standard version Width x height x depth mm 2200 x 2 000 x 600 2200 x 2 000 x 600 2800 x 2 000 x 600 Recommended protection Line protection with option L26 Rated current Frame size to DIN 43620 1 Line and semi cond protection without option L26 Rated current Frame size to DIN 43620 1 A A 3NA3352 6 ...

Page 497: ...08 Frame sizes Active Interface Module Active Line Module Motor Module JI JX JX JI JX JX JI JX JX Dimensions standard version Width x height x depth mm 2800 x 2 000 x 600 2800 x 2 000 x 600 2800 x 2 000 x 600 Recommended protection Line protection with option L26 Rated current Frame size to DIN 43620 1 Line and semi cond protection without option L26 Rated current Frame size to DIN 43620 1 A A Cir...

Page 498: ... Dimensions standard version Width x height x depth mm 2800 x 2 000 x 600 Recommended protection Line protection with option L26 Rated current Frame size to DIN 43620 1 Line and semi cond protection without option L26 Rated current Frame size to DIN 43620 1 A A Circuit breaker Circuit breaker 1 The currents are based on a power factor of cos ϕ 1 and include 10 A for the external auxiliary equipmen...

Page 499: ...ICO Binector connector BO Binector output C C Capacitance CAN Serial bus system CB Communication board CDS Command data set CI Connector input COM Center contact on a changeover contact CU Control Unit D DC Direct current DDS Drive data set DI Digital input DI DO Digital input output bidirectional DO Digital output E ESD Electrostatic devices EMC Electromagnetic compatibility EN European standard ...

Page 500: ...ardization body in the USA United States of America NO Normally open contact P p Adjustable parameter PDS Power unit data set PE Protective earth PROFIBUS Serial data bus PTC Positive temperature coefficient R r Visualization parameter read only RAM Read and write memory RS 232 Serial interface RS 485 Standard Describes the physical characteristics of a digital serial interface S SI Safety Integra...

Page 501: ... for speed setpoints Vector 10002 TM31_AI0 Vector p1001 CO Fixed speed setpoint 1 Vector 300 rpm Vector p1002 CO Fixed speed setpoint 2 Vector 600 rpm Vector p1003 CO Fixed speed setpoint 3 Vector 1500 rpm Vector p1083 CO Speed limit in positive direction of rotation Vector 6000 rpm Vector p1086 CO Speed limit in negative direction of rotation Vector 6000 rpm Vector p1115 Ramp function generator s...

Page 502: ...or overtemperature Vector p2080 14 BI PROFIBUS send status word 1 Vector r2197 3 Clockwise Vector p2080 15 BI PROFIBUS send status word 1 Vector r2129 15 No alarm for therm overload of power unit Vector p2088 PROFIBUS Invert status word Vector B800h Vector p2128 14 Select fault alarm code for trigger Vector 7910 Alarm motor overtemperature Vector p2128 15 Select fault alarm code for trigger Vector...

Page 503: ...FSW bit 1 Vector 0 p1035 MOP higher Vector r2090 13 PZD 1 bit 13 Vector p1036 MOP lower Vector r2090 14 PZD 1 bit 14 Vector p1055 Jog bit 0 Vector 0 p1056 Jog bit 1 Vector 0 p1113 Direction of rotation changeover Vector r2090 11 PZD 1 bit 11 Vector p1140 Enable RFG Vector r2090 4 PZD 1 bit 4 Vector p1141 Start RFG Vector r2090 5 PZD 1 bit 5 Vector p1142 Enable nsetp Vector r2090 6 PZD 1 bit 6 Vect...

Page 504: ... Set DI DO14 input or output CU 1 Output CU p0745 DI DO15 CU r2138 7 Ack fault Vector p0748 15 Invert DI DO15 CU 0 Not inverted p0728 15 Set DI DO15 input or output CU 1 Output CU p2103 1 Acknowledge fault TM31 r2090 7 PZD 1 bit 7 Vector p2104 Acknowledge fault 2 TM31 r4022 3 TM31 DI3 TM31 p4030 DO0 TM31 r0899 11 Pulses enabled Vector p4031 DO1 TM31 r2139 3 Fault Vector p4038 DO8 TM31 r0899 0 Read...

Page 505: ...ion p1020 FSW bit 0 Vector r4022 1 TM31 DI1 TM31 p1021 FSW bit 1 Vector r4022 2 TM31 DI2 TM31 p1035 MOP higher Vector r4022 1 TM31 DI1 TM31 p1036 MOP lower Vector r4022 2 TM31 DI2 TM31 p1055 Jog bit 0 Vector 0 p1056 Jog bit 1 Vector 0 p1113 Direction of rotation changeover Vector 0 p1140 Enable RFG Vector 1 p1141 Start RFG Vector 1 p1142 Enable nsetp Vector 1 p2103 Acknowledge fault_1 Vector 0 p21...

Page 506: ...28 14 Set DI DO14 input or output CU 1 Output CU p0745 DI DO15 CU r2138 7 Ack fault Vector p0748 15 Invert DI DO15 CU 0 Not inverted p0728 15 Set DI DO15 input or output CU 1 Output CU p2103 Acknowledge fault 1 TM31 p2104 Acknowledge fault 2 TM31 r4022 3 TM31 DI3 TM31 p4030 DO0 TM31 r0899 11 Enable pulses Vector p4031 DO1 TM31 r2139 3 Fault Vector p4038 DO8 TM31 r0899 0 Ready to start Vector p4028...

Page 507: ...I1 TM31 p1021 FSW bit 1 Vector r4022 2 TM31 DI2 TM31 p1035 MOP higher Vector r4022 1 TM31 DI1 TM31 p1036 MOP lower Vector r4022 2 TM31 DI2 TM31 p1055 Jog bit 0 Vector 0 p1056 Jog bit 1 Vector 0 p1113 Direction of rotation changeover Vector r4022 6 TM31 DI6 TM31 p1140 Enable RFG Vector 1 p1141 Start RFG Vector 1 p1142 Enable nsetp Vector 1 p2103 Acknowledge fault_1 Vector 0 p2104 Acknowledge fault_...

Page 508: ...ut or output CU 1 Output CU p0745 DI DO15 CU r2138 7 Ack fault Vector p0748 15 Invert DI DO15 CU 0 Not inverted p0728 15 Set DI DO15 input or output CU 1 Output CU p2103 Acknowledge fault 1 TM31 p2104 Acknowledge fault 2 TM31 r4022 3 TM31 DI3 TM31 p4030 DO0 TM31 r0899 11 Enable pulses Vector p4031 DO1 TM31 r2139 3 Fault Vector p4038 DO8 TM31 r0899 0 Ready to start Vector p4028 8 Set DI DO8 input o...

Page 509: ...tor 20 PROFIdrive NAMUR p1020 FSW bit 0 Vector p1021 FSW bit 1 Vector p1035 MOP higher Vector p1036 MOP lower Vector p1055 Jog bit 0 Vector p1056 Jog bit 1 Vector p1113 Direction of rotation changeover Vector p0922 p1140 Enable RFG Vector 1 p0922 p1141 Start RFG Vector 1 p0922 p1142 Enable nsetp Vector 1 p0922 p2103 Acknowledge faults_1 Vector 0 p0922 p2104 Acknowledge faults_2 Vector 0 p2106 Ext ...

Page 510: ...48 14 Invert DI DO14 CU 0 Not inverted p0728 14 Set DI DO14 input or output CU 1 Output CU p0745 DI DO15 CU r2138 7 Ack fault Vector p0748 15 Invert DI DO15 CU 0 Not inverted p0728 15 Set DI DO15 input or output CU 1 Output CU p2103 1 Acknowledge faults TM31 p2104 Acknowledge fault 2 TM31 p4030 DO0 TM31 p4031 DO1 TM31 p4038 DO8 TM31 Factory setting p4028 8 Set DI DO8 input or output TM31 Factory s...

Page 511: ... customer terminal block TM31 as the setpoint source Table A 7 Parameter macro p1000 2 TM31 terminals Sink Source Parameters Description DO Parameters Description DO p1070 Main setpoint Vector r4055 AI0 TM31 TM31 p1071 Main setpoint scaling Vector 1 100 TM31 p1075 Supplementary setpoint Vector 0 TM31 p1076 Supplementary setpoint scaling Vector 1 100 TM31 Parameter macro p1000 3 Motorized potentiom...

Page 512: ...to set the fixed setpoint as the setpoint source Table A 9 Parameter macro p1000 4 Fixed setpoint Sink Source Parameters Description DO Parameters Description DO p1070 Main setpoint Vector r1024 Active fixed setpoint Vector p1071 Main setpoint scaling Vector 1 100 Vector p1075 Supplementary setpoint Vector 0 Vector p1076 Supplementary setpoint scaling Vector 1 100 Vector ...

Page 513: ...67 Selecting the motor type 162 Basic information BICO technology 182 Binector input BI 183 Binector output BO 183 Command data set CDS 177 Connector input CI 183 Connector output CO 183 Copy motor data set MDS 181 Copying the command data set CDS 181 Copying the drive data set DDS 181 Data sets 177 Data Sets 177 Drive data set DDS 178 Drive objects 175 Encoder data set EDS 179 Motor data set MDS ...

Page 514: ...Frame size HX replacement 446 Frame size JX replace 448 Control via PROFIBUS 203 Control word 1 207 208 Customer terminal block 60 Customer terminal block extension option G61 106 D Data sets 177 Data Sets 177 Date of manufacture 25 DDS Copy 181 DDS drive data set 178 Decrease Key 232 Derating 477 Derating behavior at increased pulse frequency 336 Derating data 477 Current derating as a function o...

Page 515: ... JX replace 458 Fan voltage adjustment 54 Faults 421 Faults and alarms 421 Faults and alarms 235 Features 20 Filter mats Replacement 431 Firmware update 473 Firmware upgrading 473 Fixed setpoints 198 Fixed speed setpoints 198 Flying restart 321 with encoder 323 without encoder 322 Forming the DC link capacitors 471 Friction characteristic curve 326 Fuse Fuse A2 F101 F102 468 Fuse G1 F10 F11 468 Fu...

Page 516: ...the time 228 Software Version 229 Structure 220 Minimum speed 262 Monitoring functions 360 Monitoring Functions 400 Motor changeover selection 324 Motor data set 180 Motor Data Set 180 Motor identification 308 Motorized potentiometer 197 N NAMUR Outlet for external auxiliaries option B03 113 Separate 24 V DC power supply option B02 113 NAMUR signaling bit bar 215 NAMUR terminal block option B00 11...

Page 517: ...rd frame size JX 448 Crane lifting lugs 429 Error messages 472 Fan in the Active Interface Module frame size FI 460 Fan in the Active Interface Module frame size GI 462 Fan in the Active Interface Module frame size HI 464 Fan in the Active Interface Module frame size JI 466 Fan frame size FX 450 Fan frame size GX 452 Fan frame size HX 454 Fan frame size JX 458 Filter mats 431 Installation device 4...

Page 518: ...ge 31 Structure 22 Suppression Speed 262 Switching between clockwise and counter clockwise rotation 232 T Technical specifications 482 General 476 Version A 380 V 480 V 3 AC 483 Version A 500 V 690 V 3 AC 493 Version A 660 V 690 V 3 AC 487 Technology controller 338 Telegram selection user defined 205 Telegrams and process data 205 Temperature sensor 65 Thermal monitoring 401 Thermal motor protecti...

Page 519: ......

Page 520: ...Siemens AG Automation and Drives Large Drives P O Box 4743 90025 NÜRNBERG GERMANY www ad siemens com A5E00288214A ...

Reviews: