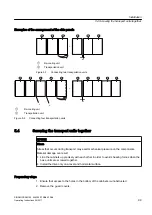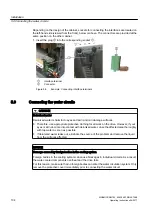
Screwing cabinets together
The cabinets are supplied with the following mounting hardware for the purpose of screwing
them together:
● Hexagon nuts ISO 4032-M10-8 A2L
● Hexagon screws ISO 4017-M10x45-8.8-A2L
● Hexagon screws ISO 4017-M10x140-8.8-A
● Washers DIN9021-10.5-140HV-A2L
● Spring washer VHD 10-1.4310
Proceed as follows to screw the cabinets together:
1. Remove the canopy panel-
2. Align the cabinets.
3. Insert the M10 screws through the mounting holes at the upper and lower sides of the
cabinet. The arrangement of the mounting holes is provided in the dimension drawing.
Select a suitable screw length depending on the location.
4. Place the washers and spring washer onto the screw.
5. Screw the transport units together using the nuts with a torque of 65 Nm.
6. Attach the canopy panel.
5.5
Connecting to the foundation
Preparatory steps
1. Ensure that access to the holes in the bottom of the cabinets is unobstructed.
2. Remove the guard covers.
Securing the cabinet to the floor
The following details are specified in the dimension drawing:
● Mounting holes
● Mounting dimensions
● Distance between the cabinet top and the room ceiling
Holes are provided for M12 screws for securing the cabinet to the foundation.
Install the transportation units in accordance with the specifications provided in the
accompanying dimension drawings in "Layout diagrams and dimension drawings".
Installation
5.5 Connecting to the foundation
SINAMICS SM150 6SL3845-7NN46-7AA0
100
Operating Instructions 04/2017
Summary of Contents for SINAMICS SM150
Page 2: ...20 04 2017 13 53 V27 00 ...
Page 14: ...Table of contents SINAMICS SM150 6SL3845 7NN46 7AA0 14 Operating Instructions 04 2017 ...
Page 122: ...Start up SINAMICS SM150 6SL3845 7NN46 7AA0 122 Operating Instructions 04 2017 ...
Page 190: ...Maintenance 9 7 Repairs SINAMICS SM150 6SL3845 7NN46 7AA0 190 Operating Instructions 04 2017 ...
Page 192: ...Spare parts SINAMICS SM150 6SL3845 7NN46 7AA0 192 Operating Instructions 04 2017 ...
Page 196: ...Service Support SINAMICS SM150 6SL3845 7NN46 7AA0 196 Operating Instructions 04 2017 ...
Page 217: ......


