background image

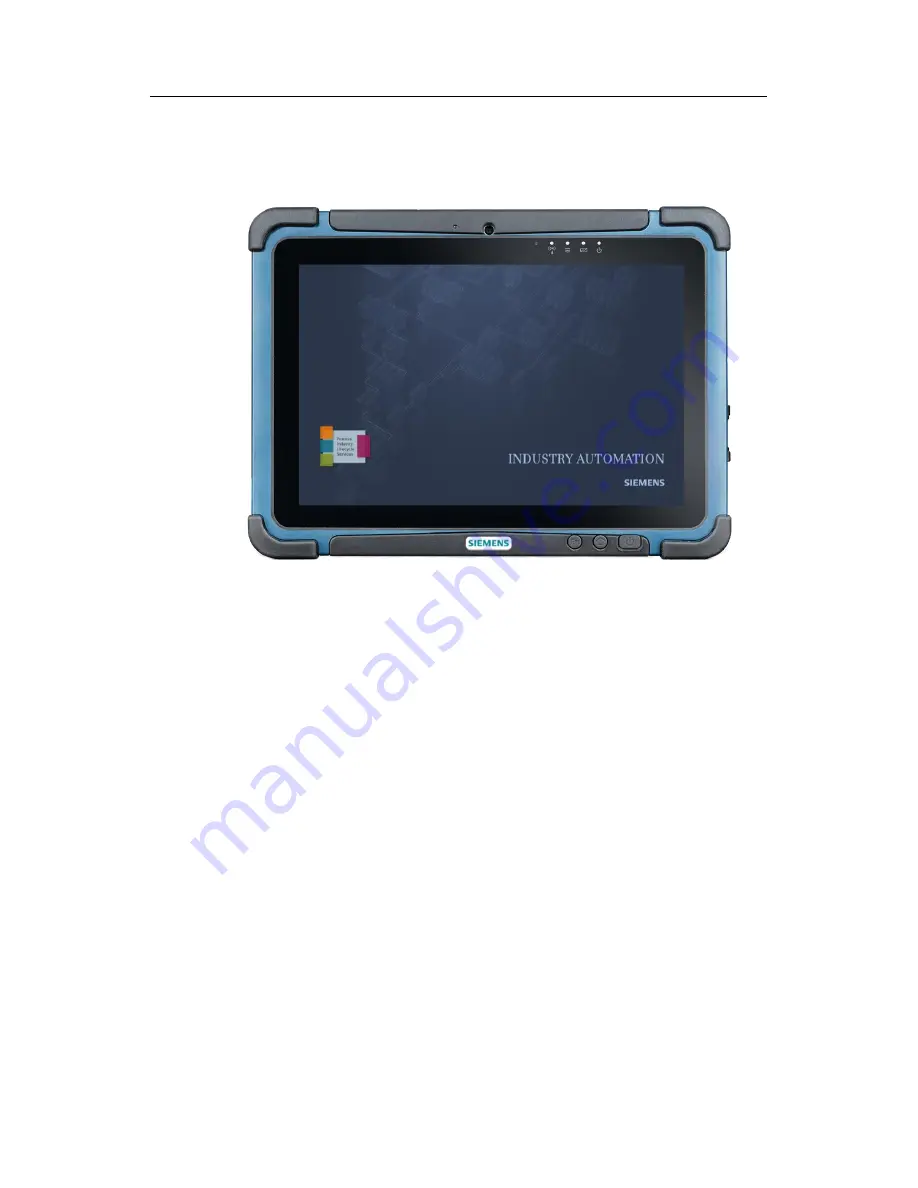
2 Product description SIPIX SD100 
 

Operating Manual SIPIX SD100 
12/2017 


 S

ie

m

e

n

s

 A

G

 2017

 A

ll r

ig

h

ts

 r

e

s

e

rv

e

d


Product description SIPIX SD100 

The SIPIX SD100 is a highly flexible and powerful Industry Tablet PC. The robust 
and compact 10.1” display is designed for use in harsh industrial environments and 
has been specifically developed for use in potentially explosive atmospheres. 


2.1 

Scope of application 

The Tablet PC carries out the collection, processing, and (radio) transmission of 
data within and outside of potentially explosive atmospheres. 

The scope of application of the Tablet PC lies primarily within remote access to 
field equipment and field service.  

It supports remote access to field instruments 


via PCS 7 and SIMATIC PDM or PDM as a stand-alone 


with permanent local SIMATIC PDM installation within a third-party process 
control system/automation system that provides HART, PROFIBUS and 
Foundation Fieldbus and MODBUS communications. 


with permanent local SIMATIC PDM installation within a third-party process 
control system/automation system that supports the HART, PROFIBUS, 
Foundation Fieldbus and MODBUS communications protocols. 

Summary of Contents for SIPIX SD100

Page 1: ...Operating Manual SIPIX SD100 Industry Tablet PC SIPIX SD100 Remote Service ...

Page 2: ...an occur the warning is always displayed with the highest possible level A notice warning of injury to persons with a safety alert symbol may also include a warning relating to property damage Qualified personnel The product system described in this documentation may be operated only by personnel qualified for the specific task in accordance with the relevant documentation in particular its warnin...

Page 3: ...st cyber threats it is necessary to implement and continuously maintain a holistic state of the art industrial security concept Siemens products and solutions only form one element of such a concept The customer is responsible for preventing unauthorized access to his plants systems machines and networks Systems machines and components should only be connected to the enterprise network or the Inte...

Page 4: ...Log in through the Common Remote Service Platform cRSP 15 6 1 2 Desktop Sharing VNC 17 6 1 3 Collaboration HUB via Chrome 22 6 2 Confirm remote connection on the side of the Tablet PC 26 6 2 1 Confirm Desktop Sharing VNC of remote expert 26 6 2 2 Start Collaboration Session on the Tablet PC 27 7 Important functions 29 7 1 HotTab 29 7 2 Functions in one Collaboration Session Expert Mode 34 8 Commun...

Page 5: ...ontains information on the use and functions of the audio video collaboration software SIPIX RC the HotTab software and the connection set up to a HART field device through a HART modem Core contents This document deals with the following key topics Product description Technical data Operation of the SIPIX Industry Tablet PC Set up of a remote connection through the Common Remote Service Platform ...

Page 6: ...transmission of data within and outside of potentially explosive atmospheres The scope of application of the Tablet PC lies primarily within remote access to field equipment and field service It supports remote access to field instruments via PCS 7 and SIMATIC PDM or PDM as a stand alone with permanent local SIMATIC PDM installation within a third party process control system automation system tha...

Page 7: ... Service PI Service can be done remotely without specific knowledge in the field technique by an expert Several experts can simultaneously access a Tablet PC Training on the Job Training of service field engineers with the help of an expert during the use of the service Mobility Optimized workflows Increased safety On board software components The pre installed software components and their settin...

Page 8: ...emens AG 2017 All rights reserved 2 2 Set up of SIPIX SD100 Front side 1 2 3 5 6 7 8 4 Table 2 1 Item Description 1 Integrated microphone 2 2 Megapixel Camera 3 Brightness sensor 4 Indicators 5 On off button 6 Home button 7 Function key Fn1 freely programmable 8 10 Touchscreen ...

Page 9: ...egapixel Camera 5 Barcode Scanner optional 6 Battery removal 7 Battery 8 Stylus 9 Battery lock 10 Loudspeaker 11 Interface for docking station not visible 12 SIM card slot 13 LTE module optional 14 External I O interface under protective cover only for use in potentially explosive atmospheres Power connection DC Audio combo connection Mic in Line out USB 3 0 30 pin combo port Giga LAN or RS232 Mic...

Page 10: ...area 20 C to 60 C Within Ex area 20 C to 50 C Storage 30 C to 70 C Humidity during operation 30 90 no condensation Power supply Battery life Up to 8 hours Battery 7 4 V at least 5300 mAh lithium polymer Charging time 2 5 h Mains adapter AC 100 240 V 50 60 Hz DC 19 V System Processor Quad Core Intel BayTrail M 1 8 GHz Working storage 8 GB SODIMM DDR3L 1600 Hard disk storage 128 GB or 256 GB mSATA M...

Page 11: ... camera 2 megapixel in front 5 megapixel at rear with LED flash USB port USB 3 0 Sensors Sensors Gyrometer E Compass light G sensor Size and weight Size 271 8 mm x 197 2 mm x 19 0 mm Weight incl battery 1 5 kg 3 2 Optional on board and add on modules Table 3 2 Optional on board modules Scanner options 1D 2D Imager Bar QR Code RFID HF Reader 13 56 MHz ISO 15693 ISO 14443 A ISO 18092 Optional add on...

Page 12: ... from the potentially explosive atmosphere and move it to a safe place Note You can find additional safety information in the outline instructions by clicking on the following link http automation bartec de tabletpcE htm Conditions for safe operation in potentially explosive atmospheres The device must be protected against shocks with high impact energy strong UV radiation and strong charge genera...

Page 13: ...be found in the SIMATIC process control system PCS 7 Compendium Part F Industrial Security manual https support industry siemens com cs ww en view 109742220 Inspection In accordance with EN 60079 17 and EN 60079 19 the operator of electrical installations in potentially explosive atmospheres is obliged to have them checked by a qualified electrician to ensure their proper state Repairs Repairs of ...

Page 14: ...1 2 If the Tablet PC has booted the Windows login page opens 2 Click on the text box and enter the default login password Siemens using the on screen keyboard Note Safety instruction Immediately after first entry into service change the Windows login password 3 Confirm the entry with Enter Note If you use a SIM card a SIM card password may be requested if necessary after the Windows login ...

Page 15: ...e Tablet PC Chapter 6 1 Note You will find additional information on the topic of Remote Service under https www siemens com global en home products services industry html 6 1 Establish remote connection on the side of the remote expert No additional software is required to establish the connection The connection is through the Common Remote Service Platform cRSP The cRSP framework is used to comm...

Page 16: ... via Site in the menu bar 4 Click on the button Search If there are multiple access points available inputting search criteria in the filter is recommended 5 Select the tablet of the on site technician here SIEMENS_PITablet_0007 In the next step three types of access to the Tablet PC are available Desktop Sharing VNC Chapter 6 1 2 The expert can use the Tablet PC remote Collaboration session via a...

Page 17: ...Click on Desktop Sharing VNC 2 Confirm the message Do you want this website by clicking the Accept button 3 Confirm the message Do you want to run this application by clicking the Accept button The browser opens a new tab with the connections If the on site technician is not yet connected to the Internet a dialog box appears Connection failure with the note Invalid Authorization Click on the OK bu...

Page 18: ...ite technician Note The VNC password on delivery is Admin Change this password before first use of the Tablet PC for security reasons The on site technician must confirm your remote inquiries and thus allow access If the on site technician has confirmed your remote inquiry a new window with the Tablet PC home screen opens automatically You can operate the Tablet PC remotely If the confirmation is ...

Page 19: ...mote expert work in parallel on the Tablet PC Avoid a high number of clicks on your desktop in order that no unwanted clicks are triggered on the Tablet PC Minimize maximize the window through the following icon in the system tray 5 Click on the Connection options icon in the menu bar 6 From the Scale by drop down list box select the required scaling for the home screen 90 here and click OK 7 Clic...

Page 20: ...Ctrl Alt Shift F to exit fullscreen 8 If you want to end desktop sharing click the Disconnect button in the Desktop Sharing VNC area in the browser Copy files You can copy files from the local PC to the Tablet PC and vice versa 1 Click on the Transfer files symbol in the menu bar Note The menu bar is not visible in fullscreen mode ...

Page 21: ...les from local PC to the Tablet 4 copy files from the Tablet PC to the local PC 5 rename file on local PC Tablet PC 6 Create folder on local PC Tablet PC 7 Delete folder on local PC Tablet PC 8 Select folder on local PC Tablet PC 2 Select the files that want to copy for example from the Tablet PC to the local PC 3 Select the files 4 Click on the button copy files from the Tablet PC to the local PC...

Page 22: ...t To achieve a high level of protection of the communication line the common Remote Service Platform cRSP is used Requirements Log in through the Common Remote Service Platform Tablet PC is connected to the Internet Audio Video Collaboration Software SIPIX RC is opened on the Tablet The common Remote Service Platform is run via the Google chrome browser Note Enable the setting allow pop ups in you...

Page 23: ...ant to run this application by clicking the Accept button The browser opens a new tab with the connections If the on site technician is not yet connected to the Internet a dialog box appears Connection failure with the note Invalid Authorization Click on the OK button to acknowledge the message and then click on the Disconnect button Wait until the Tablet PC is connected to the Internet and then p...

Page 24: ...e audio video collaboration software SIPIX RC is already open on the Tablet PC The red dot in the tab signals the constitution of a link for the audio video session If the red dot is illuminated continuously the remote session can begin If the red dot does not appear no audio video source is available in the Google Chrome browser Check Google Chrome content settings The on site technician can run ...

Page 25: ... session the video image of the Tablet PC is displayed via Livestream Tablet view RemoteExpert view Note For more information about the features in expert mode such as Freehand drawing or Creation of text labels see Chapter 7 2 6 If you want to end the Collaboration Session click the Disconnect button in the Collaboration Session area in the browser ...

Page 26: ... please refer to the Siemens Industry Mall https mall industry siemens com Note For more information about establishing a secure remote connection with cRSP see the FAQ How do you connect a PC station and the Siemens Remote Service Platform securely with a SSL VPN client https support industry siemens com cs ww en view 55394146 6 2 1 Confirm Desktop Sharing VNC of remote expert Requirements Tablet...

Page 27: ... icon on the home screen to start the Collaboration Session The SIEMENS Remote Collaboration Field Engineer website pops up automatically in the Google Chrome browser Because the application starts in the background it may take several minutes until the browser displays the home page Do not close the browser 3 Wait for the return information from the remote expert waiting for expert Note Start the...

Page 28: ...freely move the red pointer The remote expert is shown the red pointer simultaneously in the video session and it can also be moved by him as desired Tablet view RemoteExpert view Note If the Tablet PC is not used for a certain time the browser with the remote collaboration closes automatically on the Tablet PC due to data security and data protection requirements In this case rerun steps 1 and 2 ...

Page 29: ...ng blocked Double click on the Hottab icon on the home screen of the Tablet PC to open the HotTab software The main user interface includes the following menu items 1 2 3 4 1 Shortcuts 2 Camera 3 Device ON OFF 4 Setting Shortcuts In the Shortcuts menu any programs for quick access can be configured by the user You can link up to eight programs 1 Click on the Shortcuts symbol 1 to open the function...

Page 30: ...era function is disabled white first enable the feature in the menu Device ON OFF under camera enable disable Then open the Camera menu in the main interface menu again 1 2 3 4 5 6 7 8 9 1 Change front back camera 2 Settings for save destination for images videos and image quality 3 Flash 4 Image resolution of the stored images 5 End camera mode 6 Capture photos video 7 Shutter button 8 Camera ima...

Page 31: ...them 1 2 3 4 5 6 7 8 9 10 11 12 1 Expansion port enabled disabled 2 External GPS antenna On Off 3 VGA connection docking station 4 Light sensor on off 5 Touch Settings 6 Stop Device ON OFF 7 Enable Disable WLAN 8 Enable Disable WWAN 9 Enable Disable GPS 10 Enable Disable Bluetooth 11 Enable Disable Camera 12 Enable Disable Indicators Note White icon off disabled Orange icon on enabled ...

Page 32: ...on keys for Tablet PC Fn1 and Fn2 5 Brightness settings display 6 Alignment display Assignment of function keys for Tablet PC Fn1 and Fn2 There are two variants regarding the use of the two function keys Fn1 and Fn2 Short Press Long Press Both settings can be simultaneously active 1 Click on the Function 1 4 icon to assign the Fn1 function key 2 Click on the Short Press icon 3 Click the icon of th...

Page 33: ...emens AG 2017 All rights reserved 6 Press the FN1 function key Opens the previously selected application for Short Press 7 Hold the Fn1 button for approx 3 secs Opens the previously selected application for Long Press The assignment of function key Fn2 is identical ...

Page 34: ...d drawing Share images Shared Mouse Cursor The remote expert can point to objects in the livestream with the help of the mouse pointer red pointer The on site technician is shown the red pointer simultaneously on the video image and it can also be moved by him as desired Click on the Cursor icon to display the red pointer Remote Expert view Tablet view Create still image remote expert To use the C...

Page 35: ...n to freeze the current video image of the Tablet PC still image The still image is saved in the video area The live stream will continue to be displayed at the top right of the video area 1 Still image 2 Live stream 1 2 2 Click on the Live button to remove the still image from the video area and to return to the live stream ...

Page 36: ...xt label icon 2 Click on the position in the still image where you want to put the text label and label the text label in the input field CPU ET 200M SITRANS TH300 Tablet view RemoteExpert view CPU ET 200M SITRANS TH300 Note It is not possible to change the text box and the position of the text label at a later time Text labels cannot be deleted individually 3 Click on the Delete icon to return to...

Page 37: ... expert To use the function Freehand drawing you must first create a still image 1 Then click on the Brush icon 2 Press and hold down the left mouse button to draw on the still image CPU ET 200M SITRANS TH300 Tablet view CPU ET 200M SITRANS TH300 RemoteExpert view 3 Click on the Delete icon to return to the original image ...

Page 38: ...remote expert can show image files to an on site technician 1 Click on the Upload icon 2 Select the image that you want to share with the on site engineer and click on the Open button 3 The image appears in the video area The live stream will continue to be displayed at the top right of the video area Tablet view RemoteExpert view ...

Page 39: ...d Mouse Cursor Create text labels and use Freehand drawing functions on the resulting image Tablet view RemoteExpert view Messumformer Messumformer 4 Click on the Delete button to return to the original image 5 Click on the Live button to remove the image from the video area and to return to the live stream Messumformer ...

Page 40: ...terminals of the field device The polarity of the HART connections of the HART modem plays no role in both cases VIATOR HART MODEM 8 1 Setting up a link to the VIATOR Bluetooth HART Modem The VIATOR Bluetooth HART modem BT HART modem is a point to point HART PC modem for temporary connections to HART field devices The host PC uses an internal Bluetooth interface to communicate with the BT HART mod...

Page 41: ... following link https www mactekcorp com download php Note The Tablet PC has an integrated Bluetooth Class 1 adapter The maximum range of the BT HART modem of 100 m can thereby be reached 1 Click on the home screen of the Tablet PC on the HotTab icon 2 Click on Device ON OFF 3 Enable Bluetooth BT 4 Click the Bluetooth icon in the menu bar of the Tablet PC 5 Click on Add a Device 6 Turn the BT HART...

Page 42: ...tions between Tablet PCs and field devices Operating Manual SIPIX SD100 12 2017 42 Siemens AG 2017 All rights reserved 7 Select the BT HART modem Click on the Next button 8 Click on Enter the device s pairing code ...

Page 43: ... to the Tablet PC 10 Click on the home screen of the Tablet PC on the ViatorCheckBT icon to check the Bluetooth connection 11 Confirm the message Do you want to allow with the Yes button 12 Select the option Show BT and Disable Port Mapping Then click the Update Port List button The BT HART modem is displayed in the Active Com Ports field In this example the BT HART modem is assigned to port COM10...

Page 44: ... reserved 13 Click in the Active Com Ports field on MACTekViator6532 In the field HART modem information the version and the battery level of the BT HART modems and the date is displayed if successfully connected 14 Click on the Advanced tab for settings such as the automatic switch off time for the Bluetooth connection ...

Page 45: ...rights reserved 15 Click the Check HART Device 0 button to check the connection to the field device In the field HART devices the field device connected to the BT HART modem appears 16 Click on the Read Primary Variable button to check the transmission of values 17 Close the ViatorCheckBT software on the Tablet PC ...

Page 46: ... modem is Hart compliant for communication with all HART field devices Power supply to the USB HART modem is via the USB port No external power supply is needed Note You will find more information on the VIATOR USB HART Modem on the following link https www mactekcorp com download php 1 Connect the USB HART modem physically to the USB port of the Tablet PC 2 Click on the home screen of the Tablet ...

Page 47: ...l rights reserved 5 Click the Check HART Device 0 button to check the connection to the field device In the field HART devices the field device connected to the BT HART modem appears 6 Click on the Read Primary Variable button to check the transmission of values 7 Close the ViatorCheckBT software on the Tablet PC ...

Page 48: ... 48 Siemens AG 2017 All rights reserved 8 3 Connection set up to a HART field device over SIMATIC PDM 1 Click on the home screen of the Tablet PC on the SIMATIC PDM stand alone icon 2 Choose the menu option File New 3 In the Name text box type a project name In this example it is LR250_HART ...

Page 49: ... rights reserved 4 Mark networks in the Process Device Network View window and then select the menu command Insert SIMATIC PDM 5 communication network 5 Click on the Assign Device Type button in the Insert Object networks dialog box 6 In the list select Networks HART HART modem networks HART modem network Click OK ...

Page 50: ...Insert Object networks dialog box on the OK button 8 In the list select LR250_HART networks SIEMENS PC COM Port Interface 9 Right click COM Port Interface and select the menu command Object Properties 10 Go to the Communication tab and in the COM Port text box enter the assigned port for HART modems in this example it is port 10 11 Select LR250_HART networks HART modem network ...

Page 51: ... PDM 1 Object 13 Click on the Assign Device Type button in the Insert Object networks dialog box Note If the field device cannot be assigned automatically the appropriate device file must first be downloaded and installed in the Device Integration Manager Electronic Device Description abb EDD Siemens Industry Online Support https support industry siemens com cs ww en ps ...

Page 52: ...perating Manual SIPIX SD100 12 2017 52 Siemens AG 2017 All rights reserved 14 Click the Device Identification button The field device will be automatically assigned 15 Click on the OK button 16 Click on the OK button in the Insert Object networks dialog box ...

Page 53: ...you fast and competent support regarding all technical queries with numerous tailor made offers ranging from basic support to individual support contracts Send queries to Technical Support using the web form https support industry siemens com My ww en requests Service offer Our range of services includes inter alia the following Product trainings Plant data services Spare parts services Repair ser...

Page 54: ...7 Compendium Part F Industrial Security https support industry siemens com cs ww en view 109742220 3 SIPIX SD100 http automation bartec de tabletpcE htm 4 Siemens Remote Service https www siemens com global en home products services industry html 5 Siemens Industry Mall https mall industry siemens com 6 VIATOR HART Modem https www mactekcorp com download php 9 3 History Version Date Modifications ...

Reviews: