20
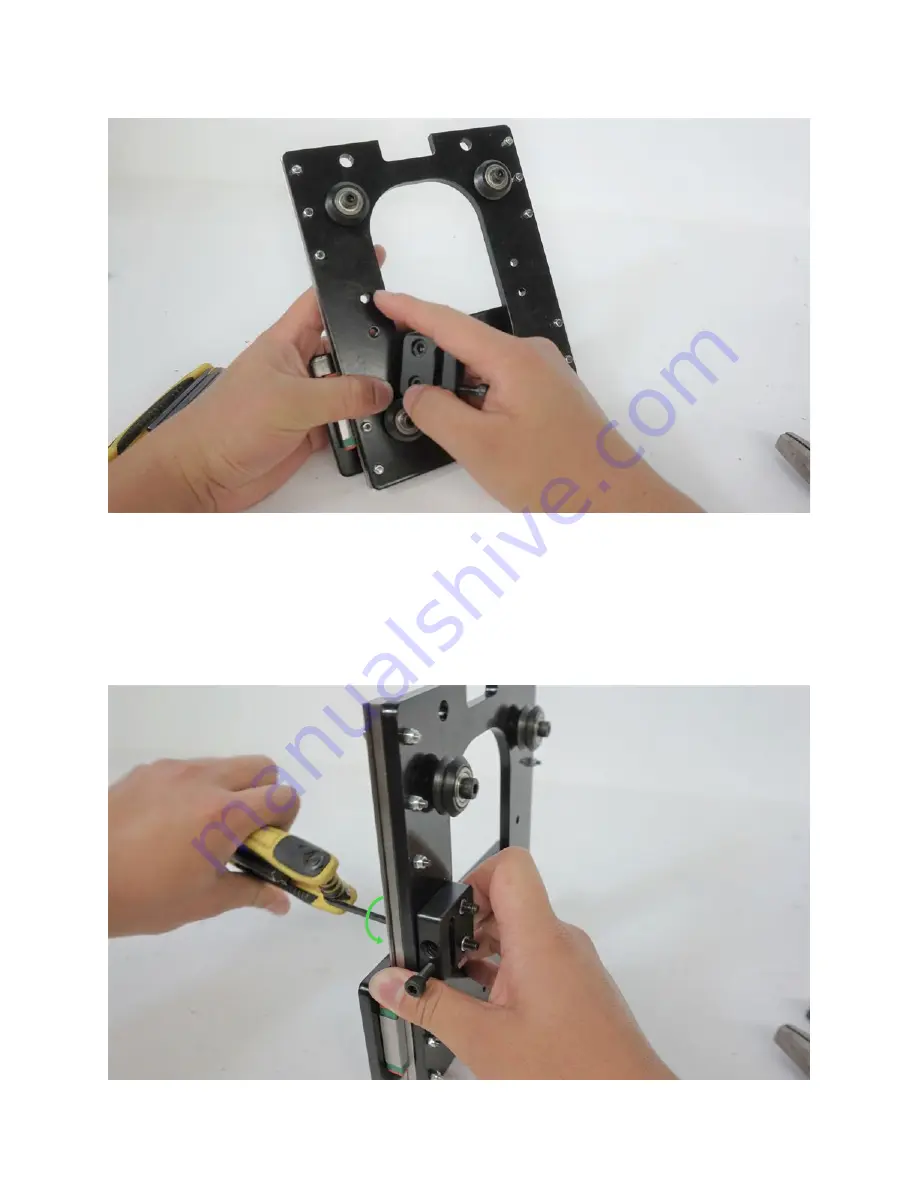
Two holes for mounting the anti-backlash nut block.
Tighten until snug, but do not overtighten.
There are two anti-backlash assemblies that attach to the XZ-gantry assembly.
The first one we will assemble goes on the X-gantry.
Use two M5-25mm bolts (the same ones used to make the v-wheel sets) to mount the nut block.
Make sure that the M5 nuts are facing outwards (pictured) so that you can see them. The block
shouldn’t
be tightened down really hard, just fasten it until it’s snug.
Summary of Contents for LongMill V2
Page 1: ...1 LongMill V2 Assembly Manual V2 ...
Page 4: ...4 Part 1 XZ Axis Gantry ...
Page 22: ...22 The completed assembly should look like this ...
Page 29: ...29 Part 2 Y Axis Gantries ...
Page 34: ...34 Tighten until snug Don t overtighten Both sides should be mirrored ...
Page 40: ...40 Part 3 X Axis Rail ...
Page 43: ...43 Your completed rail should now look something like this ...
Page 57: ...57 Part 4 Y Axis Rails ...
Page 68: ...68 Part 5 Drag Chains and Wiring ...
Page 81: ...81 Now plug in the cables for the motors on the two Y axis NEMA 23 stepper motors ...
Page 83: ...83 Part 6 Electronics ...
Page 93: ...93 Part 7 Table Mounting ...
Page 97: ...97 ...
Page 110: ...110 Bottom Carton 3 In our final carton you will find all of your 3D printed parts ...


