AirLink RV50 Series Hardware User Guide
24
4117313
5.
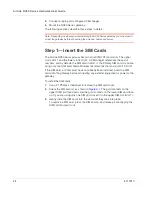
Connect a laptop and configure ACEmanager.
6.
Mount the RV50 Series gateway.
The following sections describe these steps in detail.
Note: Depending on where you are installing the RV50 Series gateway, you may want to
mount the gateway before connecting the antenna, cables and power.
Step 1 — Insert the SIM Cards
The AirLink RV50
Series gateway
has two mini-SIM (2FF) card slots. The upper
slot is Slot 1 and the lower slot is Slot 2. ACEmanager references these slot
numbers, and by default, the SIM card in Slot 1 is the Primary SIM card. If you are
using only one SIM card, Sierra Wireless recommends that you install it in Slot 1.
If the SIM card (or SIM cards) have not already been installed, insert the SIM
cards into the gateway before connecting any external equipment or power to the
gateway.
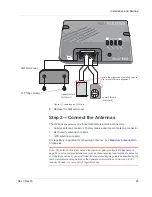
To install the SIM cards:
1.
Use a #1 Phillips screwdriver to remove the SIM card cover.
2.
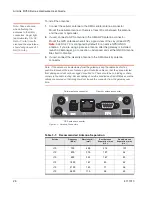
Orient the SIM card(s), as shown in
. The gold contacts on the
upper SIM card face down, and the gold contacts on the lower SIM card face
up. If you are using only one SIM card, insert it in the upper SIM slot (Slot 1).
3.
Gently slide the SIM cards into the slots until they click into place.
To remove a SIM card, press the SIM card in, and release it. Gently grip the
SIM card and pull it out.
Summary of Contents for AirLink RV50 Series
Page 1: ...AirLink RV50 Series Hardware User Guide 4117313 Rev 3 ...
Page 2: ......
Page 6: ...AirLink RV50 Series Hardware User Guide 6 4117313 ...
Page 10: ...AirLink RV50 Series Hardware User Guide 10 4117313 ...
Page 18: ...AirLink RV50 Series Hardware User Guide 18 4117313 ...
Page 50: ...AirLink RV50 Series Hardware User Guide 50 4117313 ...
Page 62: ...AirLink RV50 Series Hardware User Guide 62 4112895 ...
Page 66: ...AirLink RV50 Series Hardware User Guide 66 4117313 ...
Page 77: ......
Page 78: ......


