background image

Settings        109

Setti

ngs

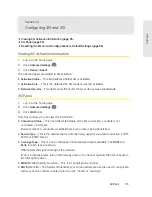
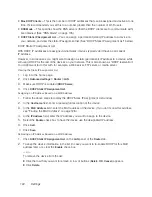
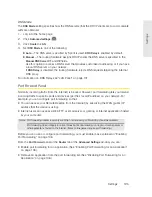
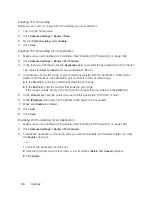
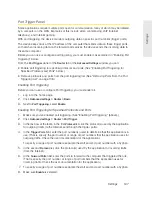
Configuring DMZ

1.

Make sure you’ve enabled DMZ. (See “Enabling DMZ” on page 108.)

2.

Click 

Advanced settings > Router > DMZ

.

3.

Specify the computer that you want exposed to the Internet: in the 

Destination IP Address


field, enter the IP address of the computer. (If you don’t know how to find the IP address, see 
“Finding the IP Address” on page 129.)

4.

In the 

Source IP Address

 section, specify what incoming traffic (not handled by port 

forwarding, port triggering, or NAT) to forward to this computer.

To forward all incoming traffic, click 

Any

.

— or —

To forward incoming traffic from certain IP addresses:

Click 

Restriction

.

In the two additional fields that are displayed, enter the start and end IP addresses of a 
range.

5.

Using the DHCP Static IP Assignment List, assign an IP address based on the MAC address 
of the computer that is in the DMZ. (See “Assigning an IP Address Based on a MAC Address” 
on page 104.)

— or —

On the computer that is in the DMZ, disable DHCP, and manually assign the IP address, 
gateway, and DNS server.

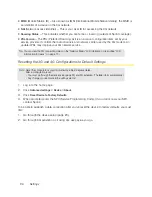
Resetting the Software to Default Settings

WARNING:

If you reset the software to default settings:

•  You must go through the device setup (page 20), as if you've just purchased the device.

•  Any changes you’ve made to the settings are lost.

Your 3G and 4G account information is not affected; after reset, the device remains 
provisioned for service.

You’ll need to reset the software to default settings if:

You’ve forgotten the administrator password.

You’ve changed the DHCP settings such that the device is inoperable (for example, there’s no 
communication with the device).

You have two options to initiate the reset:

Through the software. (See “Resetting the Software to Default Settings (Through the Browser 
Interface)” on page 111.)

Through the reset button on the device. (See the following section.)

Summary of Contents for Overdrive Pro

Page 1: ...www sprint com User Guide 2011 Sprint SPRINT and the logo are trademarks of Sprint Other marks are the property of their respective owners 3 9 11 Overdrive Pro 3G 4G Mobile Hotspot by Sierra Wireless ...

Page 2: ...Document 2131389 Revision 1 ...

Page 3: ... Ready 19 3A Setting Up Your Device 20 Account Setup 20 Device Setup 20 Section 4 Using Your Device 27 4A Connecting Through USB 28 TRU Install 28 Requirements for a USB Tethered Connection 28 Making a Tethered Connection 29 4B Browser Interface Home Page 31 Displaying the Home Page of the Device 33 Logging On as an Administrator 33 Virtual Device 34 Mini Window 34 Turning Your Device Off 35 4C Al...

Page 4: ...microSD Card Slot 55 Inserting a microSD Card 56 Removing a microSD Card 57 Accessing the microSD Card 57 4H Sprint Location Services 59 Requirements for GPS Service 59 Enabling GPS 59 Displaying Your Location Information 59 Viewing Your Current Location in a Web Browser 60 Performing a Location Search 60 4I Updates 61 Automatically Checking for Updates 61 Manually Checking for Updates 62 Upgradin...

Page 5: ...Connected Through USB 94 5H Configuring 3G and 4G 95 Viewing 3G Activation Information 95 3G Panel 95 Resetting the 3G and 4G Configurations to Default Settings 96 5I GPS Settings 97 Setting the GPS Mode 97 Setting the GPS Fix Rate 98 Using Metric Units 98 Changing Your Mapping Service 98 Performance Setting GPS 98 Accuracy 99 5J Configuring the Router Tab 100 Basic Panel 100 LAN Panel 101 Port Fo...

Page 6: ... I Access My Corporate Network Through a VPN 124 Are Terminal Sessions Supported 124 6C Tips 125 Extending Battery Life 125 Device Location 126 Improving Signal Strength 126 Improving 3G Network Service 126 Improving Wi Fi Performance 127 Security Tips 128 Finding the MAC Address 128 Finding the IP Address 129 6D Troubleshooting Tips 130 General Tips 130 LCD Is Dark 131 Insufficient Signal Strengt...

Page 7: ...ectrical Specifications 138 Software Specifications 139 Environmental Specifications 140 Mechanical Specifications 140 7B Safety Information 141 Important Notice 141 Safety and Hazards 141 7C Regulatory Notices 143 7D Legal 145 Patents 145 Licenses 145 Trademarks 157 Copyright 158 Limitation of Liability 158 Additional Information and Updates 158 Index 159 ...

Page 8: ......

Page 9: ...Section 1 Getting Started ...

Page 10: ...f the device See Your Device on page 5 Section 3 provides step by step instructions for setting up the device See Getting Your Device Ready on page 19 Section 4 describes common tasks for your device See Using Your Device on page 27 Section 5 describes advanced configuration of the device and the browser interface See Settings on page 69 Section 6 contains frequently asked questions troubleshootin...

Page 11: ...g the browser interface to view status and to configure settings The following browsers are supported 䡲 Internet Explorer version 6 0 or higher 䡲 Mozilla Firefox version 2 0 or higher 䡲 Google Chrome version 2 0 172 28 or higher 䡲 Apple Safari version 2 0 or higher 䡲 Opera version 9 64 If you ll be connecting the device through USB 䡲 Computer running Windows 7 Windows Vista Windows XP or Mac OS X ...

Page 12: ......

Page 13: ...Section 2 Your Device ...

Page 14: ...age 8 3G and 4G Networks page 8 Package Contents page 9 Care and Maintenance page 9 Connectors and Buttons page 9 Battery page 10 Connecting Through USB page 11 Charging the Device page 12 Power Button page 13 LCD page 16 Mute Switch page 17 microSD Card Slot page 17 ...

Page 15: ...Your device provides a simple way to use your 3G or 4G Internet connection with any Wi Fi enabled device and to share your Internet connection with friends and family OMPUTER IGITAL AMERA AMING ONSOLE 0RINTER IGITAL 0ICTURE RAME ...

Page 16: ... Fi access point and the Wi Fi network 3G and 4G Networks These wireless networks connect you to the Internet Depending on your coverage area you may have Both 3G and 4G coverage Only 3G coverage Only 4G coverage Your device automatically connects to the fastest network that is available to you If you have both 3G and 4G coverage and your connection happens to get disrupted your device can automat...

Page 17: ...ollow these guidelines in using and storing the device Protect the device from liquids dust and excessive heat Do not handle or operate the device while driving or operating a vehicle Doing so may distract you from properly operating the vehicle In some jurisdictions operating communication devices while in control of a vehicle is a criminal offense Do not apply adhesive labels to the device They ...

Page 18: ...fe visit the Sierra Wireless online store at https www sierrawireless com eStore Chargers and other accessories are also available from the Sprint Store at www sprint com Installing the Battery 1 Using slight thumb pressure slide the battery compartment cover upward to remove it 2 Insert the battery into the device contacts end first Make sure the battery contact points are aligned with those insi...

Page 19: ...all the device driver See Making a Tethered Connection on page 29 Use the micro USB cable included to connect the device to your computer when You want to charge the device but you don t want to use the AC charger or the AC charger is not available Your computer does not have Wi Fi You want to block others from using the device See Disabling Wi Fi When Connected Through USB on page 94 ...

Page 20: ... the AC Charger with Your Device s micro USB Port below Alternatively you can connect the device to your computer although this charges more slowly See Charging Through Your Computer on page 13 Using the AC Charger with Your Device s micro USB Port 1 Insert the larger end of the micro USB cable into the AC charger 2 Insert the other end of the cable into the micro USB port on the side of your devi...

Page 21: ...ed battery inserted or 䡲 The device is connected to the AC charger or a computer through the micro USB cable as explained above Notes If you ll be using USB for data transfer and not just for charging the device you must install the device driver See Making a Tethered Connection on page 29 If you re using Mac OS X 10 4 x after you connect the device you may see a warning message that your computer...

Page 22: ... and hold the power button for two seconds The device is turned on but the LED is turned off Optionally turn on the LED See Enabling and Disabling the Power Button LED on page 72 Lit flashing approximately every 4 seconds The device is turned on and the LED is turned on No action required Lit flashing approximately every 8 seconds The device is in standby low power mode The following are off LCD W...

Page 23: ...acknowledges a displayed message Turns off display of the Wi Fi network name and password Quick double press Wakes up turns on the LCD if the LCD was enabled but dormant The LCD turns dark after a configurable time of inactivity Briefly displays the Wi Fi network name and password See Wi Fi Password Reminder on page 90 Displays the next LCD information screen if available See LCD Information Scree...

Page 24: ...er of Wi Fi users G Battery status H Device name Message area I Amount of data transferred connection duration Message area Tip Most of the LCD icons and messages are also shown on the Virtual Device and Mini Window See Virtual Device on page 34 and Mini Window on page 34 and Messages Displayed on the Device LCD on page 131 The LCD can also display various information screens and messages as descr...

Page 25: ...he first of five LCD information screens is shown To view the first LCD information screen or to go to the next screen press the power button on the device two times quickly within a half second interval Mute Switch The mute switch is used to turn device sounds on or off The mute switch is located on the side of your device to the right of the microSD slot as shown in the following drawing Tip You...

Page 26: ......

Page 27: ...Section 3 Getting Your Device Ready ...

Page 28: ...ete setting up the device on your account See Contacting Customer Service on page 118 Have the following available before calling Your Sprint account information The ESN number of your device displayed on the packaging and inside the battery compartment Device Setup 1 Install the battery as described in Installing the Battery on page 10 2 Connect the device to the AC charger as described in Using ...

Page 29: ...on or write it down in a safe place This window provides several options To keep the default settings of the device click one of the following 䡲 The Internet to connect immediately to the Internet 䡲 My Overdrive Pro s home page to view the device status customize settings Proceed to Activating and Using Your Network Service on page 24 To change security settings click Set up my Overdrive Pro Chang...

Page 30: ...his window any time by clicking Admin Setup in the home page See Displaying the Home Page of the Device on page 33 After you change the settings and click Submit the device restarts and displays updated information on its LCD Follow the instructions on the LCD and proceed to Your Device is Now Restarting on page 24 Wi Fi Security Options If you click More options after having clicked Set up my Ove...

Page 31: ...curity Panel on page 85 None No security is used no password is required to access the Wi Fi network this setting is not recommended Anyone may access your device and use your Internet connection You are responsible for payment for data usage fees WEP 64 Bit Shared This option provides security but it s relatively weak This option works with older and newer Wi Fi devices and is recommended only if...

Page 32: ...mit The changes take effect after the device restarts automatically You should write down the following information that s displayed in the window Wi Fi network name Wi Fi password To complete the process 1 Wait until the device LCD displays Connect your computer to Wi Fi Network 2 Connect your computer to the Wi Fi network using the information you ve written down If you don t know how to do this...

Page 33: ...ur device for 3G 1 In the address bar of your Web browser type http 192 168 0 1 to display the home page 2 In the Admin Login section in the upper left area of the home page enter the administrator password 1 20 characters numbers The default password is password 3 Click OK 4 Click the alerts icon to display the alert window 5 If more than one alert is available use the and buttons at the top of t...

Page 34: ......

Page 35: ...Section 4 Using Your Device ...

Page 36: ... the setting 1 In the address bar of your Web browser type http 192 168 0 1 to display the home page 2 Make sure you re logged in to the home page the text Admin Logged in is displayed near the upper left corner of the home page If you re not logged in in the Admin Login section in the upper left area of the home page enter the administrator password 1 20 characters or numbers The default password...

Page 37: ...ta and the AutoPlay window opens click Run setup exe 4 In the TRU Install window click OK 5 Install the Sierra Wireless USB driver Follow the onscreen instructions Mac To install the device driver on Mac 1 Make sure the device is turned on 2 Connect the device to your computer through the micro USB cable 3 In the window that appears double click the pkg file 4 Install the Sierra Wireless USB drive...

Page 38: ...ing Your Device Connecting the Device to Your Computer 1 Insert the larger end of the micro USB cable into your computer 2 Insert the other end of the cable into the micro USB port on the side of your device ...

Page 39: ...ini Window page 34 Turning Your Device Off page 35 The home page is the entry page of the browser interface that lets you Display status information for your device and your data connection Launch and end a network connection Change the settings for your device and your data connections if you re logged in Access additional resources the user guide and the Important Information document ...

Page 40: ...e 33 C Clicking one of these buttons displays a window or a menu See Home Page Buttons on page 52 D This is the Virtual Device it reflects the status of your device If you click the image a movable Mini Window is opened See Virtual Device on page 34 and Mini Window on page 34 E A handy way to turn the device off especially if for example you re in an airplane before takeoff and the device is in yo...

Page 41: ... Administrator You don t need to log in to access and use the home page When you log in Additional information appears in the window that opens when you click an item on the left side of the home page See Icons and Text on page 42 You can access the Advanced Settings window where you can modify additional settings You can rerun the device setup if required Admin Setup You can install updates To lo...

Page 42: ...vice it reflects most of the icons and text displayed on the real device Mini Window If you click the virtual device in the home page the Mini Window opens an image of the device in a separate Web browser window Similar to the virtual device the Mini Window reflects most of the icons and text displayed on the real device ...

Page 43: ...o reopen the home page click the Home link If you re logged in the window has a Connect or Disconnect button and a Power Off button Turning Your Device Off From the home page 1 Make sure you re logged in to the home page 2 Click Power Off below the Virtual Device From the Mini Window 1 Make sure you re logged in to the home page 2 Click Power Off Tip You can also turn the device off by pressing an...

Page 44: ...ave to reconnect to Wi Fi after an update is installed Tip You can view a list of available alerts on the Alerts LCD information screen See LCD Information Screens on page 17 3G Activation Required If only 3G coverage is available you won t be able to connect to the Internet until 3G activation has been completed To activate 3G on your device 1 Make sure you have 3G coverage 2 Make sure you re log...

Page 45: ...the update 1 Make sure you have 3G coverage 2 Make sure you re logged in to the home page 3 Click the alerts icon to display the alert window 4 If more than one alert is available use the and buttons at the top of the alert window to browse to the alert 5 In the 3G Network Update Available alert window click Update now GPS Privacy Agreement The GPS Privacy Agreement alert appears if you haven t ac...

Page 46: ... you format the microSD card Software Update Available The update may improve performance and add or modify features Note During installation of the update your Internet and Wi Fi connections won t be available When the installation is complete you will need to reconnect to Wi Fi To install the update 1 Make sure your device is connected to the AC charger or computer through the micro USB cable No...

Page 47: ...nal area make a note of the URL displayed in the window and click I ll get the update later At a later time access the URL to download the update to your computer and then follow the steps in Upgrading Firmware From a File on page 63 When the installation is complete reconnect to Wi Fi See How Do I Connect to Wi Fi on page 120 ...

Page 48: ...overage You ve manually ended a connection by clicking Disconnect To launch a connection 䊳 Click Connect on the Virtual Device on the home page You must be logged in or Click Connect in the Mini Window You must be logged in or If the device LCD displays Disconnected from 3G 4G network Connect now press the power button on the device See also Internet Connection Information on page 49 Mobile Broadb...

Page 49: ...1 Make sure you re logged in to the home page 2 Click Disconnect on the Virtual Device or in the Mini Window See Virtual Device on page 34 and Mini Window on page 34 Note The Wi Fi connection is still available so users can for example share files by using a microSD card ...

Page 50: ... page 47 Battery Information and Settings page 48 Internet Connection Information page 49 microSD Card Information and Settings page 50 Sounds Information and Settings page 51 The left part of the home page has a vertical row of icons and text starting with the signal strength indicator Most of these icons are also shown on the physical device and Virtual Device page 34 When you hold the mouse ove...

Page 51: ...anced Settings window See Advanced Settings on page 53 Signal Information No signal Very weak signal Excellent signal Click the signal strength icon to display the Signal Quality window The window displays The active network the network that is currently being used for your data connection For example 3G EVDO Rev A 3G or 4G status 䡲 Connection status For example Connected 䡲 Tables that show the co...

Page 52: ... setting see Setup Panel on page 80 Tip If 4G is in power save mode you can also scan for 4G from the Network Status LCD information screen See LCD Information Screens on page 17 See also Improving Signal Strength on page 126 Mobile Broadband Information and Settings The 3G or 4G icon indicates the service and connection state Note that only one icon is shown the active network or You have no serv...

Page 53: ...from happening when you re roaming on 3G also select Disable when roaming Note Disable when roaming does not prevent you from roaming it only prevents a connection that was lost while roaming from automatically being reestablished 3G Roaming Information and Settings The roaming indicator shows whether you are roaming The text near the icon may indicate additional details Not roaming Roaming flashi...

Page 54: ... information see Alerts on page 36 GPS Information and Settings GPS is off not enabled Before you can use GPS you must accept the GPS privacy agreement and enable GPS See GPS Privacy Agreement on page 37 and Enabling GPS on page 59 GPS is on and available The GPS privacy agreement has been accepted and GPS is enabled flashing GPS is active acquiring a location fix The text next to the icon display...

Page 55: ...omes possible Mapping service This determines the mapping service for example Google Maps or MapQuest that displays the GPS results in a separate browser window Metric units This setting specifies whether to use metric when displaying the GPS results for example the altitude speed HEPE Note Additional settings are available at Advanced settings WAN GPS See GPS Settings on page 97 Wi Fi Users Infor...

Page 56: ...ditional information for example the charging status remaining or complete If Charging paused is displayed see What Do I Do if the Home Page Displays Charging paused on page 122 Tip You can also check the battery icon from the Home page Mini Window and device LCD Battery level is critical Charge the device immediately See Charging the Device on page 12 No battery connected to an electrical outlet ...

Page 57: ...power and AC power See Basic Panel on page 76 Note This setting has no effect when the device is connected to a computer through the micro USB cable To exit standby mode 䊳 Connect the device to the AC charger or computer through the micro USB cable or Press the power button Internet Connection Information Note Data usage amounts are approximate and should not be used for billing purposes For accur...

Page 58: ...et automatically reset to 0 on the day selected in the Starts on day list Over the lifetime of the device By network 3G and 4G and by sent received and total From this window you can Reset the data usage figures for the current billing cycle Click Reset Change the start day of the billing cycle in the Starts on day list See the number of days left in the cycle microSD Card Information and Settings...

Page 59: ...everal types of events for example Critical battery Critical temperature Software update available Network update available Routing hardware settings reset Device startup failure 䡲 Wi Fi user has joined A sound is played when a Wi Fi user connects to your network This is useful for example to detect an unwelcome Wi Fi user if you re the only one using the device 䡲 Enter standby mode A sound is pla...

Page 60: ... on page 53 Map me Use this button to do one of the following 䡲 Open a Web browser window that shows your current location See Viewing Your Current Location in a Web Browser on page 60 䡲 Search for the closest gas station restaurant other points of interest or do a custom search See Performing a Location Search on page 60 Support This button opens the online support site in a new Web browser windo...

Page 61: ... 1 Make sure you re logged in to the home page 2 Click Advanced settings Map me Button The Map me button is used for GPS Location Based Services you can for example search for the closest gas station restaurant other points of interest or do a custom search See Sprint Location Services on page 59 Support Button The Support button opens the online support site in a new Web browser window or tab Not...

Page 62: ... appear only when you re logged in Connect Disconnect Button This button connects or disconnects your device from the 3G or 4G network Power Off Button This button turns the device off Note You can turn the device on only by using the physical power button on the device or by disconnecting and reconnecting the micro USB cable ...

Page 63: ... 2 In the SD Card Information and Settings window select Enable SD Card See microSD Card Information and Settings on page 50 or Click Advanced settings Device microSD Card and set the SD Card Slot field to Enable Setting Up Access to the microSD Card If you ve enabled access to the microSD card you must also specify whether a username and password are required to access the card 1 Make sure you re...

Page 64: ... 32 letters numbers and spaces in any combination For information on how this folder name is used see Accessing the microSD Card on page 57 Inserting a microSD Card 1 Gently open the tab labeled microSD on the side of your device 2 Carefully insert the microSD card label facing up into the slot on the side of your device until the microSD card clicks into place Note If your microSD card has not be...

Page 65: ...own in the drawing above 5 Remove the microSD card and store it in a safe place 6 Close the tab over the microSD slot of the device Accessing the microSD Card If the microSD slot is enabled an inserted card appears in your file browser as a shared network drive The way to access the card varies depending on your operating system Note In the information that follows Hostname is the value of the Hos...

Page 66: ...ed select the shared drive as the folder to mount Linux 1 Open the run menu Alt F2 or a file browser and type one of the following 䡲 smb OverdrivePro 䡲 smb Router IP Address For example smb 192 168 0 1 䡲 smb Hostname For example smb MyDeviceName 2 Double click the shared folder Other operating systems Please see the user documentation for your operating system or computer If security has been enab...

Page 67: ...satellites to accurately determine position The number of obstructions present indoors often makes accurate position determination impossible Enabling GPS 1 Make sure you re logged in to the home page 2 Click the GPS icon on the left side of the home page and select Enable GPS or Click Advanced settings WAN GPS and select Enable GPS Note If Enable GPS is not available you must accept the GPS priva...

Page 68: ...tes 3 In the horizontal row of buttons across the top of the home page click Map me Performing a Location Search To perform a search for establishments near your current location 1 Make sure GPS is enabled and you re connected to the 3G or 4G network 2 In the horizontal row of buttons across the top of the home page move the mouse over Map me to display a row of icons 3 Click one of these icons to...

Page 69: ...Set the browser interface to automatically check for updates see below Manually check for updates See Manually Checking for Updates on page 62 Tip You can view the update availability and status on the Software Updates LCD information screen See LCD Information Screens on page 17 Automatically Checking for Updates To specify how often the browser interface checks for updates 1 Log in to the home p...

Page 70: ...checked for updates 1 Make sure your device is connected to the AC charger or computer through the micro USB cable Note If you ll be using USB for data transfer and not just for charging the device you must install the device driver See Making a Tethered Connection on page 29 2 Click Update options 3 Read the information in the Software Installation Options window 4 To install the update click Dow...

Page 71: ...information shown in Device About 䡲 Software version 䡲 Firmware version in the 3G Information section 䡲 Firmware version in the 4G Information section 6 Click Device Basic 7 Optionally save the current configuration recommended 䡲 Click Export 䡲 Save the file Note the filename and path 8 Click the Browse button next to the Update Firmware From File field and click the firmware file to upload to the...

Page 72: ...ersion This is the firmware version for the Wi Fi access point of the device Reconditioned Date This field indicates the date that your device has been reconditioned if applicable Router PRI Version This is the PRI version for the routing hardware of the device The PRI Product Release Instructions is a file that contains the settings used to configure wireless products for a particular service pro...

Page 73: ... of the 4G component of the device MAC Address This is the MAC address of the 4G module Each wireless device has a unique MAC address assigned by its manufacturer Plan Version This is the version information of your 4G channel plan which determines the frequencies to scan and 4G networks to detect The window also has buttons to Save the information to a text file Reset the 3G and 4G configuration ...

Page 74: ...ice page 67 The reset button is inside the hole located near the battery compartment as shown below 2ESET BUTTON For information on using this button see Restarting the Device page 67 and Resetting the Software to Default Settings Through the Reset Button page 110 ...

Page 75: ...the device or the home page seems to stop responding you can reset restart the device To restart the device 1 Using slight thumb pressure slide the battery compartment cover upward to remove it 2 Locate the small hole near the battery compartment The reset button is inside this hole 2ESET BUTTON 3 Insert a thin object for example the end of a paper clip into the hole and press down for about a sec...

Page 76: ...68 Using Your Device 4 Replace the battery compartment cover ...

Page 77: ...Section 5 Settings ...

Page 78: ...y icon The Battery Information and Settings window opens or Click Advanced settings Wi Fi Network 3 Select an option in the Battery or USB Powered section AC Power Settings You can specify the settings for AC power Short Range Choose this setting if you have a designated wireless area and you need to minimize the effect of your network on other networks in the vicinity Long Range This setting allo...

Page 79: ...will not display text and icons See Turning the LCD On or Off on page 71 To set the amount of time after which the LCD of the device temporarily turns off 1 Make sure you re logged in to the home page 2 Click Advanced settings Device Display 3 Make sure LCD Backlight is set to On 4 In the Turn Off Backlight list click a value A smaller value helps prolong the battery life Note The LCD turns on if ...

Page 80: ...ED on the device acts as a status indicator For more information see Using the Power Button to Determine the Device State on page 14 To enable or disable the power button LED 1 Log in to the home page 2 Click Advanced settings Device Display 3 Set the Power Button LED field to On or Off ...

Page 81: ...lerts A sound is played when a system alert occurs When you hear the device beep use the device LCD or the Alerts window to get information about the alert See Alert Information on page 46 Note System alerts include several types of events for example Critical battery Critical temperature Software update available Network update available Routing hardware settings reset Device startup failure Inte...

Page 82: ...the Low Battery field select Enable 4 In the Alert When list select the battery level to trigger the alert Critical Battery Level Alert You can enable an alert to sound when the battery level is critical that is dangerously low To enable this alert 1 Log in to the home page 2 Click Advanced settings Device Sounds 3 For the System Alerts field select Enable Note System alerts include several types ...

Page 83: ...r entering the administrator password is not required The timeout security feature is disabled you will never be automatically logged off To enable automatic login 1 From the computer that you want to enable automatic login log in to the home page 2 In the login area select the Remember me check box You can repeat the above steps on other computers however since only one administrator can be logge...

Page 84: ...r over an item For more information see Contextual Help in the Advanced Settings Window on page 119 Accessing the Advanced Settings Window 1 Make sure you re logged in to the home page 2 Click Advanced settings Device Tab Basic Panel 1 Log in to the home page 2 Click Advanced settings 3 Click Device Basic From this window you can view or adjust these settings or perform the following actions Admin...

Page 85: ...hecking for Updates on page 62 Display Panel From the Display panel of the Device tab you can configure settings for the device LCD To access this panel 1 Log in to the home page 2 Click Advanced settings 3 Click Device Display From this window you can view or adjust these settings Power Button LED You can enable the power button light on the device See Enabling and Disabling the Power Button LED ...

Page 86: ... sound is played when the battery is low This is useful as a reminder to charge the device In the Alert When list you can select a battery level to trigger the alert System Alerts A sound is played when a system alert occurs You can then use the device LCD or the Alerts window to get information about the alert See Alert Information on page 46 Note System alerts include several types of events for...

Page 87: ...ned Date This field indicates the date that your device has been reconditioned if applicable Router PRI Version This is the PRI version for the routing hardware of the device The PRI Product Release Instructions is a file that contains the settings used to configure wireless products for a particular service provider customer or purpose Total Bytes This is the amount of data transferred over the 3...

Page 88: ... to Default Settings on page 96 Tip You can view some of the above information on the About LCD information screen See LCD Information Screens on page 17 Log Panel 1 Log in to the home page 2 Click Advanced settings 3 Click Device Log From this window you can Enable logging of system events See Enabling and Disabling Logging of System Events on page 114 Export logs See Exporting System Events on p...

Page 89: ... The connection can be established only to 4G Connect Automatically You can set your device to connect to the network when the device powers on To prevent this from happening when you re roaming on 3G also select Disable when roaming Failover Wait time This setting specifies how long the device should wait after it loses the connection with the preferred network before it attempts to connect to th...

Page 90: ...ignal effectiveness For the receiver to decode the carrier signal the latter must be in an acceptable CINR range TX Power This number indicates the transmitter power A higher number is better Center Frequency This number indicates the frequency of the 4G channel used for the data connection NSP ID This number is the ID of the 4G Network Service Provider NAP ID This number is the ID of the 4G Netwo...

Page 91: ... Google Maps or MapQuest that displays the GPS results in a separate browser window Performance Value This specifies the amount of time the device should wait for a satellite to be discovered 䡲 Automatic The device automatically determines the most appropriate setting to use 䡲 Manual In the input field enter the number of seconds the device should wait for a satellite to be discovered If this time...

Page 92: ...You can limit the number of Wi Fi users maximum of eight that can connect to the device A smaller number improves performance and security Battery or USB Powered power settings 䡲 Short Wi Fi Range This setting improves battery life at the cost of a shorter Wi Fi range 䡲 Long Wi Fi Range This setting allows you to use your wireless devices farther from your Overdrive Pro 3G 4G Mobile Hotspot at the...

Page 93: ...n display a window that shows connected computers A table row may show one or both of these icons 䡲 The user of this computer is logged in as administrator 䡲 This computer is connected to the device through the micro USB cable Security Panel 1 Log in to the home page 2 Click Advanced settings 3 Click Wi Fi Security From this window you can set the Security This specifies the security used by Wi Fi...

Page 94: ...this panel 1 Log in to the home page 2 Click Advanced settings 3 Click Wi Fi MAC Filter From this window you can Turn off MAC filtering MAC Filter Mode No filtering Display a list of computers that are 䡲 Allowed to access the network MAC Filter Mode Allow all in list 䡲 Not allowed to access the network MAC Filter Mode Block all in list Add or remove a computer from the lists See Specifying Compute...

Page 95: ...indow 1 Log in to the home page 2 Click Advanced settings 3 Click Wi Fi Network For more information see Network Panel on page 84 See also Disabling Wi Fi When Connected Through USB on page 94 Battery and USB Power Settings on page 70 AC Power Settings on page 70 SSID Wi Fi Network Name The SSID identifies your Wi Fi network and is visible to other Wi Fi enabled devices It appears on your device s...

Page 96: ...e the SSID only the Hostname You only need to remember one name when selecting the Wi Fi network accessing the browser interface or accessing the microSD card To link the SSID and the Hostname 1 Log in to the home page 2 Click Advanced settings 3 Click Wi Fi Network or Router LAN 4 Select the Link SSID and Hostname check box The SSID field gets the value of Hostname and becomes unavailable grayed ...

Page 97: ...ively weak but stronger than WEP 64 Bit Shared This option works with older and newer Wi Fi devices and is recommended only if any of your devices don t support WPA or WPA2 Shared WEP uses the same key for encryption and authentication some consider shared WEP to be less secure than open WEP 䡲 WEP 64 Bit Open This option provides security but it s relatively weak This option works with older and n...

Page 98: ...his setting is not recommended Anyone may access your device and use your Internet connection You are responsible for payment for data usage fees 䡲 WEP 64 bit Shared The password must be 5 ASCII characters 䡲 WEP 128 bit Shared The password must be 13 ASCII characters 䡲 WEP 64 bit Open The password must be 5 ASCII characters 䡲 WEP 128 bit Open The password must be 13 ASCII characters 䡲 WPA Personal...

Page 99: ...choose one of three modes No filtering All computers are allowed to access the network Allow all in list Only computers that are in this list are allowed to access the network Block all in list All computers are allowed to access the network unless they re in this list In any case a user still needs to provide the correct Wi Fi password to access the network Specifying Computers That Can Access th...

Page 100: ...you want to block click Add 5 For each computer you want to block repeat step 4 Tip The Connected Users window has a Block check box available for each currently connected user See Wi Fi Users Information and Settings on page 47 Removing a Computer From the Allowed or Disallowed Lists 1 Log in to the home page 2 Click Advanced settings Wi Fi MAC Filter 3 In the MAC Filter Mode list click either Al...

Page 101: ... 2 Click Advanced settings 3 Click Wi Fi Network or Router LAN 4 In the Hostname field enter a name for your device The name must be 1 15 ASCII characters Valid characters are 䡲 a z 䡲 A Z 䡲 0 9 Note that the host name cannot be all numbers 䡲 hyphen Note that the host name cannot start or end with a hyphen Setting the Maximum Number of Wi Fi Users If your network is having performance issues you mi...

Page 102: ...ce automatically determine the channel to use click Auto Disabling Wi Fi When Connected Through USB You can optionally turn off the device s Wi Fi when connected via the micro USB cable In this case Only a computer that is connected to the device through the micro USB cable can use the device You can prolong the battery life of the device The battery charges faster To enable this feature 1 Make su...

Page 103: ... this window you can view this information Connection Status This field reflects the status of the 3G connection connected not connected or dormant Dormant means a connection is established but no data is being transferred Service Type This is the network that is currently being used for your data connection 1xRTT EVDO or EVDO Rev A Coverage Type This is a list of the types of 3G networks that are...

Page 104: ...e Network Status LCD information screen See LCD Information Screens on page 17 Resetting the 3G and 4G Configurations to Default Settings Note Reset the configurations only if instructed by a Sprint representative After a configuration reset You must go through the device setup page 20 and 3G activation The latter starts automatically Any changes you ve made to the settings are lost 1 Log in to th...

Page 105: ...ines whether the location fix is done Once one time or Periodically continuous used for example for turn by turn TBT navigation applications To set the GPS mode 1 Make sure you re logged in to the home page 2 Click Advanced settings WAN GPS 3 Select the Enable GPS check box if it is not selected 4 Select one of the following 䡲 One time A single fix is used Use this option if you ll be using your d...

Page 106: ...ngs window select the Metric units check box Changing Your Mapping Service To change the mapping service for example Google Maps or MapQuest that displays the GPS results in a separate browser window 1 Make sure you re logged in to the home page 2 Click the GPS icon on the left side of the home page 3 Click a service in the Mapping service list in the GPS Information and Settings window Performanc...

Page 107: ...lick Advanced settings WAN GPS 3 In the Accuracy section select one of the following 䡲 Automatic The device automatically determines the most appropriate setting to use 䡲 Manual In the input field enter the number of meters to which the data must be accurate Note If the value is very small that is very high accuracy the fix may fail ...

Page 108: ... ports See Port Trigger Panel on page 107 䡲 DMZ You can select one computer to receive all unsolicited incoming connections See DMZ Panel on page 108 Basic Panel To access this panel 1 Log in to the home page 2 Click Advanced settings 3 Click Router Basic From this window you can enable or disable these features and perform these actions USB Tethered Networking To prevent an unauthorized user from...

Page 109: ...onics intelligent appliances and mobile devices from many different vendors For more information see www upnp org Note If UPnP is enabled there are potential security risks Enabling UPnP Before you can use UPnP you must enable it 1 Log in to the home page 2 Click Advanced settings Router Basic 3 Next to UPnP select Enable SPI Stateful Packet Inspection SPI also known as dynamic packet filtering he...

Page 110: ... in minutes a computer can use its assigned IP address before it is required to renew the lease After this time is up the computer is automatically assigned a new dynamic IP address Enter a number between 2 and 10080 Max DHCP Clients This is the number of DHCP addresses that can be assigned and active at one time It s recommended you set this to a number greater than the number of Wi Fi users DNS ...

Page 111: ...t to Obtain an IP address automatically TCP IP bound to the Ethernet connection with DHCP If DHCP is disabled you must configure each device on the network with Fixed permanent static IP address DNS server addresses provided by Sprint Enabling DHCP 1 Log in to the home page 2 Click Advanced settings Router LAN 3 Next to DHCP Server select Enable Configuring DHCP To configure DHCP settings DHCP mus...

Page 112: ...or media server Viewing the Static IP Assignment List 1 Log in to the home page 2 Click Advanced settings Router LAN 3 Make sure DHCP is enabled DHCP Server 4 Click DHCP Static IP Assignment List Assigning an IP Address Based on a MAC Address 1 Follow the above steps to display the DHCP Static IP Assignment List window 2 In the Hostname field enter a meaningful description of the device 3 In the M...

Page 113: ...ffic to specific ports and devices per their local IP address on your network For example you can configure port forwarding so that You can access your Remote Desktop from the Internet by specifying the WAN public IP address that the device is using Internet users can access a Web FTP or email server or gaming or Internet application hosted by your computer Before you can use or configure port for...

Page 114: ...t number is in the specified range 䡲 In the Start field enter the number that starts the port range 䡲 In the End field enter the number that ends the port range If the range consists of only one port enter the number that you entered in the Start field 5 In the Protocol list click the protocol s used for this application TCP UDP or both 6 In the IP Address field enter the IP address of the server ...

Page 115: ...t 1 Log in to the home page 2 Click Advanced settings Router Basic 3 Next to Port Triggering select Enable Enabling Port Triggering for Specified Protocols and Ports 1 Make sure you ve enabled port triggering See Enabling Port Triggering above 2 Click Advanced settings Router Port Trigger 3 In the last row of the table in the first Protocol list click the protocol s used by the application for out...

Page 116: ...port forwarding rules port triggering rules or NAT d connections 1 If port forwarding port triggering or both are enabled incoming traffic is routed according to the port forwarding rules port triggering rules or NAT d connections 2 If incoming traffic was not routed as a result of the above 䡲 If DMZ is enabled then incoming traffic is routed to the computer that uses the IP address specified by t...

Page 117: ... MAC address of the computer that is in the DMZ See Assigning an IP Address Based on a MAC Address on page 104 or On the computer that is in the DMZ disable DHCP and manually assign the IP address gateway and DNS server Resetting the Software to Default Settings WARNING If you reset the software to default settings You must go through the device setup page 20 as if you ve just purchased the device...

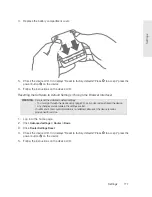
Page 118: ...light thumb pressure slide the battery compartment cover upward to remove it 2 Locate the small hole near the battery compartment The reset button is inside this hole 2ESET BUTTON 3 Insert a thin object for example the end of a paper clip into the hole and press down for five or more seconds ...

Page 119: ...software to default settings You must go through the device setup page 20 as if you ve just purchased the device Any changes you ve made to the settings are lost Your 3G and 4G account information is not affected after reset the device remains provisioned for service 1 Log in to the home page 2 Click Advanced settings Router Basic 3 Click Router Settings Reset 4 Check the device LCD If it displays...

Page 120: ...an then use the Import button to restore load the saved configuration To export the settings to a text file 1 Log in to the home page 2 Click Advanced settings Device Basic 3 Click Export Importing Settings 1 Log in to the home page 2 Click Advanced settings Device Basic 3 Browse to and click the file with the saved settings 4 Click Import Note Your device may reset and you may need to reconnect t...

Page 121: ...ta transferred In the Internet Connection Information window you can view information on the current billing cycle and lifetime of the device See Internet Connection Information on page 49 Enabling and Disabling Logging of Connects and Disconnects 1 Log in to the home page 2 Click Advanced settings Device Log 3 In the Connect Disconnect section select Enable or Disable 4 Click Save Exporting the C...

Page 122: ...s reset Firmware update Enabling and Disabling Logging of System Events 1 Log in to the home page 2 Click Advanced settings Device Log 3 In the Verbose System Event Logging section select Enable or Disable 4 Click Save Note Certain events are always logged See System Events above Exporting System Events 1 Log in to the home page 2 Click Advanced settings Device Log 3 Make sure Verbose System Event...

Page 123: ... page 2 Click Advanced settings Device Log 3 Select the 3G or the NTP check box 䡲 3G Time information is obtained from the 3G CDMA network this is more accurate than NTP but requires 3G coverage 䡲 NTP The device s clock is synchronized to a Network Time Protocol server on the Internet not as accurate as when using the 3G setting but doesn t require 3G coverage Use this setting if you have 4G but n...

Page 124: ...and then click Submit you must be logged in Note This window displays the administrator password and the address of the device home page Please remember this information or write it down in a safe place This window provides several options To keep the default settings of the device select one of the following 䡲 The Internet This connects you immediately to the Internet 䡲 My Overdrive Pro s home pa...

Page 125: ...Section 6 Resources ...

Page 126: ...r account at www sprint com Calling us toll free at 1 800 927 2199 business use or 1 888 211 4727 personal use Online Help In the browser interface click Help and from the menu select Online Help The Help system opens in a new Web browser window or tab You have several options to find the information you need Browse the Table of Contents Use the Index or Search feature click the appropriate button...

Page 127: ...over a field or button in Advanced Settings help information on this item if available appears to the right of the window To turn this feature on or off 1 Make sure you re logged in to the home page 2 Click Advanced settings Device Basic 3 Set Help for Advanced Settings to Show or Hide 4 Click Save ...

Page 128: ...e connected The 3G or 4G icon on the left side of the home page is solid For example The bottom area of the device LCD the Virtual Device and the Mini Window show the data transfer icon and data transfer information amount of data connection duration How Do I Connect to Wi Fi You may have to manually connect to Wi Fi after certain events for example as part of the initial device setup or after a s...

Page 129: ...feature is enabled display the password on the device See Wi Fi Password Reminder on page 90 Connect the device to your computer through USB then log in and view the Wi Fi password in Advanced settings Wi Fi Security Write the password down in a safe place See Connecting Through USB on page 11 Note If you ve forgotten both the Wi Fi password and the administrator login password then you must reset...

Page 130: ...connection can be re established faster than having to reconnect Billing occurs only when data is passed across the network Questions About GPS and Sprint Location Services What is LBS LBS Location Based Services is used to provide enhanced Local Search feature via internet mapping services For more information see Performing a Location Search on page 60 What is GPS GPS stands for Global Positioni...

Page 131: ...eather conditions may affect your ability to get a clear view of the satellites and thus to acquire a GPS fix How Can I Stream GPS Data to Use With a Third party GPS Application 1 Install the device driver See Making a Tethered Connection on page 29 2 Set GPS Mode in Advanced settings WAN GPS to Continuous 3 Determine the COM port number that your Sierra Wireless device that is your Overdrive Pro ...

Page 132: ...vanced Sprint Mobile Broadband Network To learn more about Data Link to arrange a connectivity solution that works for you or to configure Data Link please contact Sprint If You re Not Using Sprint Data Link Once you complete a wireless connection you may need to launch an extranet client provided by your company and supply the appropriate user name and password to gain access For support contact ...

Page 133: ...LCD off Advanced settings Device Display LCD Backlight 䡲 Decrease the brightness of the LCD Advanced settings Device Display Backlight Settings On Battery USB Power 䡲 Set the LCD to turn off sooner See Setting the LCD Timeout on page 71 Configure the setting for when battery powered or connected via USB to Short Wi Fi Range Advanced settings Wi Fi Network Battery or USB Powered Enable standby low ...

Page 134: ...Keep the device at least 3 6 feet away from electrical devices that generate RF interference for example microwaves TVs 2 4 GHz cordless phones cellular phones baby monitors wireless speakers If you re not using these electrical devices turn them off If possible place your devices so that the signal passes through open doorways or drywall as opposed to concrete brick metal walls with insulation an...

Page 135: ... Advanced settings Wi Fi Network Max Number of Users Select a longer Wi Fi range Advanced settings Wi Fi Network Long Wi Fi Range Battery or USB Powered or AC Powered Windows XP Users 1 Open the Device Manager 䡲 Click Start Settings Control Panel 䡲 Double click System 䡲 Click Hardware 䡲 Click Device Manager 2 Double click Network adapters 3 Double click the Wi Fi client network adapter of your com...

Page 136: ...inistrator Password on page 75 Use MAC filtering to specify computers that are or aren t allowed to connect to the network See MAC Filter Panel on page 86 Finding the MAC Address You ll need to know the MAC address of a device when Assigning an IP address based on a MAC address when using DHCP See DHCP Static IP Assignment List on page 104 Allowing or denying computers access to the network See Al...

Page 137: ... the following Port forwarding Port triggering DMZ Static DHCP features The steps to finding the IP address of a device vary depending on your operating system Windows 1 Open a command prompt window 䡲 Click Start and Run 䡲 Type cmd or command and click OK 2 At the command prompt type ipconfig and press Enter 3 Write down the IP Address for the entry that relates to the wireless network connection ...

Page 138: ...page 136 Cannot Check for Updates page 136 Sounds Are Enabled but the Device Doesn t Generate Any Sounds page 136 General Tips Check the system events log See Exporting System Events on page 114 If some settings are preventing you from connecting to Wi Fi connect to the device through the micro USB cable and then change the settings See Requirements for a USB Tethered Connection on page 28 and Mak...

Page 139: ...the AC charger or to a computer Insufficient Signal Strength If you have insufficient signal strength the icon is displayed on the left side of the home page Insufficient signal strength may occur because You are outside a 3G or 4G coverage area Your device s internal antenna is pointing in the wrong direction You are in or near a structure that is blocking the signal You are near a device that is...

Page 140: ...nect to 3G or 4G contact Sprint Connection Error 1 Log in to the home page 2 Click Advanced settings 3 Click WAN Setup Update 3G Profile 4 If an error message and number are displayed on the LCD after the update note the information and contact Sprint Device Activation Required If the LCD displays this message display the 3G Activation Required alert and start the activation To do this 1 Make sure...

Page 141: ...ure is enabled page 90 you can use it to display the SSID and Wi Fi password on the device LCD Nobody has changed the name or password of the Wi Fi network If the Wi Fi Password Reminder feature is enabled page 90 you can use it to display the SSID and Wi Fi password on the device LCD Nobody is connected through the micro USB cable when When connected to USB is selected for Advanced settings Wi Fi...

Page 142: ...k the following The device is turned on See Turning Your Device On on page 13 You have established a connection to the device through Wi Fi or through the micro USB cable Make sure you re typing the correct address in the Web browser 䡲 Try http SSID where SSID is as displayed on the device LCD 䡲 If the home page is still not displayed try http 192 168 0 1 or if you re using custom routing settings...

Page 143: ...to the device through the micro USB cable or Wi Fi See How Do I Connect to Wi Fi on page 120 or Making a Tethered Connection on page 29 Make sure you re in 3G or 4G coverage Try the tips in Improving Signal Strength on page 126 Check the WAN Mode setting Advanced settings WAN Setup For example if it s set to 4G only you won t be able to connect if 䡲 You have 4G coverage but you re roaming 䡲 You do...

Page 144: ...uctions between your device and the GPS satellites GPS Fix Not Available Make sure you have a clear view of the sky if you re in a forested area or in or near tall buildings move to another location To retry a fix click Retry Now Otherwise click Cancel Cannot Check for Updates Make sure your device is connected to the AC charger or computer through the micro USB cable Note If you ll be using USB f...

Page 145: ...Section 7 Technical Specifications Safety Information and Regulatory Information ...

Page 146: ... Power Button to Determine the Device State on page 14 Radio Frequency and Electrical Specifications Approvals FCC Battery Size 1800 mAh Duration for full charge AC charger 1 5 hours PC USB cable 3 6 hours Charge life 4 hours under standard use 3 hours of continuous use Current Maximum 1000 mA Standby current 48 mA 1xEV DO IS2000 hybrid mode 48 mA WiMAX Transmit PCS 1850 to 1910 MHz Cellular 824 t...

Page 147: ...ersonal TKIP AES Pre Shared Key or WPA PSK WPA2 Personal TKIP AES WPA2 PSK WPA WPA2 Personal WPA WPA2 PSK SMS IS 637 Not supported FAX Not supported IOTA Supported OTASP IS 683A IS 683B IS 683C Supported OTAPA Supported PRL Preferred Roaming List Supported Authentication Supported Voice Not supported NAM Single Position Location Standalone TTY Accessibility Not supported Mobile IP Supported Networ...

Page 148: ...perating temperature 4 to 131 F Storage temperature 13 to 140 F Humidity 90 non condensing Vibration 10 1000 Hz 6G 60 min axis 3 hrs total non operating Drop 1 m approx 39 on concrete Mechanical Specifications Dimensions W x L x H 2 7 x 2 7 x 0 69 Power button Supported Headset jack Not supported LED White ...

Page 149: ...the device or for failure of the device to transmit or receive such data Safety and Hazards Do not operate your device In areas where blasting is in progress Where explosive atmospheres may be present Near medical equipment Near life support equipment or any equipment that may be susceptible to any form of radio interference In such areas your device MUST BE POWERED OFF The device can transmit sig...

Page 150: ...to water or other liquids fire explosion or other hazards Use the battery only in the Overdrive Pro 3G 4G Mobile Hotspot If using with a charger use only the AC charger supplied with the device Do not short circuit the battery When replacing a battery use the same model of battery that was supplied with the device Follow local regulations when disposing of a used battery Avoid dropping the device ...

Page 151: ...user s body must be maintained at all times This device must not be used with any other antenna or transmitter that has not been approved to operate in conjunction with this device WARNING EMI United States FCC Information This equipment has been tested and found to comply with the limits for a Class B computing device peripheral pursuant to Parts 15 and 27 of the FCC rules These limits are design...

Page 152: ... This device complies with Parts 15 and 27 of the FCC Rules Operation is subject to the following two conditions 1 This device may not cause harmful interference and 2 this device must accept any interference received including interference that may cause undesired operation ...

Page 153: ... the license text in the distribution are listed in the sections that follow starting on page 150 GNU General Public License Version 2 June 1991 Copyright C 1989 1991 Free Software Foundation Inc 51 Franklin St Fifth Floor Boston MA 02110 1301 USA Everyone is permitted to copy and distribute verbatim copies of this license document but changing it is not allowed Preamble The licenses for most soft...

Page 154: ...e have made it clear that any patent must be licensed for everyone s free use or not licensed at all The precise terms and conditions for copying distribution and modification follow GNU GENERAL PUBLIC LICENSE TERMS AND CONDITIONS FOR COPYING DISTRIBUTION AND MODIFICATION 0 This License applies to any program or other work which contains a notice placed by the copyright holder saying it may be dis...

Page 155: ...s not the intent of this section to claim rights or contest your rights to work written entirely by you rather the intent is to exercise the right to control the distribution of derivative or collective works based on the Program In addition mere aggregation of another work not based on the Program with the Program or with a work based on the Program on a volume of a storage or distribution medium...

Page 156: ...ns are imposed on you whether by court order agreement or otherwise that contradict the conditions of this License they do not excuse you from the conditions of this License If you cannot distribute so as to satisfy simultaneously your obligations under this License and any other pertinent obligations then as a consequence you may not distribute the Program at all For example if a patent license w...

Page 157: ...IGHT HOLDERS AND OR OTHER PARTIES PROVIDE THE PROGRAM AS IS WITHOUT WARRANTY OF ANY KIND EITHER EXPRESSED OR IMPLIED INCLUDING BUT NOT LIMITED TO THE IMPLIED WARRANTIES OF MERCHANTABILITY AND FITNESS FOR A PARTICULAR PURPOSE THE ENTIRE RISK AS TO THE QUALITY AND PERFORMANCE OF THE PROGRAM IS WITH YOU SHOULD THE PROGRAM PROVE DEFECTIVE YOU ASSUME THE COST OF ALL NECESSARY SERVICING REPAIR OR CORREC...

Page 158: ...oftware and you are welcome to redistribute it under certain conditions type show c for details The hypothetical commands show w and show c should show the appropriate parts of the General Public License Of course the commands you use may be called something other than show w and show c they could even be mouse clicks or menu items whatever suits your program You should also get your employer if y...

Page 159: ...inois NCSA nor the names of its contributors may be used to endorse or promote products derived from this Software without specific prior written permission THE SOFTWARE IS PROVIDED AS IS WITHOUT WARRANTY OF ANY KIND EXPRESS OR IMPLIED INCLUDING BUT NOT LIMITED TO THE WARRANTIES OF MERCHANTABILITY FITNESS FOR A PARTICULAR PURPOSE AND NONINFRINGEMENT IN NO EVENT SHALL THE CONTIBUTORS OR COPYRIGHT H...

Page 160: ...he distribution 3 All advertising materials mentioning features or use of this software must display the following acknowledgment This product includes software developed by the OpenSSL Project for use in the OpenSSL Toolkit http www openssl org 4 The names OpenSSL Toolkit and OpenSSL Project must not be used to endorse or promote products derived from this software without prior written permissio...

Page 161: ... modification are permitted provided that the following conditions are met 1 Redistributions of source code must retain the copyright notice this list of conditions and the following disclaimer 2 Redistributions in binary form must reproduce the above copyright notice this list of conditions and the following disclaimer in the documentation and or other materials provided with the distribution 3 A...

Page 162: ...ived from this software without prior written permission For permission or any legal details please contact Office of Technology Transfer Carnegie Mellon University 5000 Forbes Avenue Pittsburgh PA 15213 3890 412 268 4387 fax 412 268 7395 tech transfer andrew cmu edu 4 Redistributions of any form whatsoever must retain the following acknowledgment This product includes software developed by Comput...

Page 163: ...ion advertising materials and other materials related to such distribution and use acknowledge that the software was developed by the University of California Berkeley The name of the University may not be used to endorse or promote products derived from this software without specific prior written permission THIS SOFTWARE IS PROVIDED AS IS AND WITHOUT ANY EXPRESS OR IMPLIED WARRANTIES INCLUDING W...

Page 164: ...derived from this software without specific prior written permission THIS SOFTWARE IS PROVIDED BY THE COPYRIGHT HOLDERS AND CONTRIBUTORS AS IS AND ANY EXPRESS OR IMPLIED WARRANTIES INCLUDING BUT NOT LIMITED TO THE IMPLIED WARRANTIES OF MERCHANTABILITY AND FITNESS FOR A PARTICULAR PURPOSE ARE DISCLAIMED IN NO EVENT SHALL THE COPYRIGHT OWNER OR CONTRIBUTORS BE LIABLE FOR ANY DIRECT INDIRECT INCIDENT...

Page 165: ...commercial applications and to alter it and redistribute it freely subject to the following restrictions 1 The origin of this software must not be misrepresented you must not claim that you wrote the original software If you use this software in a product an acknowledgment in the product documentation would be appreciated but is not required 2 Altered source versions must be plainly marked as such...

Page 166: ...ICIPATED PROFITS OR REVENUE ARISING OUT OF THE USE OR INABILITY TO USE ANY SIERRA WIRELESS PRODUCT EVEN IF SIERRA WIRELESS AND OR ITS AFFILIATES HAS BEEN ADVISED OF THE POSSIBILITY OF SUCH DAMAGES OR THEY ARE FORESEEABLE OR FOR CLAIMS BY ANY THIRD PARTY Notwithstanding the foregoing in no event shall Sierra Wireless and or its affiliates aggregate liability arising under or in connection with the ...

Page 167: ...Lifetime data 81 MAC address 65 Mobile Broadband Information window 44 Network access provider NAP ID 82 Network service provider NSP ID 82 Plan Version 65 Roaming support 121 Service type 82 Status 43 4G Only WAN Mode 45 81 4G panel of the WAN tab 82 4G Preferred WAN Mode 45 81 802 11 standards supported 139 802 11b g compatibility 85 802 11b g n compatibility 85 A About panel of the Device tab 7...

Page 168: ...nes searching for 60 Auto DNS Mode 102 105 Automatic Accuracy GPS 83 99 Automatic Performance Value GPS 83 98 Automatically checking for updates 61 Automatically log in Viewing list of computers set to automatically log in 75 Auto reconnect to network 45 B Baby monitors 126 Backlight LCD on the device adjusting 71 Backup battery message about on Mac OS X 29 Banks searching for 60 Base Station ID B...

Page 169: ...a connection 40 Playing a sound 73 Sharing your connection 40 Connect Disconnect logging 113 Connected How to tell you re connected to 3G 4G 120 Icon 44 Playing a sound when connected or disconnected 51 Wi Fi users information 47 Connected computers displaying a list of 92 Connected Users window 47 Connecting the device to your computer USB 29 Wi Fi 120 Connecting to 3G 4G message 132 Connection E...

Page 170: ...RU Install automatic driver installation enabling or disabling 28 Windows 29 Device name host name Changing 93 Input rules 93 Linking to SSID 88 Device tab About panel 79 Basic panel 76 Display panel 77 Log panel 80 microSD card panel 77 Sounds panel 78 DHCP Clients maximum number of 104 Description 103 Enabling 103 Lease time 103 Start and end address 103 Static IP Assignment List 104 DHCP IP Add...

Page 171: ...nent 65 3G modem 79 4G component 65 4G modem 80 Routing hardware 64 79 Wi Fi 64 79 Firmware upgrading from a file 63 Fix rate 83 98 Fix GPS Fix rate 83 98 Get fix now 47 83 GPS Fix Not Available 136 Type of fix GPS mode 47 83 Folder name microSD card 56 Forgot administrator password 121 Forgot Wi Fi password 121 Forward Ports 107 Fragmentation Threshold 85 Frequencies transmit and receive 138 Freq...

Page 172: ...60 Humidity specification 140 I Icons Home page 42 LCD 16 Import router settings 112 Important information booklet 53 Important notice 141 Importing device settings 112 Improving 3G Network Service 126 Improving signal strength 126 Improving Wi Fi Performance 127 IMSI International Mobile Station Identity 96 Information about your device 64 79 Information screens LCD 17 Installation requirements 3...

Page 173: ...tten what do I do 121 Long Range Wi Fi 84 AC powered 49 70 Battery or USB powered 48 84 Long Wi Fi Range field 84 Low Battery playing a sound 51 73 74 Low power mode Standby Timer 49 M MAC Media Access Control filter 86 91 MAC address 4G modem 65 80 Finding for a device 128 IP address assigning based on MAC address 104 IP address removing based on MAC address 104 Wi Fi users 47 MAC Address field 9...

Page 174: ...Identifier NAI 96 Network access provider 4G NAP ID 82 Network access configuring 91 Network operator 3G 79 95 4G NSP ID 82 Carrier the device was activated for 64 81 Network panel of the Wi Fi tab 84 Network service 3G tips on improving service 126 Activating 24 Network Time Protocol NTP 115 Network update available Alert displayed 37 Log event 114 Network corporate accessing through VPN 124 No f...

Page 175: ...page 35 54 Power Save Mode Wi Fi 85 Power settings AC powered 70 Battery powered 70 Extending battery life 125 USB powered 70 Powering the device off 14 35 Powering the device on 13 PPPD License 154 PPPDump License 155 PPPStats License 155 Preamble ID of the base station 82 PRI version 3G component 65 Routing hardware 64 79 Primary DNS of the WAN 49 Primary WAN failover log event 114 Primary WAN s...

Page 176: ...set Performing 109 Playing a sound 51 73 Routing PRI Version 64 RSSI signal strength 3G 95 4G 82 Improving 126 Insufficient signal strength 131 Viewing 43 RTS Threshold 84 Rx receive frequencies 138 S Safari browser 3 Safari can t open the page 134 Safety and hazards 141 Scan for 4G button 44 SD Card error alert 38 SD Card Information and Settings window 50 SD Card Slot field 55 Search location 60...

Page 177: ...124 Sprint Location Services See GPS Sprint stores searching for 60 Sprint website 118 ssh support 124 SSH2 License 156 SSID Wi Fi network name Broadcast 84 Changing 87 Description 87 Host Name linking to 88 SSID Broadcast 84 SSLeay License Original 153 Standby current 138 Standby mode Description 49 Playing a sound 78 Settings specifying 49 Timer how soon to go into standby mode 49 Standby Timer ...

Page 178: ...G PRL 81 Update 3G profile 81 Update Failed message 133 Update Firmware From File field 63 Updates Overview 61 3G Network Update Available alert 37 Automatically checking 61 Cannot check for 136 Firmware upgrading from a file 63 Manually checking 62 PRL 37 81 Software Update Available alert 38 UPnP Universal Plug and Play 101 UPS backup battery message about on Mac OS X 29 Usage guidelines for you...

Page 179: ...el of the Wi Fi tab 84 Password 90 Password Reminder 90 Password forgot 121 Performance tips on improving 127 Power Save Mode 85 Security 89 Security and encryption protocols supported 139 Security panel of the Wi Fi tab 85 Short Range 48 70 Sounds when user joins or leaves 51 SSID Wi Fi network name 87 USB tethered mode 94 Wi Fi users information 47 Wi Fi Age Out Time 85 Wi Fi Channel 84 94 Wi Fi...

Page 180: ......
Reviews: