


9
A freestanding installation m ust be installed with 6" x 24
gauge (m inim um ) stove pipe from the stove flue collar to
the thim ble of your chim ney. The crim ped end of each pipe
should be toward te stove. On horizontal pipe it should be
at least 1" higher where it enters the chim ney than on the
end toward the stove. Do not use m ore than (2) elbows
and keep the length of the pipe to a m inim um , but m aintain
the clearances to com bustibles.
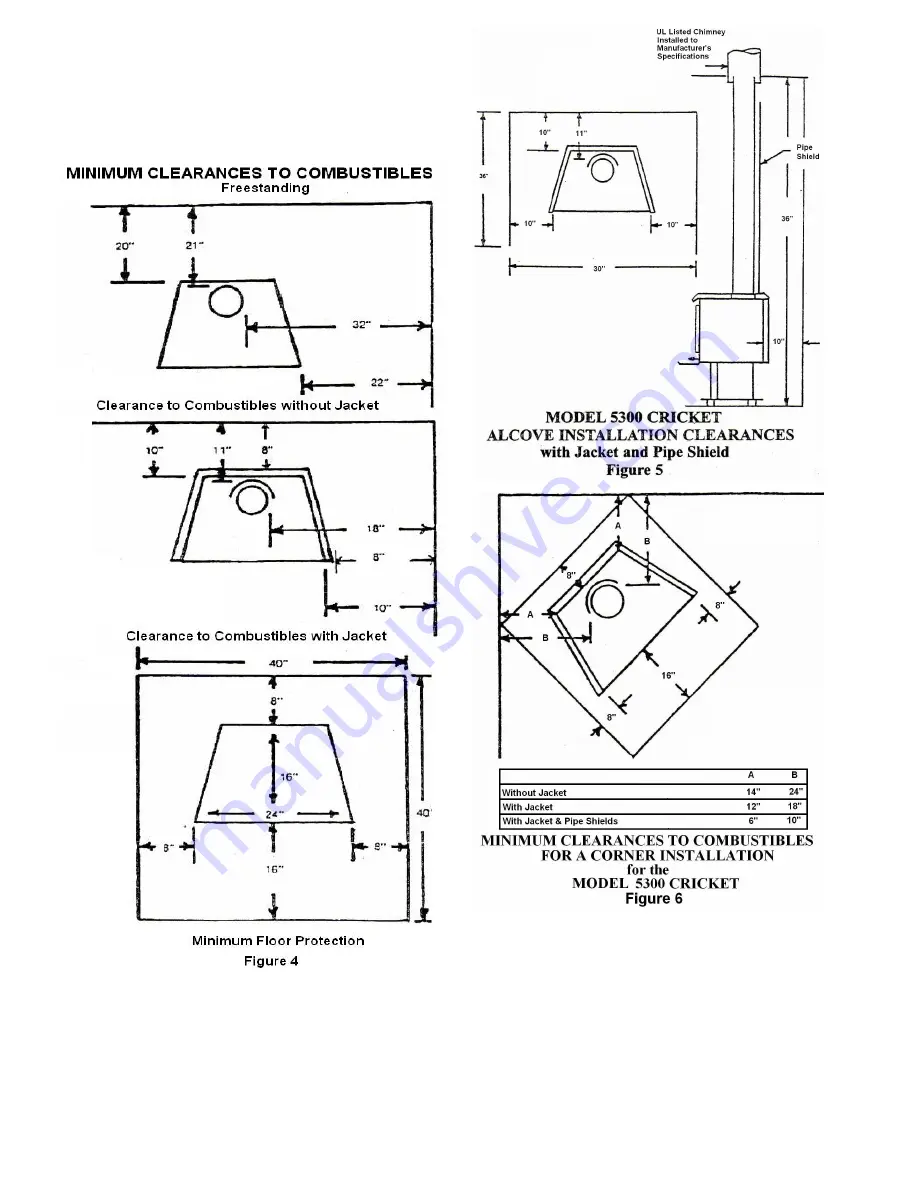
See Figure 4, 5, & 6.
The Cricket m ay also be installed with a UL listed
m anufactured chim ney. These norm ally attach to the flue
collar of the stove ad extend straight up through the ceiling
and the roof. Make sure all the m anufacturers
specifications are followed closely, especially when
passing through any com bustible walls, ceilings, or roof.
Norm ally, an installation using m anufacturer’s chim ney is
beyond the expertise of the do-it-yourselfer.
Jacket Installation:
An optional jacket is available for your Cricket which
reduces clearances to com bustibles to 8" from the sides
and rear of the unit.
If you purchased this accessory, it attaches to the stove
with the following steps: (See Figure 7)
1.
Slide jacket over stove.
2.
Bolt jacket on with one screw on either side of unit.
3.
Hook top of jacket over lip at front of stove and lay
lid back over top of stove.


