.
FLYING YOUR SIG CLASSIC
Now you are ready to fly your plane, and FLYING is what the Sig Classic models are designed for. Most models as realistic
looking as your Classic make poor flyers. They're often tricky to adjust and clumsy in the air. But Sig's Classic kits give you
three important features that assure you of successful flights:
1. A PROVEN flyable design.
2. A reliable way to make flight adjustments.
3. Complete flying instructions.
Read and follow these instructions carefully. They are the key to satisfying flying.
Testing And Adjusting
You have invested a lot of time and effort in building your model, don't waste it all now with careless testing. Most models fail to
fly because of poor adjustment, not poor craftsmanship. Be as careful in your testing as you were in your building.
Every model is a little different and needs its own special set of adjustments. Contest winning flyers make dozens, even
hundreds, of test flights "trimming" a model for best performance. So don't give up if your first flights aren't perfect.
Preflight Preparations
Before you leave the workshop for the flying field, take these important steps.
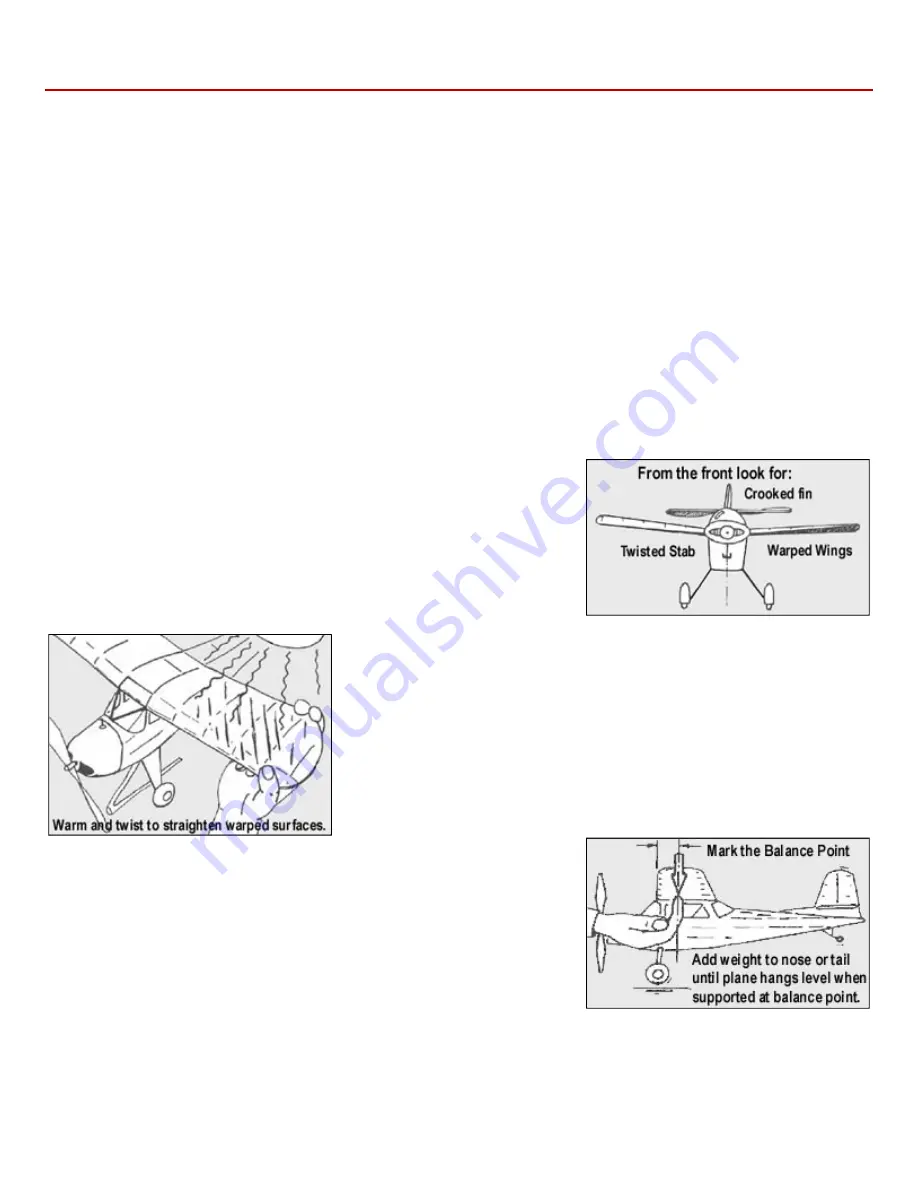
Looking from the front of the model, check that the bottom of the wing and tail
surfaces are flat - not twisted. Sight down the center line of the fuselage as shown
in the drawing. Right and left wing should look alike; you shouldn't see the top of
one wing and the bottom of the other. The fin should point straight ahead, and the
stabilizer should be flat. (This does not mean that the stabilizer and the wing sit on
the fuselage at the same angle. The wing will be tilted upward more than the tail).
A model can be made to fly with twisted surfaces, but it's confusing to adjust and if
the warps change from day to day, you can't detect it. The drawing shows how a
surface can be straightened by twisting it in the desired direction while holding it
under a heat lamp or other electric heater. Work with it until it is as flat as possible.
If your wing has struts, loosen them before bending and re-cement them afterward.
The correct "Balance Point" for your ship is shown on the plans. Mark this point on
the bottom surface of each wing. When supporting your plane on your finger tips at
these points, the fuselage should hang level. See the drawing. Add weight to the
nose or tail until it DOES hang level. Don't be afraid to add the necessary weight.
CORRECT BALANCE IS MORE IMPORTANT THAN LIGHT WEIGHT.
Modeling clay makes handy balancing weight - it can be pressed permanently in
any corner. Wire solder or BB shot can be used by cementing in place.
If one blade of your propeller always swings to the bottom, a tiny smear of clay on the other tip will improve the prop's balance
and reduce vibration.


