.
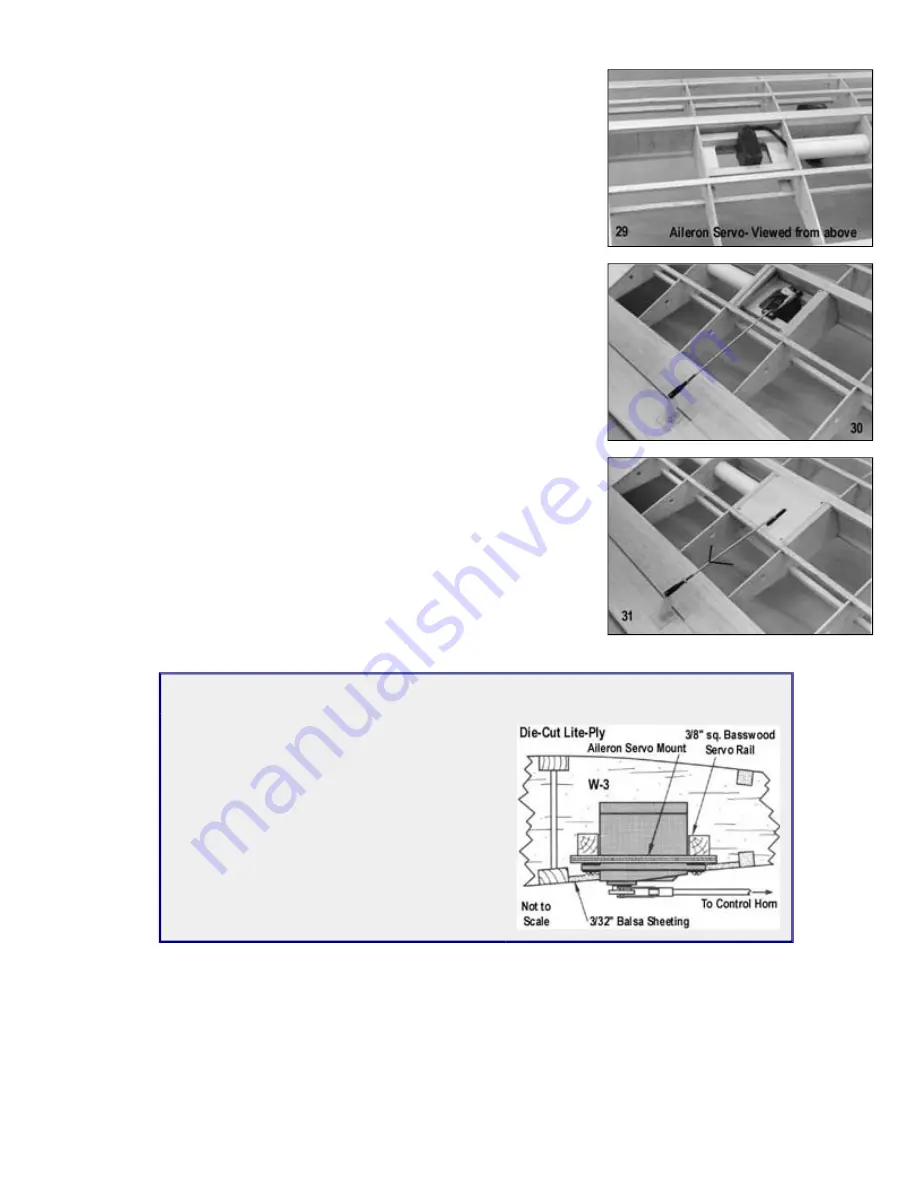
29.
a. Make an aileron pushrod as shown on the plan from a 4-40 x8" threaded
rod, a 4-40 solder clevis, and a 4-40 R/C link.
The actual length of your pushrod may have to be altered slightly
depending on the shape of your aileron servo.
b. Temporarily connect the aileron pushrod to the servo arm (with the solder
clevis) and the aileron control horn (with the R/C link). Adjust the position
of the servo mount in the wing as necessary to keep the pushrod from
hitting the bottom spar and the servo arm from hitting the hatch.
Also make certain that the covering material on the top of the wing won't
make contact with the servo.
30.
When satisfied with its position, glue the servo mount assembly to the wing ribs.
Reinforce the joints at the servo mount and the ribs with a couple of scrap pieces
of stick balsa.
31.
The plywood hatch will need an opening cut into it for the aileron pushrod.
Again, the exact-size and shape of this opening will depend on the shape and
position of your pushrod. You can make a nice-looking slot by drilling two holes,
then connecting the edges with knife cuts.
When you are done with the hatch, remove the aileron, the aileron control horn,
and the aileron pushrod; The servo can be left in place since it won't interfere
with covering.
ALTERNATE AILERON SERVO INSTALLATION
You may prefer to install your aileron servo as
shown in the diagram below. The advantages are
that the push rod can be run directly to the control
horn with no bends, it's lighter, less complex, and
provides easier servo access. The disadvantages
are a slight increase in drag and a less "finished"
look to the bottom of the wing. Simply replace the
hatch rails and plywood hatch with some 3/32"
balsa sheet (trim the bottom of the ribs to fit), and
cut an opening that's just large enough to install
and remove the servo.
Summary of Contents for Four-Star 120
Page 29: ... ...


