.
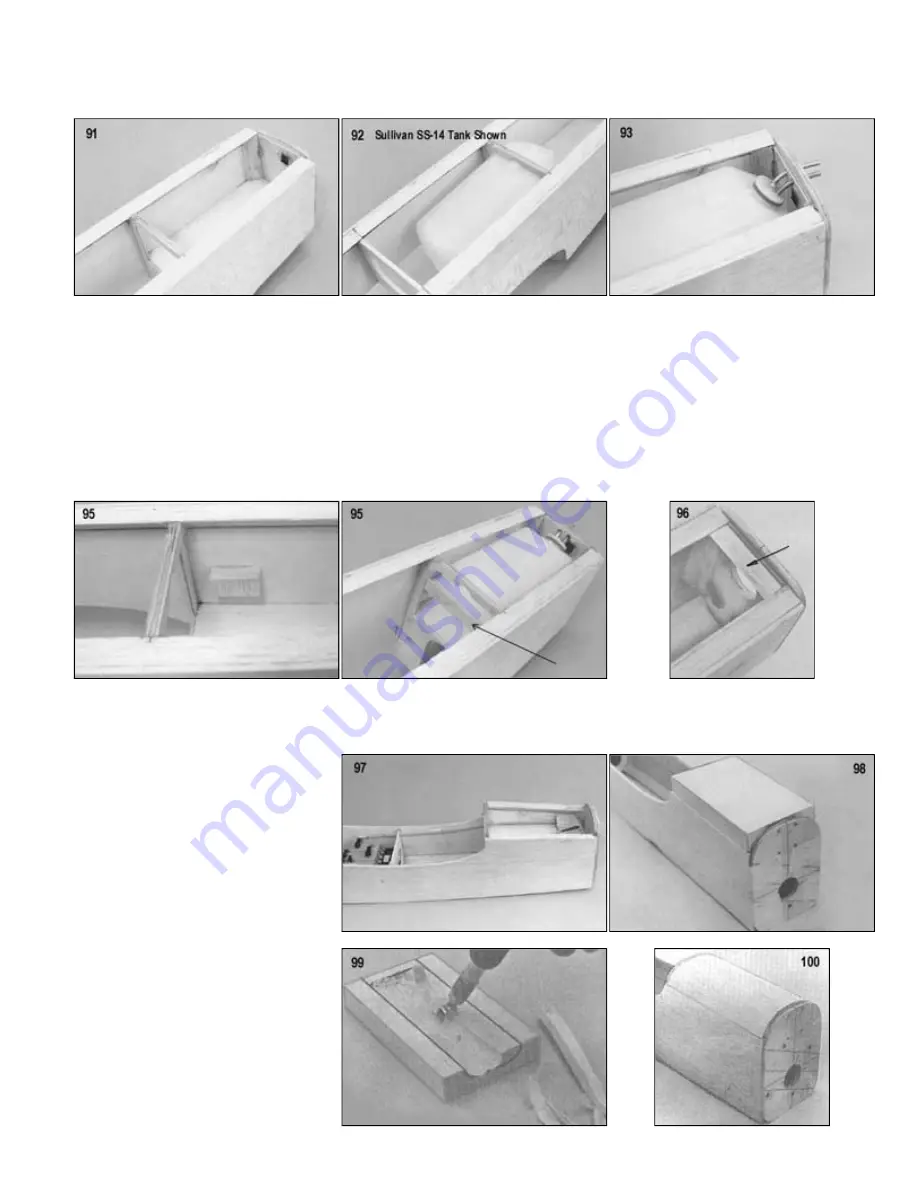
93. Bend the tubes of the tank so they point directly forward. Drill holes in the firewall to pass them.
If you have trouble bending tubing try K&S 1/8" Soft Brass Fuel Tubing.
94.
Put a scrap wood block on each side of the nose to hold the tank in place.
95.
Retain the tank with a scrap ply bar tack-glued across the back. It can be pulled off when the tank needs to be removed.
96.
When a 12 oz. Sullivan RST tank is used, a complete piece of top triangular bracing can be used as shown here in this
Kougar picture. You will have to cut away part of it for the 14 oz. tank to pass the tubes. Make certain now, before the
compartment is closed in, that the tank can be installed and replaced from the wing opening without trouble. Fix anything in
the way. Hold a piece of sheet on the top to make certain there is no hangup on it. This is a good time to oilproof the
compartment. Put in properly, you will seldom have any need to take out the tank and it is not difficult to do so when
necessary.
For the fixed gear version, the bottom block is installed in the same way as the following Kougar pictures 98, 99 and 100.
The 7/8" tank hole shown is for a 12 oz. RST tank when the entire tank cap is brought through the firewall.
Newer Sullivan tanks require a larger
15/16" hole. Other brand tanks may
require a different opening.
97.
Complete the nose pushrods before
putting on the bottom nose block.
98.
Fit the 3/4"x3" bottom block between F-1
and F-2.
99.
Hollow the bottom block out to make
room for the battery in the nose if
required for balance.
100.
Glue the block on and shape it.
101.
Sand fuselage top level and smooth.


