.
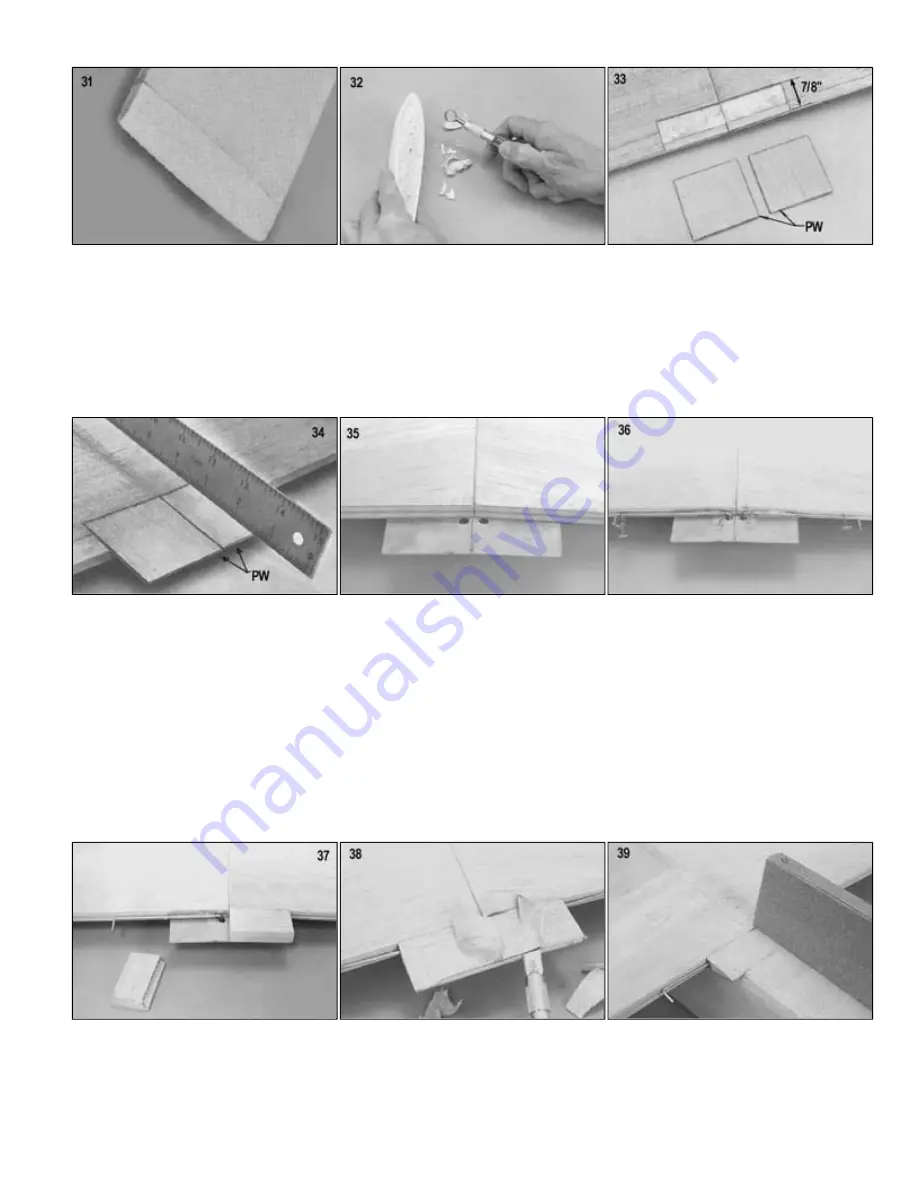
34.
Epoxy the PW tabs in place, using a ruler to line them up with the wing top surface.
35.
Drill holes in PW for aileron horn.
36.
Epoxy the brass tubes to the wing trailing edge, using pins to hold the horn wires in alignment. I find that gluing the tubes
directly to the wing puts the horn a little too close. A small scab of 1/64" plywood was used behind the brass tubing in the
photo to move them out a bit. Or, you can shim out the horn wires with pieces of balsa or cardboard and fill the small gap
behind the tubing with epoxy glue.
37.
Hollow the fronts of 1/2"x1-5/16"x2-5/16" balsa blocks WTB to fit over the brass lube bearing and horn wire. Epoxy in place.
Don't get glue into the bearing.
NOTE: Before the next step is done you will need the fuselage with the rear bottom just behind the wing shaped and the
wing mounted in final position.
38.
a. Set the wing into the fuselage and mark a line on the back of the WTB blocks to indicate the fuselage outline.
b. Carve the WTB blocks to shape.
(NOTE: Pictures 40 and 41 show the fuselage bottom block in place on the fuselage but it is best NOT to have it installed
when Step 40 and 41are done. Access to the dowels is much easier when it is not in the way.)
39.
Replace the wing on the fuselage and finish sanding the joint so that they blend together smoothly.
40.
Put a point on the 1/4" diameter wing dowels and install in the fuselage.
41.
Put the wing on and push the points into the leading edge.


