SIG
L
ENT
168
SDS2000X-E
User Manual
Set and Perform Pass/Fail Test
Do the following steps to set and perform pass/fail test:
1. Press the
Utility
button on the front panel to enter the UTILITY function menu.
2. Press the
Next Page
softkey to go to the second page of the UTILITY function menu.
3. Press the
Pass/Fail
softkey to enter the PASS/FAIL function menu.
4. Press the
Enable Test
softkey to select
On
to enable the pass/ fail test.
5. Press the
Source
softkey to select the desired channel.
6. Press the
Mask Setting
softkey to enter the MASK function menu.
7. Press the
X Mask
or
Y Mask
softkey; and then turn the
Universal Knob to
select the
desired value. The range is from 0.02div to 4div.
8. Press the
Create Mask
softkey to create the mask. Whenever the
Create Mask
softkey is pressed the old mask is erased and a new mask is created.
9. Press the
UP
softkey to return to the PASS/FAIL function menu.
10. Press the
Msg Display
to select
On
or
Off
to turn on or off the message display.
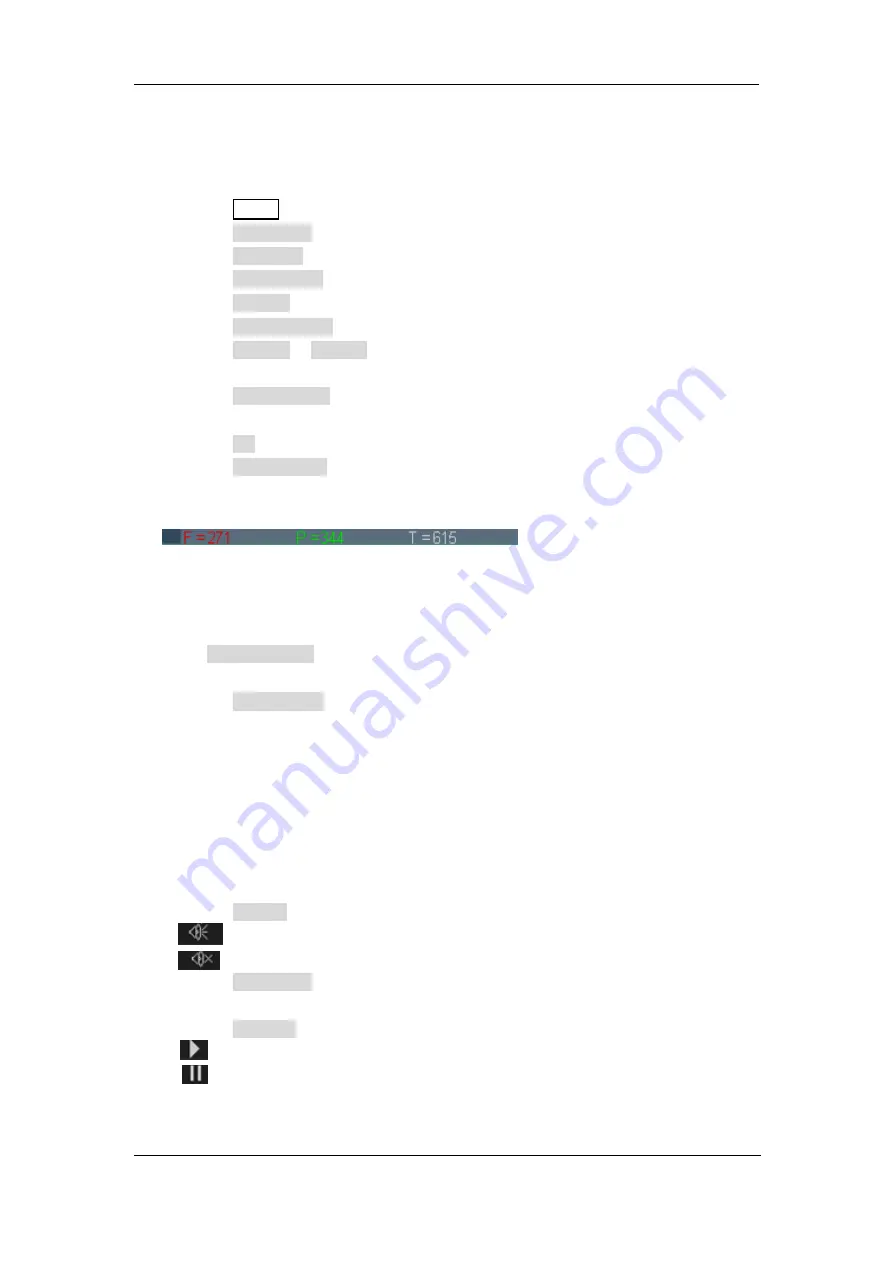
When
On
is selected, the test result will be displayed in the upper-right message box
of the screen.
F:
The frame number of the channel waveform that fails to match the mask.
P:
The frame number of the channel waveform that matches the mask.
T:
The frame number of the channel waveform that have been acquired. It is the
total of
P
and
F
.
11. Press
the Next Page
softkey to go to the second page of the PASS/FAIL function
menu.
12. Press the
Stop on Fail
softkey to select
On
or
Off
to turn on or off the function.
On:
When failed waveforms are detected, the oscilloscope will stop the test and
enter the STOP state. At this point, the results of the test remain the same on the
screen (if display is turned on) and only one pulse is output from the
[TRIG OUT]
connector (if enabled) at the rear panel.
Off:
The oscilloscope will continue with the test even though failed waveforms are
detected. The test results on the screen will update continuously and a pulse will
be output from the
[Trigger Out]
connector at the rear panel each time a failed
waveform is detected.
13. Press the
Output
softkey to select turn on or off the sound.
: When the failed waveforms are detected, the beeper sounds.
: The beeper will not sound even if the failed waveforms are detected.
14. Press the
Next Page
softkey to return to the first page of the PASS/FAIL function
menu.
15. Press the
Operate
softkey to perform the test.
: Current state is stop; press the softkey to start the pass/fail test.
: Current state is running; press the softkey to stop the pass/fail test.
Summary of Contents for SDS2000X-E Series
Page 1: ...User Manual SDS2000X E Series Digital Oscilloscope UM0102E E01A SIGLENT TECHNOLOGIES CO LTD...
Page 14: ......
Page 69: ...SIGLENT SDS2000X E User Manual 43 Figure 13 x Interpolation Figure 14 Sin x x Interpolation...
Page 98: ...SIGLENT 72 SDS2000X E User Manual Figure 29 Relative Window Trigger...
Page 100: ...SIGLENT 74 SDS2000X E User Manual Figure 30 Interval Trigger...
Page 103: ...SIGLENT SDS2000X E User Manual 77 Figure 32 State Dropout Trigger...
Page 105: ...SIGLENT SDS2000X E User Manual 79 Figure 33 Runt Trigger...
Page 125: ...SIGLENT SDS2000X E User Manual 99 Figure 49 CAN Trigger...
Page 129: ...SIGLENT SDS2000X E User Manual 103 Figure 51 LIN Trigger...
Page 162: ...SIGLENT 136 SDS2000X E User Manual...
Page 200: ...SIGLENT 174 SDS2000X E User Manual Figure 95 Built in Arb interface...
Page 206: ...SIGLENT 180 SDS2000X E User Manual Figure 100 WiFi setting menu...
Page 215: ...SIGLENT SDS2000X E User Manual 189 Figure 108 Option Information...


