SIG
L
ENT
SDS2000X-E User Manual
185
3. Press the
Next Page
softkey to go to the third page of the UTILITY function menu.
4. Press the
Do Self Test
softkey to enter the SELFTEST function menu.
5. Press the
LED Test
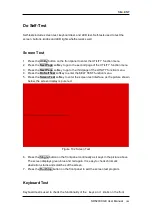
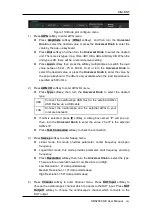
softkey to enter the keyboard test interface, as the picture shown
below.
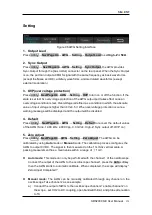
Figure 104 LED Test
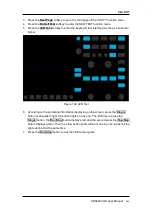
6. According to the prompting information displaying on the screen, press the
Single
button continually to light the button lights one by one. The first time to press the
Single
button, the
Run/Stop
button displays red, and the second press the
Run/Stop
button displays green. Then the other button lights will be lit one-by-one. At last all the
lights will be lit at the same time.
7. Press the
Run/Stop
button to exit the LED test program.
Summary of Contents for SDS2000X-E Series
Page 1: ...User Manual SDS2000X E Series Digital Oscilloscope UM0102E E01A SIGLENT TECHNOLOGIES CO LTD...
Page 14: ......
Page 69: ...SIGLENT SDS2000X E User Manual 43 Figure 13 x Interpolation Figure 14 Sin x x Interpolation...
Page 98: ...SIGLENT 72 SDS2000X E User Manual Figure 29 Relative Window Trigger...
Page 100: ...SIGLENT 74 SDS2000X E User Manual Figure 30 Interval Trigger...
Page 103: ...SIGLENT SDS2000X E User Manual 77 Figure 32 State Dropout Trigger...
Page 105: ...SIGLENT SDS2000X E User Manual 79 Figure 33 Runt Trigger...
Page 125: ...SIGLENT SDS2000X E User Manual 99 Figure 49 CAN Trigger...
Page 129: ...SIGLENT SDS2000X E User Manual 103 Figure 51 LIN Trigger...
Page 162: ...SIGLENT 136 SDS2000X E User Manual...
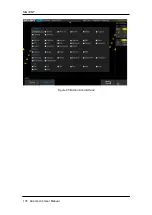
Page 200: ...SIGLENT 174 SDS2000X E User Manual Figure 95 Built in Arb interface...
Page 206: ...SIGLENT 180 SDS2000X E User Manual Figure 100 WiFi setting menu...
Page 215: ...SIGLENT SDS2000X E User Manual 189 Figure 108 Option Information...

