background image


8

se the 


 buttons to enter the preprogrammed password, then press 

 to advance to the Menu 

Screens. 
Use the 

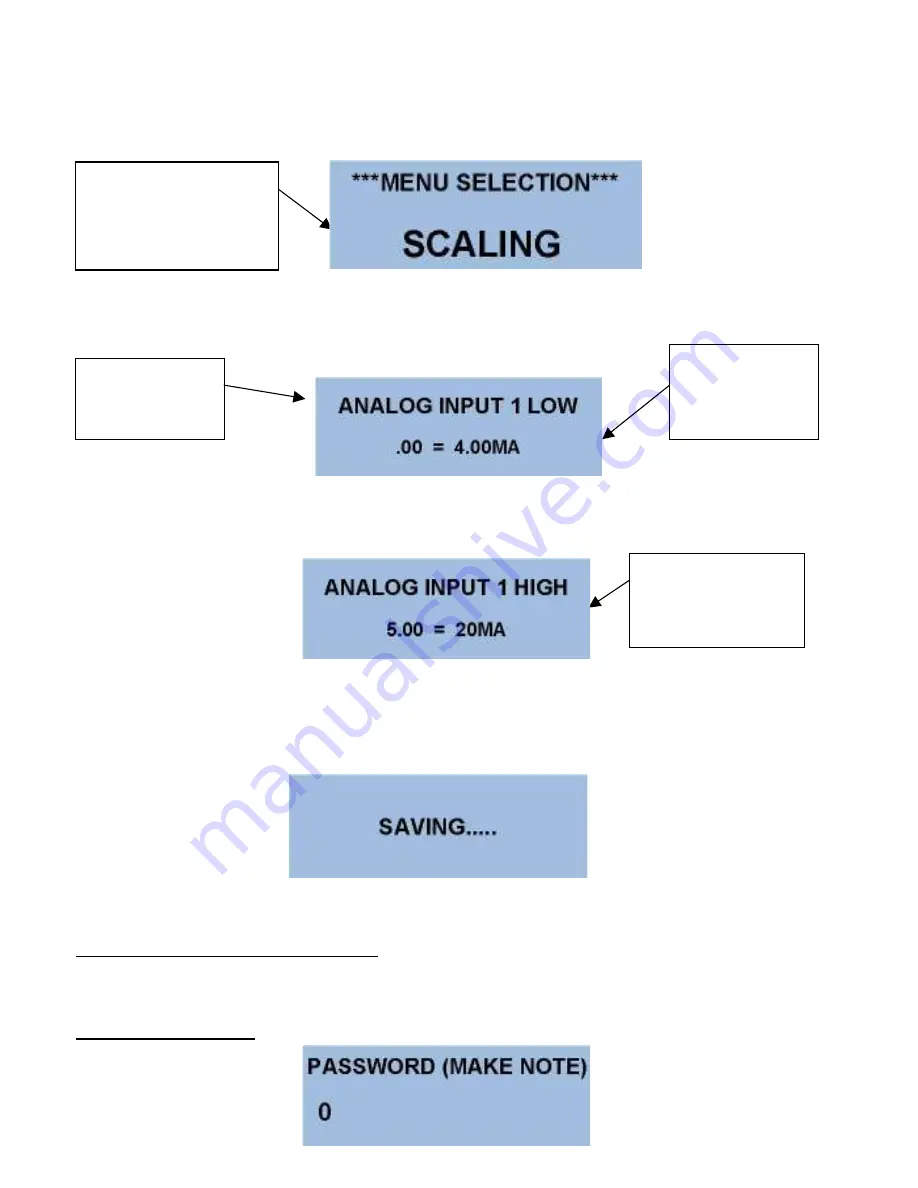
 buttons to advance to the ‘Scaling’ screen. 


Press 

 to advance through all input screens and when complete, the controller will save all changed 

values and return to the Main Screen. 


Use the 


 buttons to enter the displayed value for channel 1 low.  

NOTE:  

Numbers will


change faster 

with the key held down. 
 
Move to Screen 2 


Press 

 to advance to channel 2 settings. 

 
Continue with setting channels 2 – 8 in the same way as described. 


And return to the Main Screen. 


ADVANCE TO THE ‘SETUP’ MENU’ 
 

Setup screen provides ‘global’ parameters, which affect overall performance and operation. 
 

PASSWORD SCREEN 


Display shows 
that a value of 
4MA will 
display .00 

Shows that a value 
of 5.00 will be 
displayed with an 
input of 20MA. 

Show Channel 1 
Input Low Value 

Scaling screen allows 
user programming of all 
channels in engineering 
units. 


Summary of Contents for 700 PDL Series

Page 1: ...1 VISIT OUR WEBSITE SIGMACONTROLS COM 700 SERIES PDL PROCESS DATA LOGGER INSTRUCTION MANUAL 700 SERIES PDL PROCESS DATA LOGGER 062314...

Page 2: ...cess Data Logger Showing Inputs 8 4 20 MA Digital Output 4 Form C Relays PROGRAMMING AND INITIAL SETUP 7 Input Range Selection Terminal Block Detail Initial Setup Programming Overview Key Description...

Page 3: ...ring selection Data logs all variables on user selected interval Provides USB Port for downloading logs ORDERING INFORMATION Wall Mount Nema 4X Enclosure Sigma 700 Series PDL SPECIFICATIONS ANALOG INP...

Page 4: ...e via menu prompts and user keys The preconfigured screens and pull down sub menus with English prompts assures rapid setup and commissioning 1 YEAR WARRANTY 4 M Byte data logging with USB Port MODBUS...

Page 5: ...all local state and national codes that apply Do not exceed the rated current of the D C power supply 100MA or the form C relay outputs 5A 240VAC resistive WARNING Hazardous voltages are present withi...

Page 6: ...6...

Page 7: ...have appeared the unit will show the MAIN SCREEN which scrolls as shown below NOTE To pause the screen scroll press the buttons PROGRAMMING SCREENS From the Main Menu Press the button to access the P...

Page 8: ...bers will change faster with the key held down Move to Screen 2 Press to advance to channel 2 settings Continue with setting channels 2 8 in the same way as described And return to the Main Screen ADV...

Page 9: ...ssword Press to advance to the clock calendar settings Use the buttons to change the month Press to advance Use the buttons to change the year Press to advance Use the buttons to change the other sett...

Page 10: ...he unit NODE number when used in MODBUS Network Press to advance to the input filter screen THE DIAGNOSTIC SCREEN The final menu item is DIAGNOSTICS This screen provides real time information about th...

Page 11: ..._________ Version ________________ Scaling Channel 1 Range _________ Channel 2 Range _________ Channel 3 Range _________ Channel 4 Range _________ Setup Password ___________ Log Interval ___________ C...

Page 12: ...tage is not present check the user supplied power supply or if using the 700 DPCF TPCF supply measure across terminals 24VDC and and If no 24VDC is present consult factory If 24VDC is present check fi...

Page 13: ...LEANED BEFORE RETURNING UNITS RETURNED UNCLEANED WILL BE CONSIDERED UNREPAIRABLE AND RETURNED TO SENDER OR DISCARDED NOTE DO NOT SUBMERGE UNITS FOR CLEANING WITH CABLE CUT OR REMOVED THIS WILL ALLOW C...

Reviews: